Okay, I have to confess something. There are some recipes that just stick with you, you know? The ones you make over and over because they’re not just delicious, they’re like a warm hug in food form. For me, that’s this Caramel apple dip. Forget those fancy layered desserts that take hours; this is the magical shortcut to pure, unadulterated fall (or anytime!) happiness. I remember the first time I whipped this up. It was a chilly October evening, the kids were begging for something sweet but I was totally out of baking energy. I rummaged through my pantry, a little skeptical, and threw this together. Within minutes, the most incredible aroma filled the kitchen, and let me tell you, it was gone before I could even finish my tea. It’s got that perfect balance of sweet, a hint of salt, and that creamy, dreamy texture that just makes you swoon. If you’ve ever loved a classic caramel apple but wished you could just dip and go, this caramel apple dip is about to be your new best friend. It’s honestly so much easier than making candy apples from scratch, and the flavor? Oh, the flavor is just out of this world.
What is Caramel Apple Dip?
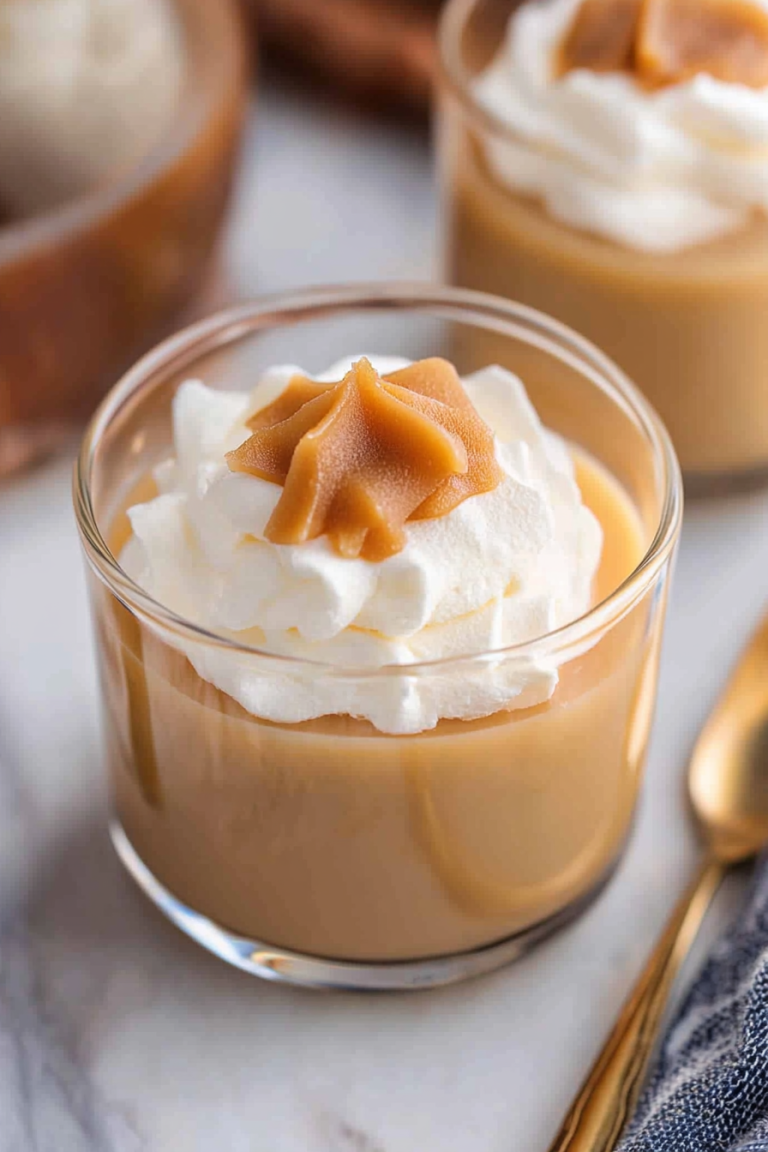
So, what exactly is this little miracle of a recipe? Think of it as all the best parts of a Caramel apple, but in a dippable, shareable, incredibly easy-to-make form. It’s essentially a rich, decadent, and ridiculously creamy caramel sauce that’s been thickened just enough to hold its shape as a dip, but it’s still wonderfully smooth and luscious. It’s not your average store-bought caramel sauce; this one has a depth of flavor that just sings. The name itself, caramel apple dip, is pretty straightforward, right? It tells you exactly what it is and how to enjoy it. It’s that comforting, sweet sensation you get from biting into a perfectly ripe apple dipped in gooey caramel, but without the sticky fingers and the whole pretzel-stick-wielding ordeal. It’s the ultimate crowd-pleaser, the ultimate comfort food, and honestly, the ultimate way to satisfy that sweet craving without much fuss. It’s pure magic in a bowl, I tell you!
Why you’ll love this recipe?
There are so many reasons why I’ve made this Caramel Apple dip more times than I can count, and why I just *know* you’re going to fall head over heels for it too. First off, the flavor is absolutely divine. We’re talking rich, buttery caramel with just the right hint of salt to cut through the sweetness. It’s incredibly satisfying without being overwhelmingly sugary. Then there’s the simplicity. Seriously, this is a lifesaver on busy weeknights when you want to make something special but have zero time. It comes together so quickly, you’ll be amazed. And let’s talk about cost-efficiency! Most of the ingredients are pantry staples, so you don’t need to break the bank to make a dessert that tastes like it came from a gourmet bakery. What truly sets this apart for me, though, is its versatility. You can serve it with so many things! Apples, of course, are a given, but think sliced pears, graham crackers, pretzels, shortbread cookies, even marshmallows for roasting. It’s also fantastic as a topping for ice cream or even a swirl in your morning oatmeal if you’re feeling particularly indulgent. Compared to something like a batch of cookies or a pie, this caramel apple dip requires so much less effort but delivers on pure comfort and deliciousness. It’s the kind of recipe that makes you feel like a kitchen wizard, even if you’re just starting out.
How do I make caramel apple dip?
Quick Overview
The process for this caramel apple dip is wonderfully straightforward. You’ll essentially be making a rich caramel sauce, letting it thicken slightly, and then getting it ready for dipping. It’s all about coaxing out that deep, toasty caramel flavor and achieving that perfect, spoonable consistency. The beauty of this method is that it’s very forgiving. Even if you’re new to making caramel, this recipe is designed to guide you smoothly through it. You’ll be amazed at how quickly you go from simple ingredients to a luscious, irresistible dip that’s ready to be devoured.
Ingredients
For the Main Batter (the caramel base):
Here’s where the magic starts! You’ll need good quality unsalted butter – about 1 cup (two sticks). Using unsalted butter gives you more control over the saltiness. A cup and a half of packed light Brown Sugar is your sweet foundation. I love using light brown sugar because it adds a lovely molasses note that deepens the caramel flavor. You’ll also need a half-cup of heavy cream. This is non-negotiable for that luxurious, creamy texture. Make sure it’s full-fat; anything less just won’t give you that silky smooth finish. And for that essential hint of salt, we’ll use about a teaspoon of fine sea salt. If you prefer a saltier edge, you can always add a touch more. A teaspoon of pure vanilla extract, added at the end, rounds out all those warm flavors beautifully.
For the Filling (optional, but highly recommended!):
This is where you can really play and customize! I often like to add a bit of chopped dark chocolate (about 2 ounces) right at the end for little pockets of melty goodness. You could also stir in some toasted chopped pecans or walnuts for a delightful crunch. Some people even add a tablespoon of instant espresso powder for a mocha twist, which is surprisingly delicious!
For the Glaze (optional finishing touch):
While the dip is delicious on its own, a little swirl of extra caramel or a drizzle of melted chocolate can make it look extra special. You can use a store-bought caramel sauce for a quick drizzle, or melt some chocolate chips with a tiny bit of coconut oil until smooth. A sprinkle of flaky sea salt on top is also a must for me!
Step-by-Step Instructions
Step 1: Preheat & Prep Pan
This step is super simple, but important for even cooking! You don’t need to preheat an oven for the dip itself, but get your stovetop ready. Grab a medium, heavy-bottomed saucepan. A heavy bottom is key here; it helps distribute heat evenly and prevents scorching. If you’re adding any mix-ins like chocolate or nuts, have those prepped and ready nearby. For the glaze, have your extra caramel or melted chocolate ready to go for when the dip is finished.
Step 2: Mix Dry Ingredients
In your saucepan (off the heat for now!), combine the packed light brown sugar and the unsalted butter. I like to give them a quick stir with a whisk or wooden spoon just to break up any big clumps of brown sugar and get them acquainted with the butter. This helps the butter start to melt more evenly when you turn on the heat. Don’t worry about it being perfectly smooth at this stage; it’s just an initial mix.
Step 3: Mix Wet Ingredients
Once your butter and brown sugar are in the pot, gently turn the heat to medium-low. We want to melt the butter slowly and combine it with the sugar. Stir almost constantly. As the butter melts, it will start to create a lovely, sandy paste with the sugar. Keep stirring until the butter is fully melted and the mixture is smooth and looks like wet sand. Don’t rush this; a gentle melt is crucial to avoid burning the sugar.
Step 4: Combine
Now, it’s time to introduce the heavy cream and salt. Very slowly, while stirring continuously, pour in the heavy cream. The mixture might seize up a little at first, but keep stirring! It will smooth out. Once the cream is incorporated, stir in the fine sea salt. Continue to cook this mixture over medium-low heat, stirring constantly, for about 5-7 minutes. You’re looking for the mixture to come to a gentle boil and thicken slightly. It should coat the back of a spoon beautifully. This is where that rich caramel flavor really starts to develop.
Step 5: Prepare Filling
If you’re adding any mix-ins like chocolate chips or chopped nuts, this is the time to get them ready. Have them measured out and within easy reach of your stovetop. You’ll add these at the very end, off the heat.
Step 6: Layer & Swirl
This step isn’t about layering in the traditional sense, but about how you finish the dip. Once the caramel has cooked for its allotted time and is beautifully thickened, remove the saucepan from the heat. Now, stir in the pure vanilla extract. If you’re adding any mix-ins (chocolate chips, nuts, espresso powder), this is the moment! Stir them in until they’re just combined and starting to melt or distribute. The residual heat will do the rest.
Step 7: Bake
No baking required for this one! This caramel apple dip is cooked entirely on the stovetop.
Step 8: Cool & Glaze
This is perhaps the hardest part: waiting! Let the caramel apple dip cool in the saucepan for about 10-15 minutes. It will thicken considerably as it cools. Once it’s slightly cooled, carefully pour it into your serving bowl. If you’re adding a glaze, now’s the time! Drizzle your extra caramel sauce or melted chocolate over the top in a decorative pattern. A sprinkle of flaky sea salt right after the glaze is my secret weapon for extra flavor pop.
Step 9: Slice & Serve
This dip is best served warm or at room temperature. It’s fantastic with a variety of dippers! I’ll get into more ideas for that in a bit. Just make sure it’s cooled enough so no one burns their tongues, but still warm enough to be wonderfully gooey. The aroma alone will have everyone gathering around!
What to Serve It With
Oh, the possibilities! This caramel apple dip is a chameleon when it comes to serving. For a lovely breakfast treat, I love pairing it with sliced Honeycrisp apples or firm pears. A little dollop on top of some fluffy pancakes or French toast is absolutely divine, especially on a lazy weekend morning. For brunch, it’s a showstopper! Serve it alongside a fruit salad, with some mini waffles or crepes. It feels so elegant and decadent, but it’s still incredibly simple to put out. As a dessert, it’s a dream. Beyond apples, I’ve served it with shortbread cookies, ginger snaps, and even pretzels for that sweet and salty perfection. For cozy snacks, it’s a winner every time. My kids adore dipping graham crackers, marshmallows (we even toast them under the broiler for a minute!), and even strawberries into it. It’s also amazing with cubes of pound cake or brownies. Honestly, if you can dip it, it’s probably going to taste amazing with this caramel apple dip. We often have it at movie nights, and it’s always the first thing to disappear!
Top Tips for Perfecting Your Caramel Apple Dip
I’ve made this caramel apple dip countless times, and through a few happy accidents and some dedicated testing, I’ve learned a few tricks to make it absolutely perfect every single time. First, about the butter and brown sugar: make sure your butter is at room temperature before you start. This helps it melt more evenly with the sugar and prevents lumps. When you add the cream, do it *slowly* and keep stirring. This is crucial to prevent the mixture from separating or becoming grainy. If it does look a little grainy, don’t panic! Just keep stirring over low heat, and it usually smooths out. For the cooking time, the 5-7 minutes after adding the cream is a guide. You’re looking for a consistency that coats the back of a spoon beautifully and is slightly thicker than heavy cream. It will thicken more as it cools. If you like your caramel really thick, cook it for a minute or two longer, but be careful not to burn it. I learned the hard way that overcooking leads to a bitter taste. When it comes to sweetness, I find the brown sugar and a touch of salt give it the perfect balance, but if you’re sensitive to sweetness, you could try reducing the brown sugar by a quarter cup and increasing the salt slightly. I tested this with a dairy-free milk alternative once, and while it was okay, it didn’t achieve that same luscious creaminess, so stick with real heavy cream if you can! For those who love a deeply rich flavor, adding a tiny pinch of espresso powder right at the end is a game-changer; it doesn’t make it taste like coffee, but it intensifies the caramel notes beautifully. And for serving, always let it cool for at least 10 minutes in the pot before transferring to your serving dish. This allows it to thicken to the perfect dipping consistency. If it gets too thick as it cools, you can always gently warm it for a few seconds in the microwave or over very low heat.
Storing and Reheating Tips
This caramel apple dip is so good, you might find yourself with leftovers (though I highly doubt it!). If you do, storing it is pretty simple. At room temperature, it’s best enjoyed within a few hours of making it, especially if it’s warm where you are. If you need to store it longer, pop it into an airtight container. In the refrigerator, it will keep beautifully for up to a week. The texture will firm up considerably when chilled, so you’ll definitely want to reheat it before serving again. To reheat, I usually transfer it to a microwave-safe bowl and heat it in 30-second intervals, stirring in between, until it’s smooth and dippable again. Alternatively, you can gently reheat it in a small saucepan over very low heat, stirring constantly. Don’t boil it! If you find it too thick after reheating, you can stir in a tablespoon or two of extra cream or milk to loosen it up. Freezing is also an option! Let the dip cool completely, then transfer it to a freezer-safe container or a heavy-duty freezer bag. It should last for about 2-3 months. Thaw it overnight in the refrigerator, then reheat as you would if it were just refrigerated leftovers. For the glaze, I usually add it just before serving, especially if I’ve chilled or frozen leftovers, to keep it looking its best.
Frequently Asked Questions
Final Thoughts
So there you have it – my absolute favorite caramel apple dip! I really hope you give this one a try. It’s the kind of recipe that brings people together, sparks joy, and tastes like pure comfort. It’s proof that you don’t need complicated steps or a ton of fancy ingredients to create something truly memorable and delicious. It’s perfect for a last-minute dessert, a cozy night in, or even to impress guests at a potluck. It’s the recipe I always reach for when I want something sweet, rich, and incredibly satisfying without a lot of fuss. If you love this, you might also enjoy my recipe for [link to a related recipe, e.g., “Spiced Apple Crumble Bars”] or my [link to another related recipe, e.g., “Easy Chocolate Lava Cakes”]. I can’t wait to hear what you think once you’ve made it! Please leave a comment below and let me know how yours turned out, and what you loved dipping into it. Happy dipping!
Caramel Apple Dip
Ingredients
Main Ingredients
- 16 ounces cream cheese softened to room temperature
- 0.75 cup powdered sugar sifted
- 1 teaspoon vanilla extract
- 13.5 ounces caramel dip Marzetti brand
- 0.25 cup english toffee bits Heath Brand Bits o’ Brickle
- 4 medium Red and green apples for serving
Instructions
Preparation Steps
- To a large mixing bowl, add the softened cream cheese, sifted powdered sugar and vanilla extract. Beat on medium-high speed, using an electric mixer, for 1-2 minutes or until smooth and fluffy. Scrape the sides and bottom of the bowl with a rubber spatula to ensure that all the ingredients are well combined and no lumps of cream cheese remain.
- Transfer the cream cheese mixture to a small (approximately 1-quart sized) serving dish and spread it out evenly.
- Top the cream cheese mixture with the caramel dip and smooth to create an even layer of caramel dip.
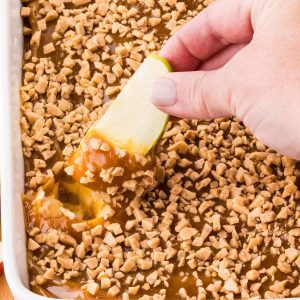
- Sprinkle the english toffee bits evenly over the caramel dip.
- Serve the caramel apple dip at room temperature alongside a tray of sliced red and green apples.