There are some recipes that just feel like a warm hug, and for me, that’s always been a slice of truly exceptional butterscotch pie. It’s the kind of dessert that takes you back – maybe to your grandmother’s kitchen on a Sunday afternoon, or to a special occasion where it was the star of the show. This butterscotch Pie Recipe is my absolute go-to when I’m craving something rich, comforting, and just a little bit nostalgic. It’s got that perfect balance of sweet, salty, and creamy that just melts in your mouth. Honestly, if you’ve ever had a store-bought pie that tasted a bit… well, artificial, you need to try this one. It’s miles apart from anything mass-produced. Think of it as the ultimate upgrade to your dessert game, or a delightful surprise for anyone you’re lucky enough to share it with. It’s not quite a custard pie, and it’s definitely not a meringue pie, but it holds its own in the best way possible. I’ve been making this for years, and it’s still the one my family asks for time and time again.
What Is Butterscotch Pie?
So, what exactly *is* a butterscotch pie? At its heart, it’s a rich, creamy pie bursting with the warm, caramel-like flavors of brown sugar and butter, often thickened with eggs and a bit of flour or cornstarch. The name “butterscotch” itself tells you the key players: butter and brown sugar. It’s a classic flavor combination that’s simple yet incredibly decadent. Unlike a chocolate Cream Pie or a lemon meringue, butterscotch pie has this unique depth. It’s sweet, yes, but it also has a subtle toffee-like nuance from the caramelization of the brown sugar. This recipe focuses on creating a filling that’s incredibly smooth and velvety, with just the right amount of sweetness to really let that butterscotch flavor shine. It’s the kind of pie that feels both elegant and down-to-earth, perfect for any gathering or just a quiet evening treat.
Why you
There are so many reasons why I keep coming back to this butterscotch Pie Recipe, and I have a feeling you’ll fall in love with it too! First off, the flavor is just out of this world. That deep, caramelized brown sugar taste, the hint of vanilla, and the overall creaminess are pure perfection. It’s a flavor profile that feels incredibly comforting and indulgent. But it’s not just about the taste; this pie is surprisingly manageable to make. Even if you’re not a seasoned baker, the steps are straightforward, and I’ve really tried to break them down so anyone can get a fantastic result. Plus, it’s remarkably budget-friendly! The ingredients are mostly pantry staples, so you don’t need to break the bank to create something truly special. I also love how versatile it is. While it’s phenomenal on its own, it’s also a wonderful base. You can top it with whipped cream, a dollop of crème fraîche, or even some toasted pecans for extra crunch. What I love most about this butterscotch pie is that it tastes like it took hours, but it’s honestly achievable for a weeknight treat if you plan a little. It’s the kind of dessert that makes people think you’ve slaved away in the kitchen all day, but you’ll know the secret – it’s just good ingredients and a solid recipe.
How to Make Butterscotch Pie
Quick Overview
Making this butterscotch pie is a delightful process that brings together simple ingredients into something truly extraordinary. You’ll essentially be creating a luscious, custard-like filling infused with the rich flavors of brown sugar and butter, all cradled in a flaky Pie crust. The key is gentle cooking to achieve that perfect silky texture without any lumps. It’s a straightforward method, and honestly, the aroma that fills your kitchen as it bakes is half the reward! Trust me, the slight effort is so worth the incredible payoff.
Ingredients
For the Pie Crust:
I always recommend a good quality, homemade or store-bought pie crust that you blind-bake until golden and flaky. A pre-baked crust is crucial here to avoid a soggy bottom. If you’re making your own, use cold butter and don’t overwork the dough – that’s the secret to flakiness!
For the Butterscotch Filling:
* 1 ½ cups packed light Brown Sugar (don’t skimp here, the quality matters!)
* ⅓ cup all-purpose flour (for thickening)
* ¼ teaspoon salt (balances the sweetness beautifully)
* 3 cups whole milk (you can experiment with half-and-half for extra richness, but whole milk is classic)
* 4 large egg yolks (these are essential for that creamy, rich texture)
* 2 tablespoons unsalted butter (adds that signature richness and flavor)
* 1 teaspoon pure vanilla extract (use the good stuff, it makes a difference!)
* Optional: A tiny pinch of ground cinnamon or a dash of nutmeg for warmth
For the Optional Topping:
* Sweetened whipped cream or a dollop of crème fraîche
* Toasted chopped pecans or walnuts
Step-by-Step Instructions
Step 1: Preheat & Prep Pan
First things first, preheat your oven to 375°F (190°C). You’ll need one 9-inch pie plate. If you’re using a homemade crust, make sure it’s blind-baked and cooled. A blind-baked crust is one that has been baked partially or fully before adding the filling. I usually bake mine until it’s lightly golden and completely set. This step is non-negotiable for avoiding a soggy bottom, and it’s a lifesaver!
Step 2: Mix Dry Ingredients
In a medium saucepan (before you turn on the heat!), whisk together the packed light brown sugar, all-purpose flour, and salt. Make sure there are no lumps of brown sugar. Giving them a good whisk helps distribute the flour evenly, which prevents lumps in your final filling. It also ensures that the sugar and flour are well combined before adding any liquid.
Step 3: Mix Wet Ingredients
In a separate medium bowl, whisk together the egg yolks. Gradually whisk in about 1 cup of the whole milk into the egg yolks until well combined. This gradual addition tempers the egg yolks, preventing them from scrambling when they hit the hot mixture. It’s a crucial step for a silky smooth filling.
Step 4: Combine
Now, gradually whisk the remaining 2 cups of milk into the brown sugar and flour mixture in the saucepan. Place the saucepan over medium heat and cook, stirring constantly, until the mixture thickens and just begins to bubble. This usually takes about 5-8 minutes. Once it’s thickened, remove the pan from the heat. Now, slowly and carefully, ladle about ½ cup of the hot milk mixture into the tempered egg yolk mixture, whisking constantly. This is another tempering step to ensure the eggs don’t cook too quickly. Once combined, pour the tempered egg mixture back into the saucepan with the rest of the hot milk mixture. Return the saucepan to medium-low heat and cook, stirring constantly, for another 2-3 minutes, or until the filling has thickened enough to coat the back of a spoon. Don’t let it boil vigorously at this stage.
Step 5: Prepare Filling
Remove the saucepan from the heat. Stir in the unsalted butter until it’s completely melted and incorporated. This is where that lovely richness comes from! Then, stir in the pure vanilla extract. If you’re using any optional spices like cinnamon or nutmeg, stir them in now too. The filling should look glossy and incredibly smooth.
Step 6: Layer & Swirl
Pour the warm butterscotch filling into your pre-baked pie crust. Smooth the top with a spatula if needed. This pie doesn’t require fancy swirling, but you want an even layer of that gorgeous filling.
Step 7: Bake
Carefully place the pie on a baking sheet (this catches any potential drips). Bake in the preheated oven at 375°F (190°C) for about 25-30 minutes, or until the filling is set but still has a slight jiggle in the center. It will continue to set up as it cools. I always test by gently shaking the pie; if the center is only slightly wobbly, it’s usually good to go. Overbaking can make it rubbery, so err on the side of caution.
Step 8: Cool & Glaze
Let the pie cool on a wire rack for at least 2-3 hours. This is important for the filling to fully set. Once it’s completely cooled, you can add your topping. If you’re using whipped cream, whip heavy cream with a little powdered sugar and vanilla until soft peaks form, then spread it over the chilled pie. For a more elegant touch, you can pipe it or just add a generous dollop.
Step 9: Slice & Serve
Once the pie is cooled and topped, it’s ready to slice! Use a sharp knife dipped in hot water and wiped dry between slices for clean cuts. Serve chilled or at room temperature. I love serving this with a cup of strong coffee or a glass of cold milk. The contrast is divine!
What to Serve It With
This butterscotch pie is a star all on its own, but here are some of my favorite ways to serve it, depending on the occasion:
For Breakfast: Okay, hear me out! A small slice of this butterscotch pie with a strong cup of black coffee is an indulgent start to the day. The richness cuts through the bitterness of the coffee beautifully. It’s my little secret treat on weekends when I want something special without the fuss of baking a full breakfast.
For Brunch: Serve it chilled, beautifully plated with a swirl of lightly sweetened whipped cream and a sprinkle of toasted pecans. It’s a sophisticated yet comforting addition to any brunch spread. Pair it with a mimosa or a glass of sparkling cider for a festive touch.
As Dessert: This is its natural habitat! After dinner, offer a generous slice, perhaps with a scoop of vanilla bean ice cream for an extra layer of deliciousness. The warm, caramel notes of the butterscotch pie are amplified by the cool, creamy ice cream. It’s pure bliss.
For Cozy Snacks: On a chilly evening, a warm beverage and a slice of this pie are the perfect antidote to a long day. I often have it with a mug of hot tea or even a rich hot chocolate. My kids, especially, love a small piece after school with a glass of milk – it’s a guaranteed smile-maker.
My family tradition is to have it for dessert after our Sunday roast. It’s just that perfect comforting end to a comforting meal. I’ve also found it pairs surprisingly well with a dessert wine, like a Madeira or a Tawny Port, if you’re feeling fancy.
Top Tips for Perfecting Your Butterscotch Pie
After making this butterscotch pie more times than I can count, I’ve picked up a few tricks that I think really elevate it. These are the little things that make a big difference between a good pie and a truly exceptional one.
Pie Crust Prep: The absolute most crucial tip is blind-baking your crust. Seriously, don’t skip this! A soggy bottom is the nemesis of a great pie. Make sure your crust is fully cooled before adding the filling. If you don’t have time to make your own, a good quality store-bought one will work wonders, just follow the blind-baking instructions carefully.
Mixing Advice: When you’re whisking the flour with the brown sugar, really make sure there are no lumps. This ensures an even texture in the filling. Also, when you’re tempering the eggs, do it slowly. Pouring a little of the hot liquid into the eggs first, whisking, and then combining them back into the pot makes all the difference between a smooth, silky filling and one with little bits of cooked egg. And remember, constant stirring over medium-low heat is your friend; it prevents scorching and ensures even cooking.
Swirl Customization: While this pie doesn’t traditionally have swirls, if you decide to add something extra on top, like a caramel drizzle, apply it when the pie is completely cool. For toppings like whipped cream, it’s best added right before serving to keep it fresh and fluffy.
Ingredient Swaps: For the milk, you can use whole milk, or for an even richer pie, you could try half-and-half. I tested this with almond milk once, and while it was still good, it didn’t have quite the same velvety texture. For the brown sugar, light brown sugar is my preference for its classic flavor, but you could experiment with dark brown sugar for a deeper molasses note. Just remember to adjust the sugar if you use a darker variety, as it can be more intense.
Baking Tips: Keep an eye on your pie while it’s baking. Ovens can vary! You want the filling to be set but still have a slight wobble in the very center. It will firm up as it cools. If the crust edges start browning too quickly, you can always loosely cover them with foil or a pie crust shield. Baking the pie on a baking sheet is also a great tip to catch any potential spills and makes it easier to transfer in and out of the oven.
Glaze Variations: If you’re not a fan of whipped cream, try a simple dusting of powdered sugar just before serving. Or, a drizzle of a homemade caramel sauce would be divine. Another idea is to toast some pecans or walnuts and sprinkle them over the top for a bit of crunch and nutty flavor. These additions can really change the overall experience of the pie!
Storing and Reheating Tips
Proper storage is key to keeping your delicious butterscotch pie tasting fresh and wonderful. Here’s how I handle leftovers:
Room Temperature: If the pie is topped with whipped cream, it absolutely needs to be refrigerated. However, if it’s plain or topped with something like chopped nuts, it can sit at room temperature for up to 4 hours. After that, it’s best to cover it loosely with plastic wrap or foil and store it in the refrigerator.
Refrigerator Storage: Once cooled, cover your butterscotch pie tightly with plastic wrap or aluminum foil, or transfer any leftovers to an airtight container. It will stay fresh in the refrigerator for about 3-4 days. I find that the flavor actually deepens a bit on the second day. For best results, try to avoid covering it too tightly if it has a meringue topping (though this recipe doesn’t, it’s a good general pie tip).
Freezer Instructions: While fresh is always best, you can freeze butterscotch pie. It’s often easier to freeze individual slices. Wrap each slice tightly in plastic wrap, then in aluminum foil. Store in the freezer for up to 1-2 months. To thaw, unwrap the slice and let it thaw in the refrigerator overnight. If you want to freeze the whole pie (without whipped cream topping), wrap it very well. Thaw it in the refrigerator for at least 24 hours before serving.
Glaze Timing Advice: If you’ve topped your pie with whipped cream, it’s best to add it just before serving, or as close to serving time as possible, especially if it’s been refrigerated. If you’re planning on storing it for a day or two, it’s better to store the pie plain and add the whipped cream just before you plan to eat it to prevent it from weeping or becoming watery.
Frequently Asked Questions
Final Thoughts
So there you have it – my cherished butterscotch pie recipe! I truly hope you give it a try. It’s one of those desserts that feels incredibly special, yet it’s so approachable. The way the brown sugar caramelizes and melds with the creamy filling is just pure magic. It’s a recipe that has brought so much joy to my table, and I can’t wait for it to do the same for yours. If you love comforting, classic flavors with a touch of indulgence, this butterscotch pie is definitely for you. It’s a winner every single time. I’m always so excited to hear how your baking adventures turn out, so please leave a comment below and let me know how your pie turned out! And if you have any tips or variations you discover, I’d love to hear them. Happy baking!
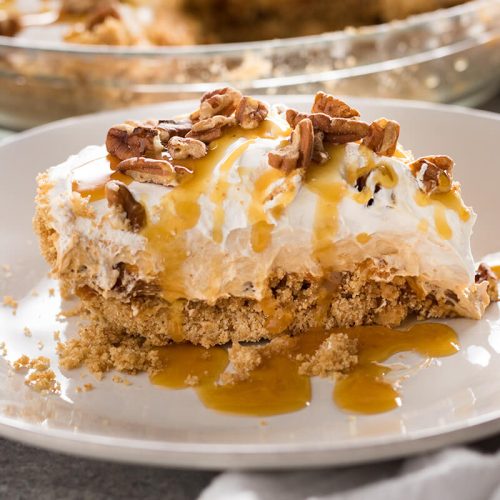
No Bake Butterscotch Pie
Ingredients
Graham Cracker Crust
- 1.67 cups Graham Cracker Crumbs
- 0.25 cup Sugar
- 6 tablespoons Butter, melted
Filling
- 2 boxes (3.4 oz each) Instant Butterscotch Pudding Mix
- 2 cups Cold Milk
- 12 ounces Cool Whip (thawed) Divided
Topping (Optional)
- 1 Butterscotch Sundae Topping To taste
- 0.25 cup Chopped Pecans Optional
Instructions
Preparation Steps
- In a medium bowl, mix together the graham cracker crumbs, sugar, and melted butter until well combined. Press the mixture into the bottom and up the sides of a 9-inch pie plate, using the bottom of a measuring cup to help flatten it.
- In a large bowl, whisk together the two boxes of instant pudding mixes and the cold milk for 2 minutes until the mixture thickens.
- Gently fold half of the Cool Whip into the thickened pudding mixture.
- Pour this half of the pudding mixture into the prepared crust and spread evenly to cover the bottom.
- In a separate small bowl, fold the remaining Cool Whip into the remaining pudding mixture until just combined (do not overmix).
- Carefully spread this second pudding layer over the first layer in the crust.
- Top the pie with butterscotch sauce and chopped pecans, if desired.
- Chill the pie in the refrigerator for at least 3 hours, or up to 3 days, before slicing and serving.