You know those days? The ones where the air has that crisp, autumn bite, and all you want is something warm and comforting to hold onto? That’s exactly when I reach for this vanilla chai muffin recipe. It’s like a cozy blanket for your taste buds, and honestly, it’s become my absolute favorite way to start a chilly morning or get through a long afternoon. They smell absolutely divine while baking, filling the whole house with this intoxicating blend of sweet vanilla and warming chai spices. If you love those fancy chai lattes from your favorite coffee shop, but wish you could bottle that cozy feeling and bake it into something delicious, then these are for you. They’re miles better than a store-bought treat, and way more satisfying than just drinking a chai latte. I’ve even found myself making a batch on busy weeknights when I just need a little sweet escape that doesn’t involve hours in the kitchen. They’re truly a lifesaver!
What is Vanilla Chai Muffins?
So, what exactly are these little gems? Think of them as your favorite warm chai latte, but transformed into a tender, moist, and utterly delicious muffin. They’re infused with all the classic chai spices – cinnamon, cardamom, ginger, cloves – but balanced with a sweet, creamy vanilla flavor that keeps them from being too overpowering. It’s that perfect marriage of fragrant spices and comforting sweetness. They’re not overly complicated; in fact, they’re remarkably straightforward. The “chai” comes from a blend of common spices you likely already have in your pantry, and the “vanilla” is the smooth, sweet undertone that makes them so incredibly approachable and satisfying. It’s essentially a hug in a muffin tin, perfect for anyone who loves that comforting, spicy-sweet profile of a good chai drink.
Why you’ll love this recipe?
Honestly, there are so many reasons this recipe has earned a permanent spot in my baking rotation, and I just know you’re going to feel the same way. First off, the flavor profile is just out of this world. You get that delightful warmth from the chai spices – cinnamon, cardamom, ginger, and a hint of cloves – all beautifully melded with a sweet, comforting vanilla. It’s complex enough to be interesting but balanced enough to be utterly delightful. And the texture? Oh, these muffins are perfectly tender and moist, never dry or crumbly. What I love most about this recipe is its incredible simplicity. You don’t need any fancy equipment or complicated techniques. It’s a true “mix-it-all-up-in-one-bowl” kind of situation (well, almost!). This means less mess, less stress, and more time to actually enjoy them. Plus, the ingredients are super budget-friendly; you’re likely to have most of them already. They’re so versatile, too. They’re perfect with a cup of coffee in the morning, a sweet treat with tea in the afternoon, or even a light dessert after dinner. They’re also a fantastic option when you’re craving something sweet but don’t want to bake a whole cake. I’ve even made a batch for my book club, and they were a huge hit! They stand out from other muffin recipes because of that unique, warming spice blend combined with the mellow sweetness of vanilla, creating a flavor that feels both familiar and wonderfully new.
How do I make vanilla chai muffins?
Quick Overview
This recipe is all about simplicity and flavor! You’ll whisk together your dry ingredients, then your wet ingredients, combine them gently, and bake them into gorgeous, fragrant muffins. The key is not to overmix, which is super easy to achieve with this method. It’s designed for maximum flavor with minimum fuss, and the result is consistently delicious, tender muffins that are perfect for any occasion. You’ll be amazed at how quickly you can whip up a batch!
Ingredients
For the Main Batter:
I always start with good quality all-purpose flour. You’ll need about 2 ½ cups. Make sure your baking powder and baking soda are fresh; that’s crucial for a good rise. I use about 2 teaspoons of baking powder and ½ teaspoon of baking soda. For sweetness, I opt for a mix of granulated sugar and a touch of Brown Sugar for that extra moisture and depth. About ¾ cup granulated sugar and ¼ cup packed light brown sugar works beautifully. And of course, salt! Just ½ teaspoon to balance everything out. For the wet ingredients, you’ll need 2 large eggs, at room temperature if possible – they emulsify better. About 1 cup of milk; I often use whole milk for richness, but you can use 2% or even a dairy-free alternative like almond or oat milk. I tested this with almond milk and it actually made it even creamier! Then, about ½ cup of melted unsalted butter or a neutral oil like vegetable or canola oil. Melted butter gives a richer flavor, but oil makes for an incredibly moist muffin. And the star: vanilla extract. I’m generous here, using a full teaspoon. For the chai spices, you’ll need 1 teaspoon ground cinnamon, ½ teaspoon ground cardamom, ½ teaspoon ground ginger, and a pinch (about ⅛ teaspoon) of ground cloves. If you can find whole cardamom pods, toasting and grinding them yourself makes a world of difference in flavor, but ground is perfectly fine!
For the Filling (Optional, but so good!):
This is where you can really amp up the chai flavor and add a delightful surprise. I like to make a quick spiced sugar mixture. Combine about ¼ cup of packed brown sugar, 1 teaspoon of cinnamon, and a pinch of cardamom. That’s it! It adds a little burst of spiced sweetness in the middle.
For the Glaze:
This is optional, but highly recommended! It adds a lovely finishing touch. You’ll need about 1 cup of powdered sugar, sifted to avoid lumps. Then, about 2-3 tablespoons of milk (or a chai tea latte if you’re feeling adventurous!). A splash of vanilla extract (½ teaspoon) is also a must for that lovely flavor. You can also add a pinch of cinnamon to the glaze if you like a stronger chai hit.
Step-by-Step Instructions
Step 1: Preheat & Prep Pan
First things first, get your oven preheating to 375°F (190°C). It’s so important to have your oven fully heated before your batter goes in. While that’s happening, grab your muffin tin and line it with those cute paper liners or grease it really well. I find using liners makes for super easy cleanup, which is always a win in my book. If you’re not using liners, make sure you get into all the nooks and crannies with your butter or oil. Don’t forget to have your ingredients measured and ready to go – this recipe comes together pretty quickly!
Step 2: Mix Dry Ingredients
Grab a large mixing bowl. This is where all the magic begins! Add your flour, granulated sugar, brown sugar, baking powder, baking soda, salt, cinnamon, cardamom, ginger, and cloves. Give it all a really good whisk. I like to whisk it for at least 30 seconds. This step is actually pretty important because it ensures that all your leavening agents and spices are evenly distributed throughout the flour. You don’t want any surprise pockets of baking soda or a concentrated patch of cinnamon! A well-mixed dry base leads to perfectly even muffins.
Step 3: Mix Wet Ingredients
In a separate, medium-sized bowl, whisk together your eggs. Then, add in your milk, melted butter (or oil), and vanilla extract. Whisk until everything is just combined and looks smooth. Make sure your melted butter isn’t too hot, otherwise, it could scramble the eggs. Just slightly warm or even room temperature is perfect. This is also where you can really smell that lovely vanilla starting to come through!
Step 4: Combine
Now for the crucial part: bringing the wet and dry ingredients together. Pour the wet ingredients into the bowl with the dry ingredients. Using a spatula or a wooden spoon, mix *just until* the dry ingredients are moistened. Seriously, don’t overmix! A few lumps are totally fine, even desirable. Overmixing develops the gluten in the flour, which can lead to tough, rubbery muffins. We want tender, delicate muffins, so stop mixing as soon as you don’t see any big streaks of dry flour. It should look a little shaggy, and that’s perfect. I always tell myself, “When in doubt, mix less.”
Step 5: Prepare Filling
If you’re adding the spiced sugar filling, now’s the time to prepare it. In a small bowl, combine the ¼ cup packed brown sugar, 1 teaspoon cinnamon, and a pinch of cardamom. Give it a quick stir to combine. This is so simple, but it adds such a lovely surprise of spiced sweetness in the middle of the muffin.
Step 6: Layer & Swirl
This is where we make them extra special. Spoon about half of the batter into your prepared muffin cups, filling each about two-thirds full. Then, sprinkle about a teaspoon of the spiced sugar mixture over the top of each muffin. Don’t worry if it looks a little uneven; that’s part of the charm. Now, gently spoon the remaining batter over the filling, covering it completely. If you like, you can take a toothpick or a skewer and gently swirl the top layer of batter a little to create a marbled effect, but honestly, just filling them evenly is perfectly fine too. The filling will mostly settle into the center as they bake.
Step 7: Bake
Pop those muffin tins into your preheated oven. Bake for 18-22 minutes. How do you know they’re done? The tops should be golden brown and spring back lightly when you touch them. You can also insert a toothpick into the center of a muffin – if it comes out clean, they’re ready! If it comes out with a few moist crumbs, that’s okay too, but if it’s wet batter, they need a little more time. Every oven is a little different, so keep an eye on them towards the end of the baking time. Mine usually take about 20 minutes.
Step 8: Cool & Glaze
Once they’re baked, carefully remove the muffin tin from the oven. Let the muffins cool in the tin for about 5-10 minutes. This helps them firm up slightly so they don’t fall apart when you take them out. Then, carefully transfer them to a wire cooling rack to cool completely. If you’re glazing them, this is where you’ll do it. Once the muffins are completely cool (this is important, otherwise the glaze will just melt off!), whisk together the powdered sugar, 2 tablespoons of milk, and the vanilla extract in a small bowl. Add more milk, a teaspoon at a time, until you reach your desired drizzling consistency. It should be thick enough to coat the muffin but thin enough to drizzle easily. Drizzle it over the tops of the cooled muffins.
Step 9: Slice & Serve
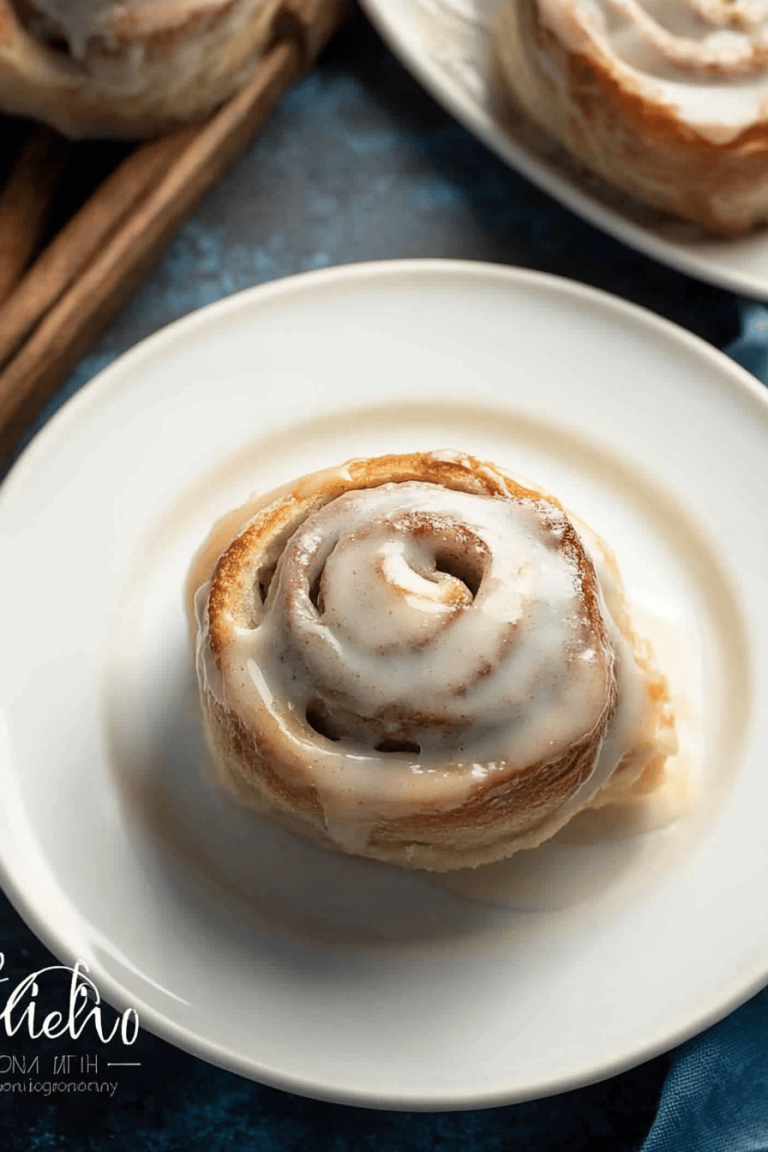
Once the glaze has set slightly, your vanilla chai muffins are ready to be devoured! I love serving them slightly warm, but they’re also delicious at room temperature. Slice one in half to admire the tender crumb and see if you hit any pockets of that spiced filling. They’re perfect on their own, but even better with a hot cup of coffee or, you guessed it, a warm chai latte!
What to Serve It With
These vanilla chai muffins are so versatile, they truly fit into any part of your day! For a simple, cozy breakfast, I love pairing them with a hot cup of coffee or a steaming mug of Earl Grey tea. They’re a step up from plain toast and smell incredible on a Saturday morning. For a more elaborate brunch, they’re a fantastic addition to a buffet. Serve them alongside some fresh fruit salad, scrambled eggs, and maybe some crispy bacon. They add a lovely sweet and spicy note that complements savory dishes beautifully. For a delightful dessert, especially when you’re craving something warm and comforting, serve them slightly warmed with a dollop of whipped cream or a scoop of vanilla bean ice cream. The warm spices are wonderful with creamy desserts. And for those moments when you just need a little pick-me-up, they’re the perfect cozy snack with a glass of milk or a soothing herbal tea. My family often requests them for after-school snacks, and they always disappear in minutes!
Top Tips for Perfecting Your Vanilla Chai Muffins
I’ve made these vanilla chai muffins more times than I can count, and through trial and error (mostly delicious error!), I’ve picked up a few tricks that I think really elevate them. First, when it comes to the dry ingredients, don’t skip the whisking step! I mean it. Whisking thoroughly ensures that your leavening agents (baking powder and soda) and all those lovely chai spices are evenly distributed. Nobody wants a muffin that’s only spicy in one bite. For mixing the wet and dry ingredients, this is where people often go wrong. You absolutely *must* stop mixing as soon as you no longer see streaks of dry flour. A few lumps are perfectly fine, even desirable. Overmixing develops gluten, which leads to tough muffins, and that’s the opposite of what we want here. Trust me on this one. For the optional spiced filling, I’ve found that using packed brown sugar gives it a richer, more caramel-like flavor, and it helps it stay a bit more cohesive within the muffin. Don’t be afraid to experiment with the swirl either! A simple toothpick swirl can create a beautiful marbled effect, but even just layering the batter and filling works wonders. If your batter seems a bit too thick when combining, a tablespoon of extra milk can help. Conversely, if it seems too thin, a tablespoon more flour can do the trick, but be careful not to add too much. For baking, always preheat your oven properly. I’ve learned that an oven that’s not quite hot enough will result in flat, dense muffins. I usually bake mine on the middle rack. When testing for doneness, a toothpick inserted should come out with just a few moist crumbs attached – not wet batter, but not bone dry either. If you find your muffins are browning too quickly on top before the inside is cooked, you can loosely tent them with foil for the last few minutes of baking. Lastly, for the glaze, consistency is key! You want it thick enough to coat but thin enough to drizzle. It’s always better to start with less liquid and add more gradually until you get that perfect ribboning consistency. A splash of extra vanilla in the glaze really enhances the overall flavor profile.
Storing and Reheating Tips
One of the best things about these vanilla chai muffins is how well they store, making them perfect for batch baking. For room temperature storage, I usually keep them in an airtight container, and they’re wonderful for about 2-3 days. They maintain their lovely moistness well. If you’ve glazed them, I find it’s best to let the glaze set completely before packing them into the container to avoid smudging. If your kitchen is particularly warm, or you want them to last a bit longer, storing them in the refrigerator is a great option. In an airtight container, they’ll stay fresh for up to a week. However, I will say, they can become a little firmer when chilled, so you might want to warm them up slightly before enjoying them. For longer storage, freezing is your best friend! You can freeze the unfrosted muffins for up to 3 months. Wrap each muffin individually in plastic wrap, then place them in a freezer-safe bag or container. When you’re ready to enjoy one, just unwrap it and let it thaw at room temperature for about an hour, or gently warm it in the microwave for 15-30 seconds. If you’ve already glazed them, I generally recommend storing them at room temperature or in the fridge, as the glaze can sometimes get a little sticky when frozen and thawed. If you do freeze glazed muffins, be extra careful with the wrapping to protect the glaze.
Frequently Asked Questions
Final Thoughts
So there you have it – my favorite vanilla chai muffins! I truly hope you give them a try. They’re more than just a recipe; they’re a little moment of comfort and warmth. They’re perfect for those days when you need a pick-me-up, a little something special to share with loved ones, or just a delicious reason to enjoy your morning coffee a little longer. The blend of vanilla and chai spices is just so comforting, and the fact that they’re relatively easy to make makes them a winner for me every time. If you love this recipe and are looking for other cozy baked goods, you might also enjoy my Spiced Apple Crumble Bars or my Pumpkin Spice Scones – they have a similar warm, comforting vibe! I can’t wait to hear what you think of these vanilla chai muffins. Please let me know in the comments below if you make them, how they turned out, and if you tried any fun variations! Happy baking!
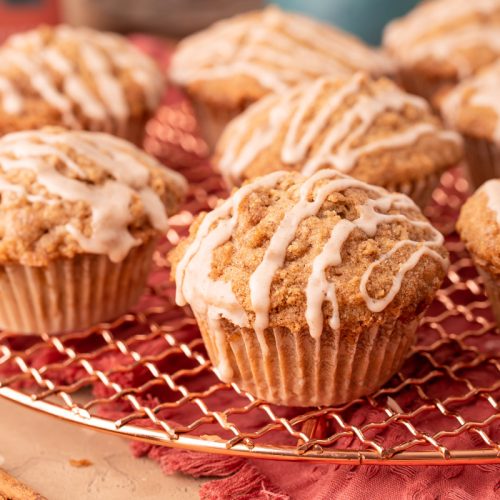
Vanilla Chai Muffins
Ingredients
Dry Ingredients
- 2 cups all-purpose flour
- 0.75 cup granulated sugar
- 2 teaspoons baking powder
- 0.5 teaspoon salt
- 1 teaspoon chai spice blend or a mix of cinnamon, cardamom, ginger, and cloves
Wet Ingredients
- 1 cup milk
- 0.25 cup vegetable oil
- 1 large egg
- 1 teaspoon vanilla extract
Instructions
Preparation Steps
- Preheat your oven to 375°F (190°C). Line a muffin tin with paper liners or grease it well.
- In a large bowl, whisk together the flour, sugar, baking powder, salt, and chai spice blend.
- In a separate medium bowl, whisk together the milk, vegetable oil, egg, and vanilla extract.
- Pour the wet ingredients into the dry ingredients and stir until just combined. Do not overmix.
- Divide the batter evenly among the prepared muffin cups, filling each about two-thirds full.
- Bake for 18-22 minutes, or until a toothpick inserted into the center of a muffin comes out clean.
- Let the muffins cool in the tin for a few minutes before transferring them to a wire rack to cool completely.