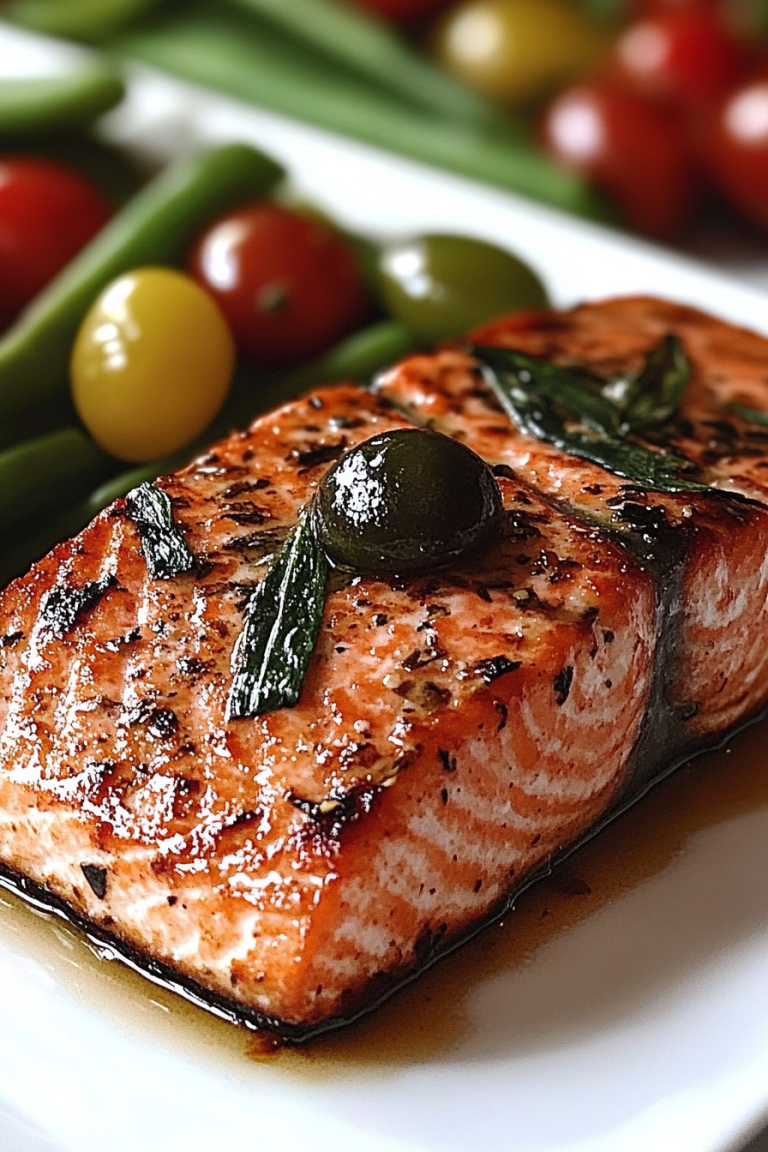
There are certain dishes that just stick with you, right? They become the reliable stars of your kitchen repertoire, the ones you can whip up without even looking at a recipe because you know them by heart. For me, that dish is sweet and sour chicken. It’s not just a meal; it’s a memory. I remember my mom making a version of this when I was a kid, the sweet and tangy aroma filling our tiny kitchen. It was always a special treat, something that felt a little bit exotic and incredibly comforting all at once. Now, as a busy parent myself, this sweet and sour chicken recipe is my secret weapon for getting a delicious, crowd-pleasing dinner on the table without a fuss. Forget those takeout menus; this homemade version is so much better – fresher, more flavorful, and surprisingly easy. It’s the kind of dish that makes everyone happy, from the pickiest eaters to the most discerning grown-ups. It’s got that perfect balance of sweet and tangy that just sings. Honestly, if you’re looking for a dish that’s a guaranteed hit, you’ve found it.
What is sweet and sour chicken?
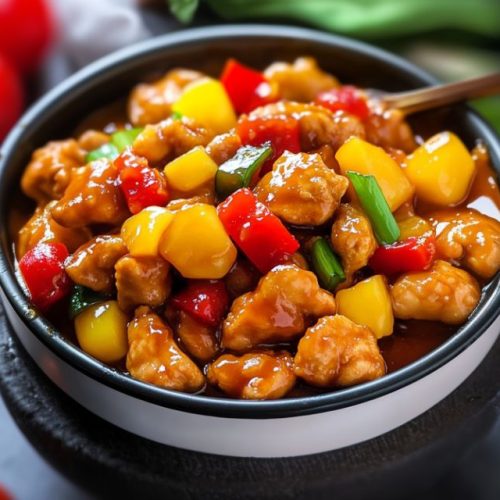
So, what exactly *is* sweet and sour chicken? At its heart, it’s a classic Chinese-American dish that’s become a global favorite. Think of it as tender pieces of chicken, often coated and fried until golden and crispy, then tossed in a vibrant, glossy sauce that’s a delightful explosion of sweet and tangy flavors. The “sweet” usually comes from sugar, honey, or pineapple juice, and the “sour” from vinegar – often rice vinegar. It’s that dynamic duo that makes your taste buds do a little dance. It’s not just about the taste, though; it’s about the texture too. That satisfying crunch of the fried chicken against the smooth, rich sauce is pure culinary magic. It’s essentially a flavor party in your mouth, and everyone’s invited! This recipe takes that classic concept and gives it a home-cooked, no-stress twist.
Why you’ll love this recipe?
There are so many reasons why this sweet and sour chicken recipe has earned a permanent spot in my recipe binder, and I’m just bursting to share them with you! First and foremost, the flavor is absolutely phenomenal. It’s that perfect harmony of sweet, tangy, and savory that’s incredibly addictive. You get the brightness of the pineapple and vinegar, balanced by the sweetness of the sugar and a hint of umami from the soy sauce. It’s the kind of sauce that you’ll find yourself wanting to lick off the plate! And don’t even get me started on the chicken – it’s crispy on the outside and tender on the inside, a textural dream. What I truly adore about this recipe, though, is its surprising simplicity. You might be thinking, “sweet and sour chicken, that sounds complicated!” but trust me, it’s not. The steps are straightforward, and the ingredients are super accessible. This is a lifesaver on busy weeknights when you’re craving something truly delicious but don’t have hours to spend in the kitchen. Plus, it’s incredibly budget-friendly. You’re using everyday pantry staples and Chicken Thighs, which are both economical and forgiving. I’ve tested this recipe with various cuts of chicken, and thighs really do give you the best tender, juicy result without drying out. Another huge plus is its versatility. While I love it served with plain steamed rice, you can jazz it up with loads of colorful veggies like bell peppers and onions for a complete meal. I even sometimes chop up the leftover chicken and add it to stir-fries or noodle dishes the next day – if there are any leftovers, that is! It truly is a dish that satisfies on every level.
How do I make sweet and sour chicken?
Quick Overview
This sweet and sour chicken recipe is designed for maximum flavor with minimum fuss. We’ll start by prepping the chicken for a perfect crisp, then whip up a vibrant, balanced sauce that coats everything beautifully. The key is in the layering of flavors and a quick fry that locks in that deliciousness. It’s all about achieving that satisfying crunch and a luscious, tangy glaze that makes this dish absolutely irresistible. You’ll be amazed at how quickly this comes together, making it a weeknight hero.
Ingredients
For the Main Batter:
You’ll need about 1.5 pounds of boneless, skinless chicken thighs. I find thighs are more forgiving and stay juicier than breasts, but breasts work too if you prefer! Cut them into bite-sized pieces, about 1-inch cubes. For the batter, grab 1 cup of all-purpose flour, 1/2 cup of cornstarch – this is the secret to that amazing crispiness! – 1 teaspoon of salt, and 1/2 teaspoon of black pepper. Whisk these dry ingredients together in a bowl. For frying, you’ll need about 2-3 cups of neutral oil, like vegetable or canola oil. Make sure you have enough to come up about an inch in your pan.
For the Filling:
This is where we add some beautiful texture and flavor. You’ll need 1 large bell pepper (any color works, but red or yellow adds a lovely sweetness) and 1 medium onion. Chop these into roughly 1-inch pieces. For a classic touch and extra sweetness, grab a 15-ounce can of pineapple chunks, drained, reserving the juice! You’ll want about 1/2 cup of that reserved juice for the sauce.
For the Glaze:
This is the heart of the sweet and sour magic! You’ll need 1/2 cup of the reserved pineapple juice, 1/3 cup of rice vinegar – this gives us that essential tang without being too harsh – 1/3 cup of ketchup (yes, ketchup! It adds color and a touch of sweetness), 1/4 cup of Brown Sugar (packed), and 2 tablespoons of soy sauce (use regular or low-sodium, your preference). Lastly, you’ll need 1 tablespoon of cornstarch mixed with 2 tablespoons of water to create a slurry. This is what thickens our glorious glaze to that perfect, syrupy consistency.
Step-by-Step Instructions
Step 1: Preheat & Prep Pan
Let’s get our frying station ready! Grab a large, heavy-bottomed skillet or wok and add your neutral oil. You want enough oil to generously coat the bottom, about an inch deep. Heat the oil over medium-high heat until it reaches about 350°F (175°C). If you don’t have a thermometer, you can test it by dropping a tiny bit of the batter mixture into the oil – it should sizzle and float to the top right away. While the oil heats, make sure your chicken is cut and your veggies are chopped. Organization is key here, especially since the frying part goes quickly!
Step 2: Mix Dry Ingredients
In a medium bowl, combine the flour, cornstarch, salt, and pepper. Whisk them together really well until they’re evenly distributed. This is your dry dredge for the chicken. Having this ready means you can move on to the wet ingredients without delay. The cornstarch is what gives us that signature crispiness, so don’t skip it!
Step 3: Mix Wet Ingredients
In a separate bowl, whisk together the reserved pineapple juice (about 1/2 cup), a splash of water, and a tablespoon of soy sauce. This is the liquid component that will help the dry ingredients cling to the chicken, creating a light, crispy coating. I find that using just enough liquid to make a thick batter is the sweet spot.
Step 4: Combine
Now, add your bite-sized chicken pieces to the wet ingredients. Toss them gently to coat each piece. Then, using a slotted spoon or fork, transfer the coated chicken pieces to the bowl of dry ingredients. Toss everything together until the chicken is thoroughly coated with the flour and cornstarch mixture. You want a nice, even coating. Don’t overcrowd the bowl; a light coating is better than a heavy, clumpy one.
Step 5: Prepare Filling
While the chicken is getting its coating, let’s get our veggies ready. Heat a tablespoon of oil in your wok or a large skillet over medium-high heat. Add your chopped bell pepper and onion. Stir-fry for about 3-5 minutes until they’re slightly tender-crisp. We don’t want them mushy; a little bite is perfect. Add the drained pineapple chunks and stir-fry for another minute just to warm them through. Remove the veggies and pineapple from the pan and set them aside. This keeps them from getting overcooked in the final sauce.
Step 6: Layer & Swirl
Now for the frying! Carefully add the coated chicken pieces to the hot oil, making sure not to overcrowd the pan. You might need to do this in batches. Fry for about 4-6 minutes, flipping them halfway through, until they’re golden brown and cooked through. They should be nice and crispy. Use a slotted spoon to remove the fried chicken from the oil and place it on a wire rack set over a baking sheet to drain any excess oil. This step is crucial for maintaining that crispiness!
Step 7: Bake
Okay, so this recipe doesn’t actually involve baking the chicken itself, but a little “bake” in the sauce is key! Once your chicken is fried and drained, set it aside. In the same pan you used for stir-frying the veggies (no need to wash it!), pour in all the glaze ingredients: reserved pineapple juice, rice vinegar, ketchup, brown sugar, and soy sauce. Bring this mixture to a simmer over medium heat, stirring to dissolve the sugar. In a small bowl, whisk together the cornstarch and water to make a slurry. Pour this slurry into the simmering sauce, stirring constantly. The sauce will thicken beautifully within a minute or two, becoming glossy and rich. This is the magic moment!
Step 8: Cool & Glaze
Once your sauce has thickened to your liking, gently add the fried chicken pieces, the stir-fried vegetables, and pineapple chunks back into the pan. Toss everything gently to coat each piece in that glorious sweet and sour glaze. You want to ensure every bite is coated. Cook for just another minute or two, allowing the flavors to meld and the chicken to reheat slightly without losing its crispiness. The goal is a beautiful, glossy coating, not a soggy mess.
Step 9: Slice & Serve
And there you have it! Your spectacular homemade sweet and sour chicken. Serve it immediately over a bed of fluffy steamed white or brown rice. Garnish with some toasted sesame seeds or chopped green onions if you’re feeling fancy. The aroma alone will have everyone gathering around the table. It’s a truly satisfying and colorful dish that looks as good as it tastes.
What to Serve It With
One of the best things about this sweet and sour chicken is how adaptable it is. While it’s a fantastic dinner, it also shines in other meal settings. For breakfast? Hear me out! If you have any leftovers (a rare occurrence in my house!), a small portion of cold sweet and sour chicken can be surprisingly good, especially if you’re craving something savory and a little sweet to kickstart your day. It’s a bit unconventional, but it works! For a delightful brunch, serve it alongside some fluffy scrambled eggs or a savory pancake. The contrast of flavors is quite interesting. Plating it nicely with a sprinkle of fresh herbs makes it feel a bit more elegant. And as for dessert? Well, not directly, but it perfectly sets the stage for something light and fruity afterwards, like a sorbet or fresh berries. It cleanses the palate beautifully. But my favorite time to serve this is for a cozy, casual dinner. It’s perfect for a family movie night, served in bowls with extra rice on the side. We often pair it with some simple steamed broccoli or snow peas for a bit of green. Another family tradition is to have it on a “build-your-own bowl” night, where everyone can customize their rice, chicken, and veggie toppings. It’s a guaranteed hit and makes for a really fun, interactive meal. Honestly, this sweet and sour chicken makes almost anything feel like a special occasion, even a Tuesday night!
Top Tips for Perfecting Your Sweet and Sour Chicken
I’ve made this sweet and sour chicken more times than I can count, and over the years, I’ve picked up a few little tricks that I think really elevate it. First, for the chicken prep, make sure your pieces are relatively uniform in size. This ensures they all cook evenly. If you’re using chicken breasts, I highly recommend pounding them slightly to an even thickness before cubing. This prevents those drier, tougher bits. When it comes to mixing the batter, don’t overwork it. A few lumps are perfectly fine; overmixing can develop the gluten in the flour and result in a tougher coating. Just whisk enough to combine. For the frying stage, patience is key! Let that oil get to the right temperature before adding the chicken. If the oil isn’t hot enough, the chicken will absorb too much oil and become greasy. Frying in batches is non-negotiable. Overcrowding the pan lowers the oil temperature drastically, leading to soggy chicken, and nobody wants that! Drain the chicken well on a wire rack; this allows air to circulate and keeps the bottom from getting steamed and soft. Now, for the sauce, the consistency is everything. If it’s too thin, simmer it a little longer. If it’s too thick, a tablespoon of water can usually fix it. Don’t cook the chicken *in* the sauce for too long once it’s added back – just a minute or two to coat and heat through is perfect to maintain that crunch. If you want to swap out ingredients, consider using honey or maple syrup instead of brown sugar for a different sweetness profile, or try a combination! For the vinegar, apple cider vinegar can work in a pinch, but rice vinegar provides that cleaner, brighter tang that’s classic for this dish. And if you want to add more veggies, thinly sliced carrots, snap peas, or even mushrooms would be lovely additions. Just make sure to stir-fry them until they’re tender-crisp before adding them to the sauce. My biggest “lesson learned” moment was when I first tried making this sauce without enough cornstarch – it was just too thin and sad! So, trust the cornstarch slurry; it’s your friend for that glossy finish. Lastly, taste and adjust! Don’t be afraid to add a touch more sugar if it’s too tart, or a splash more vinegar if it’s too sweet. It’s your kitchen, your masterpiece!
Storing and Reheating Tips
This sweet and sour chicken is so good, you’ll want to savor every last bite, and thankfully, it stores and reheats beautifully. If you happen to have any leftovers (which, let’s be honest, is rare in my household!), you can store them at room temperature for no more than two hours, as it contains cooked chicken and sauce. For longer storage, airtight containers are your best friend. Pop them in the refrigerator, and they’ll keep well for up to 3 days. The chicken will lose a bit of its crispiness as it sits in the sauce, but it’s still delicious! If you’re planning to freeze it, I highly recommend storing the sauce and chicken separately, if possible, to maintain the best texture upon reheating. Wrap the chicken tightly in plastic wrap and then in foil, or place it in a freezer-safe container. It can stay in the freezer for up to 2 months. When you’re ready to reheat, the refrigerator is the best place to thaw frozen leftovers overnight. For reheating, I usually opt for the stovetop. Gently reheat the chicken and sauce in a skillet over medium-low heat, stirring occasionally, until warmed through. This helps to re-meld the flavors. If you want to regain some crispiness, you can briefly pan-fry the chicken pieces in a little bit of fresh oil *before* tossing them with the reheated sauce. Another option is to reheat it in the oven at around 300°F (150°C) on a baking sheet, covered loosely with foil, for about 15-20 minutes. Microwaving is also an option for a quick reheat, but be sure to stir it partway through to ensure even heating and prevent drying out. My personal preference for the glaze is to add it just before serving or reheating. If you store it with the glaze already on, the chicken can get a bit soggy, especially for longer storage. So, if you’re reheating, make the sauce separately if you can, and then combine them right at the end. This way, you’ll get the best balance of tender chicken and luscious glaze!
Frequently Asked Questions
Final Thoughts
I truly hope you give this sweet and sour chicken recipe a try. It’s one of those dishes that brings me so much joy in the kitchen, and I know it will do the same for you. It’s the perfect example of how you can create something truly spectacular at home, with ingredients you probably already have on hand. The combination of tender, crispy chicken and that perfectly balanced sweet and tangy glaze is just incredible. It’s versatile enough for a quick weeknight meal or impressive enough for guests. If you love this recipe, you might also enjoy my Honey Garlic Chicken or my Crispy orange chicken – they’re in a similar flavor family and are also huge hits! Please, please let me know in the comments below how your sweet and sour chicken turns out. I’m always so excited to hear about your kitchen adventures and see how you put your own personal touches on these recipes. And if you have any tips or variations of your own, I’d love to hear them! Happy cooking, and I can’t wait to hear all about it!
sweet and sour chicken
Ingredients
For the Crispy Chicken
- 1.5 pounds boneless, skinless chicken breasts cut into 1-inch pieces
- 0.5 cup cornstarch
- 0.25 teaspoon salt
- 0.125 teaspoon black pepper
- 1 large egg beaten
- 2 cups vegetable oil for frying
For the Sweet and Sour Sauce
- 0.5 cup pineapple juice
- 0.25 cup rice vinegar
- 0.25 cup ketchup
- 3 tablespoons brown sugar packed
- 2 tablespoons soy sauce low sodium preferred
- 1 tablespoon cornstarch
For the Stir-Fry Vegetables
- 1 tablespoon vegetable oil
- 1 medium red bell pepper cut into 1-inch pieces
- 1 medium green bell pepper cut into 1-inch pieces
- 0.5 medium yellow onion cut into 1-inch pieces
- 1 cup canned pineapple chunks drained
Instructions
Prepare the Chicken
- In a medium bowl, season chicken pieces with salt and pepper. In a separate shallow bowl, whisk the egg. In another shallow bowl, place the 0.5 cup of cornstarch.
- Dip each chicken piece first into the beaten egg, then dredge thoroughly in the cornstarch, ensuring it's fully coated. Set aside on a plate.
Cook the Chicken
- Heat 2 cups of vegetable oil in a large skillet or Dutch oven over medium-high heat to about 350°F (175°C). Carefully add chicken pieces in batches, without overcrowding, and fry for 3-5 minutes per side, or until golden brown and cooked through.
- Remove fried chicken with a slotted spoon and place on a wire rack lined with paper towels to drain excess oil. Repeat with remaining chicken and set aside.
Make the Sweet and Sour Sauce
- In a small bowl, whisk together pineapple juice, rice vinegar, ketchup, brown sugar, soy sauce, and 1 tablespoon of cornstarch until smooth. Set aside.
Combine and Serve
- In a large wok or skillet, heat 1 tablespoon of vegetable oil over medium-high heat. Add bell peppers and onion; stir-fry for 3-4 minutes until slightly tender-crisp.
- Add the drained pineapple chunks and stir-fry for another minute. Pour in the prepared sweet and sour sauce and bring to a simmer, stirring constantly, until the sauce thickens.
- Add the fried chicken pieces to the wok and toss gently to coat evenly with the sauce and vegetables. Cook for 1-2 minutes until heated through.
- Serve immediately over steamed white rice, garnished with sesame seeds if desired.