You know those days? The ones where you just *need* something sweet, something comforting, something that tastes like a warm hug and a tropical vacation all rolled into one? That’s precisely the feeling these coconut bars evoke for me. They’re not just any coconut bars, mind you. These are the kind of bars that disappear from the plate faster than you can say “second helping.” My earliest memories of them involve my grandmother’s kitchen, the air thick with the sweet, toasty scent of coconut and butter, and me, a tiny whirlwind, trying to “help” her mix the batter. She always used to say, “These little coconut bars are sunshine in a pan, darling.” And honestly, she was so right. They’re remarkably easy, far simpler than a full-blown cake or pie, making them a lifesaver on busy weeknights or when unexpected guests pop by. If you’ve ever loved those classic blondies, imagine them infused with a deep, nutty coconut flavor and a wonderfully chewy texture – that’s the magic we’re diving into today.
What are Chewy Coconut Bars?
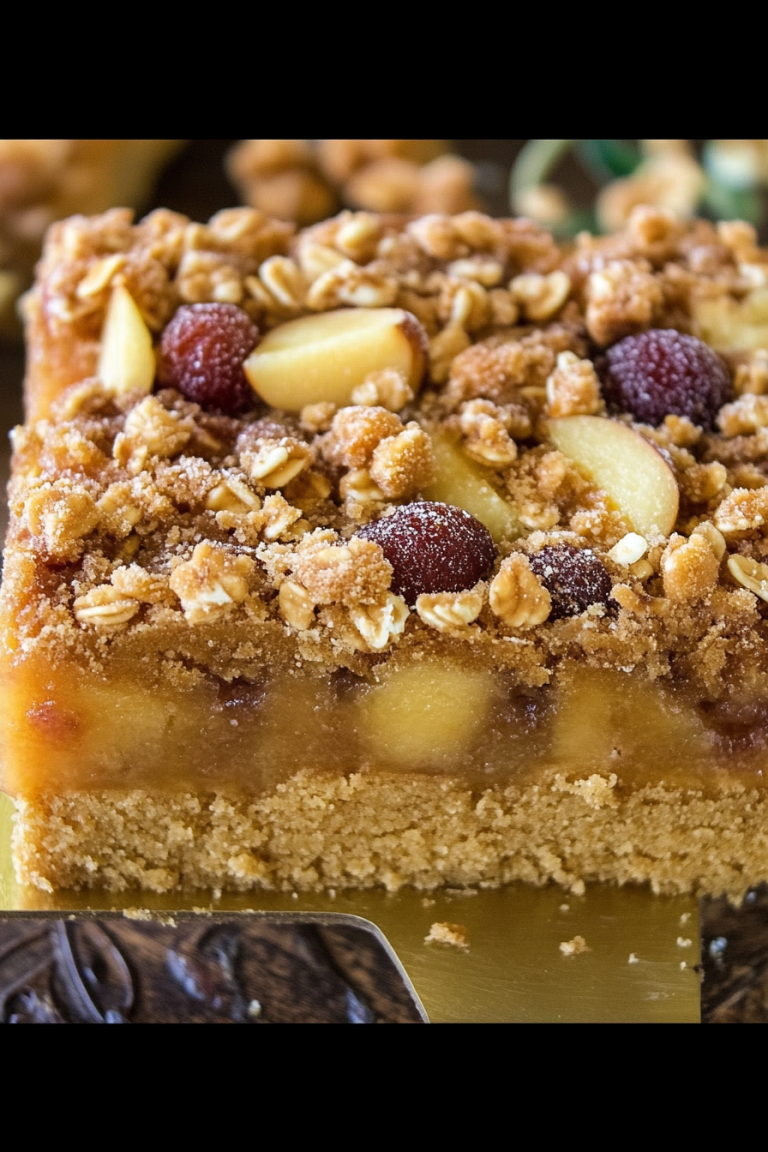
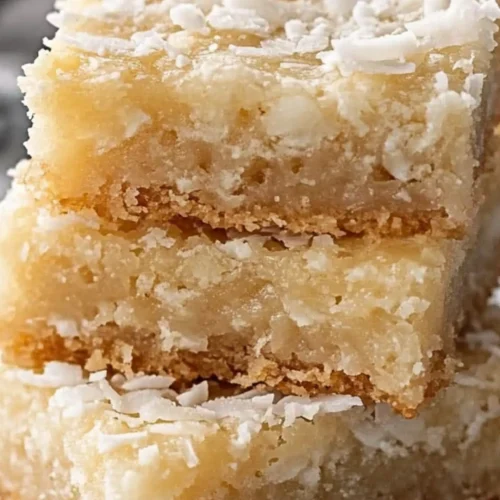
So, what exactly are these delightful little treats? Think of them as a blissful marriage between a chewy cookie and a dense, fudgy brownie, but with the star of the show being shredded coconut. They’re baked in a pan, cut into bars, and often finished with a simple, sweet glaze. The “chewy” part is key here. We’re not going for a dry, crumbly texture at all. Instead, we want something that has a satisfying bite, a tender crumb, and a richness that lingers on your palate. The name itself, “coconut bars,” is pretty straightforward, but it’s the soul of the recipe that makes them special. They’re unpretentious, honest-to-goodness delicious, and always deliver on that comforting, sweet craving. It’s essentially a simplified, intensely flavorful blondie base that embraces coconut in all its glory.
Why you’ll love this recipe?
Honestly, there are so many reasons why I keep coming back to this recipe, and why I think you’ll adore it too. First off, the flavor. Oh, the flavor! It’s a symphony of sweet, creamy coconut, rich butter, and that subtle hint of vanilla. When it bakes, the edges get this beautiful, golden-brown caramelization, and the coconut itself toasts up, releasing an aroma that’s simply intoxicating. It’s the kind of smell that makes everyone in the house gravitate towards the kitchen, asking, “What’s baking?!” Beyond the incredible taste, the simplicity of this recipe is a huge draw for me. I can whip these up from start to finish in under an hour, including baking time, which is a godsend when I’m in a pinch. They don’t require any fancy techniques or hard-to-find ingredients, making them super budget-friendly. I can usually make a batch using things I already have in my pantry. And the versatility! You can enjoy them warm, right out of the oven, with the glaze still slightly gooey, or cooled and perfectly firm. They’re fantastic for potlucks, bake sales, or just an afternoon pick-me-up with a cup of coffee. What I truly love most about these coconut bars, though, is their sheer reliability. They just *work*. Every single time, they turn out perfectly chewy, wonderfully sweet, and utterly satisfying. They’re a guaranteed crowd-pleaser, and I can’t count how many times people have asked me for the recipe after just one bite.
How do I make Chewy Coconut Bars?
Quick Overview
Making these Chewy Coconut bars is surprisingly straightforward. You’ll mix up a simple, rich batter, fold in plenty of shredded coconut, bake it until it’s golden and set, and then finish it off with a sweet, easy glaze. The process is very similar to making a blondie, but with that irresistible coconut twist. What makes this method special is how it ensures a perfectly chewy texture without any fuss. You don’t need a stand mixer or any special equipment, just a bowl, a whisk, and a spatula. It’s a forgiving recipe, which is always a plus in my book!
Ingredients
For the Main Batter:
1 cup (2 sticks) unsalted butter, melted and slightly cooled. Using unsalted butter lets you control the saltiness, and melting it helps create that dense, chewy texture we’re after. Make sure it’s not piping hot when you add it to the other ingredients, or it could scramble the eggs!
2 cups packed light Brown Sugar. This is crucial for chewiness and that lovely caramel note. Don’t try to substitute with white sugar; you’ll lose the texture.
2 large eggs, at room temperature. Room temperature eggs incorporate better into the batter, leading to a smoother, more uniform mix. I always forget to do this and have to quickly pop them in warm water for a few minutes!
1 teaspoon vanilla extract. The classic flavor enhancer that just makes everything taste better.
1 ½ cups all-purpose flour. You can use a gluten-free blend here if needed, but results might vary slightly in texture.
½ teaspoon baking powder. This gives just a little lift, but not too much, keeping them dense and chewy.
¼ teaspoon salt. Balances the sweetness beautifully.
1 ½ cups sweetened shredded coconut. This is where the magic happens! I prefer sweetened because it adds to the overall flavor and sweetness, but you can use unsweetened if you prefer to control sweetness more with the sugar and glaze. Make sure it’s the shredded kind, not the large flakes, for best distribution.
For the Filling:
(This recipe doesn’t have a separate filling layer; the coconut is mixed directly into the batter for that consistent flavor throughout.)
For the Glaze:
1 cup powdered sugar, sifted. Sifting is important to avoid lumps in your glaze. It makes it smooth and professional-looking.
2-3 tablespoons milk or cream. Milk works great, but a splash of cream makes it extra rich. You can also use unsweetened almond milk or coconut milk for a dairy-free option.
½ teaspoon vanilla extract (optional). For an extra hint of flavor.
Step-by-Step Instructions
Step 1: Preheat & Prep Pan
Start by preheating your oven to 350°F (175°C). This is a pretty standard baking temperature, so most ovens will do just fine. Grab an 8×8 inch or 9×9 inch baking pan. I find an 8×8 gives you a slightly thicker bar, which I personally love, but a 9×9 works too for a thinner, crisper edge. Grease the pan really well with butter or non-stick cooking spray, and then line it with parchment paper, leaving an overhang on two opposite sides. This overhang is your secret weapon for easily lifting the whole baked bar out of the pan later. Trust me, it’s a game-changer and makes cleanup a breeze!
Step 2: Mix Dry Ingredients
In a medium bowl, whisk together the all-purpose flour, baking powder, and salt. Just a quick whisk to make sure everything is evenly distributed. This step might seem small, but it ensures the leavening agent and salt are spread throughout the batter, preventing any pockets of saltiness or uneven rising. We want consistent deliciousness in every bite!
Step 3: Mix Wet Ingredients
In a large bowl, pour in the melted and slightly cooled butter. Add the packed light brown sugar and whisk them together until well combined. It will look like wet sand. Now, crack in your two eggs, one at a time, whisking well after each addition until the mixture is smooth and glossy. Stir in the vanilla extract. The key here is to make sure the butter isn’t too hot, so it doesn’t cook the eggs.
Step 4: Combine
Pour the dry ingredients into the wet ingredients. Use a spatula to gently fold them together until *just* combined. Seriously, don’t overmix! Overmixing can develop the gluten in the flour too much, leading to tough bars. A few streaks of flour are perfectly fine at this stage. Once the batter is mostly combined, it’s time for the star: gently fold in the sweetened shredded coconut. Make sure it’s distributed evenly throughout the batter.
Step 5: Prepare Filling
(As mentioned, there’s no separate filling for this recipe; the coconut is incorporated directly into the batter for a unified flavor and texture.)
Step 6: Layer & Swirl
Spread the batter evenly into your prepared baking pan using your spatula. Press it down gently to ensure it fills the corners and edges. Since there’s no separate swirl, the texture comes from the lovely distribution of coconut throughout the dense, chewy base. You want an even layer so it bakes uniformly.
Step 7: Bake
Place the pan in your preheated oven. Bake for 25-30 minutes for a 9×9 pan, or 30-35 minutes for an 8×8 pan. You’ll know they’re done when the edges are golden brown and a toothpick inserted into the center comes out with moist crumbs attached, but no wet batter. If you like them extra gooey, err on the side of less baking time; if you prefer them more set, bake a few minutes longer. Keep an eye on them towards the end, as ovens can vary!
Step 8: Cool & Glaze
Once baked, remove the pan from the oven and let the bars cool completely in the pan on a wire rack. This is *super* important for achieving that perfect chewy texture. If you try to cut them while they’re hot, they’ll likely fall apart. Once completely cooled, use the parchment paper overhang to lift the entire baked slab out of the pan. Now, for the glaze! In a small bowl, whisk together the powdered sugar, 2 tablespoons of milk, and vanilla extract (if using) until smooth. If it’s too thick, add more milk, a teaspoon at a time, until it reaches your desired drizzling consistency. Pour the glaze over the cooled bars and spread it evenly with a spatula or the back of a spoon. Let the glaze set for about 15-20 minutes before slicing.
Step 9: Slice & Serve
Once the glaze is set, use a sharp knife to slice the bars into your desired size. I usually cut mine into 16 squares, but you can make them bigger or smaller depending on the occasion. They’re delicious served at room temperature, but if you’re feeling indulgent, a slightly warm bar with the gooey glaze is pure heaven.
What to Serve It With
These coconut bars are so versatile, they fit in anywhere! For breakfast, they’re a delightful treat alongside a hot cup of coffee or a glass of cold milk. They’re sweet enough to feel like a treat but substantial enough to get your day started. I sometimes cut them into smaller, bite-sized pieces and serve them as part of a breakfast pastry platter – looks super elegant! For brunch, they add a touch of tropical sweetness to the spread. I love serving them with fresh berries or a dollop of whipped cream. They pair wonderfully with mimosas or a sparkling rosé. As a dessert, these are a revelation. They’re fantastic on their own, but imagine serving them with a scoop of vanilla bean ice cream or a drizzle of chocolate ganache. It’s pure indulgence! For those cozy, late-night snack cravings, these are my go-to. They’re comforting, satisfying, and just the right amount of sweet without being overwhelming. My kids adore them after school, and they’re always gone in a flash. I’ve even taken them camping and served them around the campfire – they held up beautifully!
Top Tips for Perfecting Your Chewy Coconut Bars
Over the years, I’ve learned a few tricks that help make these coconut bars consistently amazing. First, when it comes to the coconut, don’t be afraid to really pack it in there! The more coconut you use, the more intense that lovely flavor and texture will be. I’ve found that using sweetened shredded coconut gives the best balance of sweetness and chew, but if you’re watching sugar intake, unsweetened will work, you’ll just need to adjust your glaze sweetness accordingly. For the batter, I cannot stress enough the importance of not overmixing once you add the flour. It’s the number one reason why baked goods can turn out tough. Mix until *just* combined, and don’t worry about a few tiny flour streaks. They’ll disappear during baking. When it comes to the swirl – or in this case, the integrated coconut – ensure it’s evenly distributed. I like to gently fold it in a couple of times to make sure there aren’t big clumps in one area and none in another. For baking, keep an eye on those edges! They’ll go from perfectly golden to slightly too dark very quickly. A toothpick test is your best friend here – moist crumbs are good, wet batter is not. If you find your oven tends to bake unevenly, rotating the pan halfway through can help ensure consistent doneness. For the glaze, the consistency is key. Too thin and it runs off; too thick and it’s hard to spread. I always start with the lesser amount of liquid and add more as needed until I get a lovely, pourable but not watery, consistency. If you accidentally make it too thin, just whisk in a bit more powdered sugar. If it’s too thick, a tiny splash more milk will fix it. And finally, the cooling period is non-negotiable. Patience, my friends! Letting them cool completely in the pan is what allows them to set up and develop that perfect chewy texture. Trying to cut them too soon is a recipe for crumbly disappointment, I learned that the hard way!
Storing and Reheating Tips
These coconut bars are fantastic for making ahead, which is always a win in my busy household. For room temperature storage, once the glaze has fully set, I like to keep them in an airtight container. They’ll stay fresh and delicious for about 3-4 days. I usually place a piece of parchment paper between layers if I’m stacking them, just to prevent the glaze from sticking. If you live in a warmer climate or it’s a humid day, refrigerating them might be a better option to prevent the glaze from getting too soft. In the refrigerator, they’ll last for up to a week, though honestly, they rarely make it that long! They’ll be a bit firmer when cold, but still wonderfully chewy. Just let them sit at room temperature for about 15-20 minutes before serving to take the chill off, or give them a quick gentle warm-up in the microwave for about 10-15 seconds if you love that slightly melty glaze. For longer storage, these bars freeze beautifully! Once cooled and glazed, I wrap them tightly in plastic wrap, then place them in a freezer-safe bag or container. They can be stored in the freezer for up to 3 months. To thaw, simply transfer them to the refrigerator overnight, and then let them come to room temperature for about 20-30 minutes before enjoying. If you plan to freeze them, I often find it’s best to glaze them *after* thawing if possible, or ensure the glaze is fully hardened before wrapping to prevent sticking. However, I’ve frozen them with the glaze on and they’ve been perfectly fine!
Frequently Asked Questions
Final Thoughts
I truly hope you give these chewy coconut bars a try. They’re more than just a recipe to me; they’re a little bit of comfort, a taste of nostalgia, and a guaranteed way to bring a smile to people’s faces. They embody everything I love about home baking: simple ingredients, straightforward steps, and a payoff that’s absolutely delicious. Whether you’re looking for a treat to impress your friends, a sweet addition to your weekend brunch, or just a moment of pure, unadulterated deliciousness for yourself, these bars deliver. They’re a reminder that sometimes, the simplest things are the most rewarding. If you’re a fan of chewy cookies or rich blondies, you’re going to fall head over heels for these coconut bars. And if you love this recipe, you might also enjoy my fudgy brownie recipe or my classic oatmeal raisin cookies! I can’t wait to hear what you think, or even better, to see your own creations! Please feel free to leave a comment below with your experience, or share your own tips and variations. Happy baking, and enjoy every single bite!
Coconut Bars
Ingredients
Main Ingredients
- 2 cups all-purpose flour
- 1 cup unsweetened shredded coconut
- 1 cup granulated sugar
- 0.5 cup butter, melted
- 2 large eggs
- 1 teaspoon vanilla extract
- 0.5 teaspoon baking powder
- 0.25 teaspoon salt
Instructions
Preparation Steps
- Preheat your oven to 350°F (175°C). Grease and flour a 9x13 inch baking pan.
- In a large bowl, combine the all-purpose flour, shredded coconut, granulated sugar, baking powder, and salt. Mix well.
- In a separate bowl, whisk together the melted butter, eggs, and vanilla extract until well combined.
- Pour the wet ingredients into the dry ingredients and stir until just combined. Do not overmix.
- Spread the batter evenly into the prepared baking pan.
- Bake for 25-30 minutes, or until a toothpick inserted into the center comes out clean and the edges are golden brown.
- Let the bars cool completely in the pan before cutting them into squares.