You know those days when a craving hits, a deep, undeniable need for something sweet, spiced, and utterly comforting? That’s exactly when my mind drifts to these cinnamon swirl cookies. They’re not just cookies; they’re little pockets of joy, a hug in baked form. I remember my grandma making these when I was a kid, the entire house filling with that intoxicating cinnamon sugar aroma. It felt like magic then, and honestly, it still does. These cookies are like a spiced-up version of a classic sugar cookie, but with that gorgeous, swirled heart of cinnamon that just takes them to a whole new level. If you’ve ever loved a snickerdoodle or a gooey cinnamon roll, prepare yourself, because these cinnamon swirl cookies are about to become your new obsession. They’re surprisingly simple, which is always a win in my book, especially when that craving strikes at 3 PM on a Tuesday and I need a pick-me-up!
What are cinnamon swirl cookies?
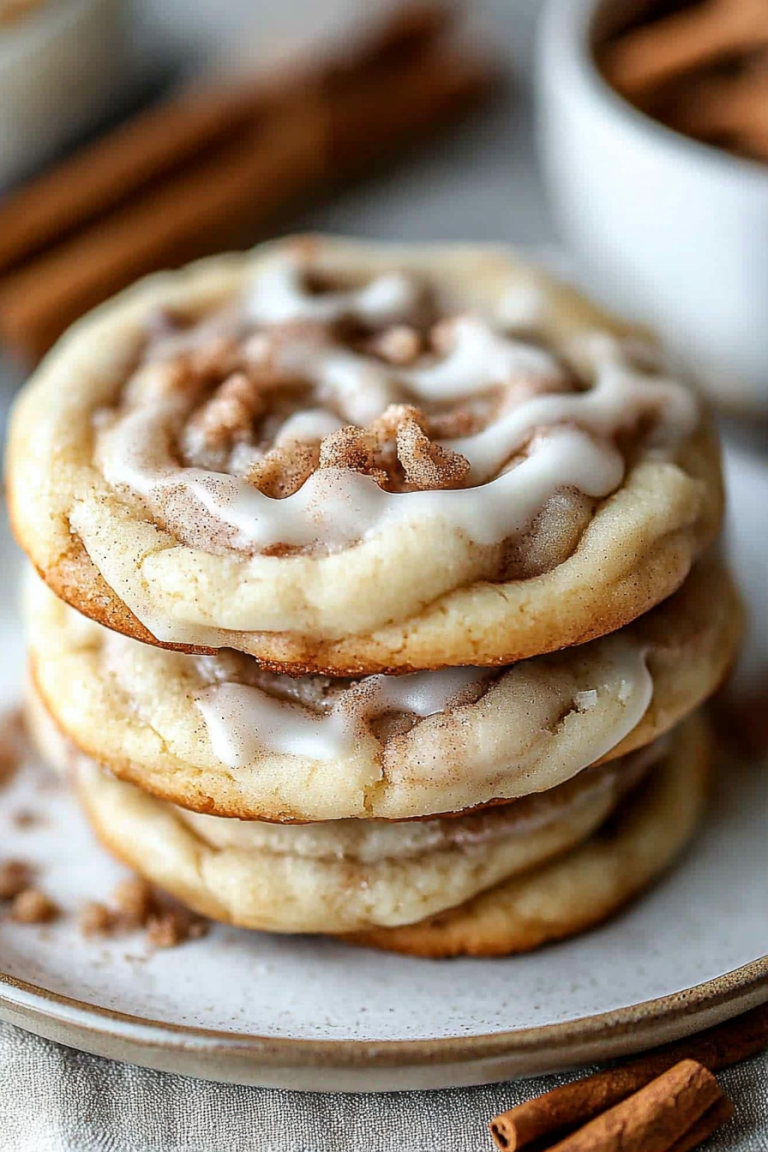
So, what exactly are these delightful treats? Think of them as a softer, chewier, more generously spiced cousin to your everyday sugar cookie. The “swirl” part comes from a delicious mixture of cinnamon and sugar (sometimes with a little butter or Brown Sugar) that gets layered and rolled into the cookie dough before baking. It creates these beautiful ribbons of cinnamon goodness right in the center of each cookie. It’s like getting all the best parts of a cinnamon roll but in a cookie format – no fork required! The dough itself is tender and buttery, designed to bake up with a slightly crisp edge and a wonderfully soft, yielding center. They’re straightforward enough for a beginner baker but have a touch of elegance that makes them perfect for sharing (or hoarding, no judgment here!).
Why you’ll love this recipe?
Honestly, there are so many reasons why this cinnamon swirl cookie recipe has earned a permanent spot in my recipe binder and why I think you’ll adore it too. First off, the flavor is just out of this world. That warm, cozy embrace of cinnamon, balanced perfectly by the sweet, buttery cookie base, is pure bliss. It’s not too overpowering; it’s just right. Then there’s the texture! Oh, the texture. When they’re fresh out of the oven, they have a slight chewiness that’s absolutely divine, with a subtle crispness around the edges. What I love most, though, is how incredibly easy they are to make. I’ve had nights where I’ve whipped these up from start to finish in under an hour, including baking time, which is a lifesaver when you need a quick treat. And the ingredients? All pantry staples, no fancy stuff required, making them super budget-friendly. Plus, they’re so versatile! Serve them warm with a glass of milk, enjoy them with your morning coffee, or even crumble them over ice cream for an extra special dessert. They’re a delightful alternative to my usual chocolate chip cookies when I’m in the mood for something a little different, and my family devours them every single time.
How do you make cinnamon swirl cookies?
Quick Overview
The magic of these cinnamon Swirl Cookies lies in their simplicity and the beautiful marbling effect. We’ll start by making a tender cookie dough, then create a sweet cinnamon-sugar filling. The dough gets rolled out, the filling is spread over it, and then it’s all rolled up and sliced into cookies. It’s a straightforward process that yields a stunning result. The key is not to overwork the dough and to get a nice, even swirl. Trust me, even if your swirls aren’t perfectly uniform, they’ll taste incredible!
Ingredients
For the Main Batter:
You’ll need about 3 cups of all-purpose flour, plus a bit extra for dusting. Make sure your flour is fresh – it really does make a difference! I like to use good quality all-purpose flour, but cake flour can also give you an even more tender cookie if you want to go that route. You’ll also need 1 teaspoon of baking soda for lift and 1/2 teaspoon of salt to balance the sweetness. For the richness, we’re using 1 cup (that’s two sticks) of unsalted butter, softened to room temperature. It’s super important that it’s softened, not melted, for the best texture. Then, 1 and 3/4 cups of granulated sugar for sweetness, 2 large eggs, which bind everything together, and 1 teaspoon of pure vanilla extract. Don’t skimp on the vanilla; it really enhances all those lovely flavors. A little trick I learned: if my eggs aren’t at room temperature, I just pop them in a bowl of warm water for about 5-10 minutes!
For the Filling:
This is where the magic happens! For the filling, you’ll need 3/4 cup of packed light brown sugar. The molasses in brown sugar adds a lovely depth of flavor that granulated sugar can’t quite replicate. Then, 2 tablespoons of ground cinnamon. I’m pretty generous with the cinnamon here because I love that bold flavor, but feel free to adjust it slightly to your preference. If you like it extra cinnamony, go for 2.5 tablespoons. And lastly, 2 tablespoons of unsalted butter, melted. This helps bind the cinnamon and sugar together and makes it easier to spread.
For the Glaze:
A simple glaze takes these cookies from delicious to divine. You’ll need 1 cup of powdered sugar, sifted if you want a super smooth glaze, but it’s not strictly necessary if you’re in a hurry. Then, about 2-3 tablespoons of milk – any kind works, dairy or non-dairy. I’ve even used a splash of heavy cream before for an extra rich glaze! And finally, 1/2 teaspoon of vanilla extract for a little extra oomph. You want the glaze to be thick enough to coat the cookies but thin enough to drizzle easily. It’s all about finding that perfect consistency.
Step-by-Step Instructions
Step 1: Preheat & Prep Pan
First things first, let’s get our oven preheated to 375°F (190°C). This ensures even baking right from the start. While the oven is heating up, grab a couple of baking sheets and line them with parchment paper or silicone baking mats. This is a lifesaver for cleanup and prevents your cookies from sticking. If you don’t have parchment paper, a lightly greased baking sheet will work in a pinch, but parchment is really my go-to for perfect cookies every time.
Step 2: Mix Dry Ingredients
In a medium bowl, whisk together your 3 cups of all-purpose flour, 1 teaspoon of baking soda, and 1/2 teaspoon of salt. Whisking them together ensures that the leavening agent and salt are evenly distributed throughout the flour, which leads to a more consistent cookie. I usually give it a good minute of whisking to make sure everything is well combined. Set this bowl aside for now.
Step 3: Mix Wet Ingredients
In a large bowl (or the bowl of your stand mixer fitted with the paddle attachment), cream together the 1 cup of softened unsalted butter and 1 and 3/4 cups of granulated sugar. Beat them together on medium speed until the mixture is light and fluffy, about 2-3 minutes. This is called creaming, and it’s crucial for creating that tender cookie texture. Scrape down the sides of the bowl as needed. Next, beat in the 2 large eggs, one at a time, until fully incorporated. Then, stir in the 1 teaspoon of vanilla extract. Your mixture should look smooth and slightly pale yellow.
Step 4: Combine
Now it’s time to bring the wet and dry ingredients together. Gradually add the dry ingredients to the wet ingredients, mixing on low speed until just combined. Be careful not to overmix! Overmixing develops the gluten in the flour, which can lead to tough cookies. Stop mixing as soon as you no longer see streaks of dry flour. The dough will be soft and slightly sticky, which is exactly what we want.
Step 5: Prepare Filling
While the dough chills slightly (or while you’re cleaning up the mixing bowls!), let’s make that glorious cinnamon filling. In a small bowl, combine the 3/4 cup of packed light brown sugar and 2 tablespoons of ground cinnamon. Stir until well combined. Then, pour in the 2 tablespoons of melted unsalted butter and mix until it forms a thick, paste-like consistency. It should be spreadable but not runny. If it seems too dry, add another teaspoon of melted butter; if it seems too wet, add a tiny bit more brown sugar or cinnamon.
Step 6: Layer & Swirl
Here comes the fun part! Lightly flour a clean work surface. Turn the cookie dough out onto the floured surface. Gently roll the dough into a rectangle, about 12×9 inches and roughly 1/4 inch thick. Don’t worry if it’s not perfectly even; rustic charm is part of the appeal! Evenly spread the cinnamon-sugar filling over the surface of the dough, leaving about a 1/2-inch border along one of the long edges. Starting from the opposite long edge, carefully but tightly roll up the dough, jelly-roll style. Pinch the seam to seal it. If the dough cracks a bit, don’t fret; just press it back together as best you can. Using a sharp knife, slice the log into 1/2-inch thick rounds. These are your cookies! You should see those beautiful cinnamon swirls starting to form.
Step 7: Bake
Arrange the sliced cookies on your prepared baking sheets, leaving about 2 inches between them to allow for spreading. Bake for 9-12 minutes, or until the edges are lightly golden brown and the centers look set but not overly firm. Ovens can vary, so keep an eye on them! I usually start checking around the 9-minute mark. The smell that fills your kitchen at this stage is just incredible!
Step 8: Cool & Glaze
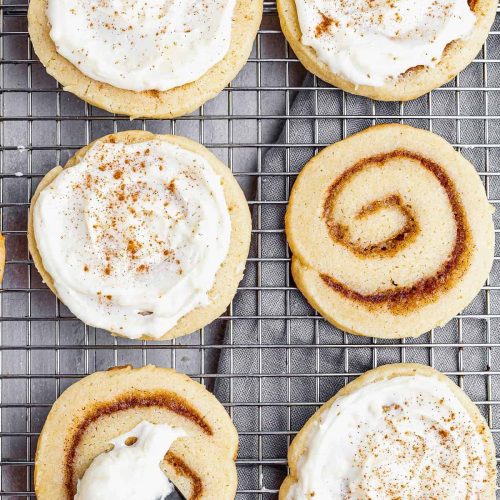
Once baked, let the cookies cool on the baking sheets for 5 minutes. This allows them to firm up slightly before moving. Then, carefully transfer them to a wire rack to cool completely. While the cookies are cooling, whisk together the 1 cup of powdered sugar, 2-3 tablespoons of milk, and 1/2 teaspoon of vanilla extract in a small bowl until you have a smooth, drizzle-able glaze. If it’s too thick, add milk a teaspoon at a time; if it’s too thin, add a little more powdered sugar. Once the cookies are completely cool, drizzle the glaze over the tops. I like to use a fork or a spoon for this, creating a pretty pattern.
Step 9: Slice & Serve
Once the glaze has set, your cinnamon swirl cookies are ready to be enjoyed! The glaze adds a lovely finishing touch, but they are also delicious plain. They are perfect warm, with a chewy center and a slightly crisp edge. These are best served fresh, but they hold up wonderfully for a few days. Get ready for them to disappear fast!
What to Serve It With
These cinnamon swirl cookies are so versatile, they’re perfect for almost any occasion! For a leisurely breakfast, I love pairing them with a steaming mug of coffee or a warm glass of milk. The cinnamon and coffee are just a match made in heaven. If you’re planning a weekend brunch, serve them on a pretty platter alongside some fresh fruit salad and maybe even some mini quiches – they add a touch of sweetness and elegance without being too heavy. As an after-dinner treat, they’re a delightful dessert, especially when served slightly warm with a scoop of vanilla bean ice cream or a dollop of whipped cream. For those cozy evenings when you just need a little something sweet, they’re the perfect companion to a good book and a cup of herbal tea. My family has a tradition of having these with hot chocolate on movie nights, and it’s become a beloved ritual.
Top Tips for Perfecting Your Cinnamon Swirl Cookies
Over the years, I’ve learned a few things that really help make these cinnamon swirl cookies absolutely perfect. When it comes to the dough, the most crucial tip is to avoid overmixing! Seriously, just mix until the flour is incorporated. Overmixing develops the gluten and can make your cookies tough instead of tender. I always start by mixing on low speed in my stand mixer or by hand, and I stop the moment I don’t see dry flour. If your dough feels a little sticky, don’t be tempted to add too much extra flour when rolling; a little dusting of flour on your surface and hands is usually enough. For the filling, ensure your brown sugar is packed well to get that lovely caramel note. If your cinnamon is a bit old, it might not have as much flavor, so using fresh cinnamon is key here. When you’re rolling up the dough, try to keep it as consistent as possible to get those beautiful, even swirls. If your log cracks a little, don’t stress! Just gently press it back together. For baking, pay attention to your oven. I find my cookies bake best on the middle rack. If your oven tends to bake hot, you might want to reduce the temperature by 25 degrees F or check on them a minute or two earlier. When it comes to the glaze, consistency is everything. You want it thick enough to coat but thin enough to drizzle. If it gets too thick as you’re glazing, a tiny splash of milk will loosen it right up. And for ingredient swaps, if you’re out of brown sugar for the filling, you can substitute with granulated sugar, but you might lose a bit of that deep flavor. If you’re feeling adventurous, a pinch of nutmeg or cardamom can be added to the cinnamon filling for an extra layer of spice!
Storing and Reheating Tips
One of the best things about these cinnamon swirl cookies is how well they store, making them perfect for making ahead. Once completely cooled and the glaze has set, you can store them in an airtight container at room temperature for up to 3-4 days. They actually tend to get even chewier and more delicious on the second day! If you plan to store them for longer, your refrigerator is your best bet. Place them in an airtight container, perhaps with a piece of parchment paper between layers to prevent sticking, and they should stay fresh for about a week. Freezing is also a fantastic option if you want to have them on hand for longer periods. You can freeze the baked and cooled cookies, unglazed, in a freezer-safe airtight container or bag for up to 2-3 months. I like to wrap them individually in plastic wrap before putting them in the container for extra protection against freezer burn. To thaw, simply remove them from the freezer and let them come to room temperature on a wire rack. If you want to add glaze after freezing, make sure they are fully thawed and dry. For reheating, you can gently warm them in a low oven (around 300°F or 150°C) for a few minutes until just warmed through, or pop one in the microwave for about 10-15 seconds for a quick, warm treat – perfect for that late-night craving!
Frequently Asked Questions
Final Thoughts
There you have it – my absolute favorite cinnamon swirl cookies! I truly hope you give them a try because they bring so much warmth and happiness to my kitchen, and I’m confident they will to yours too. They’re more than just a sweet treat; they’re a reminder of simple joys, cozy moments, and the pure magic of baking from scratch. If you loved these, you might also enjoy my classic snickerdoodle recipe or perhaps my decadent cinnamon roll bread for more spiced goodness. Don’t be shy about sharing your creations or any questions you might have in the comments below. I can’t wait to hear how your cinnamon swirl cookies turn out! Happy baking, everyone!
cinnamon swirl cookies
Ingredients
For the Cookies Dough
- 1.75 cups all-purpose flour
- 0.5 teaspoons baking powder
- 0.125 teaspoon salt
- 8 tablespoons butter, softened
- 1 cup sugar
- 1 large egg
- 1 teaspoon pure vanilla extract
For the Filling
- 1 tablespoon butter, softened
- 1 tablespoon ground cinnamon or more to taste
- 3 tablespoons light brown sugar
For the Cream Cheese Icing
- 4 ounces cream cheese, softened
- 8 tablespoons butter
- 1.5 cups powdered sugar
- 1 teaspoon pure vanilla extract
- 0.125 teaspoon lemon extract
Instructions
Preparation Steps
- In a medium-sized bowl whisk together the flour, salt, and baking powder. Set aside.
- In a large mixing bowl beat the butter and sugar with an electric mixer until light and fluffy, 3 to 4 minutes.
- Add the egg and vanilla extract and beat until combined.
- Pour in the flour mixture and beat until you have a smooth dough.
- Flatten the dough into a disk and wrap in plastic wrap. Refrigerate for 30 minutes.
- Take out a large piece of aluminum foil and lightly flour it.
- Take the dough out of the fridge and place it on top of the foil.
- Roll it out into a rectangle, about 1/4-inch thick.
- Using your hands, spread the softened butter over the entire dough; sprinkle with cinnamon; sprinkle with light brown sugar.
- Holding onto the corners of the foil, those closest to you, begin to roll the dough away from you. Work slowly.
- Roll to the end of the foil, creating a tight log.
- Wrap the rolled cookie dough tightly in the foil and place it in the freezer for 45 minutes.
- While dough freezes, prepare the icing: Place the cream cheese and butter in a mixing bowl and beat until creamy.
- Gradually add in the powdered sugar; beat until smooth, about 4 minutes.
- Pour in the vanilla extract and lemon extract; continue to mix until well incorporated.
- Preheat oven to 350°F (175°C).
- Take out the cookie dough, unwrap it, and cut the cookies off the roll into slices, about 1/4-inch thick.
- Place the cookies on an ungreased cookie sheet.
- Bake for 8 to 10 minutes, or until they begin to brown lightly around the edges.
- Remove from oven and let cookies cool on the baking sheet for 2 minutes before transferring them to a wire rack to finish cooling completely.
- Once cooled, frost generously with the cream cheese icing.
- Frosted cookies will keep several days in an airtight container.