Oh, how I love a good biscotti. But not just any biscotti, mind you. I’m talking about the kind that’s perfectly chewy, melts in your mouth, and has just the right amount of chocolatey goodness. It’s the kind of biscotti that transports you back to a cozy afternoon, maybe with a steaming mug of coffee or a glass of milk. This specific biscotti recipe is my absolute favorite, the one I’ve tweaked and perfected over years, and it’s what I whip up whenever I need a little pick-me-up or when unexpected guests pop by. It’s surprisingly simple, really, and the aroma that fills the kitchen while it bakes is just heavenly. Forget those hard, dry, toothpick-like cookies; this is the real deal, folks. If you’re a Chocolate Chip cookie enthusiast, I promise you’re going to adore this easy biscotti recipe.
What is Biscotti?
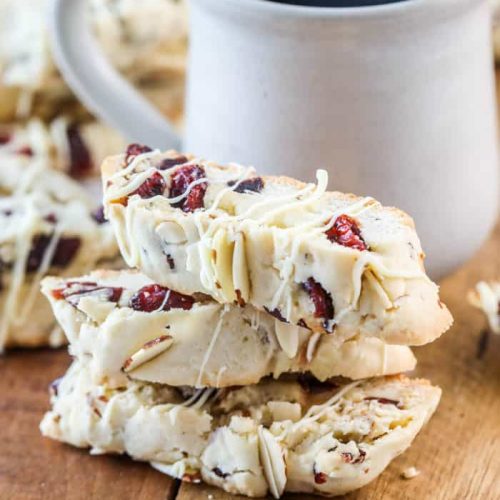
So, what exactly *is* biscotti? At its heart, biscotti (which literally means “twice-baked” in Italian) is a traditional Italian almond biscuit. They’re known for their dry, crisp texture, making them perfect for dunking into coffee, tea, or sweet wine without falling apart. Think of them as a sophisticated, slightly more robust cousin to your everyday cookie. However, the version I’m sharing today is a bit of a departure from the strictest tradition. It’s a chewy chocolate chip biscotti, which, in my book, is an absolute game-changer. It still has that delightful double-bake, giving it a lovely crisp edge, but the inside stays wonderfully soft and yielding. It’s essentially a more manageable, dippable, and intensely satisfying chocolate chip cookie experience. It’s less about the snap and more about the gentle chew, with generous pockets of melted chocolate.
Why you’ll love this recipe?
Honestly, there are so many reasons why this chewy chocolate chip biscotti recipe has become my kitchen staple. Firstly, the flavor is just out of this world. You get that familiar comfort of chocolate chip cookies, but elevated. The edges get wonderfully toasted, adding a subtle caramel note, and the chocolate chips are practically oozing. It’s the perfect balance of sweet, rich, and slightly nutty from the almonds. Secondly, and this is a big one for me, it’s surprisingly easy. I know some people are intimidated by making their own cookies, but this recipe is incredibly forgiving. You don’t need any fancy equipment, and the steps are straightforward, even for beginners. It’s a lifesaver on those busy days when you want something homemade but don’t have hours to spare. Plus, it’s wonderfully cost-efficient! Using simple pantry staples, you can create a batch of these delightful treats for a fraction of the cost of store-bought. What I love most, though, is its versatility. This isn’t just a cookie you eat on its own; it’s an experience. It’s perfect with your morning coffee, a welcome addition to any brunch spread, or a delightful after-dinner treat. It’s also incredibly satisfying when you’re craving something sweet at 10 pm but don’t want to bake a whole cake. It truly stands out because it delivers that satisfying chocolate chip cookie vibe in a format that’s just *different* and, dare I say, even better for dunking!
How do I make Chewy Chocolate Chip Biscotti?
Quick Overview
This recipe is all about that delightful double-bake. We’ll mix up a simple dough, shape it into logs, bake them until lightly golden, then slice and bake them again until they’re perfectly crisp on the outside but wonderfully chewy inside. The beauty of this method is that it ensures a longer shelf life and that signature biscotti texture, while the addition of plenty of chocolate chips and a hint of almond extract keeps them moist and incredibly flavorful. It’s a straightforward process that yields extraordinary results, so don’t be intimidated – you’ve got this!
Ingredients
For the Main Batter:
You’ll need all-purpose flour – about 2 ½ cups is a good starting point. I always use unbleached, as I find it gives a better texture. Make sure it’s measured correctly; too much flour can make them too dry. Then comes the sugar – 1 cup of granulated sugar will give you that classic sweetness. For richness and that lovely chewy texture, we’ll use 2 sticks (1 cup) of unsalted butter, softened. Don’t even think about using margarine here; the butter makes all the difference! For binding and a bit of lift, we need 2 large eggs, at room temperature. A teaspoon of baking powder is crucial for a little rise, and a pinch of salt will enhance all those sweet and chocolatey flavors. And the secret weapon for that irresistible aroma and flavor? 1 teaspoon of almond extract. Trust me, this is a must! If you’re not a huge almond fan, you can use vanilla extract, but almond is truly special here.
For the Chocolate Chips:
We’re talking about 1 ½ cups of chocolate chips. I love a mix of semi-sweet and dark chocolate chips for a richer flavor, but use whatever your heart desires! You could even throw in some White Chocolate chips or chopped chocolate chunks if you’re feeling adventurous. Just make sure they’re good quality; it makes a noticeable difference in taste.
For the Optional Nuts:
If you like a little crunch, ½ cup of slivered or chopped almonds adds a beautiful texture and flavor. I usually toast mine lightly beforehand for an extra layer of nutty goodness. It’s totally optional, though!
For the Optional Glaze:
If you want to get fancy, a simple glaze can be made with 1 cup of powdered sugar and about 2-3 tablespoons of milk or water, plus a tiny splash of almond or vanilla extract. We’ll talk more about this later!
Step-by-Step Instructions
Step 1: Preheat & Prep Pan
First things first, let’s get the oven preheated to 350°F (175°C). This is crucial for an even bake. While it’s heating up, line two large baking sheets with parchment paper. This isn’t just for easy cleanup (though it’s a lifesaver for that!), but it also prevents the biscotti from sticking and helps them bake evenly without scorching on the bottom. I always make sure my parchment paper is laid flat; crumpled paper can lead to uneven baking.
Step 2: Mix Dry Ingredients
In a large mixing bowl, whisk together your flour, baking powder, and salt. Give it a good whisk until everything is well combined and there are no pockets of baking powder. This ensures that the leavening is evenly distributed throughout the dough, which is important for the texture. I like to do this step first so I know all my dry ingredients are ready to go.
Step 3: Mix Wet Ingredients
In a separate bowl, cream together the softened butter and granulated sugar until the mixture is light and fluffy. This usually takes a few minutes with an electric mixer, but you can do it by hand if you’re feeling energetic! Then, beat in the eggs one at a time, mixing well after each addition. Stir in the almond extract. Make sure the butter is properly softened – not melted! – otherwise, you won’t get that lovely light texture.
Step 4: Combine
Gradually add the dry ingredients to the wet ingredients, mixing on low speed or by hand until just combined. Don’t overmix! Overmixing can develop the gluten too much, resulting in tough biscotti. We want them to be tender. The dough will be quite thick and a bit sticky – that’s perfectly normal. If it seems excessively dry, you can add a tablespoon of milk or water, but usually, it’s just right.
Step 5: Prepare Filling
Now for the best part: folding in the chocolate chips and any optional nuts! Gently stir them into the dough until they’re evenly distributed. I like to reserve a few chocolate chips to press onto the tops of the logs later for a pretty finish. If you’re using nuts, make sure they’re chopped to a manageable size so they don’t create too many holes in your logs.
Step 6: Layer & Swirl
Divide the dough in half. On your prepared baking sheets, shape each half into a log about 10-12 inches long and about 2-3 inches wide. They should be about ½ inch thick. Don’t make them too thick, or they’ll be hard to slice evenly later. You can lightly wet your hands to prevent sticking if the dough is being difficult. Smooth the tops and sides with a spatula or your fingers. If you reserved some chocolate chips, press them gently into the tops of the logs now.
Step 7: Bake
Bake these logs for 25-30 minutes, or until they are lightly golden brown and firm to the touch. They will spread slightly, so make sure you leave enough space between them on the baking sheets. The goal here is to bake them through, not to brown them heavily. They’ll get their final crispness in the second bake.
Step 8: Cool & Glaze
Once the logs are baked, carefully remove them from the oven. Let them cool on the baking sheets for about 10-15 minutes. This is the crucial step for slicing. If they cool too much, they’ll be brittle and might crumble. While they’re cooling slightly, preheat your oven again to 300°F (150°C). If you’re adding a glaze, this is the time to prepare it: whisk together the powdered sugar, a splash of extract, and just enough milk or water until you have a pourable, but not too thin, consistency. You want it thick enough to coat, but not so thick it’s hard to drizzle.
Step 9: Slice & Serve
Using a serrated knife, carefully slice the logs into ½-inch thick cookies. Slice on a diagonal for that classic biscotti look. Arrange the sliced biscotti cut-side down on the baking sheets. Bake for another 10-15 minutes per side, or until they are golden brown and crisp. The exact time will depend on your oven and how thick you sliced them. Let them cool completely on a wire rack. Once cooled, you can drizzle them with the glaze if you like. Let the glaze set completely before storing. And there you have it – perfect chewy chocolate chip biscotti!
What to Serve It With
Honestly, the beauty of these chewy chocolate chip biscotti lies in their versatility. They’re not just for a quick coffee break; they can elevate so many occasions!
For Breakfast: They are, of course, heavenly with a strong cup of coffee. I love having one or two alongside my morning brew to start the day on a sweet, comforting note. They’re also surprisingly good with a glass of milk, just like you might have with a more traditional chocolate chip cookie. I sometimes break them up and stir them into yogurt parfaits for a delightful crunch and flavor boost.
For Brunch: On a leisurely weekend morning, these biscotti are a welcome addition to any brunch table. Arrange them artfully on a platter with fresh berries and a dollop of whipped cream. They pair wonderfully with mimosas or a light sparkling wine, offering a sophisticated yet approachable treat that everyone will love.
As Dessert: This is where they truly shine! They’re perfect for dunking into a warm mug of hot chocolate after dinner. I also love serving them alongside a scoop of vanilla bean ice cream or a creamy panna cotta. The slightly crisp texture contrasts beautifully with softer desserts. For a real treat, try them with a dessert wine like Vin Santo or a rich port.
For Cozy Snacks: My kids adore these with a glass of cold milk after school. They’re the perfect size for little hands (and big ones too!). They make an excellent accompaniment to a good book and a cup of tea on a rainy afternoon. I’ve even packed them in lunchboxes as a special treat, and they always get rave reviews!
Top Tips for Perfecting Your Chewy Chocolate Chip Biscotti
Over the years, I’ve learned a few tricks that really make this biscotti recipe sing. They’re not complicated, but they make a world of difference.
Zucchini Prep: Wait, zucchini? Did I mention zucchini? Oh my goodness, I think I got ahead of myself! That was a slip of the tongue; this recipe does NOT call for zucchini. My apologies! Let’s stick to the delicious chocolate chip goodness. My apologies again! For this chocolate chip biscotti, the key is in the dough itself. Ensure your butter is properly softened – not melted, not rock-hard. This is vital for creaming it with the sugar to create air pockets, which contributes to the tender texture. And for the flour, measure it accurately! Spoon it into your measuring cup and level it off; don’t scoop directly from the bag, as this packs too much flour in, which can lead to dry, crumbly biscotti.
Mixing Advice: The golden rule for biscotti, and many baked goods, is to *not overmix*. Once you add the flour, mix only until the ingredients are just combined. Overmixing develops gluten, which makes your biscotti tough and dense instead of tender and chewy. You want to see just a hint of flour streaks disappear before you fold in your chips.
Swirl Customization: While this is a chocolate chip biscotti, you can absolutely customize the “swirl” by how you fold in your chips. I like to gently fold them in to avoid breaking them too much, ensuring you get whole pockets of melted chocolate. You can also press extra chips onto the top of the logs before the first bake for visual appeal, as I mentioned earlier. Don’t be afraid to mix your chips – semi-sweet, dark, milk, or even white chocolate all work beautifully together!
Ingredient Swaps: If you’re not a fan of almond extract, a good quality vanilla extract works well, though it changes the flavor profile slightly. For the chocolate chips, feel free to use chunks or even different varieties. Some readers have had success using a mix of chocolate chips and chopped dried cranberries for a festive twist. For an added flavor dimension, a pinch of cinnamon or nutmeg in the dry ingredients can be lovely, especially around the holidays.
Baking Tips: The double-bake is essential for the biscotti texture. Don’t rush the first bake; ensure the logs are firm and lightly golden. For the second bake, watch them closely! Ovens vary, and you’re looking for that perfect golden-brown crispness without them becoming too hard. If one side seems to be browning faster, you can carefully flip them over mid-bake in the second round. I usually bake them on the middle rack for even heat distribution.
Glaze Variations: For the glaze, consistency is key. Too thin, and it’ll run off. Too thick, and it’ll be clumpy. Whisk gradually, adding liquid a teaspoon at a time until you reach a nice drizzling consistency. You can also add a drop of food coloring for a fun pop! Alternatively, a simple dusting of powdered sugar or a drizzle of melted chocolate (instead of glaze) works just as well and looks beautiful.
Storing and Reheating Tips
One of the best things about biscotti is how wonderfully they keep! Because they’re twice-baked, they have a low moisture content, which means they store exceptionally well. This is why they’re perfect for making ahead of time.
Room Temperature: Once completely cooled, store your biscotti in an airtight container at room temperature. They will stay wonderfully crisp and delicious for at least 2-3 weeks, sometimes even longer. If you live in a very humid climate, you might want to add a food-safe silica gel packet to the container to absorb any extra moisture and ensure they maintain their crispness. I’ve had batches last a whole month!
Refrigerator Storage: While not strictly necessary, you can store them in the refrigerator if you prefer. However, I find they don’t retain their crispness as well in the fridge, and condensation can form. If you do refrigerate them, make sure they are in an airtight container and consume them within a week to ensure the best quality.
Freezer Instructions: For longer storage, freezing is an excellent option. Wrap the cooled biscotti tightly in plastic wrap, then place them in a freezer-safe airtight container or a heavy-duty freezer bag. They can be stored in the freezer for up to 3 months. When you’re ready to enjoy them, simply thaw them at room temperature for a few hours. They usually regain their texture beautifully.
Glaze Timing Advice: If you’ve glazed your biscotti, it’s best to store them at room temperature. The glaze can sometimes get sticky or soft in the refrigerator. For the best results with glazed biscotti, consume them within a week. If you plan to freeze them, I highly recommend glazing them *after* thawing them. This way, the glaze remains fresh and perfectly set.
Frequently Asked Questions
Final Thoughts
There you have it – my absolute favorite chewy chocolate chip biscotti recipe! I truly hope you give this a try. It’s more than just a recipe; it’s a little piece of comfort and joy that I love sharing. It’s amazing how simple ingredients can come together to create something so wonderfully satisfying. The slight chewiness, the abundance of melty chocolate, and that hint of almond truly make these a standout. They’re perfect for sharing with loved ones, or for those quiet moments when you just need a sweet treat. If you’re looking for other comforting baked goods, you might also enjoy my [Link to another recipe, e.g., Soft & Chewy Oatmeal Raisin Cookies] or my [Link to another recipe, e.g., Classic Vanilla Bean Scones]. I can’t wait to hear how your biscotti turns out! Please leave a comment below and let me know what you think, or share any creative twists you added. Happy baking!
Almond Biscotti
Ingredients
Main Ingredients
- 3 cups all-purpose flour
- 1.5 teaspoons baking powder
- 0.5 teaspoons salt
- 1 cup granulated sugar
- 0.5 cup unsalted butter, softened
- 2 large eggs
- 1 teaspoon vanilla extract
- 1 cup sliced almonds, toasted
Instructions
Preparation Steps
- Preheat oven to 350°F (175°C). Line a baking sheet with parchment paper.
- In a medium bowl, whisk together flour, baking powder, and salt.
- In a large bowl, cream together softened butter and sugar until light and fluffy.
- Beat in the eggs one at a time, then stir in the vanilla extract.
- Gradually add the dry ingredients to the wet ingredients, mixing until just combined. Fold in the toasted almonds.
- Divide the dough in half. On a lightly floured surface, shape each half into a log about 10-12 inches long and 2 inches wide.
- Place the logs on the prepared baking sheet, leaving space between them. Flatten them slightly with your hand.
- Bake for 25-30 minutes, or until golden brown and firm to the touch.
- Remove from oven and let cool on the baking sheet for 10-15 minutes. Reduce oven temperature to 300°F (150°C).
- Carefully transfer the logs to a cutting board. Using a serrated knife, slice the logs into 0.5-inch thick pieces.
- Place the slices cut-side down on the baking sheet. Bake for another 20-25 minutes, flipping halfway through, until golden brown and dry.
- Let cool completely on a wire rack before serving.