There’s something about this Easter cake that just takes me back every single year. I remember sitting in my grandma’s kitchen, the air thick with the cozy scent of warm spices and sugary glaze, while she hummed old songs and let me sneak bites of the batter (which she always warned me against but never really minded). This cake is one of those treasures that feels like a big, soulful hug—just sweet enough, freshly fragrant with hints of cinnamon and orange zest, and ridiculously easy to make. Honestly, it’s kind of like a cross between a light zucchini loaf and that classic carrot cake, but with its own springtime twist that always surprises guests. If you’re looking for an Easter cake that’s comforting, nostalgic, and wildly crowd-pleasing without a fancy fuss, this one’s where it’s at.
What is an Easter cake?
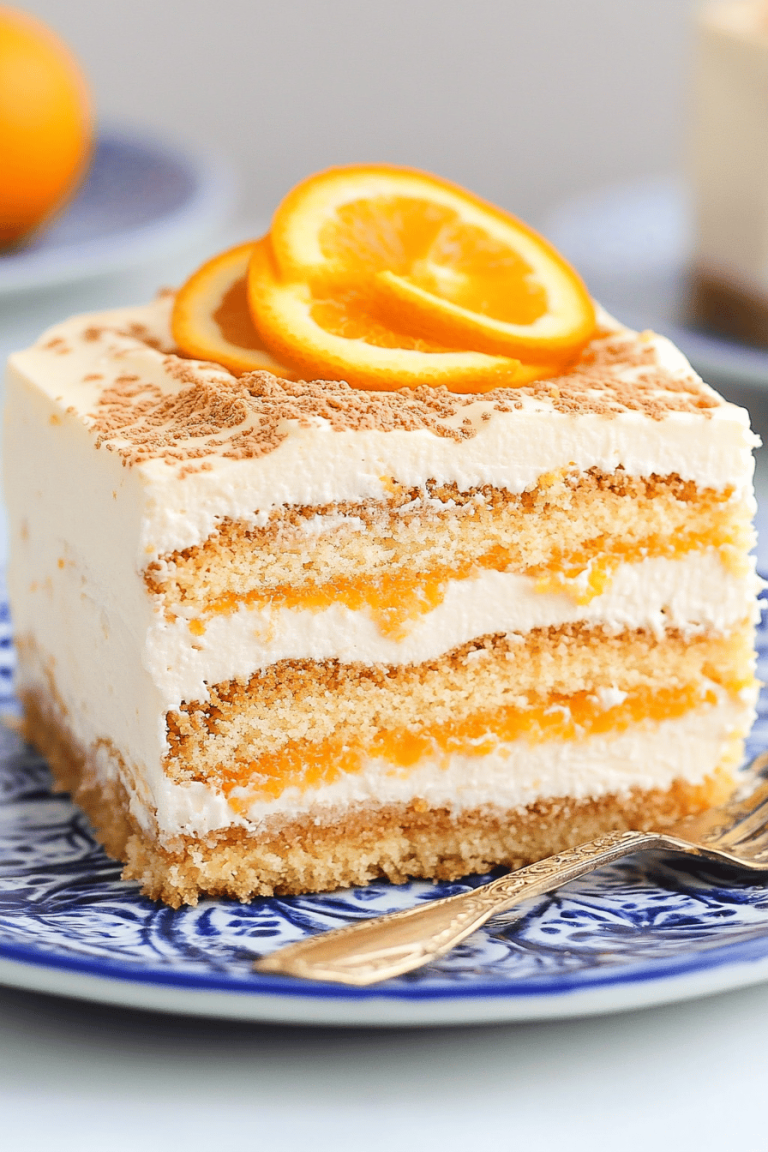
Think of this Easter cake as a celebration wrapped up in a slice—a seasonal treat meant to bring a little joy to your spring table. Originally, Easter cakes vary widely based on traditions, but this version I’m sharing is a simple, moist, spiced cake layered with a creamy filling and finished with a delicate glaze. It’s essentially a humble, tender cake that feels special because of the warm spices and the lovely texture from fresh ingredients like shredded zucchini and a hint of citrus. I guess you could say it’s my little way of marking the passing of winter with something sweet, bright, and full of life—just like the holiday itself.
Why you’ll love this recipe?
Okay, let me tell you what I love about this recipe, because it’s the kind of thing that makes me smile every time I pull it out. First off, the flavor—it’s subtle but compelling. You get that gentle sweetness complemented by the earthiness from the zucchini, which keeps it super moist, and the warming spices like cinnamon and nutmeg give it a comforting twist that just feels right on a chilly spring morning. Then, there’s the filling, which isn’t your typical cream cheese overload but a lighter touch that makes each bite balanced and rich. What I really adore is how incredibly simple it is to pull together. I never stress over complicated steps, and it’s the kind of recipe where the mixing bowls practically clean themselves from the crumbs (well, almost!).
Another thing? It’s crazy budget-friendly. You don’t need any exotic ingredients—just pantry basics and whatever zucchini you have on hand. And hey, it works for just about any occasion during spring—not only for Easter brunch but also as a lovely afternoon pick-me-up. When I’m in a pinch, I even tweak it into muffins, which my kids love as quick snacks before school. If you like something like carrot cake or zucchini bread but want a fresh twist that feels extra special, this Easter cake will quickly become your go-to.
How do I make an Easter cake?
Quick Overview
I always say the beauty of this Easter cake lies in its simplicity. You start by mixing your dry and wet ingredients separately, then gently bring them together so the batter stays tender and light—not dense and heavy. The magic happens when you layer that creamy filling inside, swirling it for a fun marbled look. Baking it slow and low ensures it cooks through evenly with that lovely golden crust. And the glaze on top? Just enough sweetness to make it sing but not overwhelm. Really, if you can whisk, fold, and bake, you’re golden.
Ingredients
For the Main Batter:
- 2 cups all-purpose flour – fresh is best for lighter crumb
- 1½ teaspoons baking powder – don’t skimp here, it’s key for rise
- ½ teaspoon baking soda – pairs with the acid from yogurt
- 1 teaspoon ground cinnamon – the warm heart of the flavor
- ¼ teaspoon ground nutmeg – subtle and perfect
- ½ teaspoon salt – balances the sweetness
- 1 cup granulated sugar – classic and reliable
- ½ cup brown sugar – for depth and chewiness
- 2 large eggs – room temperature helps blend better
- ¾ cup vegetable oil – keeps it moist without weight
- 1 teaspoon vanilla extract – little things like this really lift it
- 1 cup plain yogurt or sour cream – tangy and tenderizes the crumb
- 1½ cups grated zucchini (about 1 medium zucchini) – fresh and not watery
- Zest of 1 orange – the secret springtime pop
For the Filling:
- ½ cup cream cheese, softened – makes it luscious yet light
- 3 tablespoons sugar – balances the tang
- 1 teaspoon vanilla extract – complements the cake’s vanilla note
- Optional: a tablespoon of chopped walnuts or pecans for crunch
For the Glaze:
- 1 cup powdered sugar – sifted to avoid lumps
- 2–3 tablespoons fresh orange juice – for acidity and thinness
- 1 teaspoon orange zest – for subtle flare
- Optional pinch of salt – to balance sweetness
Step-by-Step Instructions
Step 1: Preheat & Prep Pan
First things first, get your oven heated to 350°F (175°C). I usually set a timer to remind me since I get distracted chatting or sipping coffee. Grease a 9×5-inch loaf pan with butter or oil, then line it with parchment paper to make removal a breeze. I learned this the hard way after one too many cakes stuck stubbornly to the pan—it’s a game-changer!
Step 2: Mix Dry Ingredients
Whisk together the flour, baking powder, baking soda, cinnamon, nutmeg, and salt in a large bowl. I usually do this first so everything is evenly distributed and you won’t get pockets of baking powder or clumped spices later. It smells great already with all those spices mingling.
Step 3: Mix Wet Ingredients
In a separate bowl, beat the eggs with both sugars until you see the mix lighten and thicken slightly—which takes about 2 minutes by hand, longer if you’re not using a mixer. Add the oil, vanilla, yogurt (or sour cream), orange zest, and grated zucchini, stirring gently until just combined. The zucchini should look fresh but not soggy—more on that in my tips section!
Step 4: Combine
Pour the wet ingredients into the dry and fold carefully with a spatula. Keep it light and don’t overmix, or your cake won’t be as tender. I like to stop folding when I don’t see any dry flour patches but there’s still some streaks of batter left—the rest will even out while baking.
Step 5: Prepare Filling
Mix the softened cream cheese, sugar, and vanilla extract until silky smooth. If you want to jazz it up, adding nuts or even a little lemon zest can be delicious. I keep mine simple since the cake itself has plenty of flavor going on.
Step 6: Layer & Swirl
Transfer half your batter to the pan, then dollop the cream cheese filling evenly over the top. Spread gently but don’t mix into the edges—then pour the remaining batter on top. Using a butter knife or skewer, swirl the filling into the batter with slow, circular motions to create a pretty marbled effect. It’s a small step but when you cut into the cake, everyone always comments on how beautiful the layers look.
Step 7: Bake
Bake in the preheated oven for about 50–60 minutes, but start checking at 50. I always do the toothpick test—insert it into the center, and if it comes out with just a few moist crumbs, it’s done. If it comes out wet with batter, give it five more minutes. Ovens vary, so trust your instincts here. The smell at this point is absolutely intoxicating, so make sure to peek through the oven window often (or just smell the air!).
Step 8: Cool & Glaze
Let the cake cool in the pan on a wire rack for about 15 minutes, then carefully lift it out using the parchment and let it cool completely. Don’t glaze it while still warm, or the glaze will melt right off. When cool, whisk your glaze ingredients until smooth and pour or drizzle evenly over the top. Sometimes I even add a second layer of glaze for extra shine—it’s all about what mood I’m in.
Step 9: Slice & Serve
Slice with a sharp knife, wiping it clean after each cut for the prettiest slices. It’s so good warm with a cup of tea, but just as magical once fully cooled. The contrast of the creamy filling and moist crumb is what makes this Easter cake a total winner at our table.
What to Serve It With
For Breakfast: Nothing beats a thick slice with a creamy latte or a freshly brewed cup of coffee. I especially love adding a smear of butter on a warm slice—old school but oh so nostalgic.
For Brunch: Serve slices alongside fresh fruit like berries or a citrus salad. A chilled mimosa or sparkling elderflower drink pairs beautifully, making it feel like a little celebration.
As Dessert: Plate it with a dollop of lightly whipped cream or a scoop of vanilla bean ice cream. Toasted almonds sprinkled on top add a lovely crunch and make it feel extra special for after-dinner treats.
For Cozy Snacks: This cake is perfect with a glass of cold milk or a warm cup of herbal tea in the afternoon. On rainy days, it’s what we reach for when we want something soothing and a little sweet—my kids actually request it for those moments!
Top Tips for Perfecting Your Easter Cake
Zucchini Prep: One of my biggest lessons was learning to squeeze out excess moisture from the grated zucchini. Too much water and you’ll have a soggy cake. I wrap the zucchini in a clean kitchen towel and press it gently to remove as much liquid as possible—this keeps the crumb just right and not too dense. Use fresh, firm zucchini for the best results.
Mixing Advice: I always emphasize folding gently to avoid overmixing. When flour hits wet ingredients, gluten forms, which can lead to a tough texture. Stop mixing as soon as the dry ingredients disappear. It doesn’t have to be perfectly smooth.
Swirl Customization: For those who want to get creative, try adding a teaspoon of cocoa powder into the cream cheese filling to create a chocolate swirl. Or, vary the swirl pattern by zigzagging instead of circles—makes for fun presentation and super Instagram-worthy slices.
Ingredient Swaps: I’ve swapped regular yogurt for almond milk yogurt, and surprisingly, it made the cake even creamier with a subtle nutty undertone! You can also use coconut oil instead of vegetable oil, but make sure it’s melted and not too strong in flavor. For flour, whole wheat pastry flour works too, just expect a denser crumb.
Baking Tips: Place the pan in the middle rack for even heat. If your oven’s prone to hot spots, rotate the pan halfway through baking. If the top browns too fast, tent with foil.
Glaze Variations: If you want something lighter, try a simple dusting of powdered sugar or rub on a thin layer of melted honey. Adding a touch of ginger juice to the glaze can also surprise your taste buds for a zingy finish. I usually keep it simple—just sweet, smooth, and a little tangy!
Storing and Reheating Tips
Room Temperature: Keep the cake covered with a clean kitchen towel or in a cake dome. It stays fresh like this for about 2 days and is best enjoyed within that time frame for optimum moisture.
Refrigerator Storage: Wrap the cake tightly with plastic wrap or store in an airtight container. It keeps well for up to 5 days without drying out. Bring slices to room temperature before serving—they soften up nicely.
Freezer Instructions: You can freeze this cake whole or cut into slices. Wrap tightly in plastic wrap, then in foil or a freezer bag to avoid freezer burn. It lasts about 3 months frozen. Thaw overnight in the fridge, then allow it to come to room temperature before enjoying.
Glaze Timing Advice: If you plan to freeze, it’s better to glaze after thawing to keep that shiny, fresh look. For fridge or room temp storage, glaze before storing to keep the cake moist and pretty.
Frequently Asked Questions
Final Thoughts
This Easter cake has been my little slice of springtime joy for years—easy enough to whip up on a busy afternoon but special enough to make you feel like you’re doing something meaningful. It’s the kind of recipe I turn to when I want to bring my family together over simple, honest flavors that nourish and satisfy. You’ll find this cake is more than dessert or breakfast; it’s a tradition in a pan, with all those homey scents and sweet swirls that bring everyone to the kitchen (trust me, it disappears fast). If you give it a try, I’d love to hear your thoughts or any fun twists you dream up—don’t be shy to drop a comment or share photos. Happy baking, friend! I can’t wait to hear how yours turns out.
Easter cake
Ingredients
Main Ingredients
- 1 box white cake mix
- 0.25 cup water
- 4 large egg whites
- 0.5 cup vegetable oil
- 1 cup sour cream
- 1 teaspoon pure vanilla extract
- 0.5 cup unsalted butter, softened
- 2 cups powdered sugar
- 0.25 teaspoon salt
- 2 to 4 tablespoons heavy cream or milk as alternative
- food coloring blue, pink, and yellow, gel or liquid
- sprinkles optional decoration
Instructions
Preparation Steps
- Preheat oven to 350°F and grease a 9x13 inch baking dish.
- In a large mixing bowl, beat cake mix, water, egg whites, oil, sour cream, and vanilla extract with an electric mixer on low speed for 30 seconds, then medium speed for 2 minutes, scraping the bowl edges occasionally.
- Pour 2 cups of the batter into the prepared pan.
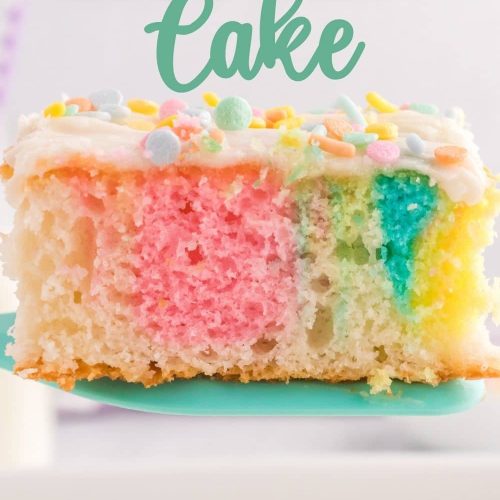
- Divide the remaining batter into three medium bowls. Add a few drops of blue, pink, and yellow food coloring to each bowl and stir until the desired color is reached.
- Drop spoonfuls of each colored batter randomly over the white batter. Use a butter knife to gently swirl the colors together to create a tie-dye effect.
- Bake for 30 to 35 minutes or until a toothpick inserted into the center comes out clean. Cool completely before frosting.
- For frosting, whip the butter with an electric mixer for 1 to 2 minutes until fluffy and lighter in color.
- Add powdered sugar and salt to the butter and beat on low to medium speed for about 1 minute until combined.
- Add vanilla extract and 2 tablespoons of heavy cream; beat for 1 minute. If desired, add food coloring to the frosting. Adjust consistency with more cream as needed and whip until light and fluffy.
- Spread frosting evenly over cooled cake and decorate with sprinkles for a festive finish.