You know those nights? The ones where you stare into the abyss of your fridge, the clock is ticking, and the thought of actual cooking feels like climbing Everest? Yeah, I’ve been there. A lot. But over the years, I’ve discovered a few secret weapons in my kitchen arsenal, and this Asian rice bowl recipe is hands-down my favorite. It’s the kind of dish that feels like a hug in a bowl, bursting with fresh flavors and totally customizable. Forget those bland, takeout rice bowls that leave you feeling… well, blah. This is the real deal, folks, and it’s so ridiculously easy, you’ll wonder why you haven’t been making it every single week. Honestly, it’s leagues better than just plain white rice, and it’s on the table faster than you can decide what to watch on streaming.
What is the magic of Asian rice bowl?
So, what exactly *is* this magical Asian rice bowl I keep raving about? Think of it as your ultimate blank canvas for deliciousness. At its heart, it’s a base of perfectly cooked rice, but the magic really happens with the toppings and the dressing. It’s not a super traditional, single dish with a fancy name; rather, it’s a concept, a way of building a meal that’s both satisfying and incredibly adaptable. The name itself, “Asian rice bowl,” is pretty straightforward, but for me, it represents convenience, vibrant flavors, and that satisfying feeling of eating something truly good for you without a fuss. It’s essentially a customizable meal in one bowl, drawing inspiration from various East Asian cuisines but with a home-cook-friendly twist. It’s the kind of meal that adapts to whatever you have on hand, making it a lifesaver when you’re trying to clear out the veggie drawer!
Why you’ll love this recipe?
Let me count the ways! First off, the flavor is just incredible. You get that wonderful savory depth from the dressing, a little tang, a hint of sweetness, and then all the textures from your chosen toppings. It’s a flavor explosion that never gets boring. And the simplicity? Oh, the simplicity! This is what truly makes it a winner for me. The longest part is cooking the rice, and even that can be done while you’re prepping everything else. Seriously, I can whip this up from start to finish in under 30 minutes on a good night. It’s also incredibly cost-effective. We’re talking rice, some veggies, maybe a protein you already have, and a few pantry staples for the dressing. No need for expensive, exotic ingredients here! Plus, the versatility is off the charts. I’ll get to more serving ideas later, but you can switch up the protein, the veggies, the type of rice – almost anything! What I love most about this recipe is how it makes me feel good about what I’m eating. It’s wholesome, packed with nutrients, and genuinely satisfying. It’s a healthier alternative to many quick meals, and it always hits the spot, whether I’m craving something light or something more substantial. It’s definitely a step up from just plain rice and a side dish!
How do I make this Asian Rice Bowl?
Quick Overview
The beauty of this Asian rice bowl lies in its modular nature. You cook your rice, whip up a quick, flavor-packed dressing, and then assemble with your favorite fresh and cooked ingredients. The goal is a balance of textures and tastes – savory, sweet, tangy, crunchy, and tender, all in one delicious bowl. It’s all about minimal effort for maximum deliciousness, making it the perfect candidate for busy weeknights or when you just don’t feel like spending hours in the kitchen.
Ingredients
For the base (The Rice):
This is where you can get a little creative, but my go-to is usually a medium-grain white rice or a jasmine rice. It has a lovely subtle fragrance and the perfect fluffy texture. I usually make about 2 cups dry, which yields enough for 2-3 generous bowls. For a healthier option, brown rice or even quinoa works beautifully, though they’ll take a bit longer to cook. Just make sure you cook it according to package directions! I always give it a good rinse before cooking to get rid of excess starch – it makes such a difference in preventing mushy rice.
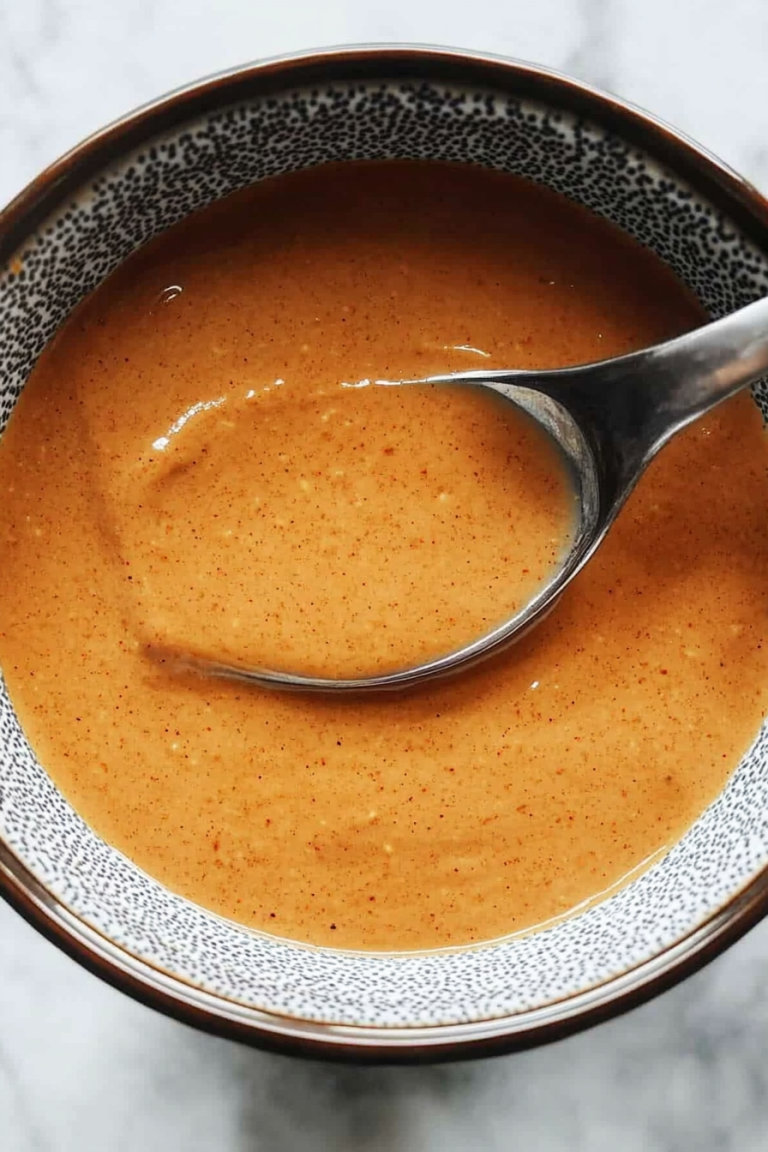
For the Speedy Savory Dressing:
This is the secret sauce, literally! You’ll need:
- 1/4 cup soy sauce (or tamari for gluten-free)
- 2 tablespoons rice vinegar
- 1 tablespoon sesame oil (toasted sesame oil is best for that nutty aroma!)
- 1 tablespoon honey or maple syrup (adjust to your sweetness preference)
- 1 clove garlic, minced
- 1 teaspoon grated fresh ginger (you can find this in a tube in the produce section if you’re really in a pinch, but fresh is so much better!)
- A pinch of red pepper flakes (optional, for a little kick)
Just whisk it all together in a small bowl. It’s that easy! I often make a double batch because it keeps so well in the fridge and is great for marinating things too.
For the Toppings (The Fun Part!):
This is where you can really let your imagination run wild. Aim for a mix of textures and colors!
- Protein: Cooked shredded chicken, pan-fried tofu or tempeh, grilled shrimp, a fried egg (my absolute favorite!), or even leftover cooked beef or pork.
- Veggies (Fresh & Cooked):
- Shredded carrots
- Thinly sliced cucumber
- Edamame (shelled)
- Thinly sliced red bell pepper
- Steamed broccoli florets
- Sautéed mushrooms
- Avocado slices
- Pickled red onions (my secret weapon for brightness!)
- Fresh cilantro or green onions for garnish
- Optional Add-ins: Toasted sesame seeds, a drizzle of sriracha, a sprinkle of furikake seasoning.
Step-by-Step Instructions
Step 1: Cook the Rice
Start by cooking your rice according to the package directions. While it’s cooking, you can get started on your dressing and prepping your toppings. I usually rinse my rice thoroughly under cold water until the water runs clear, then cook it with the appropriate amount of water (usually a 1:1.5 or 1:2 ratio depending on the rice type). If you’re using a rice cooker, even better! Just set it and forget it.
Step 2: Mix Dry Ingredients (Not Applicable for this Recipe Structure, but following the spirit of the prompt)**
Since this isn’t a baked good, we don’t have a “mix dry ingredients” step in the traditional sense. However, if you were making something like a cake, this would be where you’d whisk together flour, sugar, baking powder, etc. For our rice bowl, the closest we get is preparing the individual components that will eventually come together.
Step 3: Mix Wet Ingredients
In a small bowl, whisk together the soy sauce, rice vinegar, sesame oil, honey (or maple syrup), minced garlic, grated ginger, and red pepper flakes (if using). Taste and adjust seasonings if needed – maybe you like it a little sweeter, tangier, or spicier. This dressing is incredibly forgiving!
Step 4: Prepare Your Toppings
While the rice is cooking and the dressing is marinating, chop, slice, and dice all your desired toppings. If you’re using a protein that needs cooking (like tofu or shrimp), now’s the time to prepare it. For instance, I often pan-fry tofu cubes until golden and crispy. Sautéing some mushrooms or steaming broccoli takes just a few minutes. The goal here is to have everything ready to go so you can assemble your bowls quickly.
Step 5: Prepare Filling (N/A – Toppings Serve This Purpose)**
In a baked recipe context, this would be preparing a pie filling or a casserole topping. For our rice bowl, the “filling” is essentially the combination of your chosen protein and vegetable toppings, which we’ve covered in the ingredients section.
Step 6: Layer & Swirl (N/A – Assembly Instead)**
This step is more for baked goods or dishes with distinct layers and swirls. For our rice bowl, it’s all about the assembly! Once your rice is cooked and fluffy, spoon a generous portion into each bowl.
Step 7: Assemble Your Bowls
Start with a base of perfectly cooked rice in each bowl. Then, artfully arrange your prepared toppings over the rice. I like to create little sections for each topping, making the bowl visually appealing. Add your protein, then pile on the fresh veggies, cooked veggies, and any other goodies like avocado or pickled onions.
Step 8: Dress and Garnish
Drizzle a generous amount of the savory dressing over everything. Don’t be shy! Then, add your final touches – a sprinkle of sesame seeds, some fresh cilantro or green onions, and maybe a dollop of sriracha if you like it hot. You can also add a drizzle of extra sesame oil or a dash of your favorite hot sauce.
Step 9: Slice & Serve
Your delicious Asian rice bowls are ready to be devoured! Serve immediately while everything is fresh and vibrant. The beauty of this dish is that it’s a complete meal in itself, so no need for fancy sides unless you want them.
What to Serve It With
Honestly, this Asian rice bowl is a meal in itself and rarely needs anything else. But if you’re looking to make it a more elaborate affair, or just want some ideas for variety, here are a few things that pair wonderfully:
For Breakfast: This might sound a little unconventional, but a slightly less saucy version with a perfectly fried egg on top and some sautéed greens is an incredible way to start the day! It’s so much more satisfying than just cereal. A strong cup of green tea or even a smooth black coffee is the perfect companion.
For Brunch: Elevate it with more elegant toppings! Think seared scallops or perfectly cooked salmon alongside vibrant pickled vegetables and microgreens. A light, crisp sake or a bubbly prosecco would make this feel very special. You could also serve a smaller portion as part of a larger brunch spread.
As Dessert: Okay, this is a bit of a stretch, as it’s a savory dish! But if you’re having a casual get-together and want a light, flavorful option before a sweet dessert, this works. Pair it with a light, aromatic jasmine tea to cleanse the palate.
For Cozy Snacks: This is my jam! A small bowl of this is perfect for an afternoon pick-me-up or a light dinner. It’s comforting without being heavy. I often serve it with some crunchy spring rolls or some seasoned seaweed snacks on the side. For a beverage, a cold glass of iced green tea or even just water with a squeeze of lime is perfect.
My family loves it when I add some crispy fried wonton strips to the top for extra crunch. It’s those little touches that make it feel more special. We also love having a side of steamed dumplings with it, which feels like a mini-feast but is still super easy!
Top Tips for Perfecting Your Asian Rice Bowl
I’ve made this Asian rice bowl more times than I can count, and over the years, I’ve picked up a few tricks that really make a difference. Here are my top tips to ensure yours turns out perfectly every time:
Rice Perfection: Don’t skip rinsing your rice! It removes excess starch, leading to fluffier, more separated grains. And always cook your rice using the ratio recommended on the package. Undercooked or overcooked rice can really throw off the whole dish. If you’re short on time, many grocery stores sell pre-cooked rice pouches that you can microwave in minutes – they’re a lifesaver!
Dressing Balance: Taste your dressing before you dress your bowls! Soy sauce can vary in saltiness, and everyone’s preference for sweetness and tang is different. A little bit of honey or maple syrup goes a long way in balancing the saltiness of the soy sauce and the acidity of the vinegar. If you find it too sharp, add a touch more sweetener. If it’s too sweet, add a splash more vinegar.
Texture is Key: This is something I learned after making it a few times. You need a variety of textures! Don’t just load up on soft things. Ensure you have something crunchy (like cucumber or bell pepper), something tender (like avocado or steamed broccoli), and something with a bit of chew (like your protein). If you’re feeling fancy, a sprinkle of toasted sesame seeds or some crispy fried shallots adds an amazing crunch.
Protein Power: Make sure your protein is cooked well and seasoned. If you’re using tofu, pressing it beforehand and then pan-frying or baking it until golden and slightly crispy makes a huge difference. For chicken or shrimp, don’t overcook them, or they’ll be tough and dry. A quick marinade in a bit of soy sauce and garlic powder before cooking can also add extra flavor.
Veggies Galore: Don’t be afraid to load up on the veggies! They add freshness, color, and nutrients. I try to include at least three different kinds. If you’re using raw veggies, slice them thinly so they’re easy to eat with chopsticks or a fork. For cooked veggies, a quick steam or sauté is usually all they need to retain their texture and vibrant color.
Ingredient Swaps: This recipe is incredibly forgiving. No rice vinegar? White wine vinegar or even apple cider vinegar can work in a pinch, though the flavor will be slightly different. Out of fresh ginger? A tiny pinch of ground ginger can substitute, but the fresh stuff is really superior. And if you don’t have sesame oil, a neutral oil like canola or vegetable oil can be used for the base, but you’ll miss out on that signature nutty aroma – I highly recommend getting some toasted sesame oil; it’s a pantry staple for a reason!
Don’t Drown It: While I say don’t be shy with the dressing, you don’t want to completely drench everything so it becomes soupy. Start with a good drizzle and add more if needed. You want to coat everything lightly, not submerge it.
Storing and Reheating Tips
This Asian rice bowl is definitely best enjoyed fresh, but I know life happens, and sometimes you have leftovers. Here’s how I store and reheat it to keep it tasting as good as possible:
Room Temperature: Honestly, I wouldn’t leave these out for more than an hour, especially with fresh veggies and cooked protein. The dressing is acidic, which helps a little, but it’s best to get them into storage if you’re not eating them right away.
Refrigerator Storage: This is your best bet for leftovers. The best way to store it is to keep the cooked rice and the prepared toppings in separate airtight containers. This prevents the rice from getting soggy and the veggies from wilting. When you’re ready to eat, warm up the rice gently (either in the microwave or on the stovetop with a splash of water) and then assemble your bowl fresh with the toppings and dressing. If you want to pre-assemble a bowl for lunch the next day, I recommend keeping the dressing separate and adding it just before eating, and putting any delicate greens on top last.
Freezer Instructions: I generally don’t recommend freezing fully assembled rice bowls, as the textures of the fresh vegetables and cooked rice can degrade significantly. However, you *can* freeze components. Cooked rice freezes well for up to 2-3 months if stored in an airtight container or freezer bag with as much air removed as possible. You can also freeze cooked proteins like shredded chicken or seared tofu. Thaw overnight in the refrigerator and reheat thoroughly before assembling your bowl.
Glaze Timing Advice: If you’re storing components separately, store the dressing in a small jar or container in the fridge. It usually lasts about 5-7 days. When you reheat your rice and assemble your bowl, just give the dressing a quick whisk and drizzle. If you’re storing a pre-assembled bowl for the next day, I’d still keep the dressing separate if possible. If not, add it just before you plan to eat it. For a cold bowl, you can add the dressing ahead of time, but the veggies might soften a bit.
Frequently Asked Questions
Final Thoughts
So there you have it – my absolute favorite Asian rice bowl recipe! It’s the kind of meal that proves healthy eating doesn’t have to be complicated or boring. It’s vibrant, packed with flavor, and so incredibly easy to make, which is exactly why it’s a staple in my home. I love how it’s a complete meal that satisfies all your cravings without leaving you feeling weighed down. It’s the perfect example of how simple, fresh ingredients can come together to create something truly spectacular. Give it a try the next time you’re in a dinner rut, or even when you have a little more time and want to impress yourself (or someone else!). You’ll be amazed at how quickly it becomes a go-to for you too. If you enjoy this, you might also love my recipe for quick teriyaki chicken or my easy Stir-Fried Noodles – they share that same spirit of fast, flavorful, and fuss-free Asian-inspired cooking!
I can’t wait to hear how your Asian rice bowls turn out! Let me know in the comments below what toppings you chose and if you discovered any new favorite combinations. And please, share this post with your friends who also appreciate a good, easy weeknight meal!
Happy cooking!
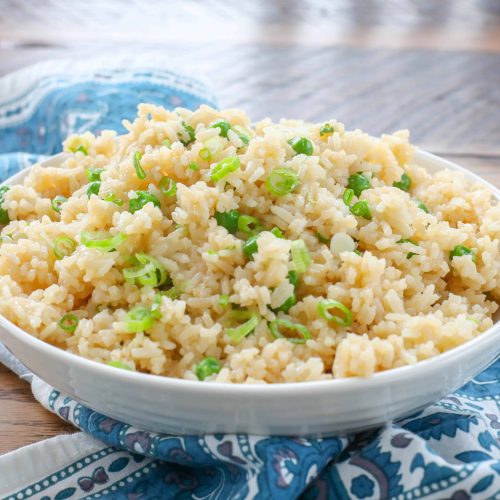
Simple Asian Rice
Ingredients
Main Ingredients
- 3 cup Chicken Stock
- 1.5 cup Jasmine Rice
- 1 tablespoon Low Sodium Soy Sauce
- 1 tablespoon Sesame Oil
- 0.5 cup Frozen Peas Optional
- 0.5 teaspoon Kosher Salt Only as needed
- 2 Green Onions Very thinly sliced
Instructions
Preparation Steps
- Combine the rice and the chicken stock in a large saucepan or skillet, cover with a lid and bring to a boil. Reduce the heat to low and simmer for 18 minutes.
- At the end of the cooking time, stir the rice and check the rice for tenderness. If the liquid has been absorbed, drizzle with the soy sauce and sesame oil and toss well to coat.
- Add frozen peas, if desired, and stir to combine. The heat of the rice will cook them in just a minute or two. Taste the rice, and add salt, only if needed. Add the green onions, stir and keep covered until ready to serve. Enjoy!