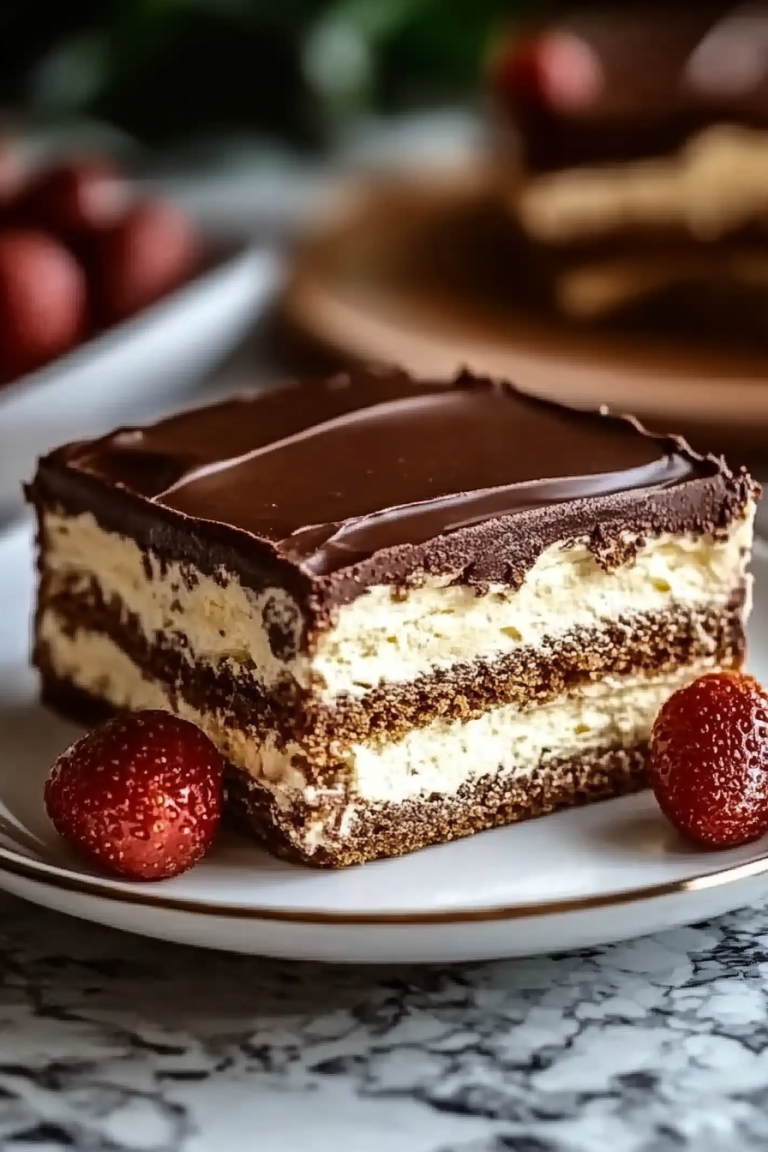
Oh, where do I even begin with these butterscotch blondies? They’re not just a dessert; they’re pure comfort, a little bit of sunshine on a cloudy day, and honestly, they’ve become my go-to whenever I need something sweet but don’t have a ton of time. You know how some recipes just *feel* like home? This is one of them. It’s got that incredible, caramel-y, butterscotch flavor that just melts in your mouth, but it’s surprisingly simple to whip up. I remember the first time I made them for a potluck, and people were practically begging for the recipe. It’s got this magical balance – chewy, gooey edges with a perfectly soft center, and that unmistakable butterscotch goodness. Honestly, if you’ve ever loved a really good chocolate chip cookie, imagine that vibe but with the rich, complex flavor of butterscotch. This butterscotch dessert is a game-changer, I promise you.
What are Butterscotch
So, what exactly *are* butterscotch blondies? Think of them as the cooler, more sophisticated cousin of the classic chocolate chip cookie or brownie. Instead of cocoa powder for that dark, rich base, we’re using brown sugar and butter as our stars, which gives them that signature deep, caramel-like butterscotch flavor and a beautiful golden hue. They’re called “blondies” because, well, they’re blonde! They don’t have any chocolate chips (though you *can* add them, more on that later!), relying on that amazing butterscotch essence. It’s essentially a buttery, brown-sugary bar that bakes up with a slightly crisp edge and a wonderfully soft, chewy interior. The name just perfectly describes their delicious, golden appearance and their star flavor – a true butterscotch dessert delight!
Why you’ll love this recipe?
There are so many reasons why this butterscotch dessert recipe has earned a permanent spot in my recipe binder, and I just know you’re going to fall in love with it too! For starters, the flavor is absolutely out of this world. It’s this deep, rich, caramel-y goodness that’s just so satisfying. It’s not overly sweet, but it has this wonderful depth that keeps you going back for another bite. And the texture? Oh, the texture! The edges get just slightly crisp and caramelized, while the center stays wonderfully soft and gooey. It’s like the perfect bite every single time. Beyond the incredible taste, this recipe is a lifesaver on busy nights. Seriously, I can whip up a batch in under 30 minutes, active time, and then it’s just a matter of waiting for them to bake and cool. It’s so much easier than dealing with a whole cake or even a complex cookie recipe. And let’s talk about cost-effectiveness – the ingredients are all pantry staples, and you probably already have most of them on hand. No fancy, expensive ingredients here! What I love most about these butterscotch blondies, though, is their versatility. They’re fantastic on their own, but they’re also amazing with a scoop of vanilla ice cream or a drizzle of extra caramel sauce. They hold up beautifully for bake sales, potlucks, or just for sharing with family and friends. They truly are a crowd-pleaser, and they never fail to get rave reviews. They’re a step above a basic cookie but still super approachable for any home baker!
How do you make butterscotch blon
Quick Overview
Making these butterscotch blondies is surprisingly straightforward, even if you’re new to baking. The whole process involves just a few simple steps: melting the butter, whisking in the sugars and eggs to get that lovely, creamy base, stirring in the dry ingredients, and then baking until golden and delicious. The key is not to overmix, which keeps them wonderfully tender. It’s a wonderfully forgiving recipe, which is why I love it so much. You’ll have a batch of warm, gooey goodness ready to enjoy in no time!
Ingredients
For the
Unsalted Butter: 1 cup (2 sticks), melted. Using unsalted butter gives you more control over the saltiness of your blondies. Make sure it’s properly melted and slightly cooled before you start mixing.
Light Brown Sugar: 1 ¾ cups, packed. This is crucial for that signature butterscotch flavor and chewy texture. Make sure to pack it firmly into your measuring cup!
Eggs: 2 large. These bind everything together and add richness. I like to have them at room temperature, as they incorporate better.
Vanilla Extract: 2 teaspoons. Pure vanilla extract makes a world of difference here, enhancing all those lovely brown sugar notes.
All-Purpose Flour: 1 ½ cups. Spooned and leveled, not scooped. This is the structure of our blondies.
Baking Powder: 1 teaspoon. This gives them just a little lift, preventing them from being too dense.
Salt: ½ teaspoon. Essential for balancing the sweetness and bringing out all those flavors.
For the Butterscotch Swirl (Optional but Highly Recommended!):
Butterscotch Chips: 1 cup. You can find these in most grocery stores. They’ll melt into pockets of pure butterscotch bliss.
Heavy Cream or Milk: 1-2 tablespoons. To help create a swirlable consistency.
Step-by-Step Instructions
Step 1: Preheat & Prep Pan
First things first, preheat your oven to 350°F (175°C). I always use a standard 8×8 inch baking pan for this. Line it with parchment paper, leaving an overhang on the sides. This makes it super easy to lift the blondies out once they’re baked. Lightly grease the parchment too, just for good measure.
Step 2: Mix Dry Ingredients
In a medium bowl, whisk together the flour, baking powder, and salt. Make sure they’re thoroughly combined. This ensures the leavening and salt are evenly distributed, so you don’t get any weird salty bites!
Step 3: Mix Wet Ingredients
In a large bowl, pour in your melted (and slightly cooled) butter. Add the packed brown sugar and whisk it all together until it’s smooth and creamy. Then, crack in your eggs one at a time, whisking well after each addition. Stir in the vanilla extract. The mixture should look glossy and lovely.
Step 4: Combine
Now, it’s time to bring it all together. Gradually add the dry ingredients to the wet ingredients. Use a spatula to gently fold them together until *just* combined. Be careful not to overmix! You don’t want to develop the gluten too much, or your blondies can turn tough. A few streaks of flour are okay!
Step 5: Prepare Filling (Butterscotch Swirl)
If you’re adding the butterscotch swirl, now’s the time. In a small microwave-safe bowl, combine the butterscotch chips with 1 tablespoon of cream or milk. Microwave in 30-second intervals, stirring in between, until mostly melted and smooth. If it’s still a bit thick, add another tablespoon of cream. You want it pourable but not too runny.
Step 6: Layer & Swirl
Spread about half of the blondie batter evenly into your prepared pan. Dollop spoonfuls of the melted butterscotch mixture over the batter. Then, spread the remaining blondie batter over the top, trying to cover as much of the butterscotch as possible. You can use a toothpick or a knife to gently swirl the butterscotch into the batter for a pretty marbled effect. Don’t over-swirl, or the colors will just blend together.
Step 7: Bake
Bake in your preheated oven for about 25-30 minutes. You’re looking for the edges to be golden brown and the center to be set but still a little gooey. A toothpick inserted into the center should come out with moist crumbs attached, not wet batter. Every oven is different, so keep an eye on them!
Step 8: Cool & Glaze
This is probably the hardest part – letting them cool! Let the blondies cool completely in the pan on a wire rack. This is super important because they continue to set as they cool. If you try to cut them too early, they’ll just fall apart. Once completely cool, use the parchment paper overhang to lift the whole block out of the pan. If you’re adding a glaze, now is the time! You can make a simple powdered sugar glaze or a caramel glaze and drizzle it over the top.
Step 9: Slice & Serve
Once cooled (and glazed, if using), slice your butterscotch blondies into squares. For the cleanest cuts, use a sharp knife and wipe it between cuts. Serve them at room temperature for the best texture. They’re utterly delightful on their own, but trust me, a little extra something makes them even more special.
What to Serve It With
These butterscotch blondies are so versatile, they fit into almost any meal or occasion! For a cozy breakfast, I love cutting them into smaller squares and serving them with a hot cup of coffee. The warm, sweet flavors are just perfect to start the day. They also make a surprisingly elegant addition to a brunch spread. Imagine them alongside some fresh fruit salad, maybe a quiche, and a nice mimosa. For dessert, of course, they shine. They’re incredible served warm with a scoop of good quality vanilla bean ice cream, letting the ice cream melt slightly into the gooey blondie. A drizzle of extra caramel sauce takes it to a whole new level of indulgence. And for those quiet, cozy snack times when you just need a little treat, they’re perfect with a glass of cold milk or a comforting cup of tea. My family has a tradition of having these after Sunday dinner, and it’s become a really special ritual for us. They’re just that kind of dessert that brings people together and creates happy memories.
Top Tips for Perfecting Your Butterscotch Blondies
Over the years, I’ve learned a few things that really make these butterscotch blondies extra special. First, when it comes to the brown sugar, make sure it’s fresh and moist. If it’s a bit hard, pop it in the microwave for a few seconds with a damp paper towel to revive it. This makes a huge difference in texture. For mixing, the golden rule is truly “do not overmix.” Once the flour is incorporated, stop stirring. A few streaks of flour are perfectly fine; they’ll disappear during baking. Overmixing develops the gluten in the flour, leading to tough blondies instead of the tender, chewy ones we’re after. When you’re making the butterscotch swirl, don’t overheat the chips. Melt them gently and stir until just smooth. If they get too hot, they can seize up. For the swirl itself, I find a gentle zig-zag motion with a knife works best. You want distinct ribbons of butterscotch, not a muddy mess. If you’re not a fan of butterscotch chips, you can actually chop up a good quality butterscotch candy bar for an even richer flavor. I tried this once when I was out of chips, and it was a revelation! For baking, pay attention to your oven. If you know your oven runs hot, you might want to reduce the temperature by 10-15 degrees or shorten the baking time slightly. The toothpick test is your best friend here – moist crumbs are perfect, but a clean toothpick means they might be overbaked and could turn dry.
I’ve also experimented with ingredient swaps over the years. For a slightly different flavor profile, I’ve tried adding a teaspoon of espresso powder to the dry ingredients – it deepens the caramel notes beautifully without making it taste like coffee. If you want to make these a bit more exciting, you can absolutely fold in about ½ cup of chocolate chips or chopped nuts (like pecans or walnuts) along with the flour. They’re delicious either way! Regarding the glaze, if you find yours too thick, just add a tiny bit more liquid (milk, cream, or even lemon juice for a slight tang). If it’s too thin, whisk in a little more powdered sugar. The consistency is personal preference, but I like mine thick enough to drizzle without running off completely. Remember, these are forgiving, so don’t be afraid to tweak things slightly based on your preferences and what you have on hand. That’s the beauty of home baking!
Storing and Reheating Tips
Proper storage is key to keeping these butterscotch blondies tasting their absolute best. If you plan to enjoy them within a couple of days, keeping them at room temperature is perfectly fine. Just make sure to store them in an airtight container. They’ll stay fresh and chewy for about 2-3 days this way. If you need them to last longer, the refrigerator is your best bet. Pop them into an airtight container or wrap them tightly in plastic wrap. They’ll keep well in the fridge for up to a week, though honestly, they rarely last that long in my house! The texture might firm up slightly in the fridge, but they’re still delicious. If you’re looking to freeze them for longer storage, I highly recommend doing it before you add any glaze. Wrap individual blondies or a whole pan tightly in plastic wrap, then in aluminum foil, or place them in a freezer-safe container. They can be frozen for up to 2-3 months. When you’re ready to enjoy them, let them thaw completely at room temperature. If you like them warm, you can gently reheat them in a low oven (around 250°F or 120°C) for about 5-10 minutes, or pop them in the microwave for a few seconds – just enough to warm them through without making them tough. For the glaze, I usually add it *after* they’ve cooled completely, right before serving or storing at room temperature. If you glaze them and then refrigerate or freeze, the glaze might get a bit sticky or hardened, so it’s best to add it fresh.
Frequently Asked Questions
Final Thoughts
So there you have it – my absolute favorite butterscotch blondies! I truly believe this is a recipe worth trying, especially if you’re looking for that perfect balance of comforting flavor and simple execution. They’re proof that you don’t need a ton of fancy ingredients or complex techniques to create something truly special and delicious. The rich, caramelly taste, the wonderfully chewy texture, and that hint of nostalgia they bring… it just makes them a winner in my book. If you’re a fan of this butterscotch dessert, you might also enjoy my recipe for chewy caramel cookies or my easy one-bowl brownies, which have a similar comforting vibe. I can’t wait for you to try these blondies and experience that hug-in-dessert form for yourself. Please, let me know in the comments how yours turn out, what variations you tried, or any sweet memories they bring back for you! Happy baking, my friends!
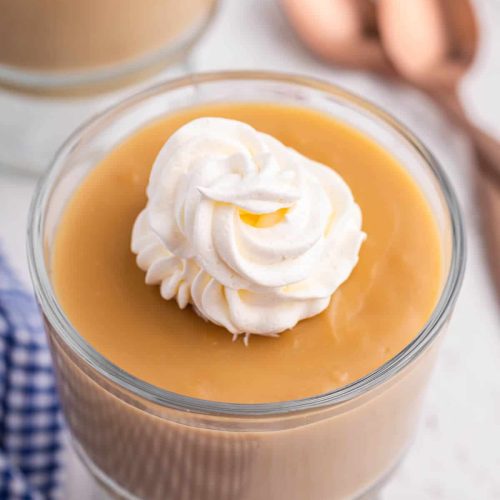
butterscotch dessert
Ingredients
Main Ingredients
- 2 tbsp unsalted butter
- 0.5 cup dark brown sugar
- 2 cup scalded milk
- 0.25 cup cold milk
- 3 tbsp cornstarch
- 0.25 tsp salt
- 1 tsp vanilla extract
Instructions
Preparation Steps
- Add butter and brown sugar to a medium pot over low heat and stir constantly until sugar melts. Add sugar mixture to scalded milk, slowly, and stir until blended.
- In another bowl, stir together cornstarch, salt and cold milk. Add to scalded milk mixture.
- Cook on medium heat until thickened, stirring constantly. Cool slightly and then add vanilla. Stir.
- Pour pudding into individual serving dishes. Serve warm or cold, topped with nuts or whipped cream.