Okay, confession time. If there’s one appetizer that has saved my bacon more times than I can count, it’s this 7 layer dip. Seriously, it’s my go-to for everything from last-minute potlucks to super bowl parties where I want to impress without stressing. I remember the first time I made it; I was a nervous wreck trying to whip up something for my husband’s work gathering and this 7 layer dip was the star of the show. People were raving! It’s one of those dishes that looks way more complicated than it actually is, and the flavors? Oh, the flavors! It’s like a party in your mouth, with creamy, savory, a little bit of tang, and just enough spice to make you want another chip. It’s the kind of thing that makes you feel like a culinary genius, even if you spent all of ten minutes assembling it. Forget those fancy, multi-step appetizers; this is the real deal for easy entertaining.
What is 7 Layer Dip?
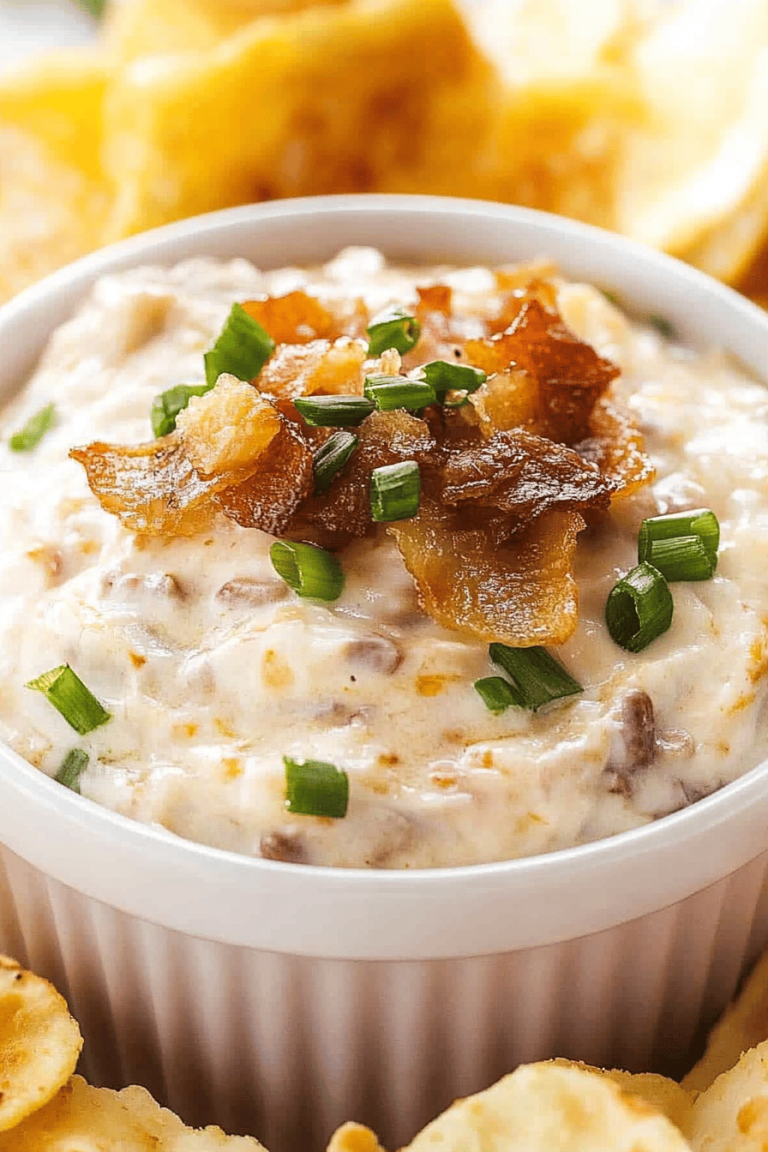
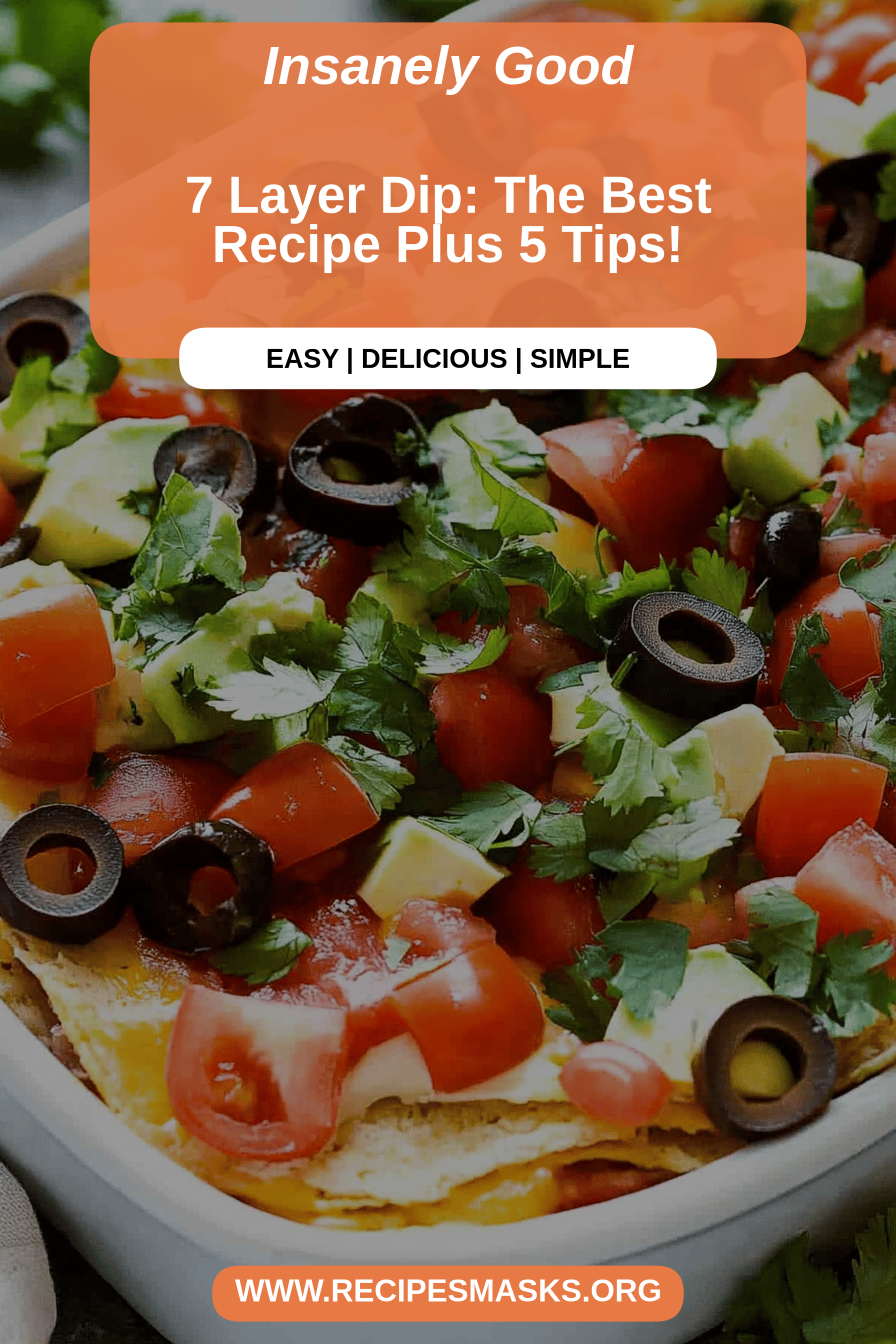
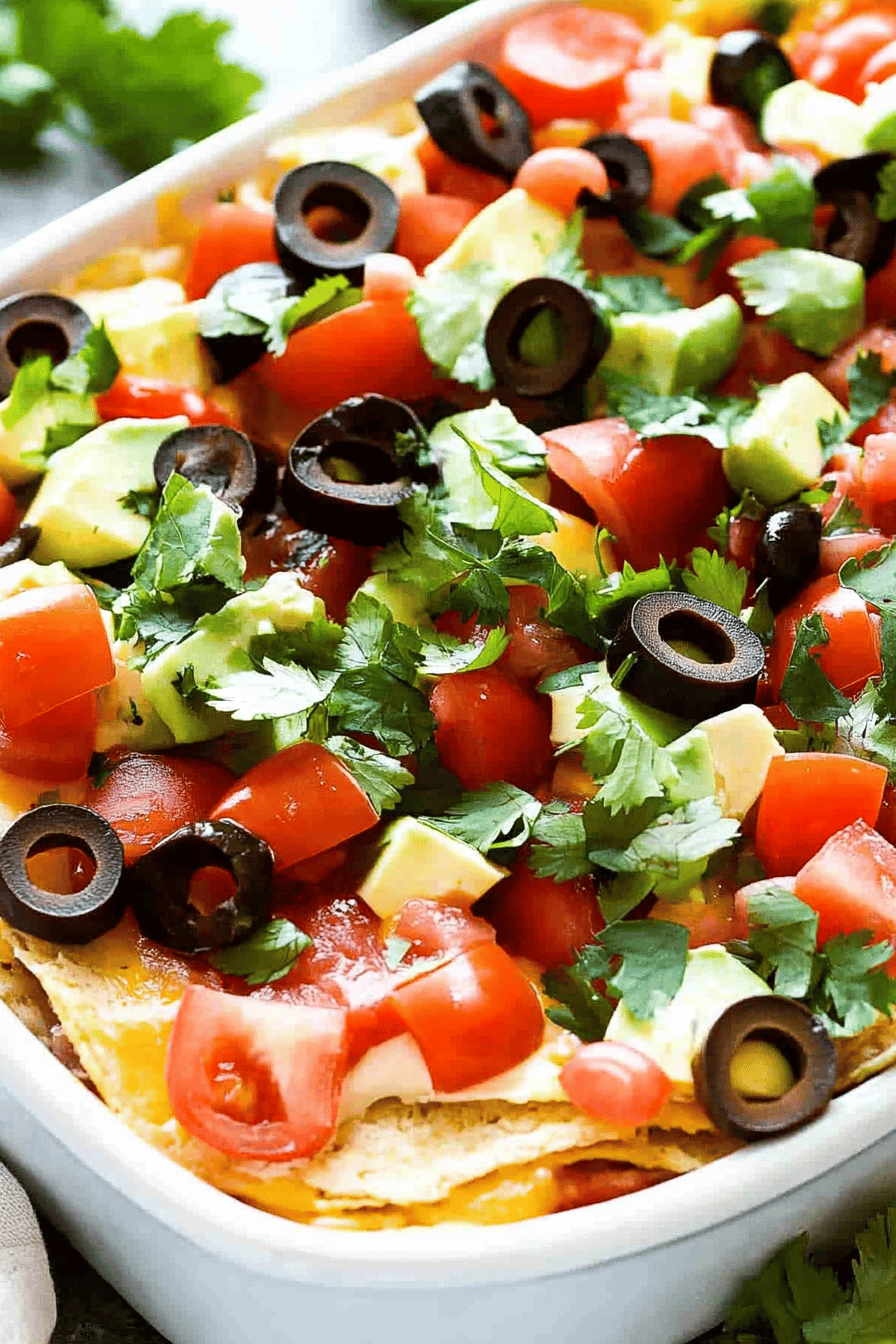
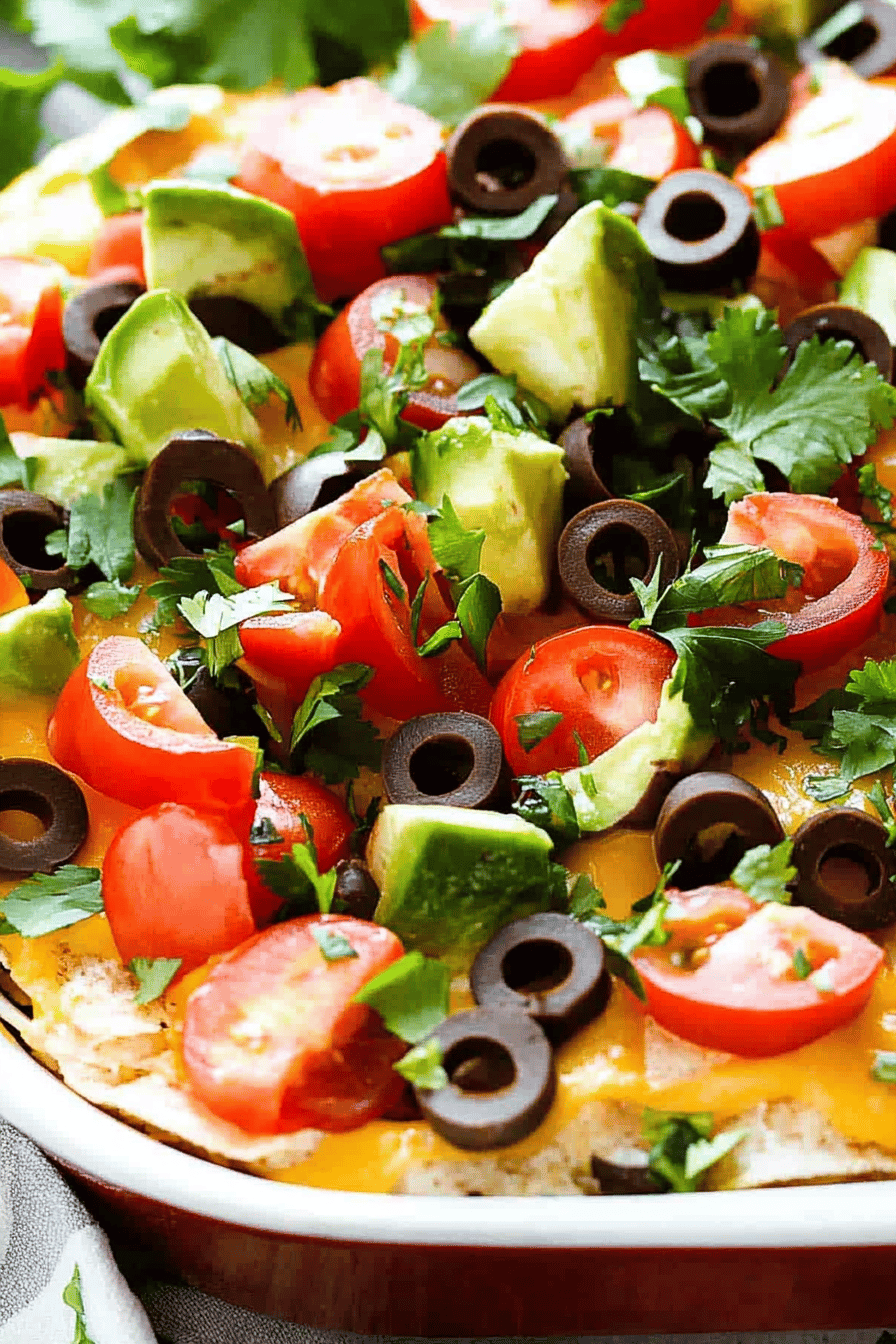
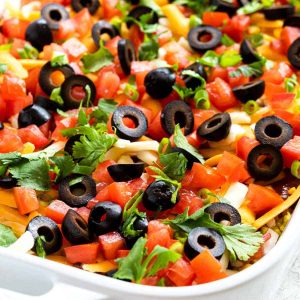
So, what exactly is this magical creation called 7 layer dip? At its heart, it’s a chilled appetizer made in a clear dish, where each component is carefully layered one on top of the other, creating a beautiful visual spectrum before you even dig in. The name pretty much says it all – it has seven distinct, delicious layers, though some folks like to get a little creative with the exact count. Think of it as a deconstructed, super-charged taco or burrito salad, but served cold and perfect for scooping up with a crunchy tortilla chip. It’s that perfect combination of textures and tastes – the smooth refried beans, the tangy sour cream, the zesty salsa, the sharp cheddar, the creamy guacamole, the crisp lettuce, and often a sprinkle of black olives or jalapeños for a little punch. It’s truly a symphony of flavors that somehow work together in perfect harmony.
Why you’ll love this recipe?
There are so many reasons why this 7 layer dip has become a permanent fixture in my recipe rotation, and I’m betting it will in yours too! First off, the flavor profile is just out of this world. You get that comforting, savory base from the refried beans, followed by the cool, creamy tang of sour cream and guacamole, the bright, zesty kick from the salsa, the sharp bite of cheese, and the refreshing crunch of lettuce. Each bite is an adventure! What I love most, though, is the sheer simplicity. I can have this put together in under 15 minutes, which is an absolute lifesaver on those crazy busy weeknights or when unexpected guests pop by. Plus, it’s incredibly budget-friendly. All the ingredients are pretty standard pantry or fridge staples, so you don’t need to break the bank to make something truly spectacular. It’s also ridiculously versatile. While I have my tried-and-true method, you can totally customize it to your liking. If you’re a fan of my Spicy Black Bean Salsa., you could definitely use that as a layer, or if you’re more of a mild kind of person, go with a milder salsa. It’s perfect for game days, birthday parties, holiday gatherings, or even just a Tuesday night craving. It’s the kind of dish that appeals to everyone, from picky eaters to adventurous foodies.
How do I make 7 Layer Dip?
Quick Overview
This is honestly one of the easiest recipes you’ll ever make, and that’s part of its charm! The beauty of this 7 layer dip lies in its assembly. You’ll essentially be layering pre-made or easily prepared components in a clear dish. The goal is to have distinct layers that hold their shape until scooped. It’s all about thoughtful layering and vibrant colors. You don’t need any fancy equipment or complicated techniques, just a good serving dish and your favorite tortilla chips to dive in!
Ingredients
For the Base Layer (Beans):
2 cans (16 ounces each) refried beans (I always go for the classic pinto bean variety)
1 packet taco seasoning (or about 2 tablespoons of my homemade blend)
1/4 cup water (or milk for a creamier consistency)
Tip: For a smoother layer, you can warm the beans gently on the stovetop or in the microwave with the taco seasoning and water. This also helps distribute the flavor evenly. Some people prefer a chunkier texture, so just stirring them cold works too!
For the Creamy Middle Layers:
1 container (16 ounces) sour cream
1 packet (1 ounce) ranch seasoning mix (this is my secret weapon for extra flavor!) OR 1 tablespoon lime juice and 1 teaspoon garlic powder
2-3 ripe avocados, mashed (about 2 cups)
1 tablespoon lime juice (crucial for preventing browning and adding brightness)
1/4 teaspoon salt (or to taste)
Tip: For the sour cream layer, mixing in the ranch seasoning makes it taste so much more interesting than plain sour cream. It’s a game-changer! For the guacamole, make sure your avocados are ripe but not mushy. The lime juice is non-negotiable here!
For the Flavorful Toppings:
1 jar (16 ounces) chunky salsa (mild, medium, or hot – your choice!)
2 cups shredded cheddar cheese (or a Mexican blend)
2 cups shredded iceberg lettuce (or romaine)
Optional: Sliced black olives, chopped fresh cilantro, diced jalapeños, diced tomatoes
Step-by-Step Instructions
Step 1: Preheat & Prep Pan
You don’t need to preheat an oven for this recipe! The only thing you need to prep is your serving dish. I highly recommend a clear, shallow rectangular or square glass dish (around a 9×13 inch size is perfect). This allows everyone to see those beautiful layers. Make sure it’s clean and dry.
Step 2: Mix Dry Ingredients
This step is mostly for the beans. In a medium bowl, combine the refried beans, taco seasoning, and water (or milk). Stir everything together until it’s well combined and has a smooth, spreadable consistency. If you want it extra creamy, you can mash it a bit more with a fork or even give it a quick blend with an immersion blender. Don’t overmix, though; we still want some texture!
Step 3: Mix Wet Ingredients
Now for the creamy layers. In one bowl, combine the sour cream and the ranch seasoning mix (or lime juice and garlic powder). Stir until it’s smooth and the seasoning is fully incorporated. In a separate bowl, mash the avocados with the lime juice and salt until you reach your desired consistency – some like it super smooth, others a little chunky. Again, the lime juice is key here to keep it from turning brown!
Step 4: Combine
This step is more about assembling than combining in a bowl. You’ll be spreading your layers directly into the serving dish.
Step 5: Prepare Filling
This step is already done with the ingredients you’ve prepared! The refried bean mixture, the seasoned sour cream, and the mashed guacamole are your core “fillings” for the first few layers.
Step 6: Layer & Swirl
This is the fun part! Start by spreading the seasoned refried beans evenly across the bottom of your dish. Then, carefully spread the seasoned sour cream over the beans. Try not to mix them too much. Next, gently spread the mashed avocado mixture over the sour cream. Now comes the salsa layer – pour it evenly over the avocado. Finally, sprinkle the shredded cheese generously over the salsa, followed by the shredded lettuce. If you’re using any optional toppings like olives or jalapeños, add them on top now for that extra visual appeal.
Step 7: Bake
No baking required for this chilled delight! It’s designed to be served cold or at room temperature.
Step 8: Cool & Glaze
This recipe doesn’t use a glaze, but if you wanted to add something extra, a drizzle of lime crema or a sprinkle of crumbled cotija cheese could be lovely. You’ll want to let the dip sit in the refrigerator for at least 30 minutes before serving to allow the flavors to meld and the layers to set slightly. This also ensures it’s nice and chilled.
Step 9: Slice & Serve
This isn’t a dish you slice; it’s a dish you scoop! Serve chilled with plenty of your favorite tortilla chips, pita bread, or even some veggie sticks. The best way to serve it is to let everyone dig in and create their own perfect chip-full. It’s designed for communal enjoyment!
What to Serve It With
This 7 layer dip is incredibly versatile, making it a perfect addition to almost any meal or gathering. For a relaxed breakfast or brunch, I love serving it alongside some scrambled eggs or a breakfast burrito bar. The cool, creamy layers are a refreshing contrast to warm eggs. For a more elegant brunch, I might plate it in smaller individual ramekins and top with a sprinkle of Pico de Gallo and a tiny sprig of cilantro. It’s surprisingly sophisticated when presented this way. As a dessert? Well, not traditionally, but hear me out! If you make a sweeter version with fruit and cream cheese layers (a completely different recipe, but the concept is similar!), it can work. However, for this savory version, it shines as an appetizer or a hearty snack. Think game days, holiday parties, or casual get-togethers. I always have a big bowl of tortilla chips ready to go, but it’s also fantastic with pita chips, sturdy crackers, or even raw veggie sticks like bell peppers, carrots, and celery for a healthier option. My kids absolutely love it with tortilla chips, and it’s become a staple for movie nights at home. It’s the kind of dish that brings people together, and the simple act of sharing a scoop from the same bowl feels wonderfully communal.
Top Tips for Perfecting Your 7 Layer Dip
After making this 7 layer dip more times than I can count, I’ve picked up a few tricks that I think really elevate it from good to absolutely amazing. First off, for the bean layer, don’t be afraid to season it well! A good quality taco seasoning is key, or if you’re feeling adventurous, whip up your own blend with chili powder, cumin, paprika, garlic powder, and onion powder. Warming the beans slightly with a splash of water or milk before spreading them makes them easier to smooth out and helps the seasoning penetrate. For the sour cream, adding that packet of ranch seasoning is a non-negotiable for me. It adds a fantastic tangy, herby flavor that complements everything else. If you can’t find ranch seasoning, a little garlic powder, onion powder, and a squeeze of lime juice works in a pinch, but it’s not quite the same magic. Now, for the guacamole layer, ripeness is everything! You want avocados that yield to gentle pressure but aren’t mushy. Mash them by hand with a fork; you want some texture. And for the love of all things delicious, don’t skip the lime juice! It not only prevents browning but adds a crucial bit of zing. A little salt is also essential. When it comes to the salsa, I prefer a chunkier style for better texture and visual appeal. You can use your favorite jarred salsa, or if you’re feeling ambitious, whip up a quick fresh pico de gallo. For the cheese, a good quality sharp cheddar or a Mexican blend melts beautifully and has the best flavor. I always opt for shredding my own cheese from a block; pre-shredded cheese often has anti-caking agents that can make it a bit clumpy. And finally, the lettuce! Shred it nice and fine. Iceberg lettuce gives that satisfying, refreshing crunch, but romaine is also a great option if you prefer. Don’t let it sit too long once assembled, or the lettuce can get a little sad. The key to a truly great 7 layer dip is to keep things fresh and flavorful in each layer, and to assemble it relatively close to serving time for the best texture and appearance.
Storing and Reheating Tips
This 7 layer dip is best enjoyed fresh, but it’s pretty forgiving! If you find yourself with leftovers (which is rare in my house!), here’s how to store them. For refrigerator storage, cover the dish tightly with plastic wrap, pressing it down gently onto the surface to minimize air exposure, especially to the lettuce and guacamole. It should stay good in the fridge for about 2-3 days. The textures might soften a bit over time, particularly the lettuce and guacamole, but the flavor will still be there. For room temperature storage, it’s really best to serve this dip within 2 hours. Beyond that, the dairy components can start to degrade, and the guacamole can brown significantly, making it less appealing. If you absolutely must keep it out longer for a party, try to keep the cheese and lettuce layers as the top layer and add them closer to serving if possible. I’ve never frozen this 7 layer dip because the creamy components and the fresh veggies don’t typically freeze and thaw well; they tend to get a watery, mushy texture. So, my best advice is to make only what you think you’ll eat, or be prepared for slightly softer textures if you do have leftovers. For reheating, it’s not really recommended as it’s a cold dish. If you must, you could scoop out some of the bean and cheese layers and warm them, but it defeats the purpose of the fresh, chilled layers.
Frequently Asked Questions
Final Thoughts
Seriously, if you haven’t tried making this 7 layer dip yet, you are missing out! It’s that perfect blend of creamy, zesty, and savory that just screams “party.” It’s a recipe that truly delivers on flavor without demanding hours in the kitchen. The fact that it looks so impressive with minimal effort is just the icing on the cake, or rather, the lettuce on the dip! It’s the kind of dish that disappears from the buffet table faster than any other, and you’ll always have people asking for the recipe. It’s a real crowd-pleaser and a lifesaver for any host. If you love this recipe, you might also enjoy my Easy Guacamole Recipe or my Spicy Bean Dip for more appetizer inspiration. Don’t be afraid to experiment with the layers – make it your own! I can’t wait to hear how yours turns out. Let me know in the comments below what your favorite layer is, or if you have any brilliant additions you love to include!
7 Layer Dip
Ingredients
Main Ingredients
- 1 can refried beans
- 0.5 cup salsa
- 1 container sour cream
- 2 cups shredded cheddar cheese
- 1 avocado ripe avocado mashed
- 0.125 cup lime juice
- 0.25 teaspoon salt
- 0.25 teaspoon black pepper
- 0.5 cup black olives sliced
- 0.25 cup chopped green onions
Instructions
Preparation Steps
- Spread the refried beans evenly in the bottom of a 9x13 inch baking dish or serving platter.1 can refried beans
- Spread the salsa evenly over the refried beans.1 can refried beans
- In a small bowl, mix the sour cream with the lime juice, salt, and pepper. Spread this mixture evenly over the salsa.1 can refried beans
- In another small bowl, mash the avocado with the remaining lime juice, salt, and pepper. Spread this guacamole layer over the sour cream mixture.1 can refried beans
- Sprinkle the shredded cheddar cheese evenly over the guacamole.1 can refried beans
- Garnish the top with sliced black olives and chopped green onions.1 can refried beans
- Serve with tortilla chips.