
There’s something about the smell of balsamic vinegar sizzling in a hot pan that takes me right back to those cozy Sunday dinners at my mom’s house. It’s not just any chicken dish — it’s that perfect mix of sweet tang and savory depth that stops everyone mid-conversation and sends forks diving back in for another bite. I remember the first time I made this balsamic chicken recipe; my kitchen felt like a warm hug, and honestly, it quickly became a family favorite. My kids even ask for it regularly, which, trust me, is a big deal when you’re bombarded with picky palates. What’s wild is how deceptively simple this recipe comes together, but the flavors feel anything but basic — much like a classic roast chicken but with a zing that keeps everyone guessing and wanting more.
What is balsamic chicken?
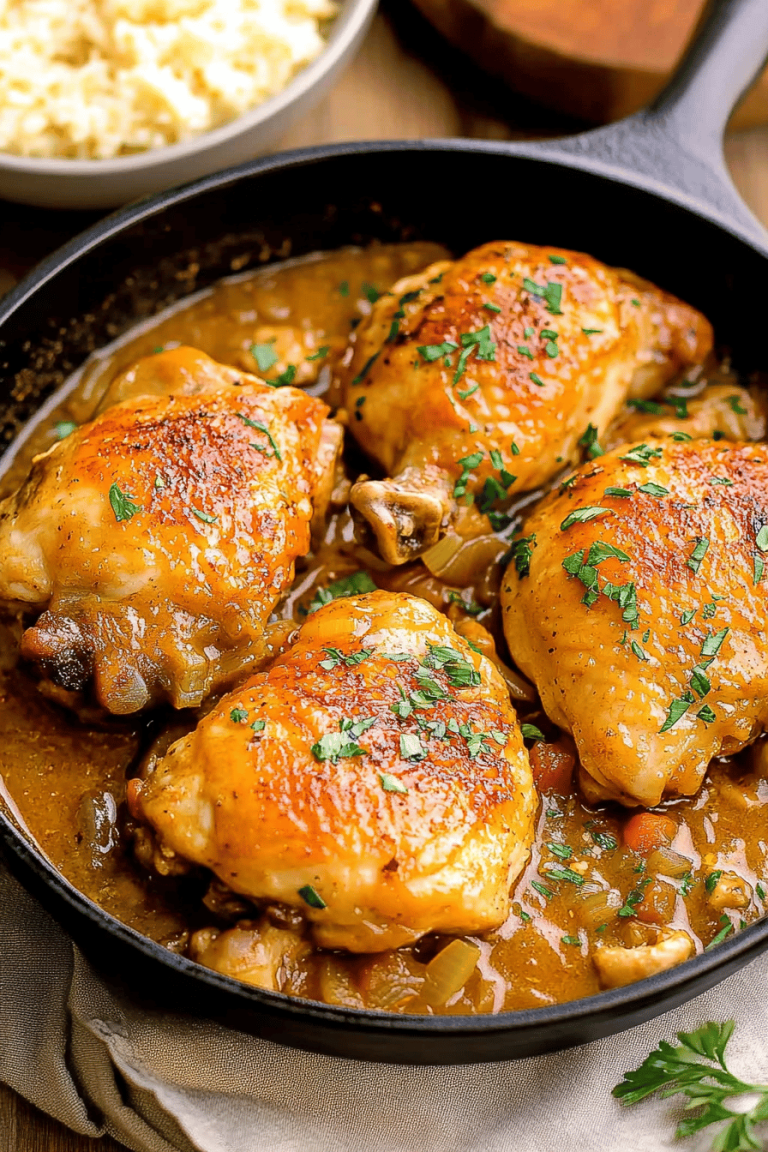
Think of balsamic chicken as a humble but fancy little twist on your everyday chicken dinner. It’s essentially chicken breasts, often pan-seared or baked, that get bathed in this luscious balsamic glaze—a syrupy, slightly sweet reduction of balsamic vinegar that coats the meat and turns every bite into a little celebration of flavors. The name comes from that star ingredient: balsamic vinegar, which hails from Italy and brings a rich acidity and deep sweetness that’s hard to beat. It sounds a bit gourmet, but honestly, it’s just home-cooking magic made simple. This dish often pairs the chicken with garlic, herbs, maybe a touch of honey or brown sugar, all simmered down until that thick, glossy sauce is ready to steal the show.
Why you’ll love this recipe?
Where do I even start? What I adore most about this balsamic chicken is how effortlessly the bold flavor profile comes together — tangy, sweet, and savory all at once, with that velvety glaze that clings to the tender, juicy chicken. It’s genuinely one of those dishes that tastes like you slaved away all afternoon, but you really didn’t. I’ve made this countless times on busy weeknights when inspiration runs thin, and it always delivers that “wow” factor without stress. Plus, balsamic vinegar is super budget-friendly, so you’re not shelling out for fancy ingredients here, just a handful you probably already have on hand. This recipe’s versatility is something else, too — I’ve tossed it over salads for a light lunch, served it next to mashed potatoes for a cozy dinner, or even shredded it into sandwiches with arugula and goat cheese. Honestly, it’s the kind of recipe I keep returning to because it’s reliable, refreshing, and a crowd-pleaser through and through. If you like dishes that pack flavor without fuss, this balsamic chicken is a winner.
How do you make balsamic chicken?
Quick Overview
This recipe is a total lifesaver when you want something juicy, flavorful, and ready in under 30 minutes. You basically season the chicken, sear it off to get that gorgeous golden crust, then pour on a balsamic glaze that simmers down to a sticky, luscious coating. The magic happens when that glaze caramelizes slightly, locking in moisture and flavor. Honestly, the simplicity of the process means it’s impossible to mess up, and the results always make me feel like a kitchen rockstar.
Ingredients
For the Chicken:
- 4 boneless, skinless chicken breasts (try to pick even-sized ones so they cook evenly)
- Salt and freshly ground black pepper (season generously)
- 2 tablespoons olive oil or avocado oil (for that lovely sear)
For the Balsamic Glaze:
- ½ cup balsamic vinegar (look for “traditional” or aged for deeper flavor)
- 2 tablespoons honey or brown sugar (balances out the acidity perfectly)
- 2 cloves garlic, minced (adds a subtle savory punch)
- 1 teaspoon Dijon mustard (optional, but I swear it amps up the flavor)
- Fresh herbs like thyme or rosemary (just a sprig or two for aroma)
Step-by-Step Instructions
Step 1: Preheat & Prep Pan
Heat a large skillet over medium-high heat and add your oil. I always use cast iron here because it gets so evenly hot and gives the chicken that crispy crust I love. Meanwhile, lightly season the chicken with salt and pepper — don’t be shy here, seasoning is key to a flavorful crust.
Step 2: Mix Dry Ingredients
Okay, this recipe is pretty straightforward, so rather than a mix of dry ingredients, you want to focus on evenly seasoning your chicken. If you decide to add a pinch of smoked paprika or dried herbs, sprinkle them now — it’s a small touch that makes a big difference.
Step 3: Mix Wet Ingredients
For the glaze, whisk together balsamic vinegar, honey or brown sugar, minced garlic, and Dijon mustard in a small bowl. This blend is where the magic happens, so take a moment to enjoy the tangy-sweet smell when you stir it all together. Make sure your honey is runny for even mixing. If it’s too thick, a quick zap in the microwave helps.
Step 4: Combine
Once your chicken has a nice golden sear (about 5-6 minutes per side depending on thickness), pour that balsamic glaze right into the pan, add your fresh herbs, and reduce the heat to medium low. The glaze will bubble and thicken, turning glossy—this is when you want to spoon it over the chicken repeatedly, letting the flavor soak in. Don’t rush this part; it’s the heart of the dish.
Step 5: Prepare Filling
This dish doesn’t need a filling per se, but if you want to get a little creative, I sometimes pile on sautéed mushrooms or caramelized onions on top before finishing with the glaze. It adds an earthy sweetness that pairs beautifully with the balsamic tang.
Step 6: Layer & Swirl
If you’re feeling fancy, swirl that glaze around the pan to coat everything evenly — think of it as painting your chicken with the best flavor-bomb sauce in the kitchen. It’s a small step that lifts the whole experience.
Step 7: Bake
For thicker chicken breasts, once glazed, I usually transfer the whole skillet to a preheated 375°F oven for about 8-10 minutes to ensure they’re cooked through but still juicy. If you don’t have an ovenproof skillet, transfer to a baking dish, but remember to scrape all that glaze goodness with you.
Step 8: Cool & Glaze
Let your chicken rest for 5 minutes after cooking — this helps the juices redistribute so every bite is tender. Then, pour any remaining glaze from the pan back over the top before serving. That sticky glossy finish? Totally worth waiting for.
Step 9: Slice & Serve
Slice on a slight angle for a nice presentation, or leave whole for a rustic look. Serve immediately while the glaze is still warm and luscious. Oh, and if you want bonus points, drizzle a little extra balsamic vinegar reduction or a sprinkle of fresh thyme leaves before plating.
What to Serve It With
For Breakfast: If you’re brave (and I say why not), slice leftover balsamic chicken over scrambled eggs or an avocado toast. Pair it with a strong black coffee to balance the tang.
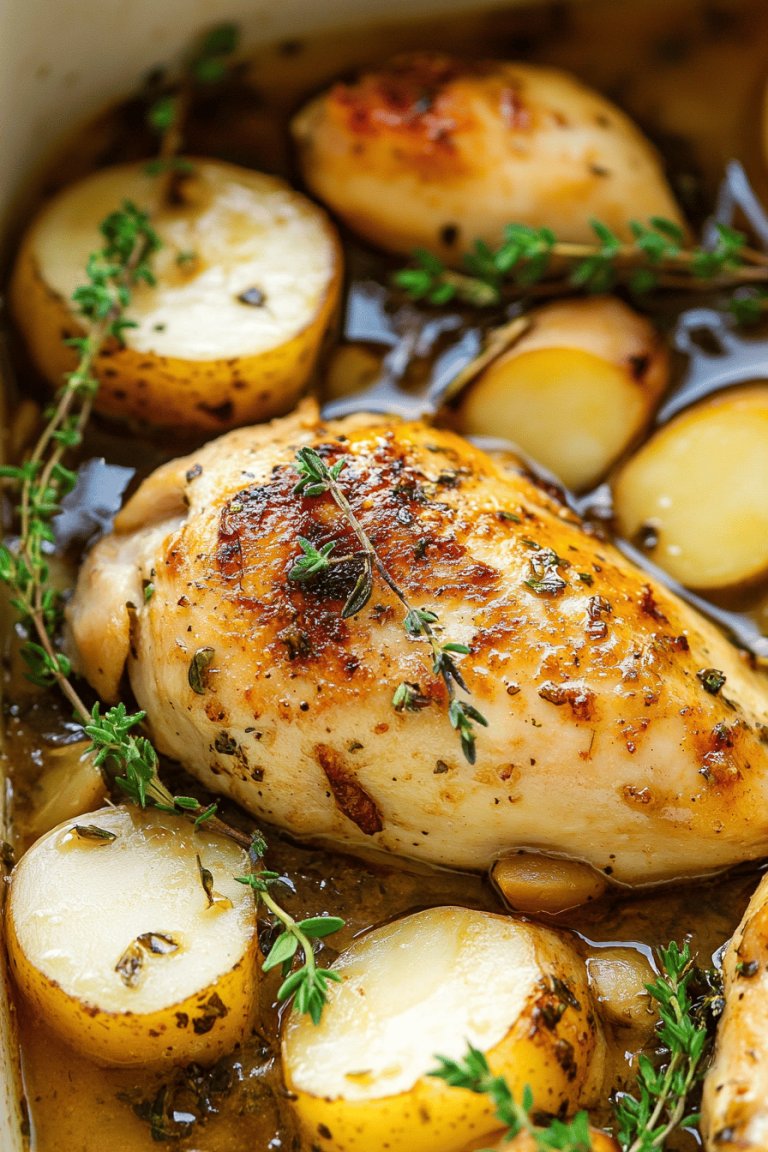
For Brunch: Serve alongside roasted baby potatoes and a light arugula salad drizzled with lemon vinaigrette. A chilled mimosa or fresh squeezed juice complements the richness perfectly.
As Dinner: This is my go-to combo: garlic mashed potatoes, steamed green beans, and a glass of chilled white wine or sparkling water with lemon. The meal feels fancy but comes together in a snap.
For Cozy Snacks: Shred leftover chicken into warm pita with a smear of cream cheese, fresh spinach, and a few slices of roasted red pepper. This quick snack has saved me more than once on those rushed, hungry afternoons.
Top Tips for Perfecting Your Balsamic Chicken
Chicken Prep: Pat your chicken dry with paper towels before seasoning. Moisture is the enemy of a crisp sear, and trust me, I’ve had too many spectacles where the chicken just steamed instead of browning.
Mixing Your Glaze: When mixing the balsamic reduction, don’t skip the honey — it’s what cuts the vinegar’s sharpness and helps caramelize the sauce. If you need less sweetness, reduce it but a tiny bit is not just tasty, it’s essential.
Swirling the Glaze: When the glaze starts thickening, tilt the pan slightly to pool the glaze on one side and use a spoon to scoop and swirl it over the chicken again and again. It really creates that shiny, clingy finish you want.
Heating Adjustments: Don’t rush the simmering of the glaze. Too high and it burns; too low and it won’t thicken. A gentle simmer is your best friend here. Use a silicone spatula to check thickness — it should coat the back of a spoon nicely.
Ingredient Swaps: I’ve swapped honey for maple syrup and while it gives a different vibe—more earthy—it still works beautifully. Also, a splash of chicken broth in the glaze adds depth without overpowering the balsamic flavor.
Glaze Variations: Try adding a few frozen berries or some fresh garlic slices into the glaze for an extra layer of flavor complexity. Lemon zest is another sneaky trick that brightens it up without changing the core taste.
Storing and Reheating Tips
Room Temperature: Leftover balsamic chicken can sit out for about two hours covered loosely with foil or a clean kitchen towel. The glaze might thicken a bit but the flavors deepen nicely.
Refrigerator Storage: Place chicken in an airtight container and refrigerate for up to 4 days. Reheat gently on the stove or in the microwave — add a splash of water or broth to loosen the glaze if it’s gotten too sticky.
Freezer Instructions: Wrap portions tightly in plastic wrap then foil, or place in freezer-safe containers for up to 3 months. Thaw overnight in the fridge and reheat as above — the glaze will come back to life with a little heat and stirring.
Glaze Timing Advice: If you’re planning to store leftovers, I recommend saving some glaze separately. Reapply it after reheating to freshen the dish and get that just-cooked shine back.
Frequently Asked Questions
Final Thoughts
Every time I make this balsamic chicken, it feels like a little celebration in the kitchen. The harmony of tangy balsamic with the sweetness and those tender chicken breasts is just unbeatable. What really seals the deal is how it effortlessly turns even the busiest night into a special occasion—with minimal fuss and maximal flavor. I’ve watched this recipe go from weeknight saver to family tradition, and I’m excited for you to feel that same joy. Once you try it, you might find yourself planning your week around making it again, just like I do! If you’re craving more, I’d nudge you toward my garlic lemon shrimp or honey mustard pork chops — similar ease, wildly delicious. Don’t forget to leave a comment with your tweaks or moments this recipe sparked at your table — I love hearing your stories. Happy cooking and see you next time!
balsamic chicken
Ingredients
Main Ingredients
- 0.33 cup balsamic vinegar
- 0.25 cup olive oil
- 1 Tbsp minced garlic approximately 3 cloves
- 2 tsp minced fresh rosemary or 0.75 tsp dried rosemary
- 2 tsp minced fresh thyme or 0.75 tsp dried thyme
- 2 tsp dijon mustard
- 1 tsp salt
- 1 tsp freshly ground black pepper
- 2 lb boneless skinless chicken thighs or breasts
- 1 Tbsp chopped fresh parsley optional, for garnish
Instructions
Preparation Steps
- Place chicken in a gallon size resealable bag or bowl.
- In a mixing bowl, whisk together balsamic vinegar, olive oil, garlic, rosemary, thyme, dijon mustard, salt, and black pepper until combined.
- Pour marinade over chicken in the bag or bowl. Seal the bag while pressing out excess air.
- Rub marinade over chicken by twisting and tying the top of the bag so marinade fully covers the chicken.
- Let the chicken marinate in the refrigerator for 2 to 8 hours for breasts, and 2 to 24 hours for thighs.
- Preheat grill to medium-high heat (about 400°F). Clean and oil grill grates using tongs and a balled-up paper towel.
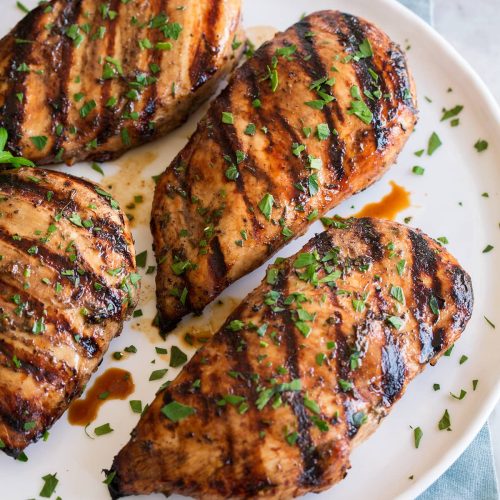
- Remove chicken from marinade, shaking off excess back into the bag. Place chicken on the grill and cook covered for about 5 to 8 minutes per side.
- Check internal temperature of chicken in the thickest portion; cook until it reaches 165°F for doneness.
- Garnish with parsley if desired and serve warm.
That smell really does bring back the best memories! Balsamic vinegar adds such a rich, flavorful kick to dishes.