You know those nights? The ones where you *really* want to impress, but your energy tank is hovering around empty? Or maybe it’s the holiday season and your appetizer spread needs a serious star player. Well, I’ve got just the thing, and it’s a recipe that has become an absolute legend in my own kitchen: the Taco Cheese Ball. Seriously, this isn’t just a cheese ball; it’s a fiesta in appetizer form. I first stumbled upon a similar idea years ago, but it’s been tweaked and perfected through countless gatherings, family movie nights, and even just random Tuesday cravings. It’s the kind of dish that makes people’s eyes light up and their spoons dive in before you even finish saying, “Who wants the first bite?” It’s got that familiar, comforting Tex-Mex flavor profile, but presented in such a fun, shareable way. If you’ve ever loved a classic cheese ball or a great plate of nachos, get ready, because this Taco Cheese Ball is going to be your new obsession.
What is Taco Cheese Ball?
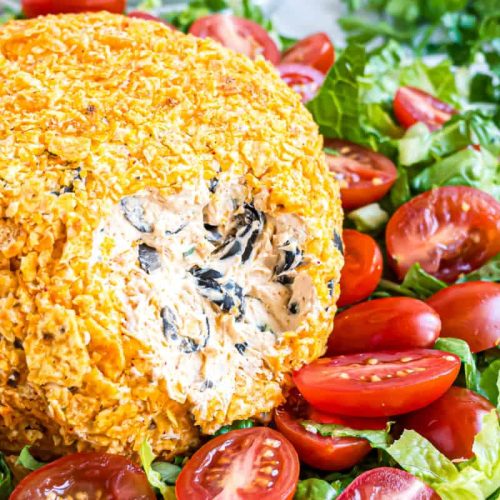
So, what exactly *is* this magical Taco Cheese Ball I keep raving about? Think of it as a delicious, crowd-pleasing explosion of your favorite taco flavors, all rolled into a perfectly shaped ball of creamy, cheesy goodness. It’s essentially a rich, savory cheese mixture – the kind you want to scoop up with anything and everything – infused with all the zesty, spicy, and satisfying elements of a taco. We’re talking seasoned Ground Beef (or a vegetarian alternative!), melty cheese, and a hint of spice, all bound together and then often coated in something extra special for crunch and flavor. The “Taco” part comes from the incredible seasonings and mix-ins that give it that unmistakable Tex-Mex flair. It’s not just a cheese ball; it’s an experience. It’s the appetizer that says, “I thought about this, and I really want you to have a good time eating!” It’s approachable, fun, and frankly, just utterly delicious.
Why you’ll love this recipe?
What are some of the reasons why I love this Taco Cheese Ball recipe?flavor is just out of this world. It hits all the right notes: savory, a little spicy, cheesy, and packed with those warm, comforting taco spices we all adore. It’s like taking your favorite taco and condensing all that deliciousness into one perfect bite. Then there’s the simplicity. Honestly, you’d think something this good would be complicated, but it’s surprisingly easy. Most of the magic happens in a bowl, with minimal fuss. It’s a lifesaver on busy nights when you need a stunning appetizer without spending hours in the kitchen. And let’s talk about Cost-efficiency: What is the best way to measure cost-efficiency?. The ingredients are all pretty standard pantry staples or easily found at any grocery store, making it a budget-friendly way to serve a crowd. Plus, it’s incredibly versatile. You can serve it with tortilla chips for a classic pairing, or get creative with veggies, crackers, or even little pieces of toasted bread. What I love most about this Taco Cheese Ball, though, is how it brings people together. It’s the centerpiece of any good snack table, sparking conversation and smiles. It’s worlds away from a plain old cheese ball; this one has personality and zest! If you’re a fan of my Speedy Salsa Chicken Bake or my Ultimate Nacho Platter, you’re going to adore the flavor profile here.
How to Make the Taco Cheese Ball
Quick Overview
Making this Taco Cheese Ball is a breeze! You’ll basically combine a creamy cheese base with seasoned taco fillings, shape it into a ball, chill it until firm, and then either roll it in a crunchy coating or serve it as is. The key is to get all those savory taco elements perfectly incorporated into the cheese mixture. It’s a straightforward process that delivers maximum flavor with minimal effort, making it the perfect go-to for any occasion where you want a show-stopping appetizer without the stress.
Ingredients
For the Main Cheese Base:
Two (8-ounce) packages cream cheese, softened: Make sure these are truly softened. I usually leave them out on the counter for at least an hour. It makes them so much easier to mix without lumps. Full-fat cream cheese gives the best texture, but low-fat works in a pinch if that’s what you have.
1/2 cup shredded sharp cheddar cheese: I love the sharpness of cheddar here, but a Mexican blend or Monterey Jack would also be delicious.
1/4 cup finely diced yellow onion: You can omit this if you’re not a fan of raw onion, but it adds a lovely subtle bite. Make sure it’s super fine!
2 tablespoons chopped fresh cilantro: Essential for that fresh Tex-Mex flavor. If you’re one of those people who think cilantro tastes like soap, you can leave it out or use a bit of fresh parsley instead.
1 teaspoon chili powder: For a little warmth and depth of flavor.
1/2 teaspoon cumin: This spice is key for that authentic taco taste.
1/4 teaspoon garlic powder: Because everything is better with a little garlic.
Salt and freshly ground black pepper to taste: Start with a pinch and adjust as you go.
For the Taco Filling:
1/2 pound ground beef (or ground turkey, or black beans for vegetarian): I usually go with ground beef for that classic taco flavor. If you’re going vegetarian, well-rinsed black beans, mashed slightly, are fantastic.
1/2 packet (about 1 tablespoon) taco seasoning: You can use a store-bought packet or your own homemade blend. This is where a lot of the taco magic happens!
1/4 cup mild salsa: Adds moisture and another layer of taco flavor. Pick your favorite!
2 tablespoons chopped green chilies (optional): For an extra kick of mild heat.
For the Coating (Optional but Highly Recommended!):
1/2 cup crushed tortilla chips: The classic choice! Gives a great crunch.
1/4 cup finely chopped black olives: For a briny bite and visual appeal.
1/4 cup shredded Monterey Jack cheese: Melts just enough and adds another cheesy layer.
Step-by-Step Instructions
Step 1: Preheat & Prep Pan
While this recipe doesn’t involve baking the cheese ball itself, it’s always good practice to have your kitchen ready. For the filling, you’ll need to cook the ground beef. Grab a skillet and heat it over medium-high heat. You don’t need to add oil if your beef is fatty enough; it will render its own fat. If you’re using lean beef or ground turkey, a teaspoon of oil might be helpful.
Step 2: Mix Dry Ingredients
In a large bowl, combine the softened cream cheese, shredded cheddar cheese, finely diced onion, chopped cilantro, chili powder, cumin, and garlic powder. Season with a pinch of salt and pepper. Using a sturdy spoon or an electric mixer on low speed, beat these ingredients together until they are well combined and smooth. You want a nice, creamy base with no big lumps of cream cheese.
Step 3: Mix Wet Ingredients
In the same skillet where you’ll cook the meat (or a separate bowl if you’ve already cooked the meat), add the ground beef (or your chosen alternative). Break it up with a spoon and cook until it’s nicely browned and no pink remains. Drain off any excess grease – this is important for the texture of your cheese ball! Stir in the taco seasoning and cook for another minute until fragrant. Then, stir in the salsa and chopped green chilies (if using). Let this mixture simmer for about 2-3 minutes, allowing the flavors to meld.
Step 4: Combine
Once the taco filling has cooled slightly (you don’t want it piping hot when you add it to the cream cheese), gently fold it into the cream cheese mixture from Step 2. Add the cooked taco meat mixture and stir until everything is evenly distributed. You want to see bits of seasoned beef and maybe some flecks of onion and cilantro throughout the creamy cheese base. Taste and adjust seasonings if needed – maybe it needs a touch more salt or a pinch more chili powder.
Step 5: Prepare Filling
This step actually just happened in Step 4! We’ve already prepared our delicious taco filling and mixed it right into the cheese base. So, consider this step complete – the filling is now perfectly integrated!
Step 6: Layer & Swirl
This recipe doesn’t really involve layering or swirling in the traditional sense, as all the delicious taco components are mixed throughout the cheese base. However, for a beautiful presentation, you can shape the mixture into a neat ball. You can also decide at this point if you want to add an external coating for extra texture and flavor. If you plan to roll it in the coating (Step 8), do that after chilling.
Step 7: Bake
No baking is required for this Taco Cheese Ball! That’s another reason it’s so fantastic. You just need to chill it to let it firm up before shaping and coating.
Step 8: Cool & Glaze
Transfer the cheese mixture onto a large piece of plastic wrap. Shape it into a ball as best you can. Then, wrap it up tightly in the plastic wrap. Refrigerate for at least 2-3 hours, or until it’s firm enough to handle. This chilling step is crucial for it to hold its shape. Once chilled and firm, unwrap the cheese ball. If you’re using a coating, spread your crushed tortilla chips, olives, and Monterey Jack cheese on a plate or shallow dish. Gently roll the chilled cheese ball in the coating mixture, pressing lightly so it adheres all over. You can also just press the coating onto specific areas for a more artistic look.
Step 9: Slice & Serve
Once coated (or if you’re going without a coating), your Taco Cheese Ball is ready to be served! Place it on a serving platter. I like to serve it with a small spreader or a cheese knife. Provide plenty of tortilla chips, crackers, or vegetable sticks for dipping. It’s best served cold or at room temperature, so if it’s been chilling for a while, let it sit out for about 15-20 minutes before serving for optimal flavor and texture.
What to Serve It With
This Taco Cheese Ball is so incredibly versatile, making it perfect for any gathering or mood! For Breakfast, believe it or not, I’ve seen people enjoy a small portion with some scrambled eggs – it’s a little unconventional, but the savory notes work surprisingly well. Imagine a little dollop on the side of your morning plate! For Brunch, this is an absolute star. Serve it with a beautiful platter of fresh fruit, mini muffins, and maybe some avocado slices. It elevates the whole spread. It’s a fantastic addition to a mimosa-fueled morning. As Dessert? Okay, maybe not a traditional dessert, but if you’re craving something savory and satisfying after a sweet meal, this hits the spot. It’s the perfect palate cleanser or a little something to share with a late-night coffee. For Cozy Snacks, this is where it truly shines. Think movie nights, game days, or just a casual get-together with friends. Load up a platter with a variety of tortilla chips (scoops are great!), some sturdy crackers, maybe some celery sticks and bell pepper strips. My family loves it with those little mini toasts too. We often have a tradition of making it for “Taco Tuesday” appetizers, even if we’re having tacos for dinner. It’s just that good and sets the mood perfectly!
Top Tips for Perfecting Your Taco Cheese Ball
I’ve made this Taco Cheese Ball more times than I can count, and over the years, I’ve picked up a few tricks that really make a difference. For the Zucchini Prep, actually, wait – this recipe doesn’t use zucchini! My apologies, I must be thinking of another recipe. For *this* Taco Cheese Ball, the key is really in the meat preparation. Make sure you drain off *all* the excess grease after cooking the ground beef. A greasy cheese ball just won’t have the right texture and can feel a bit heavy. Using a paper towel-lined colander is my favorite way to ensure it’s super dry. When it comes to Mixing Advice, don’t overwork the cream cheese if you’re using a mixer; you want it smooth but not soupy. For the filling, ensure it cools slightly before folding it into the cream cheese. Adding hot filling can melt the cream cheese prematurely and make it harder to shape. For Swirl Customization, while this recipe is more of a mix-in, if you wanted to add a “swirl” effect, you could reserve a small portion of plain cream cheese mixture and gently marble it in at the end, but I find the even distribution of taco flavor is more appealing here. For Ingredient Swaps, as I mentioned, you can absolutely use black beans instead of meat for a vegetarian version. Mash them up a bit so they integrate well. For the cheese, a spicy pepper jack would be amazing if you like more heat, or a sharp white cheddar for a different visual appeal. If you don’t have taco seasoning, a mix of chili powder, cumin, paprika, garlic powder, and onion powder can work wonders. For Baking Tips, since there’s no baking involved for the cheese ball itself, the most important tip is about chilling. Don’t rush the chilling process! A properly chilled cheese ball is firm and easy to shape and coat. If your kitchen is very warm, you might need to chill it a bit longer. For Glaze Variations, if you’re not a fan of the tortilla chip coating, consider rolling it in finely chopped pecans for a nutty crunch, or even a mix of shredded cheese and breadcrumbs. A drizzle of a spicy ranch dressing or a lime crema just before serving can also be a lovely finishing touch.
Storing and Reheating Tips
One of the best things about this Taco Cheese Ball is that it can be made ahead, which is a huge win for entertaining! For Room Temperature storage, once it’s made and chilled, it can sit out for about 1-2 hours while you’re serving it. Any longer and it’s best to keep it chilled. For Refrigerator Storage, wrap the cheese ball tightly in plastic wrap, or store it in an airtight container. It will stay fresh and delicious in the fridge for up to 3-4 days. The flavors actually tend to meld and get even better on the second day! For Freezer Instructions, this is a bit trickier because of the cream cheese. You can freeze the cheese ball *before* coating it. Wrap it very securely in plastic wrap, then in aluminum foil, and place it in a freezer-safe bag or container. It should last for about 1-2 months. To thaw, transfer it to the refrigerator overnight. Once thawed, you might notice a slight change in texture, so it’s best to serve it with crackers or chips to add that desired crunch. For Glaze Timing Advice, it’s always best to add the coating (like tortilla chips or other toppings) *just before* serving, especially if you plan to refrigerate it for an extended period or freeze it. If the coating sits too long, it can get soggy. If you’re serving it the next day and it’s been coated, it might lose a little of its crispness, but it will still be tasty!
Frequently Asked Questions
Final Thoughts
Honestly, this Taco Cheese Ball is more than just an appetizer; it’s a reliable friend in the kitchen. It’s the dish you can whip up when unexpected guests arrive, the perfect addition to your holiday spread, and the reason your family might start asking for “that taco dip thingy” all the time. It delivers big on flavor without asking too much of your time or energy. I just love how it brings everyone together around a plate, sharing bites and stories. It’s proof that sometimes, the most beloved recipes are the simplest ones, especially when they’re packed with so much personality and deliciousness. If you’re looking for other flavor-packed, easy recipes, you might want to check out my Fiesta Chicken Casserole or my Easy Guacamole recipe – they’re all in the same vein of crowd-pleasing Tex-Mex goodness. I truly hope you give this Taco Cheese Ball a try. I can’t wait to hear how it turns out for you and what variations you come up with! Happy snacking!
Taco Cheese Ball
Ingredients
Main Ingredients
- 16 oz cream cheese softened
- 1 packet taco seasoning
- 2 oz salsa
- 0.5 cup shredded cheddar cheese
- 0.5 cup finely chopped black olives
- 0.5 cup finely chopped green onions
- 1.5 cup crushed tortilla chips for coating
Instructions
Preparation Steps
- In a medium bowl, combine the softened cream cheese, taco seasoning, and salsa. Mix until well combined.
- Stir in the shredded cheddar cheese, chopped black olives, and chopped green onions. Mix until evenly distributed.
- On a plate or shallow dish, spread the crushed tortilla chips. Shape the cream cheese mixture into a ball and roll it in the crushed tortilla chips until fully coated.
- Cover the cheese ball and refrigerate for at least 30 minutes to allow it to firm up.
- Serve with your favorite tortilla chips or crackers.