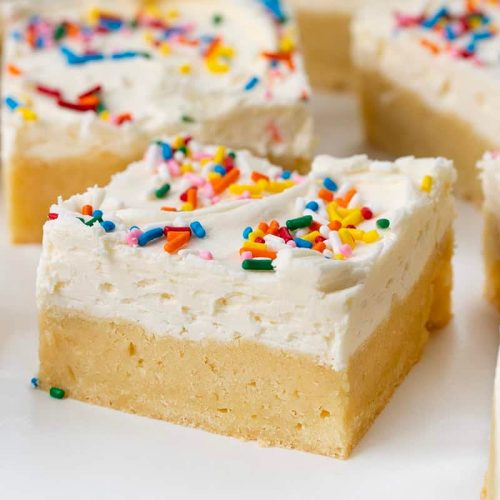
Oh, these sugar cookie bars! If there’s one treat that instantly brings me back to my childhood kitchen, it’s these. We’re talking about the kind of soft, chewy sugar cookie bars that are just begging to be frosted, but honestly, they’re pretty darn spectacular even without it. They remind me a little bit of those classic frosted sugar cookies, but in bar form, they’re just so much easier to make and serve a crowd. I remember my mom making these for every bake sale and school party, and they were always the first thing to disappear. Now, when I need a guaranteed crowd-pleaser or just a little something sweet to brighten my day, these sugar cookie bars are my absolute go-to. They’re seriously a lifesaver on busy nights when the sweet craving hits hard and I don’t have time to fuss with rolling out individual cookies.
What are sugar cookie bars?
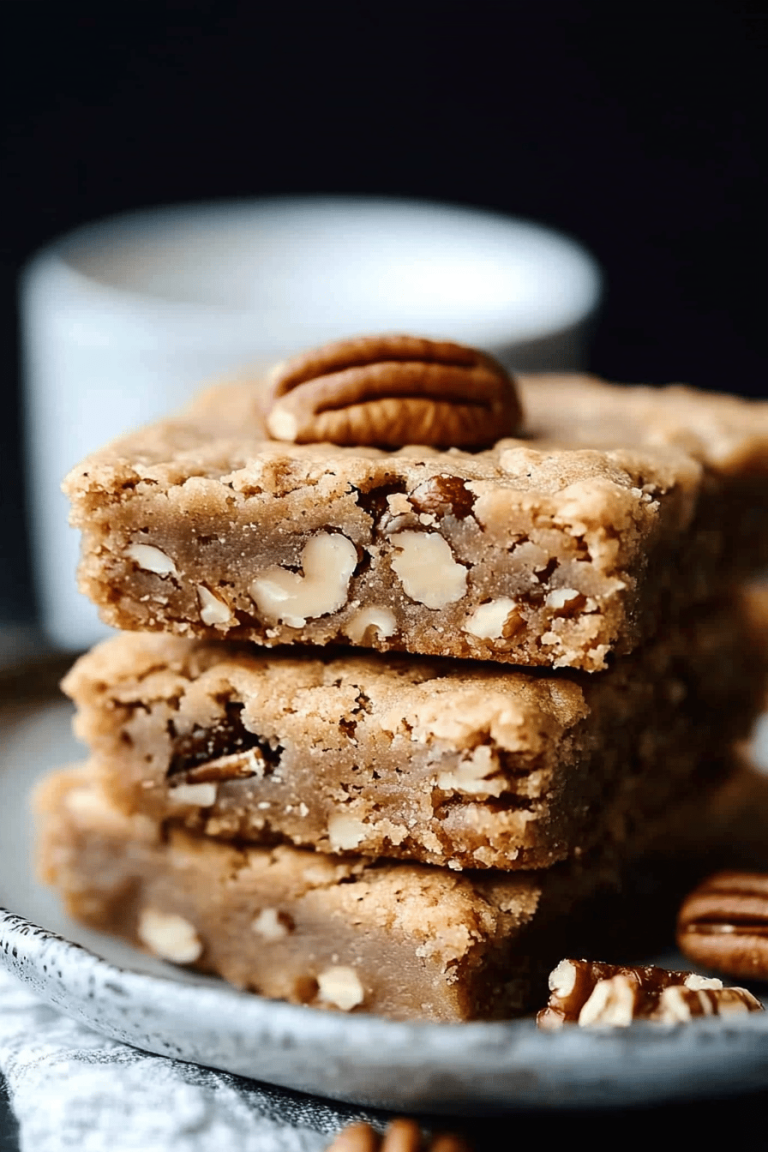
So, what exactly *are* sugar cookie bars? Think of them as a deconstructed, more forgiving version of your favorite Sugar Cookies. Instead of chilling dough, rolling it out, and cutting out shapes, you press a soft, buttery sugar cookie dough right into a baking pan. Once baked, you cut them into easy-to-handle bars. It’s essentially all the deliciousness of a classic sugar cookie—that sweet, slightly vanilla-y flavor and perfectly tender texture—but made incredibly simple. The “bar” part just means you get a lot of that cookie goodness in every bite, and they’re perfect for sharing. They’re less fussy than traditional cookies, which is why I’ve fallen so hard for them over the years. It’s the perfect way to enjoy that comforting sugar cookie taste without all the extra steps.
Why you’ll love this recipe?
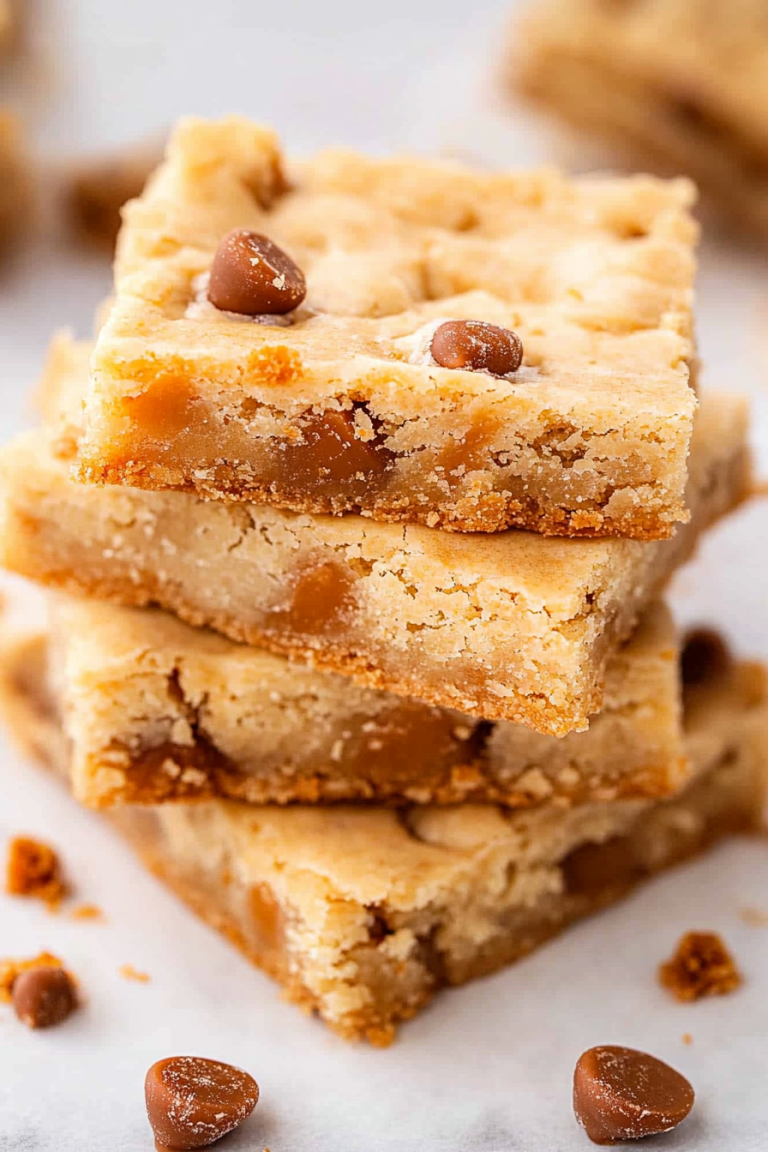
I love sugar cookie bars, and I know you will too!flavor is just pure comfort. They’re wonderfully sweet, with a lovely vanilla essence that just sings. They have that signature slightly crisp edge and a soft, chewy center that’s utterly addictive. Then there’s the simplicity. Honestly, this recipe is a dream. You can whip up the dough in minutes, press it into the pan, and have warm, delicious bars ready to go. No chilling, no rolling, no fancy cookie cutters needed! It’s the kind of recipe that makes you feel like a baking wizard, even if you’re just starting out. Plus, they are so cost-efficient. The ingredients are all pantry staples, making this a fantastic treat that won’t break the bank. I also adore their chocolate chipversatility. While they’re amazing on their own, they’re also a perfect canvas for all sorts of toppings and glazes. You can frost them, sprinkle them, or even add a swirl of jam. They’re wonderful served warm with a scoop of ice cream, or cooled and cut into perfect squares for a party. What I love most about these sugar cookie bars, compared to some other desserts, is their sheer adaptability. They’re the perfect treat for a quick weeknight craving, a holiday dessert table, or even just a simple afternoon pick-me-up. They really do tick all the boxes for a truly beloved dessert!
How to Make Sugar Cookie Bars
Quick Overview
The process for these Sugar cookie bars couldn’t be simpler. You’ll cream butter and sugar, add in your wet ingredients, then mix in your dry. Press this delightful dough into a baking pan, bake until golden, and then let them cool slightly before adding a simple glaze or your favorite frosting. It’s a straightforward, foolproof method that yields incredibly satisfying results every single time. You’ll be amazed at how quickly you can go from craving to cookie bar bliss!
Ingredients
For the Main Batter:
1 cup (2 sticks) unsalted butter, softened – Make sure it’s really soft, like you can easily dent it with your finger, but not melted. This makes a huge difference in how well it creams with the sugar. I always use good quality butter; it really does impact the flavor!
1 ½ cups granulated sugar – This gives them that lovely sweetness and helps with the chewy texture.
2 large eggs – Room temperature is best. If you forget to take them out, pop them in a bowl of warm water for about 5 minutes.
1 teaspoon vanilla extract – Don’t skimp here! A good vanilla extract makes all the difference. I’ve even tried a bit of almond extract mixed in, and oh my, that’s a delicious twist!
2 ½ cups all-purpose flour – Spooned and leveled, not scooped. Scooping can pack too much flour, leading to drier bars.
1 teaspoon baking powder – This helps them puff up just a little.
½ teaspoon salt – Balances out the sweetness beautifully.
For the Glaze:
2 cups powdered sugar – Sifted if you want a super smooth glaze, but honestly, I rarely do.
3-4 tablespoons milk (or heavy cream for richer glaze) – Start with 3 tablespoons and add more a teaspoon at a time until you reach your desired consistency.
½ teaspoon vanilla extract – For that extra touch of flavor.
Step-by-Step Instructions
Step 1: Preheat & Prep Pan
First things first, let’s get your oven preheated to 350°F (175°C). Then, grab a 9×13 inch baking pan. You can grease it really well with butter or cooking spray, or even better, line it with parchment paper, leaving some overhang on the sides. This makes lifting the bars out so much easier later on. Trust me, this parchment trick is a game-changer!
Step 2: Mix Dry Ingredients
In a medium bowl, whisk together your all-purpose flour, baking powder, and salt. Just a quick whisk to make sure everything is evenly distributed. This simple step helps ensure your leavening agent and salt are spread throughout the batter, preventing any pockets of saltiness or dense spots. It also gets a little air into the flour, which is always a good thing.
Step 3: Mix Wet Ingredients
In a large bowl, cream together the softened butter and granulated sugar. Beat them with an electric mixer (or a whisk and some serious arm power!) until the mixture is light and fluffy. This usually takes about 2-3 minutes. Then, beat in the eggs one at a time, followed by the vanilla extract. Make sure each egg is fully incorporated before adding the next. You want this mixture to look smooth and well-combined.
Step 4: Combine
Now, gradually add the dry ingredients to the wet ingredients. Mix on low speed, or by hand, just until combined. Be careful not to overmix! Overmixing can develop the gluten in the flour too much, which can lead to tougher bars. You’re looking for a soft dough that’s just come together. It might seem a little crumbly at first, but keep mixing until it forms a cohesive dough.
Step 5: Prepare Filling
This step is actually for the *glaze*, not a filling for the bars themselves! So, once your bars are baked and cooling, you’ll whisk together the powdered sugar, 3 tablespoons of milk, and vanilla extract in a small bowl. Keep whisking until smooth. If it’s too thick, add more milk, a teaspoon at a time, until it’s pourable but not too runny. You want a nice, thick but spreadable consistency.
Step 6: Layer & Swirl
Take about two-thirds of your sugar cookie dough and press it evenly into the bottom of your prepared baking pan. It can be a little sticky, so wetting your fingers or using a spatula can help. Don’t worry about it being perfectly smooth; it will spread as it bakes. Then, dollop spoonfuls of the remaining dough over the top. You can either just leave it as is for a more rustic look, or gently press and swirl the top dough into the bottom layer with a knife or toothpick to create a marbled effect. I love the swirled look!
Step 7: Bake
Bake in your preheated oven for 20-25 minutes, or until the edges are lightly golden brown and the center is set. A toothpick inserted into the center should come out with moist crumbs attached, not wet batter. Keep an eye on them towards the end, as ovens can vary. I usually find 23 minutes is my sweet spot.
Step 8: Cool & Glaze
Once they’re done baking, let the bars cool in the pan on a wire rack for at least 15-20 minutes. This is crucial for them to set up properly. While they’re still warm (but not piping hot), you can pour the prepared glaze over the top and spread it evenly. The warmth of the bars will help the glaze spread beautifully. Let the glaze set for another 10-15 minutes before slicing.
Step 9: Slice & Serve
Once the glaze has set, lift the bars out of the pan using the parchment paper overhang. Place them on a cutting board and cut them into squares. I usually get about 16-20 bars, depending on how thick I slice them. They are delicious served warm, at room temperature, or even chilled. Enjoy every perfect bite!
What to Serve It With
These sugar cookie bars are so wonderfully versatile, they fit in everywhere! For Breakfast, they’re a delightful treat alongside a steaming mug of coffee or a glass of milk. I like to cut them into smaller squares for a little morning indulgence. For Brunch, they elevate any spread! Arrange them on a pretty platter, perhaps with a dusting of powdered sugar or a few fresh berries. They pair beautifully with mimosas or a light fruit juice. As Dessert, they’re a showstopper. Serve them warm with a scoop of vanilla bean ice cream – it’s pure bliss! You can also dress them up with sprinkles, chocolate drizzle, or even a dollop of whipped cream. For Cozy Snacks, these are just perfect. Grab a bar with your afternoon tea or a glass of cold milk for that ultimate comfort food experience. My family loves these after school with a glass of chocolate milk. We’ve also had them at casual get-togethers, potlucks, and movie nights, and they’re always a huge hit. They’re the kind of treat that feels special without being fussy, making them a go-to for any occasion.
Top Tips for Perfecting Your Sugar Cookie Bars
Over the years, I’ve learned a few tricks that I think really make these sugar cookie bars sing. For the batter, the most important thing is to make sure your butter is truly softened, not melted. If it’s melted, your bars will spread too much and end up thin and dry. For mixing, don’t go crazy with the electric mixer once you add the flour. Just mix until it’s *barely* combined. You want to avoid developing too much gluten, which can make your bars tough. If it still looks a little floury, that’s okay; the residual heat and moisture will take care of it. When it comes to pressing the dough into the pan, a trick I love is to slightly dampen my hands or use the bottom of a measuring cup or glass to get an even layer. This prevents the dough from sticking to your fingers. For the glaze, patience is key. Let the bars cool for a bit before glazing. If they’re too hot, the glaze will melt and run off. If they’re completely cold, the glaze might be too thick to spread evenly. Warm is the sweet spot. And if you’re making the glaze and it seems too thick, just add milk, a teaspoon at a time, until it’s perfectly pourable. I’ve also experimented with different ingredient swaps, and while this recipe is classic, you can have fun! A touch of lemon zest in the batter adds a bright note, or a sprinkle of coarse sugar on top before baking adds a lovely crunch. For baking, every oven is different. Start checking around the 20-minute mark. You want the edges to be golden, but the center should still look soft and slightly underdone. They’ll continue to bake a bit as they cool in the pan. If you’re worried about over-baking, err on the side of slightly underdone; they’ll still be delicious and wonderfully chewy.
Storing and Reheating Tips
One of the best things about these sugar cookie bars is how well they keep! For Room Temperature Storage, once the glaze is fully set, you can cover the pan tightly with plastic wrap or transfer the bars to an airtight container. They’ll stay fresh and delicious for about 3-4 days. Make sure they are completely cooled before covering, otherwise, you’ll get condensation, which isn’t ideal. If you live in a very warm or humid climate, you might want to opt for refrigerator storage even before the 3-4 days are up. For Refrigerator Storage, you can keep them in an airtight container for up to a week. They might become slightly firmer in the fridge, but they’re still fantastic, especially if you let them come back to room temperature for a bit before serving. Just make sure the container is well-sealed to prevent them from absorbing other odors. When it comes to Freezer Instructions, these bars freeze beautifully! Cut them into individual squares and wrap each one tightly in plastic wrap, then place them in a freezer-safe bag or container. They’ll last for up to 2-3 months. To thaw, simply remove them from the freezer and let them sit at room temperature for about 30-60 minutes. For the Glaze Timing Advice, if you plan to freeze unfrosted bars, that’s perfectly fine! You can glaze them after thawing. However, if you do glaze them before freezing, make sure the glaze is completely set before wrapping and freezing. Some glazes can become sticky or a bit soft when thawed, so sometimes it’s best to frost them just before serving, especially if you’re taking them to an event.
Frequently Asked Questions
Final Thoughts
I truly hope you give these sugar cookie bars a try! They are such a simple, straightforward recipe, but the results are always so incredibly rewarding. They capture that classic, comforting sugar cookie flavor in a way that’s just so easy and approachable for any home baker. Whether you’re looking for a quick treat for yourself, a crowd-pleasing dessert for a party, or just a sweet way to make an ordinary day feel a little more special, these bars are your answer. They’re forgiving, delicious, and always a guaranteed hit. If you love these, you might also enjoy my recipe for [Link to a similar cookie recipe] or my classic [Link to another sweet treat recipe]. I can’t wait to hear what you think of these sugar cookie bars! Please leave a comment below with your thoughts or share any variations you try. Happy baking, and enjoy every single sweet, chewy bite!
sugar cookie bars
Ingredients
Cookie Bars
- 1.5 cups unsalted butter room temperature (3 sticks / 340 g)
- 2 cups granulated sugar
- 2 large eggs room temperature
- 2 large egg yolks
- 1 tablespoon vanilla extract
- 1 teaspoon almond extract
- 4 cups all-purpose flour
- 1 teaspoon kosher salt
- 1 teaspoon baking powder
Buttercream Frosting
- 1 cups unsalted butter room temperature (2 sticks / 227 g)
- 4 cups confectioners' sugar
- 1 teaspoon vanilla extract
- pinch kosher salt
- 2 tablespoons whole milk as needed
- rainbow sprinkles for topping
Instructions
Preparation Steps
- Preheat oven to 350°F (175°C). Spray a 9x13-inch baking dish with nonstick cooking spray.
- In the bowl of a stand mixer, cream together the butter and sugar until well-combined (about 2 minutes).
- With the mixer on low, add in the eggs and egg yolks, mixing until well incorporated.
- Turn off the mixer and scrape the sides of the bowl.
- With the mixer back on low, add the vanilla and almond extract.
- In a separate bowl, whisk together the flour, salt, and baking powder.
- With the mixer on low, gradually add the flour mixture, about 1 cup at a time, mixing until just combined after each addition.
- Press the batter into the prepared baking dish.
- Bake for 20–25 minutes, or until the edges are lightly golden and a toothpick inserted in the center comes out clean.
- Remove from the oven and let cool as you make the buttercream frosting.
- For the frosting: Combine the butter, sugar, vanilla, and salt in the bowl of a stand mixer fitted with a paddle attachment.
- Start mixing on low speed until the sugar is incorporated with the butter. Increase the mixing speed to high and beat until smooth and fluffy, about 2 minutes.
- Adjust the consistency with milk as needed (use 1-3 tablespoons).
- Spread buttercream over the cooled sugar cookie bars and top with sprinkles.