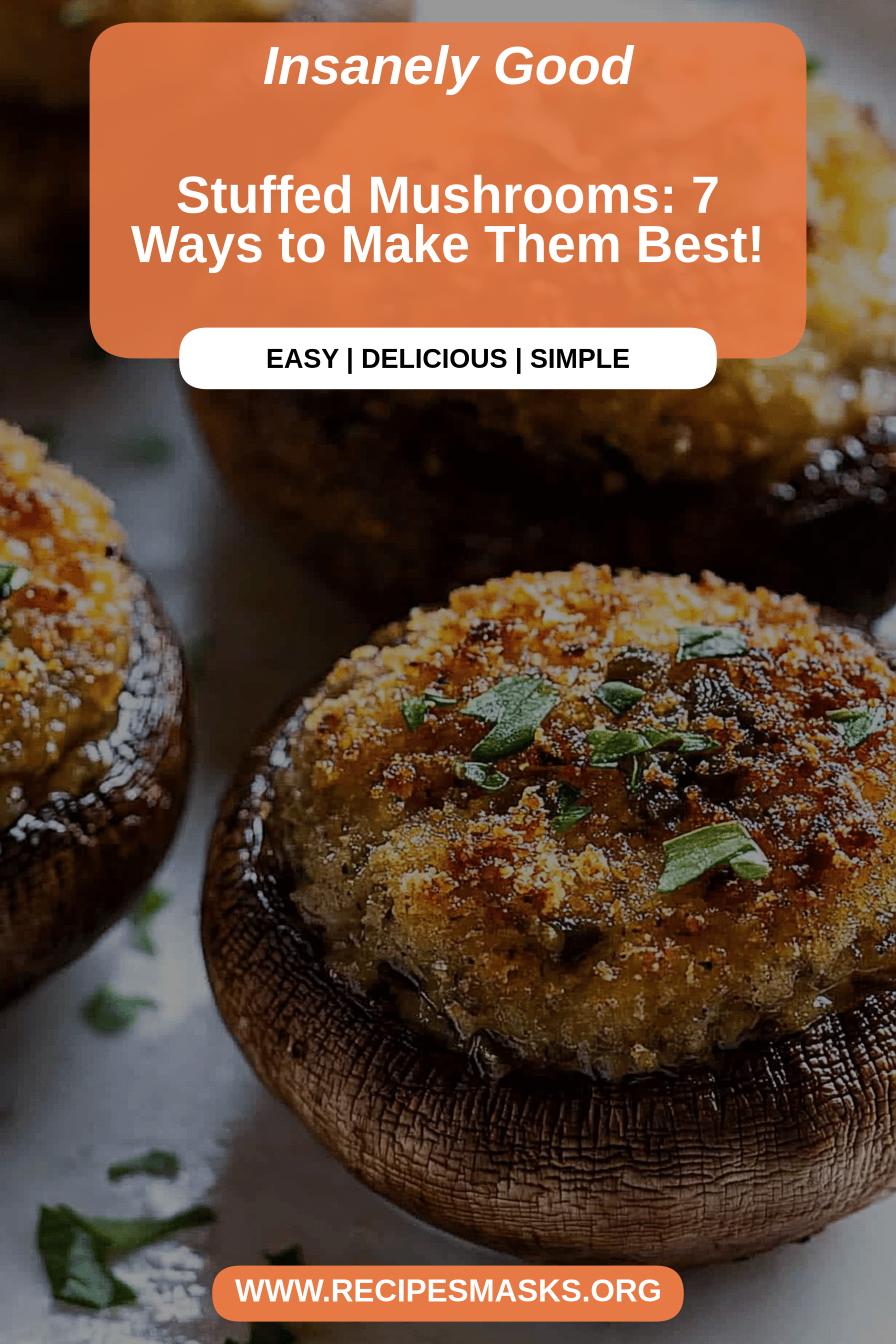
Oh, these stuffed mushrooms! Honestly, they’re one of those recipes that just feels like a warm hug. I remember the first time I made them for a holiday gathering, and within minutes, every single one was gone. I’m talking gone, vanished, like they’d sprouted little legs and walked away! My Aunt Carol, who is notoriously picky, even went back for seconds, and that, my friends, is high praise indeed. They’re just so darn delicious – savory, a little bit creamy, and perfectly bite-sized. If you’re looking for a crowd-pleaser that doesn’t require hours in the kitchen, especially during those hectic holiday seasons or even just a busy weeknight when you want something special without the fuss, these are an absolute lifesaver. They’re kind of like the sophisticated, yet incredibly easy, cousin to a classic cheese ball, but in individual, bite-sized form. You can’t go wrong with these stuffed mushrooms!
What are stuffed mushrooms?
So, what exactly are these little wonders? At their heart, stuffed mushrooms are simply fresh mushrooms, usually the cremini or white button variety, with their stems removed and their caps filled with a delicious mixture. Think of it as a savory little edible cup. The filling is where the magic really happens, though! It’s usually a combination of things like breadcrumbs, cheese, herbs, and maybe some garlic or onion for extra punch. The whole thing gets baked until the mushrooms are tender and the filling is golden and bubbly. It’s essentially a flavor explosion packed into a convenient, bite-sized package. They’re fantastic because they feel fancy, but are surprisingly simple to pull together. You can customize the filling to your heart’s content, which is why I love them so much – they’re never boring!
Why you’ll love this recipe?
There are so many reasons why this stuffed mushroom recipe has earned a permanent spot in my recipe rotation. First and foremost, the flavor is just out of this world. You get that earthy, savory taste from the mushrooms, perfectly complemented by the rich, cheesy, herby filling. It’s a combination that just sings! And honestly, the simplicity is a huge win. Even if you’re not a seasoned chef, you can whip these up without breaking a sweat. I’ve tested this with friends who are just starting out in the kitchen, and they’ve had perfect results every time. Plus, they’re incredibly budget-friendly. Mushrooms are usually pretty affordable, and the other ingredients are pantry staples. You don’t need fancy, expensive items to make something truly spectacular. What I love most, though, is their versatility. They’re not just for holidays; they’re perfect as an appetizer for a dinner party, a side dish for a weeknight meal, or even just a comforting snack. They’re a fantastic alternative to those more involved appetizers, and I’ve found that people are always asking for the recipe. They truly stand out without demanding all your time and energy.
How do I make stuffed mushrooms?
Quick Overview
Making these stuffed mushrooms is a breeze! You’ll basically clean your mushrooms, whip up a quick filling, stuff those mushroom caps generously, and then bake them until they’re tender and the tops are beautifully golden. The whole process is straightforward, and I promise, even if you’re short on time, you can have these ready to impress. The minimal effort required for such a satisfying result is what makes this recipe a true winner for me, especially on those nights when you want something delicious without a lot of fuss.
Ingredients
For the Mushrooms: What are some good mushrooms to eat?
24-30 medium cremini mushrooms (about 1.5 to 2 pounds)
1 tablespoon olive oil (for wiping, optional)
A tiny pinch of salt and pepper (for seasoning the caps, if desired)
For the Filling:
8 ounces cream cheese, softened (this is key for a smooth filling!)
1/2 cup finely grated Parmesan cheese (plus extra for topping)
1/4 cup panko breadcrumbs (for that perfect crispness)
2 cloves garlic, minced (or 1 teaspoon garlic powder if you’re in a pinch)
2 tablespoons fresh parsley, finely chopped (or 1 teaspoon dried parsley)
1 tablespoon fresh chives, finely chopped (optional, but adds a lovely mild oniony note)
1/4 teaspoon black pepper
1/8 teaspoon salt (taste your cheese first, as it can be salty!)
Pinch of red pepper flakes (for a little warmth, optional)
For the Optional Glaze:
2 tablespoons unsalted butter, melted
1 teaspoon soy sauce or tamari
1/2 teaspoon Worcestershire sauce (check for vegan if needed!)
A tiny pinch of garlic powder
Step-by-Step Instructions
Step 1: Preheat & Prep Pan
First things first, let’s get that oven warmed up! Preheat your oven to 375°F (190°C). While the oven is heating, get a baking sheet ready. You can line it with parchment paper for super easy cleanup, or just give it a light spritz of cooking spray. This step is simple but important to ensure even baking and no sticking!
Step 2: Mix Dry Ingredients
In a medium bowl, combine the panko breadcrumbs, Parmesan cheese, minced garlic, chopped parsley, chives (if using), black pepper, salt, and red pepper flakes (if you like a little kick). Give it a good stir to make sure everything is well combined. This is where a lot of the flavor is built, so don’t skip this!
Step 3: Mix Wet Ingredients
In a separate, larger bowl, add your softened cream cheese. You want it to be nice and soft so it creams up beautifully. Add the remaining Parmesan cheese (about 1/4 cup) and any other wet ingredients that might go into your filling base. If you’re making a simple cream cheese filling, this is just the cream cheese itself.
Step 4: Combine
Now, add the dry ingredients from Step 2 into the bowl with the softened cream cheese. Mix everything together really well. I usually use a sturdy spoon or a spatula for this. You want to ensure the cream cheese is thoroughly incorporated into the breadcrumb and cheese mixture, creating a cohesive, thick filling that holds its shape. Don’t overmix, but make sure there are no pockets of plain cream cheese or dry breadcrumbs.
Step 5: Prepare Filling
This step is essentially the combining you did in Step 4. The goal is to have a thick, dippable consistency that will hold its shape when scooped into the mushroom caps. Taste the filling at this point and adjust seasoning if needed. Does it need a little more salt? A bit more pepper? This is your chance to perfect it. I sometimes add a tiny splash of lemon juice for brightness, but that’s just me!
Step 6: Layer & Swirl
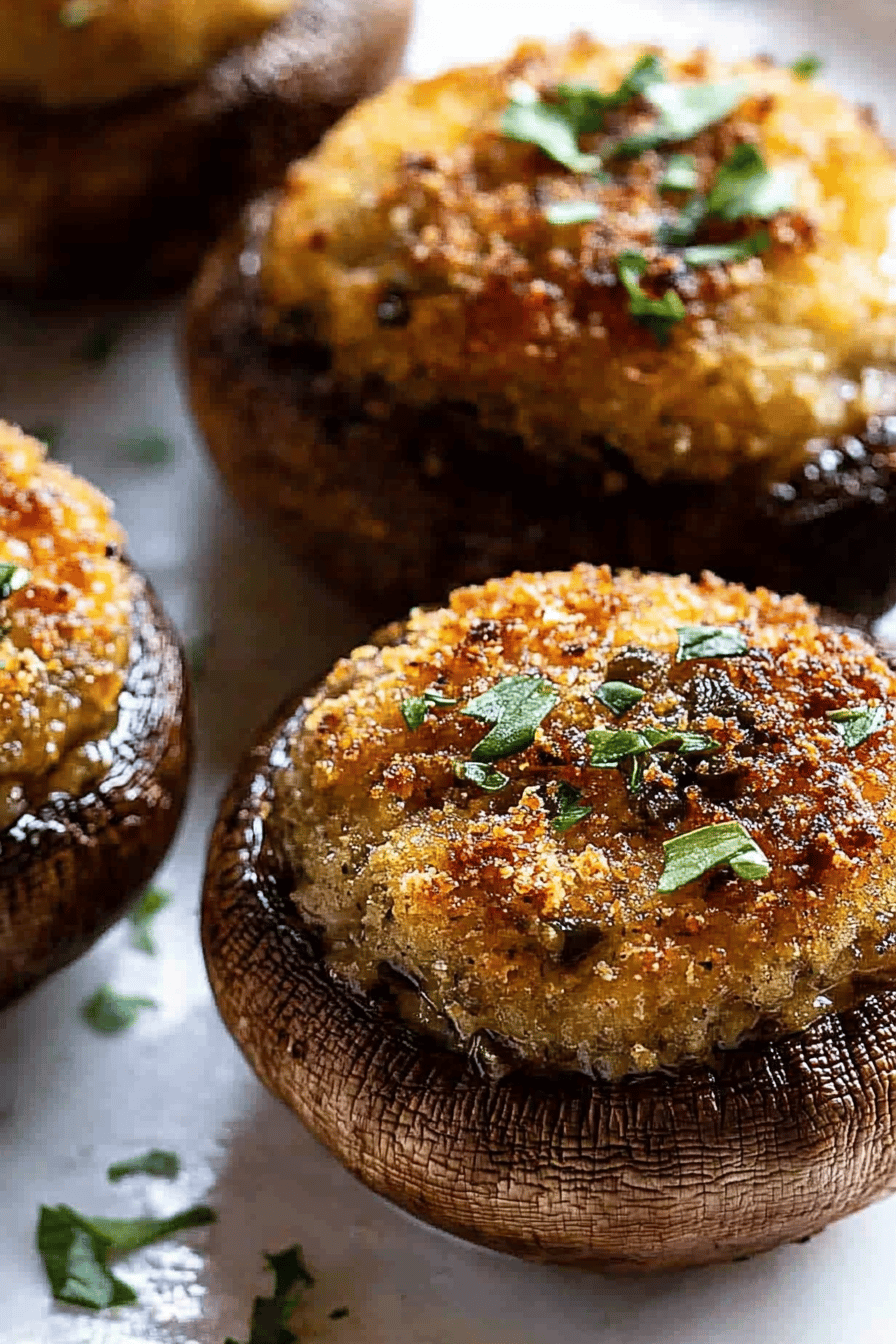
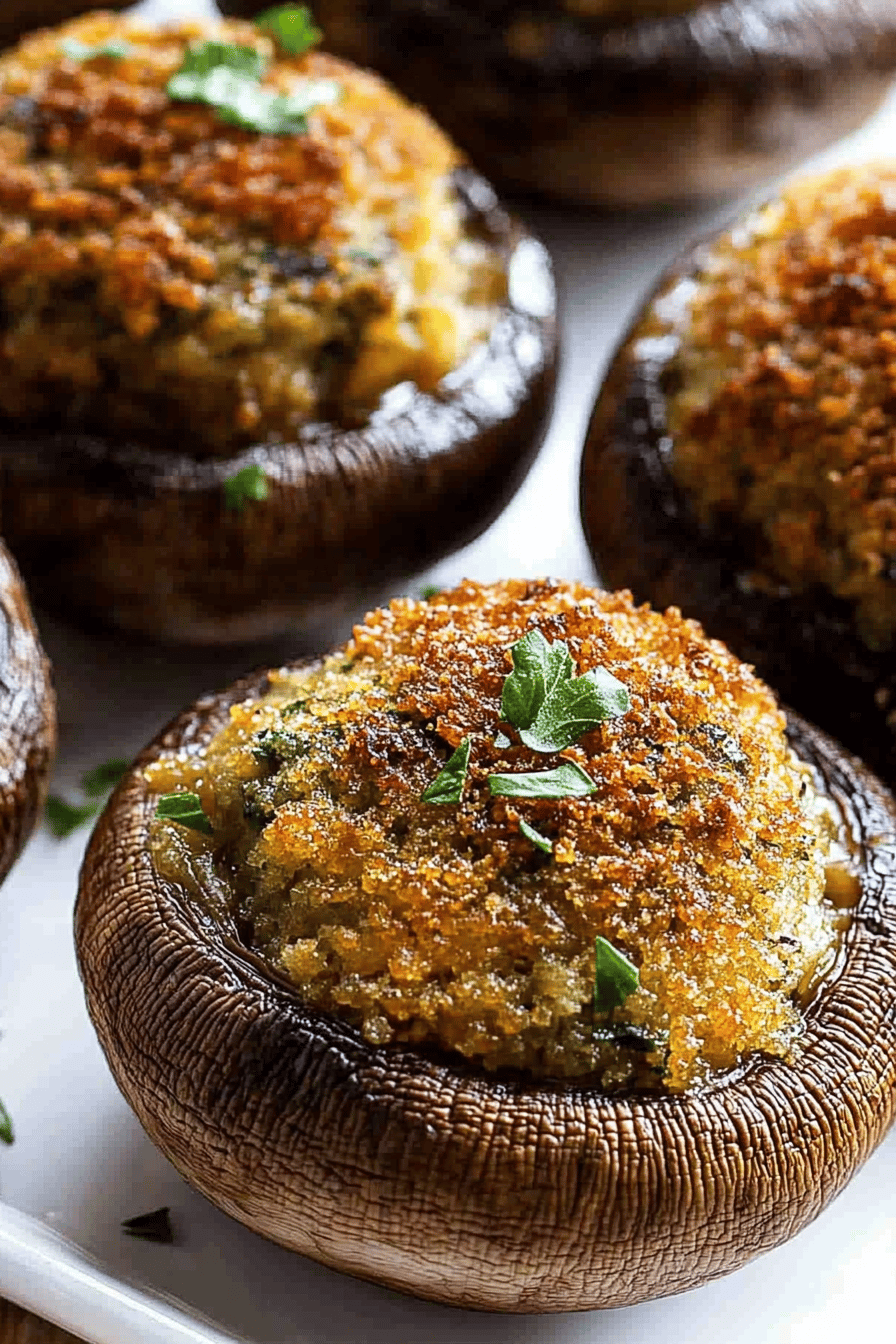
Clean your mushrooms. You can gently wipe them with a damp paper towel, or if they’re really earthy, a quick rinse and pat dry. Gently twist or cut out the stems. You can chop up the stems finely and add them to your filling for extra mushroom flavor – I often do this! Now, take a small spoon and generously stuff each mushroom cap. Don’t be shy! Pile the filling high; it will puff up slightly as it bakes. For an extra touch, you can sprinkle a little more Parmesan cheese on top of each stuffed mushroom.
Step 7: Bake
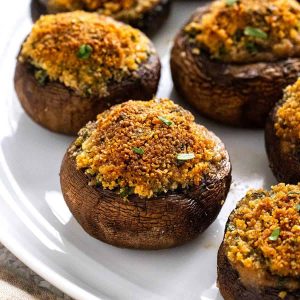
Arrange the stuffed mushrooms on your prepared baking sheet, ensuring they’re not too crowded. Pop them into the preheated oven. Bake for 18-25 minutes, or until the mushrooms are tender and the filling is hot and golden brown on top. The exact time will depend on the size of your mushrooms and your oven.
Step 8: Cool & Glaze
Once they’re done, carefully remove the baking sheet from the oven. Let them cool for just a few minutes. If you’re using the glaze, whisk together the melted butter, soy sauce, Worcestershire sauce, and garlic powder in a small bowl. Then, gently brush or drizzle this mixture over the hot stuffed mushrooms. This step adds an extra layer of savory goodness and a beautiful sheen!
Step 9: Slice & Serve
These are best served warm, so once they’ve cooled slightly, they’re ready to be devoured! Arrange them on a serving platter and watch them disappear. They’re perfect as is, or you can serve them with toothpicks for easy grabbing.
What to Serve It With
These stuffed mushrooms are so versatile, they can truly go with almost anything! For a lovely breakfast or brunch, I love serving them alongside a frittata or some fluffy scrambled eggs. They add a touch of elegance and savory goodness to the morning. Paired with a mimosa or a good cup of coffee, it’s a brunch that feels indulgent but is surprisingly easy to manage. As a more substantial appetizer for a dinner party, they are phenomenal. They pair beautifully with a charcuterie board, or as a warm starter before a roasted chicken or a hearty pasta dish. For a truly decadent dessert, believe it or not, I’ve had them as a savory indulgence after a rich meal – they’re like a savory bite to cleanse the palate. And for those cozy nights in, they’re the perfect companion to a glass of wine and a good book, or just as a comforting snack that feels a bit special. My family also loves them as a side dish when we have burgers or steak; it’s a nice way to get some veggies in, and they don’t even realize they’re eating them!
Top Tips for Perfecting Your Stuffed Mushrooms
Over the years, I’ve picked up a few tricks that make these stuffed mushrooms even better. For cleaning mushrooms, I always opt for wiping them with a damp paper towel. If they’re really dirty, a quick rinse under cold water followed by a very thorough pat-dry works, but you want to avoid them getting waterlogged. For the filling, the key is to ensure your cream cheese is truly softened. This makes it so much easier to mix and creates a much smoother, more homogenous filling. If you forget to soften it, you can pop it in the microwave for about 15-20 seconds, but be careful not to melt it! When it comes to the breadcrumbs, I swear by panko for their fantastic crunch. Regular breadcrumbs can work, but they can sometimes make the filling a bit too dense. Don’t be afraid to really pack the filling into the mushroom caps; they will shrink slightly as they bake, and a generous mound looks and tastes so much better. If you want to elevate your swirl game, try using a piping bag with a star tip for a fancy presentation, though a simple spoon works beautifully too. For ingredient swaps, if you don’t have parsley or chives, dried herbs work fine, just use about a third of the amount. And if you’re dairy-free, I’ve found that a good quality dairy-free cream cheese alternative can work, though the texture might be a little different. For baking, keep an eye on them. Every oven is different, and you want those mushrooms tender but not mushy, with a golden-brown topping. If you notice the tops browning too quickly, you can always loosely tent the baking sheet with foil.
Storing and Reheating Tips
These stuffed mushrooms are absolutely best enjoyed fresh, right out of the oven. However, they do store surprisingly well! Once they’ve cooled completely, you can store them in an airtight container in the refrigerator for up to 3 days. They won’t be quite as crisp as when they’re fresh, but they’re still delicious. For reheating, the best method is to pop them back into a moderate oven (around 350°F or 175°C) for about 10-15 minutes, or until heated through. This helps them regain some of their crispness. I wouldn’t recommend microwaving them if you can avoid it, as they can get a bit soggy. If you plan to freeze them, it’s best to do so before baking. Arrange the stuffed mushrooms on a baking sheet and freeze until solid, then transfer them to a freezer-safe bag or container. They can be kept frozen for up to 2 months. To bake from frozen, place them on a baking sheet and bake at 375°F (190°C) for about 25-30 minutes, or until heated through and golden. For the glaze, I always recommend adding it *after* they’ve been baked and reheated, just before serving, to keep that fresh, shiny finish. It really makes a difference!
Frequently Asked Questions
Final Thoughts
So there you have it – my absolute favorite stuffed mushrooms! They’re more than just an appetizer; they’re a little bit of joy on a plate. They’re proof that you don’t need complicated techniques or exotic ingredients to create something truly memorable. The combination of earthy mushrooms and that savory, cheesy filling is just perfection. I really hope you give these a try, especially if you’re looking for something that’s guaranteed to impress your guests (or just treat yourself!). They’re a testament to simple ingredients making something extraordinary. If you love this recipe, you might also enjoy my baked brie dip or my mini quiches – they’re other easy crowd-pleasers that get rave reviews! I can’t wait to hear how yours turn out, so please leave a comment below and let me know what you think, or share your own creative filling variations. Happy cooking!
Classic Stuffed Mushrooms
Ingredients
Main Ingredients
- 0.5 cup Panko breadcrumbs
- 0.25 cup Grated Parmesan cheese
- 0.25 cup Finely chopped fresh parsley
- 1 clove Garlic, minced
- 0.125 teaspoon Salt
- 0.125 teaspoon Black pepper
- 24 large Mushrooms, stems removed and chopped
- 2 tablespoon Olive oil
Instructions
Preparation Steps
- Preheat your oven to 375°F (190°C).
- In a medium bowl, combine the Panko breadcrumbs, Parmesan cheese, chopped mushroom stems, parsley, minced garlic, salt, and pepper. Mix well.
- Brush the mushroom caps with olive oil and place them on a baking sheet.
- Generously stuff each mushroom cap with the breadcrumb mixture.
- Bake for 18-20 minutes, or until the mushrooms are tender and the topping is golden brown.
- Let cool slightly before serving.