Oh, I am SO excited to share this with you today! This Stuffed Chicken Breast recipe is genuinely one of my all-time favorites, the kind of dish that makes everyone at the table light up. I remember the first time I perfected this, my little one took one bite and his eyes just went wide. He declared it “the best dinner ever!” and honestly, that’s all the validation I needed. It’s not just delicious; it’s surprisingly simple once you get the hang of it, which is a huge win for me on busy weeknights. Think of it as a more elegant, incredibly flavorful cousin to your average weeknight chicken dinner. If you’ve ever struggled with dry, boring chicken, or just want something that feels a bit special without being fussy, you’ve landed in the right place. This stuffed chicken breast is about to become your new go-to!

What is Stuffed Chicken Breast?
So, what exactly *is* this magical stuffed chicken breast we’re talking about? At its heart, it’s chicken breast that’s been lovingly butterflied or pocketed, then filled with a delicious, savory mixture before being baked to juicy perfection. The “stuffing” is where the real fun begins, and it can be anything your heart desires – from creamy cheeses and sautéed veggies to herbaceous breadcrumbs or even a rich meat filling. My version leans into a wonderfully creamy, cheesy, and slightly herby center that just oozes out when you cut into it. It’s less about a complicated technique and more about creating a flavor explosion inside something familiar. It’s essentially taking a humble chicken breast and giving it a luxurious, flavor-packed surprise waiting for you. It’s comfort food that looks and tastes incredibly sophisticated, which is a total win-win in my book!
Why you’ll love this recipe?
Honestly, there are so many reasons why this particular stuffed chicken breast recipe has earned a permanent spot in my recipe rotation. First off, the FLAVOR is just out of this world. The chicken stays unbelievably moist and tender thanks to the filling, and that combination of juicy chicken with the creamy, savory center is pure bliss. Seriously, the smell that fills the house while it’s baking is enough to make anyone’s stomach rumble! Then there’s the SIMPLICITY. I know “stuffed” can sometimes sound intimidating, but trust me, it’s totally approachable. Once you do it once, you’ll see how easy it is, and it feels like you’ve really accomplished something special. It’s also incredibly COST-EFFECTIVE. Chicken breasts are usually pretty budget-friendly, and the filling ingredients are simple pantry staples. You get a restaurant-quality meal without the restaurant price tag! And the VERSATILITY is another huge plus. While I have a favorite filling, you can totally switch it up. Craving something with a bit of a kick? Add some jalapeños. Love mushrooms? Sauté some in with the spinach. It’s a fantastic canvas for your favorite flavors. What I love most about this is that it’s a real crowd-pleaser. It’s elegant enough for guests but comforting enough for a weeknight family dinner. It’s a true lifesaver when you want to impress without stressing!
How do I make a Stuffed Chicken Breast?
Quick Overview
The process is really straightforward: you’ll prepare your chicken breasts by creating a pocket, then mix up a delightful filling, stuff it in, and bake until golden and cooked through. The key is to not overstuff, and to ensure the chicken is cooked to the perfect internal temperature. It’s a simple assembly line of deliciousness that results in a moist, flavorful stuffed chicken breast every single time. You’ll be amazed at how quickly it comes together, making it perfect for even the busiest of evenings.
Ingredients
For the Chicken Breast:
4 boneless, skinless chicken breasts (about 6-8 oz each)
Salt and freshly ground black pepper, to taste
For the Creamy Spinach & Cheese Filling:
1 tablespoon olive oil
1 clove garlic, minced
4 cups fresh spinach, roughly chopped (about 4 oz)
4 oz cream cheese, softened
1/4 cup shredded Parmesan cheese
2 tablespoons chopped fresh parsley
1/4 teaspoon nutmeg (optional, but it adds a lovely depth!)
Salt and freshly ground black pepper, to taste
For the Optional Glaze:
2 tablespoons butter
1 tablespoon honey or maple syrup
1 teaspoon Dijon mustard
Step-by-Step Instructions
Step 1: Preheat & Prep Pan
First things first, let’s get your oven ready. Preheat it to 400°F (200°C). While the oven is warming up, grab a baking dish. I like to give mine a quick spray with cooking spray or a light brush of olive oil. This just ensures nothing sticks and makes cleanup a breeze. It’s a small step, but it’s one of those little things that make cooking more enjoyable.
Step 2: Mix Dry Ingredients
This recipe doesn’t really have a separate “dry ingredients” mix for the chicken itself, but you will season the chicken breasts generously with salt and pepper. Just sprinkle them all over, making sure to get both sides. This is your foundation for flavor, so don’t be shy!
Step 3: Mix Wet Ingredients (for Filling)**
In a skillet over medium heat, add the olive oil. Once it’s shimmering, toss in the minced garlic and cook for about 30 seconds until fragrant – be careful not to burn it! Now, add the chopped spinach. It will look like a LOT, but it wilts down considerably. Cook, stirring, until all the spinach is wilted and most of the moisture has evaporated, about 3-5 minutes. Remove from heat and let it cool slightly. Once cooled a bit, gently squeeze out any excess liquid from the spinach. This is a crucial step to avoid a watery filling!
Step 4: Combine (Filling)**
In a medium bowl, combine the softened cream cheese, shredded Parmesan, chopped parsley, and that pinch of nutmeg if you’re using it. Add the cooled, squeezed spinach. Season with salt and pepper to your liking. Mix everything together until it’s well combined and creamy. Taste it! This is your chance to adjust the seasoning. Does it need more salt? A touch more pepper? Make it perfect for you.
Step 5: Prepare Filling
This step is technically done in step 4, but it’s worth reiterating the importance of the filling. You want it to be flavorful and creamy, but not too wet. That’s why squeezing out the spinach is so vital. The texture should be spreadable but hold its shape. If it seems too thick, you can add a tiny splash of milk or cream, but usually, the cream cheese is enough to make it perfectly pliable.
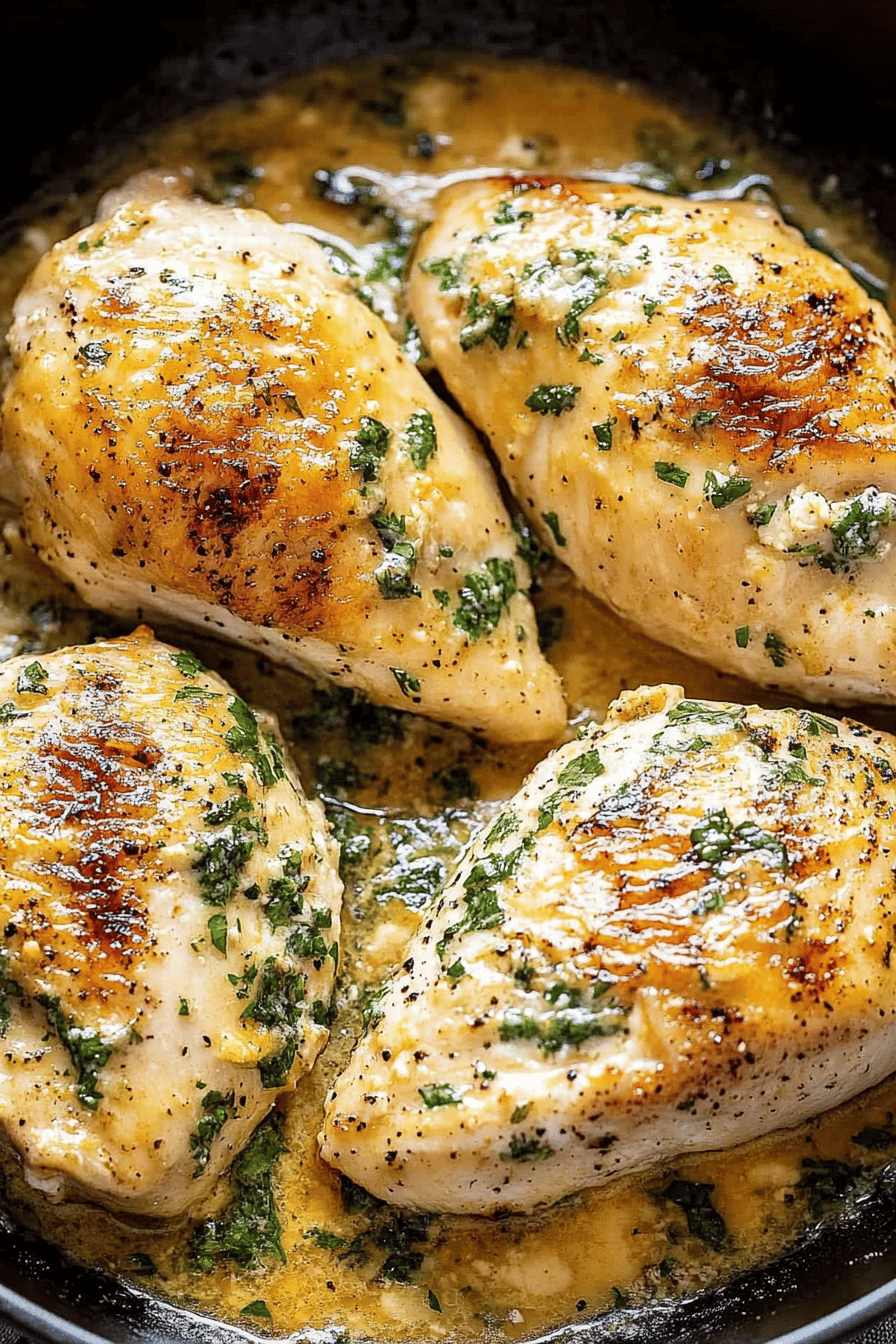
Step 6: Layer & Swirl (Stuff the Chicken)**
Now for the fun part! Take each chicken breast and place it on a cutting board. Using a sharp knife, carefully cut a pocket into the thickest side of each breast. You want to cut almost all the way through, but not all the way, creating a space to stuff. Be gentle so you don’t cut through the other side. Once you have your pockets, spoon the spinach and cheese filling generously into each one. Don’t overstuff them, or the filling might ooze out too much during baking. You can secure the opening with a toothpick if you’re worried about leakage, but I often find it stays put on its own.
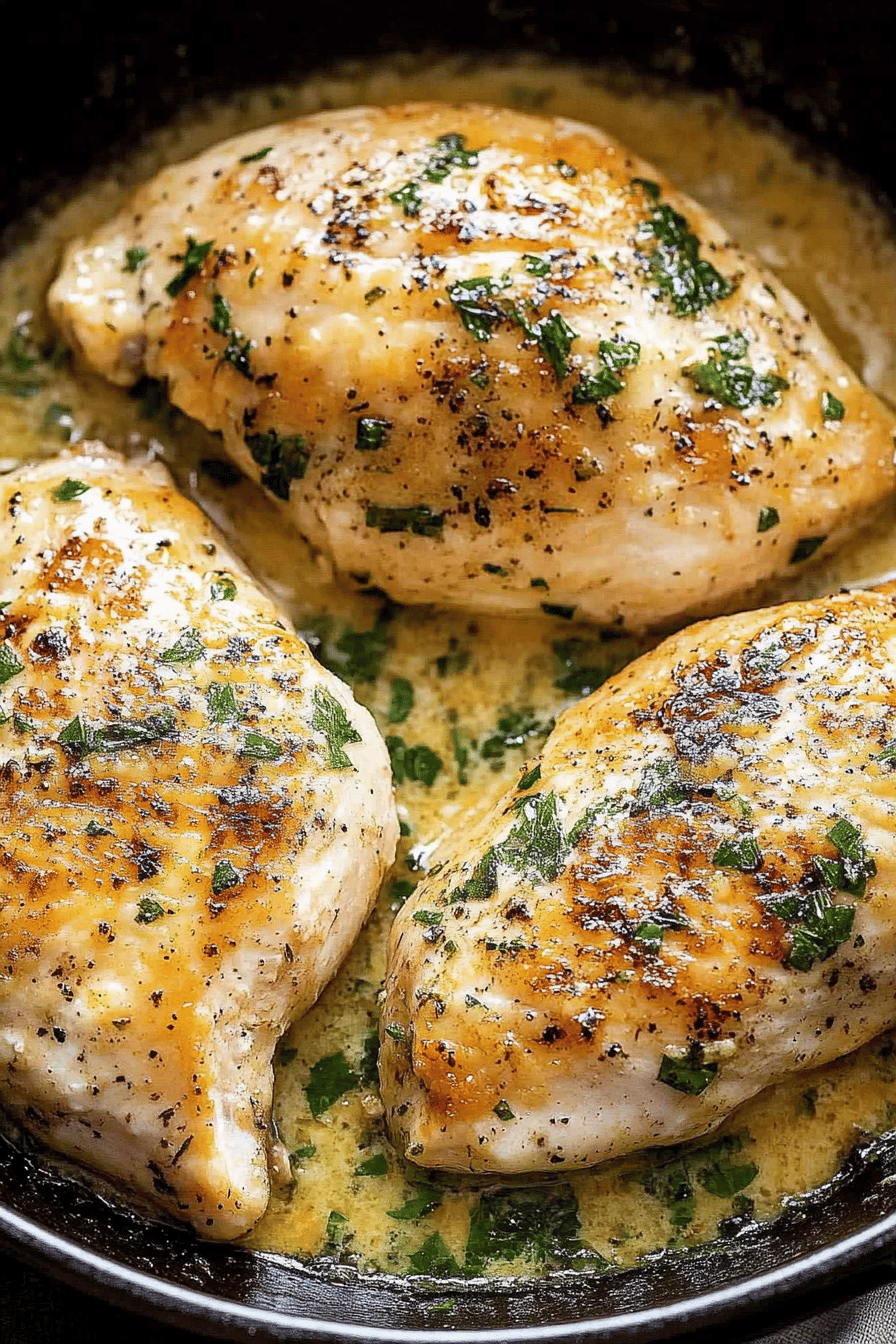
Step 7: Bake
Place the stuffed chicken breasts into your prepared baking dish. Bake in the preheated oven for 25-35 minutes, or until the chicken is cooked through and the internal temperature reaches 165°F (74°C) when tested with a meat thermometer. The exact time will depend on the thickness of your chicken breasts. You want the chicken to be golden and slightly puffed, and the filling to be melted and bubbly.
Step 8: Cool & Glaze
Once the chicken is cooked, carefully remove the baking dish from the oven. Let the stuffed chicken breasts rest for about 5-10 minutes before slicing. This resting period is super important for juicy chicken! While the chicken is resting, you can quickly whip up the optional glaze. In a small saucepan, melt the butter over medium heat. Stir in the honey (or maple syrup) and Dijon mustard. Cook for about a minute, stirring constantly, until the glaze is combined and slightly thickened. Brush this delicious glaze over the tops of the resting chicken breasts. It adds a lovely touch of sweetness and shine!
Step 9: Slice & Serve
After resting and glazing, slice the stuffed chicken breast into thick pieces. You’ll see that gorgeous, creamy filling spilling out, and the chicken will be incredibly moist. Serve immediately and watch everyone dive in!
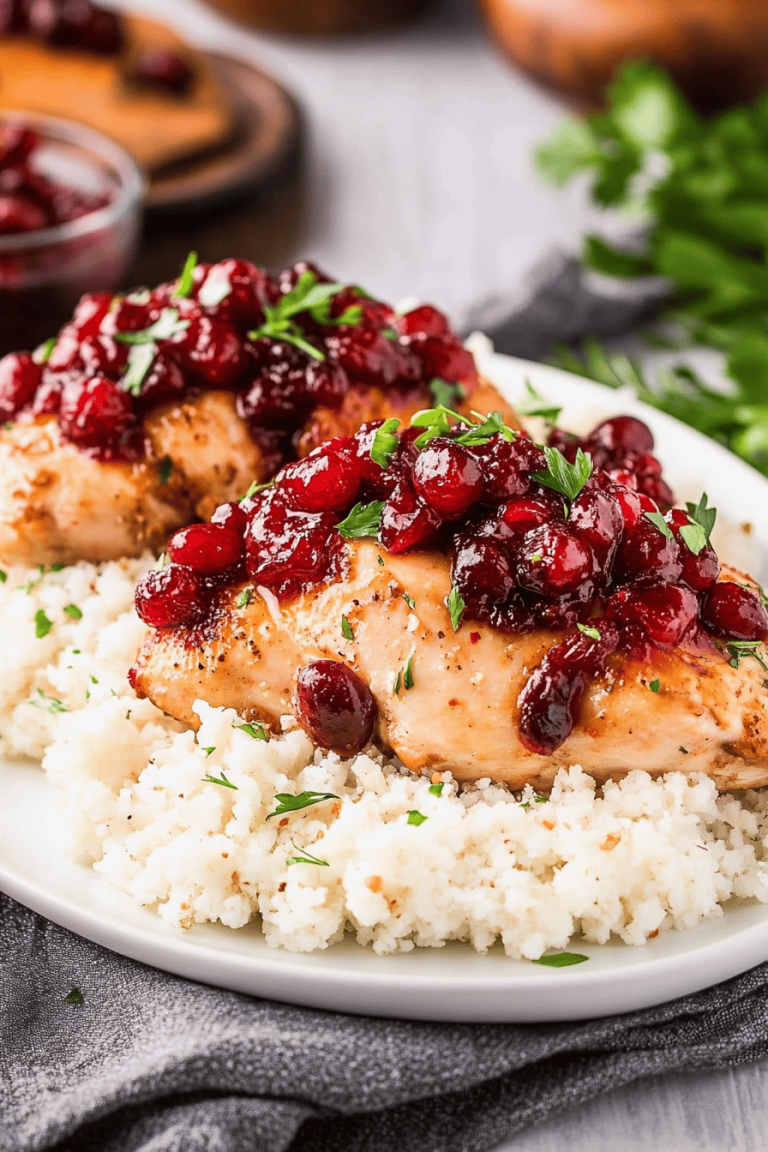
What to Serve It With
This stuffed chicken breast is so versatile, it practically goes with everything! For a lovely BREAKFAST or BRUNCH, I love serving it with some roasted breakfast potatoes and a side of fresh fruit salad. It feels so decadent and special for a weekend morning. If you’re looking for a more complete DINNER, it pairs beautifully with simple sides that let the chicken shine. Think a light, crisp green salad, some steamed asparagus, or roasted broccoli. mashed potatoes or a simple pilaf are also fantastic choices to soak up any extra delicious juices. For a COZY SNACK or a lighter meal, sometimes I’ll just serve a smaller portion with a crusty piece of bread for dipping. It’s also wonderful served over a bed of quinoa or rice. My kids love it with their favorite pasta, so that’s another win. The possibilities are really endless, and it always feels like a complete, satisfying meal.
Top Tips for Perfecting Your Stuffed Chicken Breast
I’ve made this stuffed chicken breast more times than I can count, and over the years, I’ve picked up a few tricks that make it even better. First, for the Zucchini Prep (if you’re using it in a different variation): always, always, *always* squeeze out as much moisture as humanly possible. Grating zucchini can release a ton of water, and a soggy filling is the enemy of a perfectly baked stuffed chicken breast. I usually press it with paper towels or even use a clean kitchen towel to wring it out thoroughly. When it comes to MIXING the filling, the key is to avoid overworking it, especially if you’re using a food processor for any part of it. You want that creamy, delicious texture, not a rubbery paste. Gentle is the name of the game. For SWIRL CUSTOMIZATION, if you decide to add other ingredients like sun-dried tomatoes or roasted red peppers, chop them finely and mix them evenly so you get flavor in every bite. If you’re feeling artistic, you can even swirl in a little pesto or tapenade into the cream cheese mixture before stuffing for a beautiful marbled effect. For INGREDIENT SWAPS, if you don’t have cream cheese, ricotta can work in a pinch, but it will be a little looser. You might need to add a touch more Parmesan to help it bind. For the spinach, kale is a great substitute, just make sure to cook it down a bit longer. And if you don’t have Parmesan, Pecorino Romano is a fantastic, sharper alternative. When it comes to BAKING, always use a meat thermometer! It’s the most reliable way to ensure your chicken is cooked perfectly – no dry, overcooked chicken here! Oven temperatures can vary, so getting familiar with how your oven bakes is helpful. If the filling starts to brown too quickly, you can always loosely tent the chicken with foil. For GLAZE VARIATIONS, a balsamic glaze or a simple lemon-butter sauce can be equally delicious if you’re not a fan of honey mustard. Just ensure the glaze is brushed on *after* baking and resting, so it doesn’t burn.
Storing and Reheating Tips
This stuffed chicken breast is fantastic for leftovers, which is a major win in my house! For ROOM TEMPERATURE storage, it’s best to get it into the fridge within two hours of cooking. It will keep well for a few days, but it’s most enjoyable when fresh. When storing in the REFRIGERATOR, make sure to let the chicken cool down completely before packing it away. I like to store leftovers in an airtight container. It will stay good in the fridge for about 3-4 days. If you’re thinking about FREEZER INSTRUCTIONS, this recipe freezes beautifully! Once the chicken is completely cooled, wrap each individual stuffed breast tightly in plastic wrap, then in a layer of aluminum foil, or place them in freezer-safe bags. It can be stored in the freezer for up to 2-3 months. To reheat from frozen, it’s best to thaw it overnight in the refrigerator first. Then, you can reheat it in a 350°F (175°C) oven until heated through, or gently in a covered skillet on the stovetop with a splash of broth. For the glaze, I usually recommend making a fresh batch for reheating if you can, as glazes can sometimes change texture upon freezing and reheating. If you’re reheating leftovers, you can gently warm the glaze in a small saucepan and brush it on just before serving.
Frequently Asked Questions
Final Thoughts
So there you have it – my absolute favorite stuffed chicken breast recipe! I truly hope you give this one a try. It’s the kind of dish that brings people together and makes mealtime feel a little more special, without any of the fuss. I love how versatile it is, how it stays incredibly moist, and how that creamy, cheesy filling just makes everything taste better. It’s a recipe that has truly earned its place in my heart (and on my dinner table!), and I’m so excited for you to experience it too. If you try it out, please let me know what you think in the comments below – I’d love to hear about your creations and any fun twists you come up with! And if you enjoyed this, you might also like my recipe for Lemon Herb Roasted Chicken or my Creamy Tuscan Chicken Pasta for more delicious chicken inspiration. Happy cooking, and I can’t wait to hear how yours turns out!

Stuffed Chicken Breast with Broccoli and Cheese
Ingredients
Main Ingredients
- 4 pieces Boneless, skinless chicken breasts about 6-8 ounces each
- 2 cups Broccoli florets steamed and finely chopped
- 1 cup Shredded cheddar cheese
- 0.5 cup Cream cheese softened
- 2 cloves Garlic minced
- 0.25 teaspoon Salt
- 0.125 teaspoon Black pepper
- 2 tablespoons Olive oil
Instructions
Preparation Steps
- Preheat your oven to 375°F (190°C).
- In a medium bowl, combine the chopped broccoli, cheddar cheese, softened cream cheese, minced garlic, salt, and pepper. Mix well until everything is evenly distributed.
- Place the chicken breasts on a cutting board. Using a sharp knife, carefully cut a horizontal pocket into the thickest side of each chicken breast, being careful not to cut all the way through.
- Generously stuff the pocket of each chicken breast with the broccoli and cheese mixture. Secure the opening with toothpicks if necessary.
- Heat the olive oil in an oven-safe skillet over medium-high heat. Sear the stuffed chicken breasts for about 2-3 minutes per side until golden brown.
- Transfer the skillet to the preheated oven. Bake for 25-30 minutes, or until the chicken is cooked through and the internal temperature reaches 165°F (74°C).
- Let the chicken rest for a few minutes before serving. Remove toothpicks before serving.