You know those recipes that just feel like a warm hug? This is one of them. Ever since I was a little kid, gathering in the kitchen with my grandma, the smell of sweet dough baking and a hint of vanilla has just felt like home. And these snowman cookies? Oh, they’re pure magic. They’re not just cookies; they’re little edible characters that bring out the kid in everyone. While other holiday cookies might be fussy or require a million steps, these snowman cookies are surprisingly simple, yet they look like you spent hours crafting them. They’re like the cozy sweater of the cookie world – comforting, approachable, and always a crowd-pleaser. If you love a good gingerbread or a classic sugar cookie, I guarantee you’re going to adore these, because they offer that same festive cheer with a unique, melt-in-your-mouth texture that’s just heavenly.
What are snowman cookies?
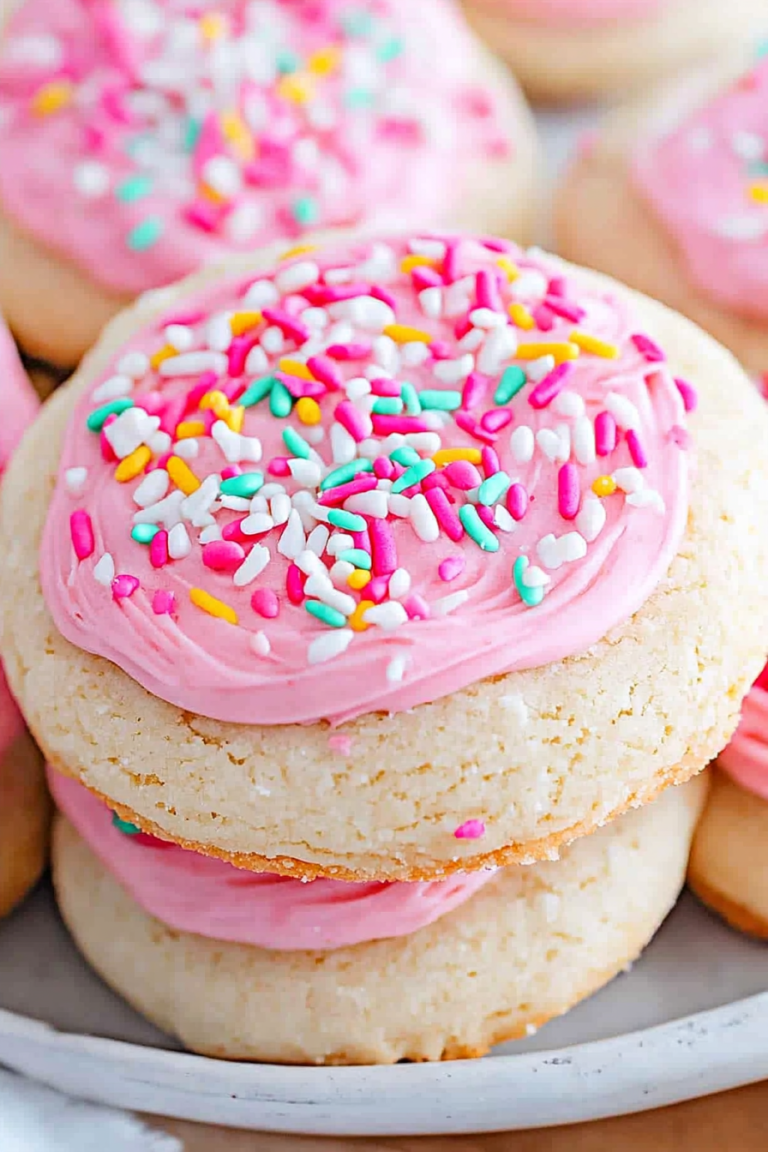
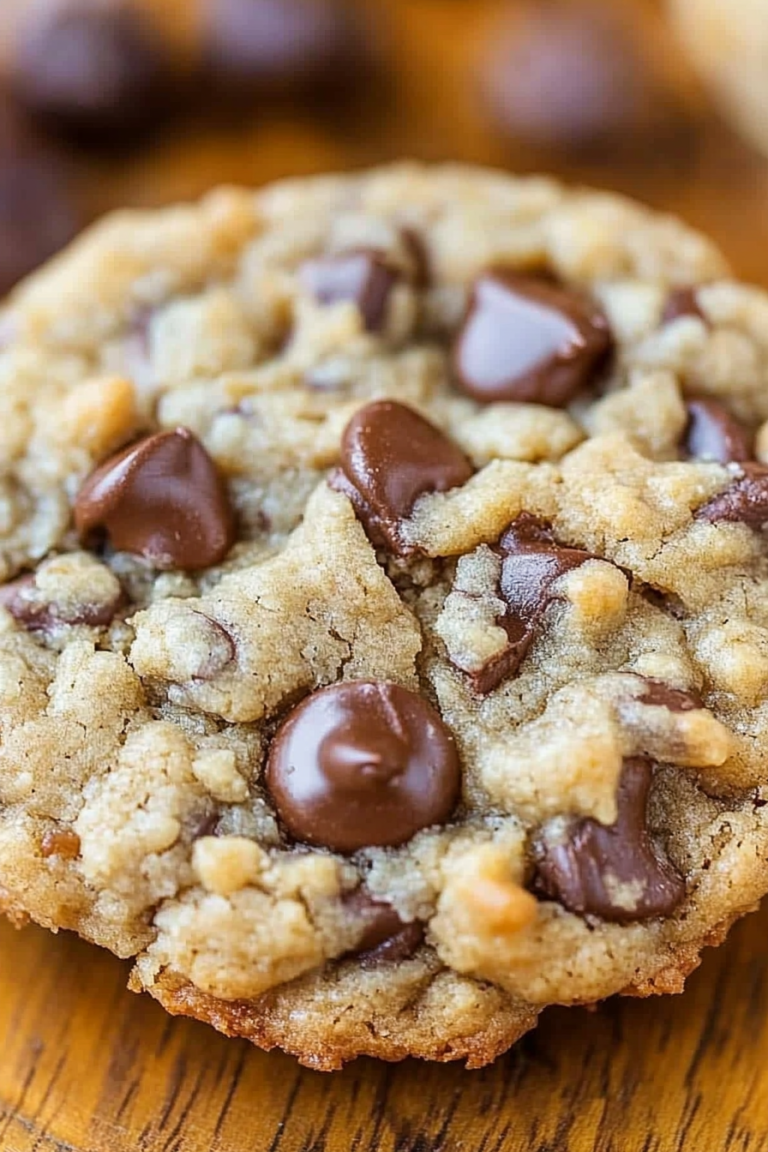
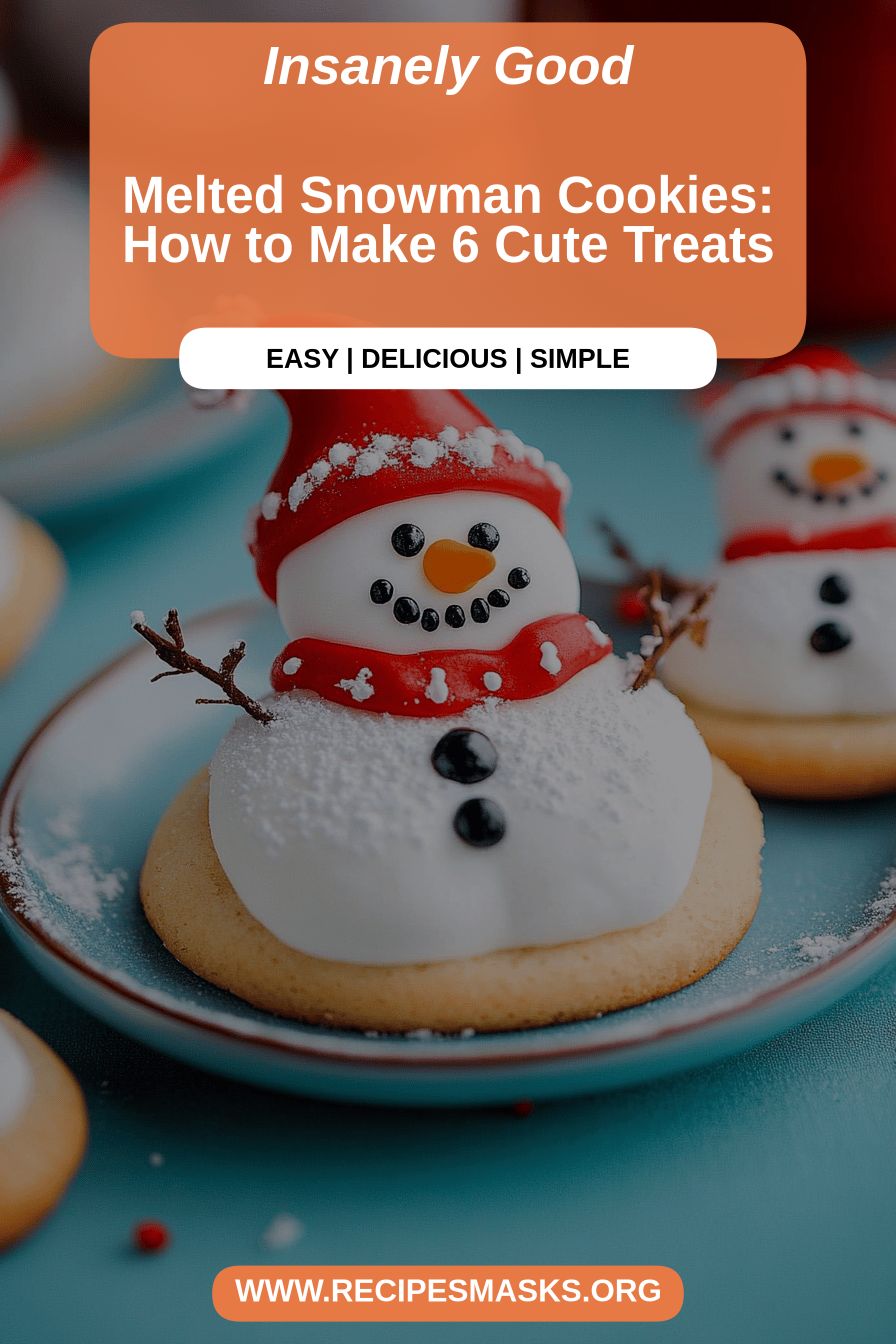
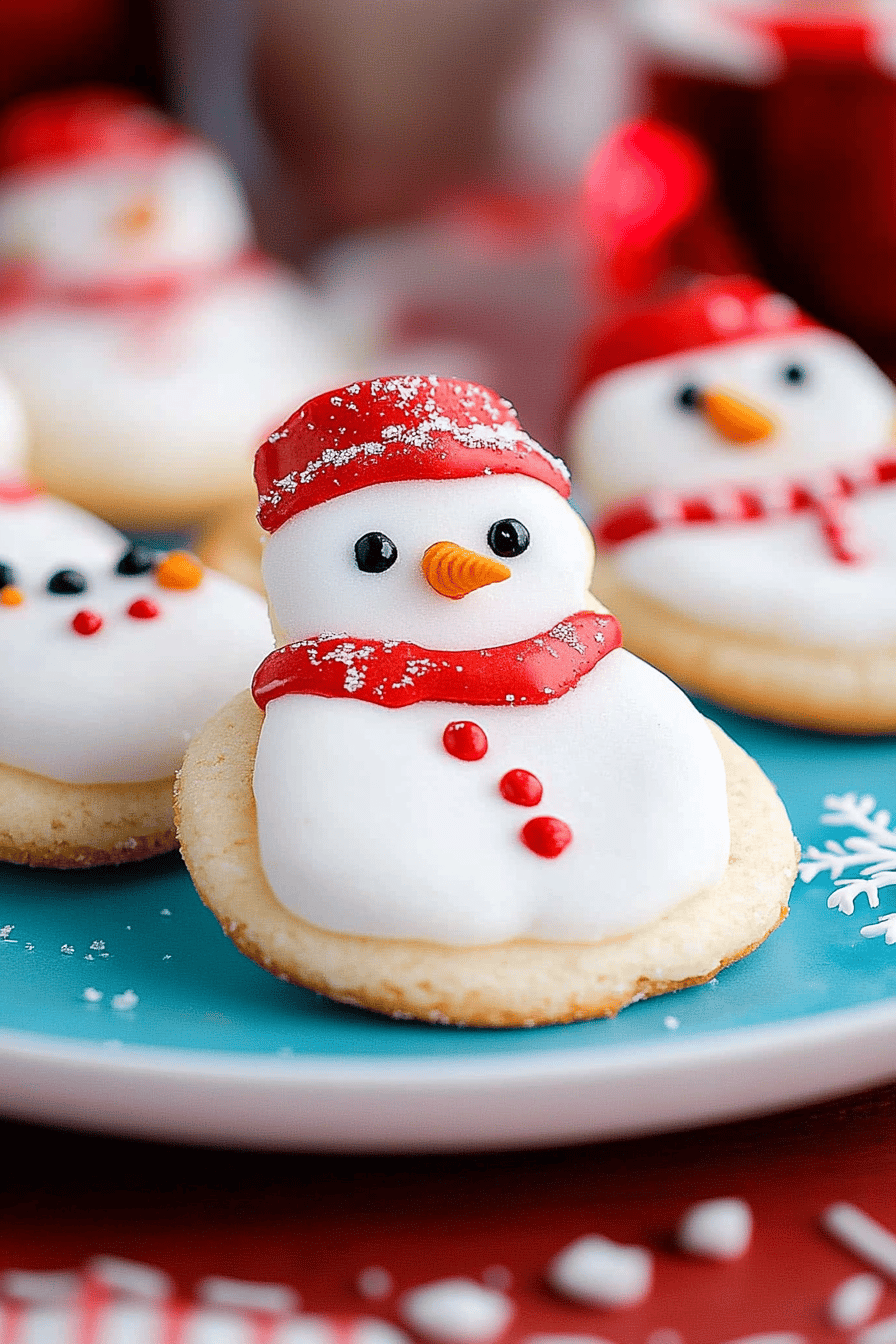
So, what exactly are these delightful little guys? Think of them as a playful, simplified take on a classic shortbread or butter cookie, but with a charming snowman shape! The magic usually comes from how they’re assembled – often using three different sized cookie cutters or even just shaping by hand. They’re typically a beautiful golden-brown, with a tender, crumbly texture that just melts on your tongue. The “snowman” aspect often comes to life with a simple glaze, maybe some candy details for eyes and buttons, and a little jaunty hat or scarf made from frosting or sprinkles. It’s essentially a celebration of simple ingredients coming together to create something wonderfully whimsical. They’re less about intricate decorating and more about capturing that joyful, festive spirit in a way that feels accessible to everyone, no matter your decorating skill level.
Why you’ll love this recipe?
Honestly, I could talk your ear off about why I adore these snowman cookies, but let me break down the highlights! First off, the **flavor**. They have this perfect balance of buttery richness and a subtle sweetness that isn’t overpowering. It’s just enough to make them utterly irresistible. And when you get that hint of vanilla (or maybe a touch of almond extract if you’re feeling adventurous!), it’s pure bliss. Second, the **simplicity** is a game-changer. Life gets busy, right? This recipe is a lifesaver. You don’t need any fancy equipment or super-specific techniques. It comes together pretty quickly, which means you can whip up a batch for an impromptu holiday gathering or just when a craving strikes. Plus, they’re surprisingly **cost-effective**. The ingredients are all pantry staples, so you won’t be breaking the bank to make a whole festive platter. And let’s not forget the **versatility**! These aren’t just for Christmas. You can easily adapt them for winter parties, kids’ bake sales, or just a fun afternoon project with the little ones. While I love a good sugar cookie, these snowman cookies have a special place in my heart because they’re a little more unique and always bring a smile. They’re perfect for those times you want something homemade and heartwarming without the stress.
How do you make a snowman cookie?
Quick Overview
This recipe is all about simple joy! We’ll mix up a straightforward, buttery dough, shape it into adorable little snowmen, bake them to golden perfection, and then add a simple glaze to make them truly shine. It’s a wonderfully forgiving recipe, which is why I love it so much. You don’t need to be a master baker to achieve gorgeous results. Just follow these easy steps, and you’ll have a batch of cheerful snowman cookies ready to impress!
Ingredients
For the Main Batter:
2 ½ cups all-purpose flour, plus more for dusting
1 teaspoon baking powder
½ teaspoon salt
1 cup (2 sticks) unsalted butter, softened (this is key! Make sure it’s nice and soft)
1 cup granulated sugar
1 large egg
2 teaspoons pure vanilla extract
For the Glaze:
1 ½ cups powdered sugar
2-3 tablespoons milk (or water for a thinner glaze)
½ teaspoon pure vanilla extract (optional, but lovely!)
Assorted sprinkles, edible markers, or small candies for decorating (like mini chocolate chips for buttons and eyes)
Step-by-Step Instructions
Step 1: Preheat & Prep Pan
First things first, let’s get our oven fired up. Preheat it to 350°F (175°C). Then, grab your baking sheets and line them with parchment paper. This makes cleanup a breeze and ensures your cookies won’t stick. Trust me, using parchment paper is a game-changer!
Step 2: Mix Dry Ingredients
In a medium bowl, whisk together the flour, baking powder, and salt. Whisking them together ensures the leavening agents are evenly distributed, which leads to a nice, even rise. You want this mixture to be light and well combined.
Step 3: Mix Wet Ingredients
In a large bowl, cream together the softened butter and granulated sugar until light and fluffy. This step is crucial for a tender cookie. Use an electric mixer if you have one, or a sturdy whisk and some elbow grease! Beat in the egg and vanilla extract until everything is well incorporated. It should look smooth and creamy.
Step 4: Combine
Gradually add the dry ingredients to the wet ingredients, mixing on low speed (or by hand) until just combined. Be careful not to overmix here! Overmixing can develop the gluten too much, resulting in tough cookies. Stop as soon as you don’t see any more dry streaks of flour.
Step 5: Prepare Filling
(This step is more for shaping, as this recipe doesn’t have a separate filling in the traditional sense. The “filling” is the cookie dough itself, and the “swirl” is the shape we create.)
Step 6: Layer & Swirl
This is where the fun really begins! Lightly flour your work surface and your rolling pin. Roll out the dough to about ¼-inch thickness. Now, use three different sized round cookie cutters to cut out your snowman shapes. You can cut out a large circle for the base, a medium for the middle, and a small one for the head. Alternatively, you can just roll small balls of dough and stack them up gently on the baking sheet before baking, or use a freehand snowman shape. I find using cookie cutters gives a nice, clean look, but don’t stress if they’re not perfect; they’re supposed to look homemade!
Step 7: Bake
Carefully place your snowman cookie shapes onto the prepared baking sheets, leaving a little space between them. Bake for 8-12 minutes, or until the edges are lightly golden. Keep a close eye on them, as ovens can vary. You want them baked through but not browned too much, so they stay nice and soft.
Step 8: Cool & Glaze
Let the cookies cool on the baking sheets for a few minutes before transferring them to a wire rack to cool completely. This is important! If you try to glaze them while they’re still warm, the glaze will just melt off. While the cookies are cooling, whisk together the powdered sugar, milk, and vanilla extract in a small bowl until smooth. You want a consistency that’s thick enough to coat the cookie but still pourable. If it’s too thick, add a tiny bit more milk; if it’s too thin, add a little more powdered sugar. Once the cookies are completely cool, dip them in the glaze or use a spoon to drizzle it over. Immediately add your decorations while the glaze is still wet – press on candy buttons, use edible markers for eyes, or add a sprinkle scarf. Get creative!
Step 9: Slice & Serve
Once the glaze has set, your adorable snowman cookies are ready to be enjoyed! They’re best served at room temperature. Arrange them on a festive platter and watch them disappear!
What to Serve It With
These snowman cookies are so versatile, they’re practically the life of any party! For **Breakfast**, they’re a delightful treat alongside a steaming mug of coffee or a tall glass of cold milk. Imagine waking up on a snowy morning and having one of these little guys with your breakfast – pure comfort! For **Brunch**, they add a touch of whimsy and elegance. I love to arrange them on a tiered stand with mini muffins and fresh fruit. They pair wonderfully with a sparkling cider or a festive mimosa. As **Dessert**, they’re a no-brainer. Serve them on a dessert buffet alongside other holiday treats, or package them up as sweet edible gifts. They’re the perfect ending to a rich meal. And for **Cozy Snacks**, they’re simply unbeatable. Curl up on the couch with a good book and a snowman cookie (or three!) and a cup of hot cocoa – it’s hygge perfection. My family loves them so much, we often have a “cookie decorating party” where everyone gets to personalize their own snowmen. It’s a tradition I truly cherish.
Top Tips for Perfecting Your Snowman Cookies
After making these snowman cookies more times than I can count, I’ve picked up a few tricks that I think you’ll find super helpful. For the **Zucchini Prep** (oops, wrong recipe, let’s stick to cookies!), let’s talk about the dough. When it comes to **Mixing Advice**, the biggest thing is not to overmix the dough once you add the flour. You want to mix until *just* combined. If you overwork it, you’ll end up with tough cookies, and nobody wants that! I learned this the hard way when I was younger, rushing through the process and wondering why my cookies weren’t as tender. For **Swirl Customization** (again, thinking of a different recipe!), let’s focus on the decorating. When you’re glazing, make sure your cookies are *completely* cool. I’ve tried glazing warm cookies, and it’s a sticky, messy disaster. The glaze consistency is also key – aim for something like thick honey. If it’s too thin, your decorations will slide off. For **Ingredient Swaps**, if you don’t have baking powder, you *can* sometimes use baking soda, but you’ll need to adjust the recipe significantly for acidity, so I highly recommend sticking to baking powder for this one. For **Baking Tips**, always know your oven. Ovens can run hot or cold, so the first batch is always a test. If yours tends to bake quickly, pull them out a minute or two sooner. If it runs cooler, they might need a minute or two longer. The edges should be just golden, and the centers should look set, not wet. For **Glaze Variations**, don’t be afraid to play with colors! A drop of food coloring in the glaze can make for rainbow snowmen, or you can use different colored sprinkles for scarves and hats. Sometimes I even add a tiny bit of cinnamon or nutmeg to the dough for a little extra warmth.
Storing and Reheating Tips
These snowman cookies are generally pretty forgiving when it comes to storage. If you’re keeping them at **Room Temperature**, make sure they are completely cooled and the glaze is set. Store them in an airtight container, and they should stay fresh for about 3-5 days. I like to put parchment paper between layers if I’m stacking them, just to prevent the glaze from sticking. For **Refrigerator Storage**, it’s usually not necessary unless you live in a very humid climate. If you do refrigerate them, use an airtight container, and they’ll be good for about a week, but they might lose a bit of their crispness. **Freezer Instructions** are great if you want to get a head start on holiday baking. Wrap the cooled, unglazed cookies tightly in plastic wrap, then in foil, and freeze for up to 2-3 months. Thaw them at room temperature before glazing and decorating. For **Glaze Timing Advice**, I always wait until the cookies are completely cool before glazing. If you plan to freeze them, it’s best to freeze them unglazed. Then, thaw them, and glaze them fresh. This way, the glaze and decorations will look their absolute best. If you do glaze them before freezing, make sure the glaze is *fully* hardened, but be aware that condensation can sometimes affect the finish.
Frequently Asked Questions
Final Thoughts
Honestly, these snowman cookies are more than just a recipe; they’re a little piece of edible joy. They bring that nostalgic, heartwarming feeling that only homemade treats can deliver. They’re easy enough for a busy weeknight, impressive enough for a holiday party, and fun enough to make with the kids. If you enjoyed making these, you might also love my easy gingerbread cookies or my classic shortbread recipe for more festive baking fun! I truly hope you give these snowman cookies a try. They’re a simple way to add a little bit of magic to your day. Please, tell me in the comments below how yours turned out, or share your favorite decorating ideas! I can’t wait to hear all about it. Happy baking, everyone!
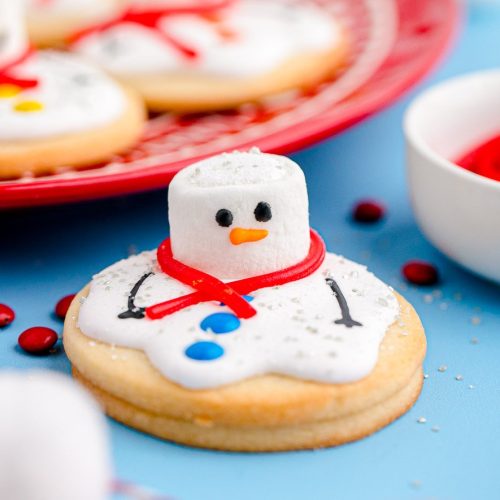
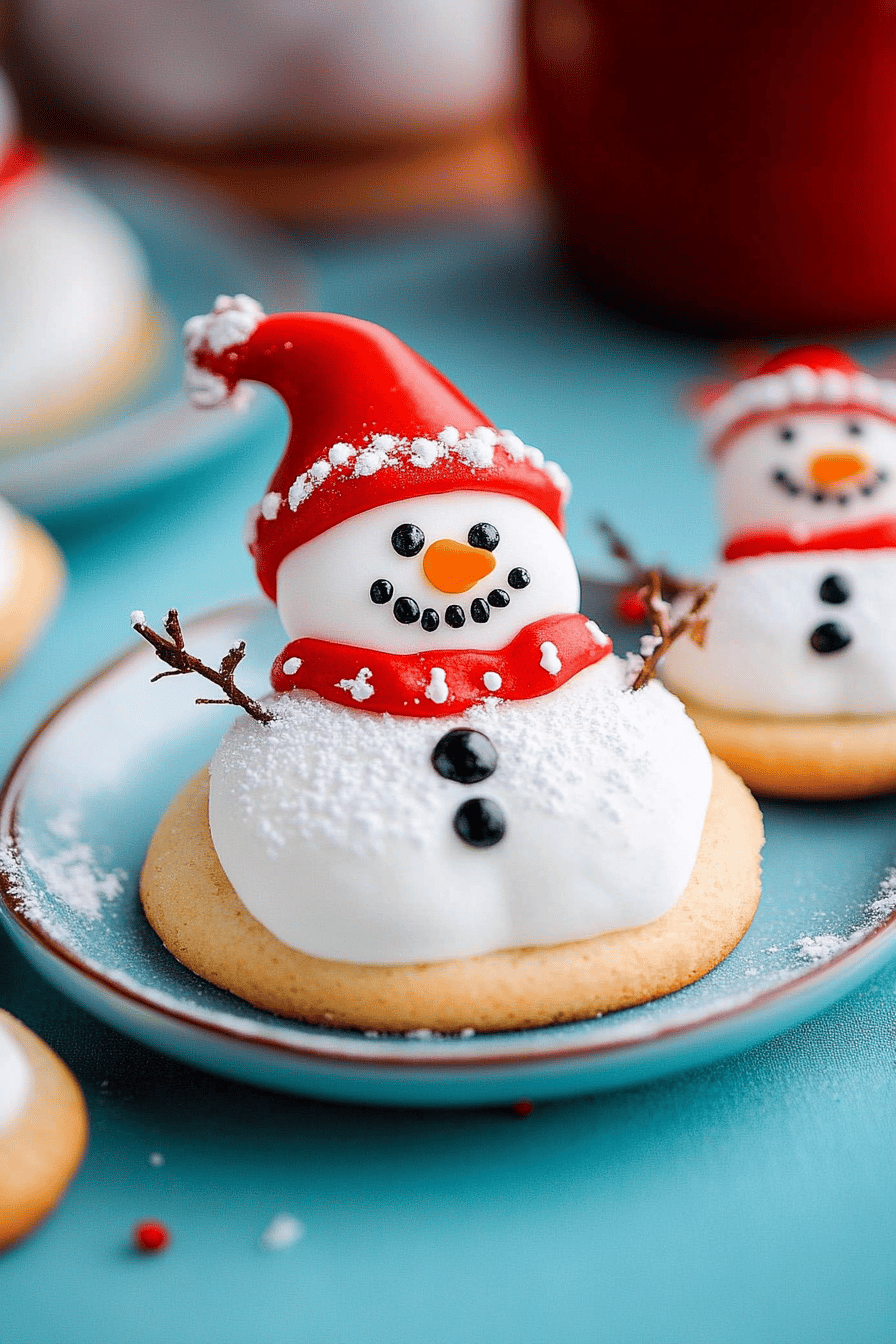
Melted Snowman Cookies
Ingredients
Cookie Dough
- 1 cup unsalted butter softened
- 1.5 cup granulated sugar
- 2 large eggs
- 1 teaspoon vanilla extract
- 4 cup all-purpose flour
- 1 teaspoon baking soda
- 0.5 teaspoon salt
Decorations
- 1 bag white candy melts
- 24 black edible marker
- 24 orange candies (e.g., Reese's Pieces) for the nose
- 24 red candies (e.g., M&M's) for buttons
- 1 black licorice laces for arms
Instructions
Preparation Steps
- Cream together the softened butter and granulated sugar until light and fluffy.
- Beat in the eggs one at a time, then stir in the vanilla extract.
- In a separate bowl, whisk together the flour, baking soda, and salt.
- Gradually add the dry ingredients to the wet ingredients, mixing until just combined. Do not overmix.
- Divide the dough in half, flatten each half into a disc, wrap in plastic wrap, and refrigerate for at least 1 hour.
- Preheat oven to 350°F (175°C). Line baking sheets with parchment paper.
- On a lightly floured surface, roll out the dough to about 1/4 inch thickness.
- Cut out round cookie shapes using a cookie cutter.
- Place cookies on the prepared baking sheets, leaving about 2 inches between them.
- Bake for 10-12 minutes, or until the edges are lightly golden.
- Let cookies cool on the baking sheets for a few minutes before transferring them to a wire rack to cool completely.
- Melt the white candy melts according to package directions. Dip one end of each cookie into the melted candy to create the 'melted' effect.
- While the candy coating is still wet, place an orange candy for the nose, and two red candies for buttons on the lower half of the cookie.
- Use the black edible marker to draw eyes and a mouth on the upper half of the cookie.
- Cut small pieces from the licorice laces and insert them into the sides of the cookie for arms. Let the candy coating set completely.