
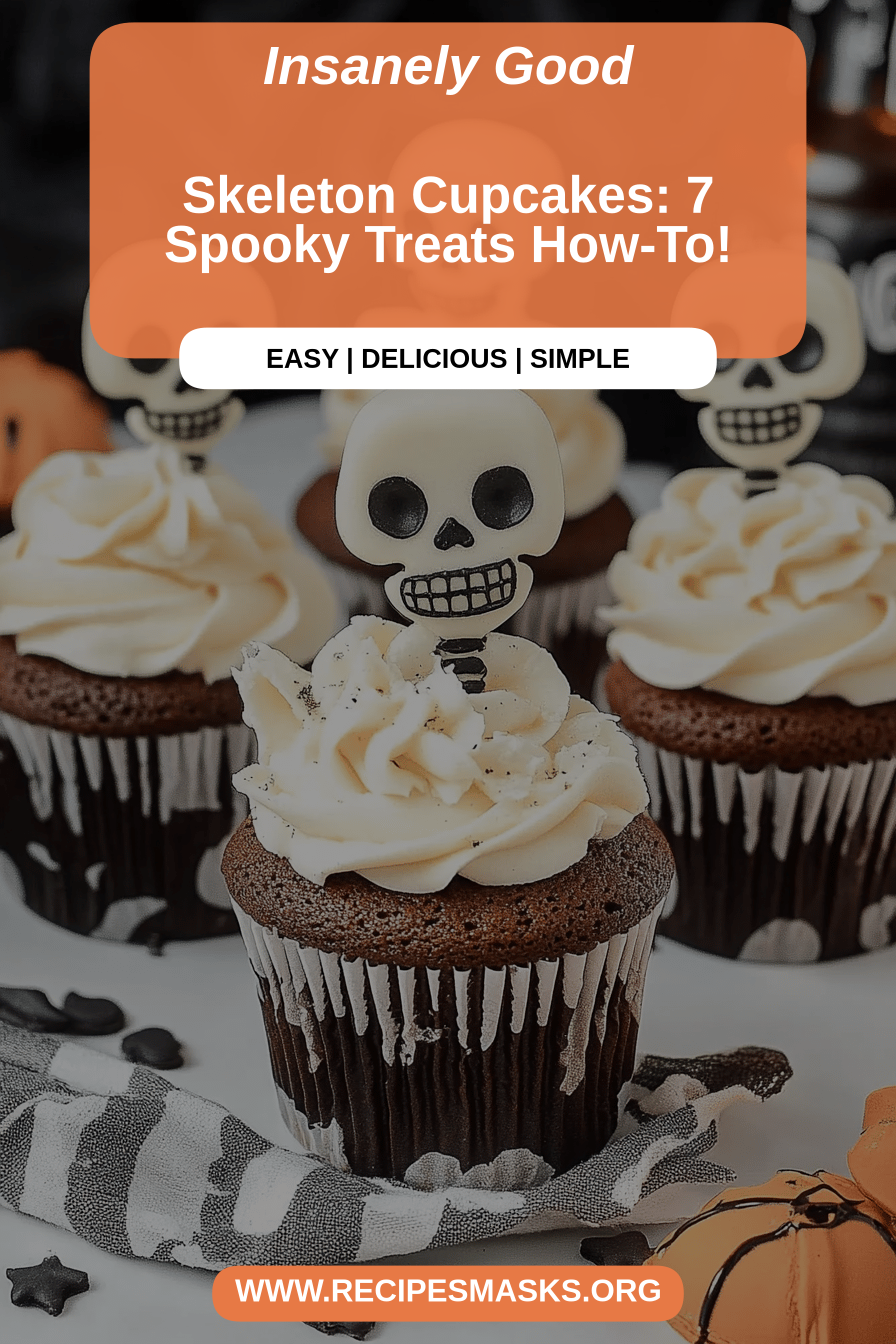
You know, sometimes I get these cravings that just won’t quit, and this time of year, with the leaves changing and that crisp autumn air, I start thinking about all things cozy and a little bit spooky. My absolute favorite way to lean into that feeling? These incredible skeleton cupcakes. They’re not just for Halloween, though they are a total showstopper then! I’ve found myself making them for birthday parties, surprise afternoon treats, or just when the mood strikes for something a little bit fun and visually striking. Honestly, they’re a delightful twist on a classic chocolate cupcake, but with a surprise swirl that looks so cool. If you’ve ever loved a good, moist Chocolate Cake, you are going to adore these. They’re like a little slice of edible art that tastes just as good as it looks. Forget those elaborate carved pumpkins; these skeleton cupcakes are my go-to for a memorable dessert that’s surprisingly easy to pull off.
What are Skeleton Cupcakes?
So, what exactly are skeleton cupcakes? At their heart, they’re moist, rich chocolate cupcakes with a beautifully marbled center. The “skeleton” part comes from the visual effect created by a specific swirling technique and a contrasting colored filling that peeks through when you slice into them. Think of it like a beautiful cross-section where light and dark colors intertwine, reminiscent of a skeletal pattern or even a galaxy. It’s not just about looks, though; the contrast in flavors is pretty fantastic too! We’re using a deep, dark chocolate cake base and a creamy, often lighter-colored filling, which adds another layer of deliciousness. It’s essentially a gourmet-looking treat that’s incredibly approachable for home bakers. It’s the kind of dessert that makes people say, “Wow, you made these?!” and then they dive in with delight.
Why you’ll love this recipe?
There are so many reasons why this recipe has become a staple in my kitchen, and I just know you’re going to fall in love with it too. First off, the flavor is out of this world. The chocolate cake itself is wonderfully moist and deeply chocolaty, not too sweet, so it’s perfect with that slightly tart swirl. It’s the kind of cake that makes your kitchen smell absolutely divine while it’s baking, you know? And then there’s the simplicity. Now, I know a swirled filling might sound intimidating, but trust me, it’s surprisingly straightforward, and I’ll walk you through every step. This recipe is also incredibly budget-friendly. Most of the ingredients are pantry staples, so you don’t need to break the bank to create something spectacular. Plus, they’re so versatile! You can serve these as a simple dessert, dress them up for a party, or even pack them for a school bake sale (if you can bear to part with them!). What I love most is the “wow” factor they bring without a ton of extra effort. They’re a step up from your basic cupcake, offering a delightful surprise inside that keeps people guessing and coming back for more. They truly stand out, much like a perfectly executed chocolate lava cake, but in cupcake form and with that incredible visual appeal.
How do you make skeleton cupcakes?
Quick Overview
Making these skeleton cupcakes involves a few distinct stages, but none of them are complicated. We’ll start by whipping up a quick, no-fuss chocolate cake batter. Then, we’ll prepare a simple, creamy filling that will become the “skeleton” effect. The magic happens when we layer these together and give them a gentle swirl before baking. The result is a stunning, marbled cupcake that’s moist, flavorful, and incredibly impressive. It’s honestly one of those recipes that looks like it took hours, but you can have these ready to impress in under an hour and a half, including baking time!
Ingredients
For the Main Batter:
2 cups all-purpose flour
1 ¾ cups granulated sugar
¾ cup unsweetened cocoa powder (the good stuff makes a difference!)
1 ½ teaspoons baking soda
1 teaspoon baking powder
½ teaspoon salt
2 large eggs, at room temperature
1 cup buttermilk, at room temperature (you can make your own by adding 1 tbsp lemon juice or vinegar to 1 cup milk and letting it sit for 5 minutes)
½ cup vegetable oil (or other neutral oil)
1 teaspoon vanilla extract
1 cup hot brewed coffee (this is my secret weapon for deep chocolate flavor!)
For the Filling:
8 ounces cream cheese, softened (full-fat is best here for creaminess)
½ cup powdered sugar, sifted
¼ cup sour cream or plain Greek Yogurt (for tang and moisture)
1 teaspoon vanilla extract
Optional: 1-2 drops of black or dark food coloring for a more pronounced skeleton effect (use sparingly!)
Step-by-Step Instructions
Step 1: Preheat & Prep Pan
First things first, get your oven preheating to 350°F (175°C). Line a standard 12-cup muffin tin with pretty paper liners. I always find that using liners makes cleanup a breeze, and it gives them a nice finished look right from the start. Make sure you have all your ingredients measured out and ready to go – it really speeds things up!
Step 2: Mix Dry Ingredients
In a large mixing bowl, whisk together the flour, granulated sugar, cocoa powder, baking soda, baking powder, and salt. Whisking them well ensures everything is evenly distributed, which is crucial for a consistent rise and texture. You want it to look like a uniform, dark sandy mixture.
Step 3: Mix Wet Ingredients
In a separate medium bowl, whisk together the eggs, buttermilk, vegetable oil, and vanilla extract until well combined. Don’t over-whisk; just get it nicely incorporated. This mixture will be added to your dry ingredients.
Step 4: Combine
Pour the wet ingredients into the bowl with the dry ingredients. Mix on low speed with an electric mixer (or vigorously with a whisk) until just combined. It will be a thick batter at this stage. Now, slowly pour in the hot brewed coffee. The batter will become quite thin – don’t panic! This is exactly what you want. The hot coffee “blooms” the cocoa powder, intensifying the chocolate flavor and creating that incredible moistness. Mix until everything is smooth and lump-free. Again, avoid overmixing; just mix until everything is incorporated.
Step 5: Prepare Filling
While the batter is resting for a moment, let’s make the filling. In a medium bowl, beat the softened cream cheese with an electric mixer until it’s smooth and creamy. Add the sifted powdered sugar and beat again until well combined and no lumps remain. Stir in the sour cream or Greek yogurt and vanilla extract. If you’re using food coloring, add a tiny drop or two now and mix until you achieve your desired shade. You want it to be spreadable but not too runny.
Step 6: Layer & Swirl
Now for the fun part! Spoon about a tablespoon of the chocolate batter into each cupcake liner, filling it about halfway. Then, dollop about a teaspoon of the cream cheese filling on top of the batter. Use a toothpick or a skewer to gently swirl the filling into the batter. Don’t over-swirl, or you’ll lose the distinct pattern! You’re just looking for a few gentle passes to create those pretty marble effects. You can also alternate layers: some batter, then some filling, then more batter on top, and then swirl. Experiment with what looks good to you!
Step 7: Bake
Bake for 18-22 minutes, or until a wooden skewer or toothpick inserted into the center of a cupcake comes out clean (avoiding any pockets of filling). Keep an eye on them, as oven temperatures can vary. You want them to be set but still incredibly moist.
Step 8: Cool & Glaze
Let the cupcakes cool in the muffin tin for about 5-10 minutes before transferring them to a wire rack to cool completely. This is super important – trying to glaze warm cupcakes is a recipe for disaster! Once they’re completely cool, you can add a simple glaze if you like, or just dust them with powdered sugar. For a simple glaze, whisk together about 1 cup of powdered sugar with 1-2 tablespoons of milk or cream until it reaches your desired drizzling consistency.
Step 9: Slice & Serve
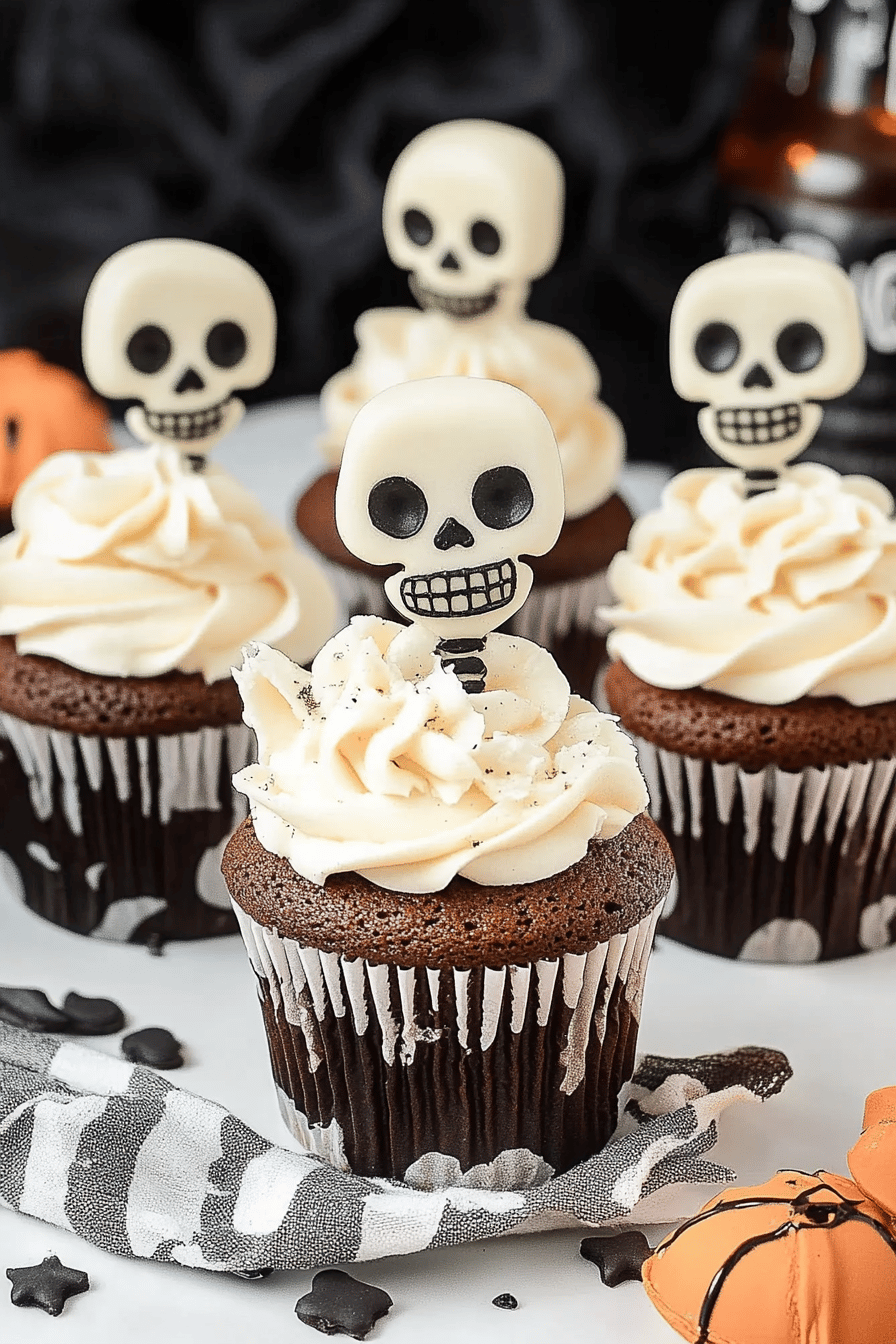
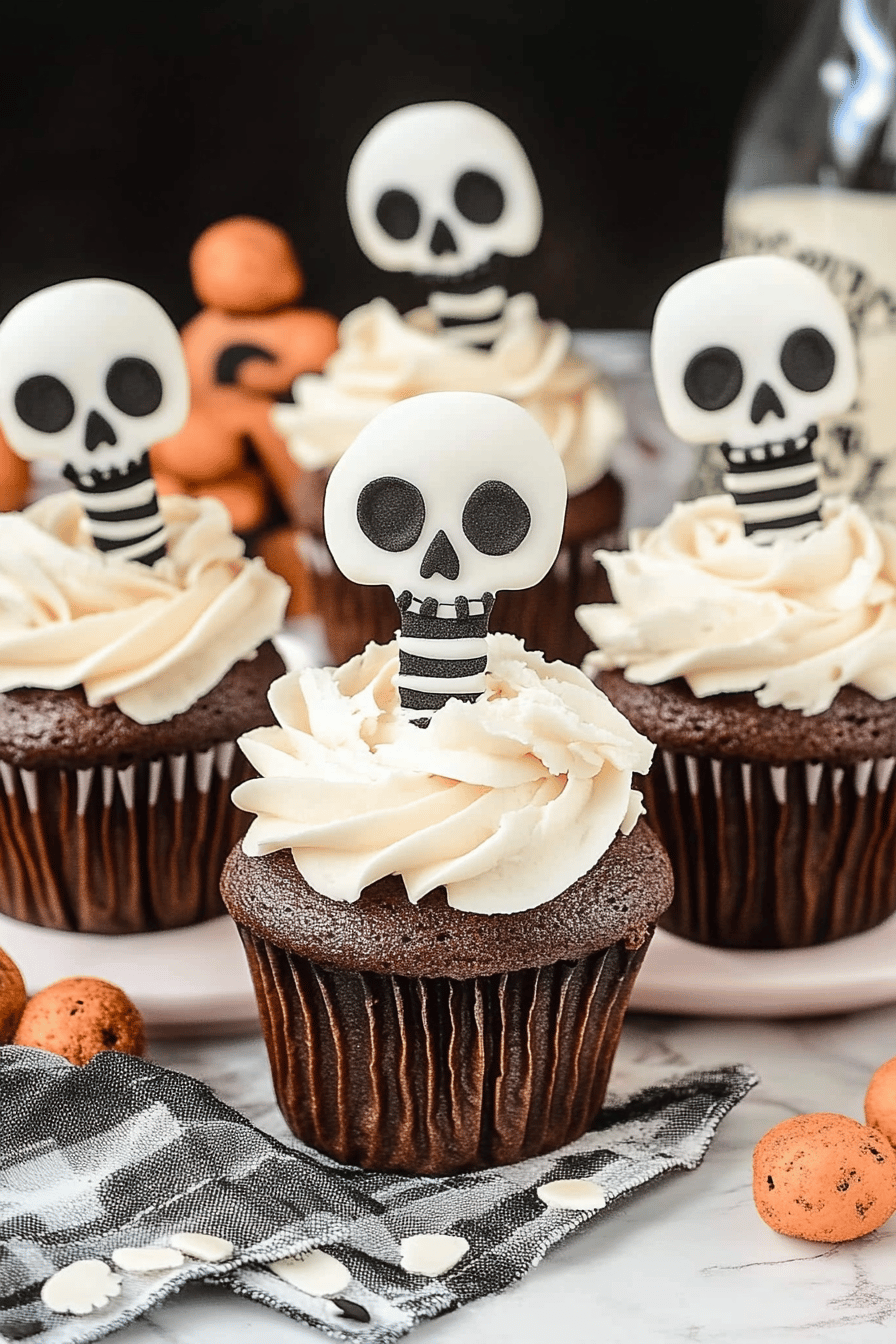
The real reveal happens when you slice into these! Serve them as is, or with a dollop of whipped cream. They’re perfect served at room temperature. The swirls look absolutely magical when you cut into them, making them a real conversation starter.
What to Serve It With
These skeleton cupcakes are wonderfully adaptable, and honestly, they’re fantastic all on their own. But if you’re looking to create a whole spread, here are a few ideas that work beautifully:
For Breakfast: While these are more of a treat, a slightly less sweet version could be enjoyed with a strong cup of black coffee or a creamy latte. Imagine a single cupcake alongside your morning ritual – pure indulgence!
For Brunch: Pair them with a fruit salad or a yogurt parfait. They make a sweet ending to a savory brunch spread. A mimosa or a sparkling cider would be a lovely beverage pairing.
As Dessert: These are phenomenal after dinner, especially with a scoop of vanilla bean ice cream. They also go wonderfully with a glass of milk or even a dessert wine like a port. For a more elaborate presentation, you could serve them alongside some fresh berries.
For Cozy Snacks: Honestly, my favorite way to enjoy them is with a big mug of hot chocolate on a chilly afternoon. They’re also perfect for a mid-afternoon pick-me-up with a glass of cold milk. My kids absolutely adore these as a special treat after school. It feels celebratory without being over the top.
My family tradition is to have these on the first “officially spooky” weekend of October, and we always serve them after a cozy chili dinner. The contrast of the warm chili and the cool, sweet cupcake is just divine. Another time I made them was for a friend’s baby shower, and everyone raved about the surprise inside!
Top Tips for Perfecting Your Skeleton Cupcakes
I’ve definitely learned a thing or two making these over the years, and I’m happy to share my hard-won wisdom! Let’s make your skeleton cupcakes the best they can be.
Zucchini Prep: If you’re tempted to add zucchini for extra moisture (which I sometimes do in the fall!), make sure you grate it finely and squeeze out as much liquid as possible. Overly wet zucchini can make your cupcakes soggy, which is never the goal. I usually use about 1 cup of finely grated zucchini, squeezed very dry.
Mixing Advice: The key to a tender chocolate cake is not to overmix. Once you combine the wet and dry ingredients, mix just until you no longer see streaks of flour. A few tiny lumps are okay! Overmixing develops the gluten too much, leading to a tougher cake, and we want these to be melt-in-your-mouth delicious.
Swirl Customization: For the best swirl effect, don’t go crazy with the toothpick! Think gentle figure-eights or just a few passes. If you overdo it, the colors will blend too much, and you’ll lose that striking skeleton pattern. For a more defined look, you can also use a piping bag with a round tip to pipe the filling onto the batter before swirling.
Ingredient Swaps: If you don’t have buttermilk, the sour cream or Greek yogurt trick works wonders in the batter too! Just add about 1 tablespoon of it to the regular milk and let it sit for a few minutes. For the filling, if you’re out of cream cheese, a thick mascarpone cheese can also work, though it will be a bit richer and less tangy.
Baking Tips: Always use the oven rack in the center of your oven for even baking. If your oven tends to run hot, you might want to reduce the temperature by 10-15 degrees Fahrenheit and keep an eye on them. For doneness, besides the toothpick test, the tops of the cupcakes should spring back lightly when gently touched.
Glaze Variations: If you find the standard powdered sugar glaze a bit too sweet, try a cream cheese glaze instead. Just mix some softened cream cheese with powdered sugar and a splash of milk or vanilla until smooth. You can also add a little espresso powder to the chocolate batter for a mocha kick, or a bit of cinnamon to the filling for a warmer spice note.
Storing and Reheating Tips
Keeping these skeleton cupcakes fresh is easy peasy, and they’re often even better the next day!
Room Temperature: Unfrosted or simply dusted cupcakes can be stored in an airtight container at room temperature for up to 2-3 days. If you’ve frosted them with a cream cheese-based frosting, it’s best to store them in the refrigerator.
Refrigerator Storage: For cupcakes with frosting, or if you live in a warm climate, store them in an airtight container in the refrigerator for up to 4-5 days. They’ll stay wonderfully moist. I like to wrap them individually in plastic wrap before placing them in a container for extra protection.
Freezer Instructions: These cupcakes freeze beautifully! Wrap each cooled, unfrosted cupcake tightly in plastic wrap, then in aluminum foil. You can also place them in a freezer-safe bag. They’ll keep well for up to 2-3 months. To thaw, unwrap them and let them come to room temperature for a few hours. If they’re frosted, thaw them in the refrigerator overnight.
Glaze Timing Advice: If you plan to store your cupcakes for more than a day, I often find it best to add the glaze just before serving, especially if it’s a simple powdered sugar glaze. This prevents it from becoming sticky or soaking into the cake too much, keeping the finish looking its best. For longer storage, keeping them unfrosted and glazing later is a great trick!
Frequently Asked Questions
Final Thoughts
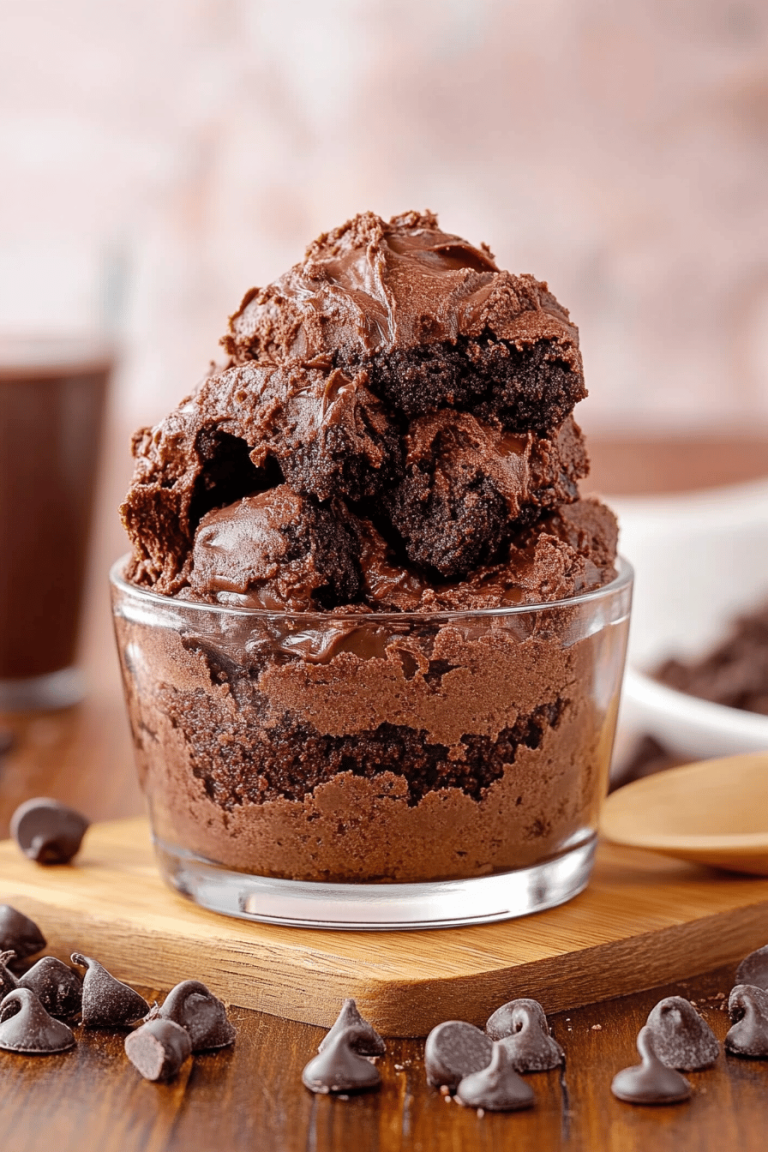
There you have it – my absolute favorite skeleton cupcakes! I really hope you give these a try. They’re more than just a dessert; they’re a little bit of magic, a fun project, and a whole lot of deliciousness all rolled into one. The joy on people’s faces when they see the swirl inside is totally priceless. If you love these, you might also enjoy my recipe for Fudgy Brownies or my Easy Chocolate Mousse Cake. They’re in a similar vein of comforting, crowd-pleasing chocolate treats. So grab your apron, put on some good music, and get ready to create something truly special. I can’t wait to hear how yours turn out! Let me know in the comments below what you think, or if you’ve tried any fun variations. Happy baking!
Skeleton Cupcakes
Ingredients
Cupcakes
- 1.5 cups all-purpose flour
- 1 cup granulated sugar
- 0.5 teaspoon baking soda
- 0.25 teaspoon salt
- 0.5 cup unsalted butter, softened
- 1 large egg
- 1 teaspoon vanilla extract
- 0.5 cup milk
Frosting & Decoration
- 1 cup unsalted butter, softened
- 3 cups powdered sugar
- 0.25 cup heavy cream
- 1 teaspoon vanilla extract
- 1 package black edible marker or black icing for drawing skeleton features
Instructions
Preparation Steps
- Preheat oven to 350°F (175°C). Line a muffin tin with cupcake liners.
- In a large bowl, whisk together flour, sugar, baking soda, and salt.
- In a separate bowl, cream together softened butter, egg, and vanilla extract until well combined.
- Gradually add the dry ingredients to the wet ingredients, alternating with the milk, beginning and ending with the dry ingredients. Mix until just combined, do not overmix.
- Divide the batter evenly among the prepared cupcake liners, filling each about two-thirds full.
- Bake for 18-22 minutes, or until a wooden skewer inserted into the center comes out clean.
- Let the cupcakes cool in the muffin tin for a few minutes before transferring them to a wire rack to cool completely.
- While the cupcakes cool, prepare the frosting: In a large bowl, beat softened butter until creamy. Gradually add the powdered sugar and heavy cream, beating until smooth and fluffy. Stir in the vanilla extract.
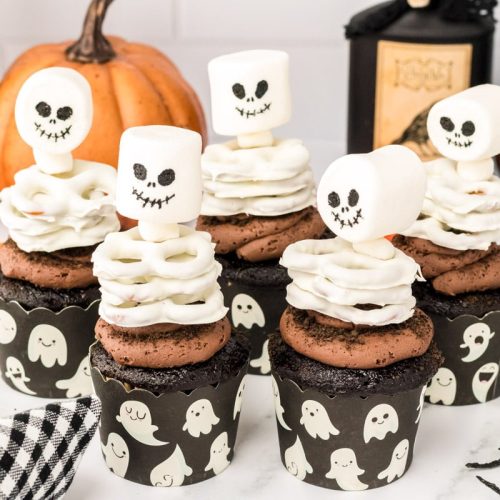
- Once the cupcakes are completely cool, frost them generously. Use a black edible marker or black icing to draw skeleton faces (eyes, nose, mouth) on each cupcake.
Love these spooky cupcakes! Perfect for fall and Halloween.