I remember the first time I ever made these Reindeer Treats. It was years ago, on a whim, right before Christmas. My little ones were still quite small, and their eyes were wide with anticipation for Santa’s arrival. I wanted to bake something special, something that felt like a little bit of holiday magic we could *eat*. I stumbled upon this recipe, and honestly, I was a little skeptical. Could something so simple really taste that good? Oh, friends, let me tell you, it absolutely does. It’s the kind of treat that smells like a cozy cabin fireplace and tastes like pure joy. It’s become our go-to for holiday baking, and the kids still ask for them with the same excitement they had all those years ago. Forget those fancy, fussy cookies; this is the real deal when it comes to easy, delicious Reindeer Treats that truly capture the spirit of the season. They’re surprisingly light, bursting with warm spices, and that little hint of citrus is just *chef’s kiss*!
What are reindeer treats?
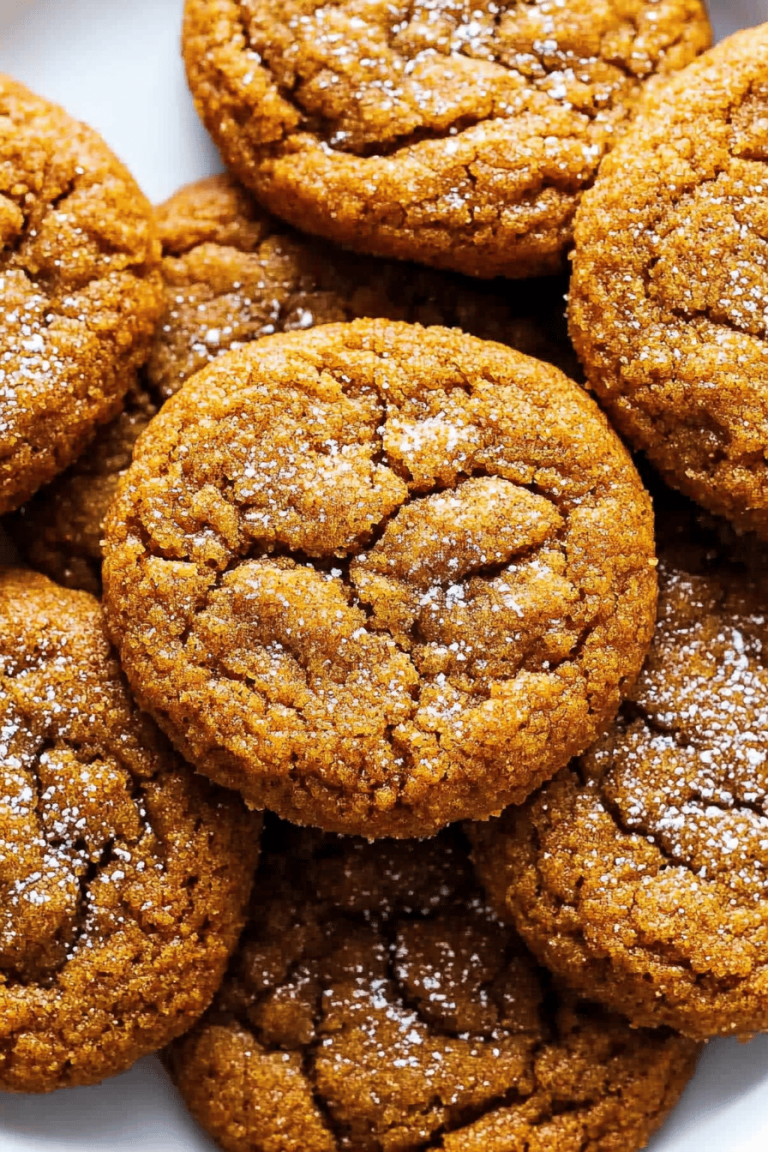
So, what exactly are these magical Reindeer Treats? Think of them as a delightfully soft, cakey cookie with a hint of spice and a wonderfully moist texture. They’re not your average gingerbread man or sugar cookie, though they share that same festive spirit. The name “Reindeer Treats” kind of evokes that charming, whimsical feeling of the North Pole, and honestly, they’re perfect for leaving out for Santa’s helpers on Christmas Eve. They’re made with simple, everyday ingredients you probably already have in your pantry, which is a huge win when you’re in a holiday baking frenzy. The key to their unique texture and flavor is the addition of a bit of grated fruit and a specific spice blend that just screams winter holidays. It’s essentially a no-fuss, incredibly rewarding bake that brings a little bit of that snowy wonderland right into your kitchen.
Why you’ll love this recipe?
Honestly, where do I even begin with why this Reindeer Treats recipe is a keeper? First off, the flavor! It’s this incredible balance of warm, comforting spices like cinnamon and nutmeg, with a subtle tang from a grated citrus zest that just brightens everything up. It’s not overwhelmingly sweet, which I personally love, making it a perfect treat any time of day. Then there’s the texture – oh my goodness, the texture! They are so wonderfully soft and almost melt-in-your-mouth tender. It’s like a little bite of spiced cake in cookie form. And for all of us who are constantly juggling life, the simplicity of this recipe is a lifesaver. You can whip up a batch in no time, and the ingredients are so budget-friendly, which is always a bonus during the holidays. What I love most about these Reindeer Treats, though, is their versatility. They’re fantastic on their own, but they’re also divine with a cup of hot cocoa or a steaming mug of spiced apple cider. They’re also incredibly resilient! They hold up really well, making them great for baking ahead of time. If you’re looking for something that tastes truly special without a lot of fuss, this is it. It’s become a staple in my holiday baking repertoire, right up there with my grandma’s famous gingerbread. They’re just so satisfyingly delicious and evoke that pure, unadulterated holiday cheer!
How do you make reindeer treats?
Quick Overview
Making these Reindeer Treats is surprisingly straightforward and incredibly rewarding. You’ll essentially be making a soft, spiced batter, adding in your flavorings, and then baking them until they’re perfectly tender. The magic happens with the simple combination of ingredients that creates that unique soft texture and comforting aroma. It’s a recipe that encourages you to get the kids involved, too – they love helping measure and mix! Trust me, the smell that will fill your kitchen as these bake is just heavenly. The whole process, from start to finish, takes less than an hour, making it a perfect option for those busy holiday afternoons.
Ingredients
For the Main Batter:
You’ll want to start with good quality all-purpose flour. I usually grab a standard brand, nothing fancy needed here. Make sure it’s measured correctly – spoon it into the cup and level it off, don’t scoop directly from the bag, or you might end up with dry treats! Granulated sugar provides the sweetness, and a touch of baking soda and baking powder will give them that perfect lift without making them too cakey. A pinch of salt is always essential to balance out the sweetness and enhance all those lovely flavors. For the spices, ground cinnamon is a must, followed by a hint of nutmeg and a tiny bit of ground cloves for that classic holiday warmth. Don’t skip the ground ginger either; it adds a wonderful subtle zing!
For the Flavor Boosters:
This is where the real magic happens! You’ll need softened unsalted butter for richness and tenderness. Large eggs bind everything together and add to that soft, cakey texture. And here’s a little secret weapon: finely grated orange zest. It sounds simple, but it adds this incredible brightness and aroma that truly elevates these treats. You can also use lemon zest if you prefer, but orange just has that extra special holiday feel for me. A splash of pure vanilla extract rounds out the flavors beautifully. And for that signature moisture and chew, we’ll add in some unsweetened applesauce. Make sure it’s unsweetened so you can control the sweetness yourself.
Step-by-Step Instructions
Step 1: Preheat & Prep Pan
First things first, let’s get our oven ready. Preheat it to a nice 350 degrees Fahrenheit (175 degrees Celsius). While that’s heating up, grab your baking sheets and line them with parchment paper. This is a lifesaver for easy cleanup and ensures your Reindeer Treats won’t stick. If you don’t have parchment, a light greasing and flouring of the baking sheets will do the trick, but parchment is my go-to for perfect cookies every time.
Step 2: Mix Dry Ingredients
In a large mixing bowl, whisk together your flour, granulated sugar, baking soda, baking powder, salt, cinnamon, nutmeg, cloves, and ginger. Whisking them well ensures that all the leavening agents and spices are evenly distributed, which is key for uniform baking and flavor. You want to see a lovely, uniform mixture with no pockets of spice. I usually give it a good 30 seconds of whisking to make sure everything is perfectly combined.
Step 3: Mix Wet Ingredients
In a separate medium bowl, cream together the softened butter and granulated sugar until it’s light and fluffy. This is where you really want to get some air into the mixture, which contributes to the tender texture of the final treats. Then, beat in the eggs one at a time, making sure each one is fully incorporated before adding the next. Stir in the vanilla extract and the finely grated orange zest. You’ll start to smell that wonderful citrus aroma already!
Step 4: Combine
Now, it’s time to bring it all together. Gradually add the dry ingredients to the wet ingredients, mixing on low speed (or by hand with a spatula) until just combined. Be careful not to overmix! Overmixing can lead to tough cookies, and we want these to be delightfully tender. It’s okay if there are a few tiny streaks of flour; we’ll get those incorporated in the next step.
Step 5: Prepare Filling
Stir in the unsweetened applesauce until it’s just incorporated. The batter will be thick but still soft. At this point, you can fold in any optional additions like chopped nuts or dried cranberries if you like. I usually keep them plain because I love that pure spiced flavor, but feel free to experiment!
Step 6: Portion & Shape
Using a tablespoon or a cookie scoop, drop rounded spoonfuls of the dough onto your prepared baking sheets, leaving about 2 inches between them to allow for spreading. I like to roll mine gently into a ball with slightly flattened tops. They don’t spread a ton, but giving them space ensures they bake evenly.
Step 7: Bake
Pop those baking sheets into your preheated oven. Bake for about 10-12 minutes, or until the edges are lightly golden brown and the centers are set. They’ll look a little soft in the middle, and that’s exactly what you want. Don’t overbake them, or they’ll lose that wonderful tender texture. I usually check mine around the 10-minute mark. A toothpick inserted into the center should come out with a few moist crumbs, not wet batter.
Step 8: Cool & Decorate (Optional)
Let the Reindeer Treats cool on the baking sheets for a few minutes before transferring them to a wire rack to cool completely. This is the perfect time to enjoy the incredible aroma wafting through your kitchen! Once completely cool, you can enjoy them just as they are, or, if you’re feeling fancy, you can drizzle them with a simple glaze made from powdered sugar and a tiny bit of milk or citrus juice. A few festive sprinkles make them extra special for the holidays!
Step 9: Slice & Serve
These Reindeer Treats are best served at room temperature. They are so incredibly soft and flavorful on their own. If you do glaze them, make sure the glaze is fully set before stacking or storing.
What to Serve It With
These Reindeer Treats are wonderfully versatile, fitting into almost any holiday occasion. For a cozy breakfast, they are absolutely divine alongside a steaming mug of rich, dark coffee or a warm cup of spiced chai. Their subtle sweetness won’t overpower your morning beverage. If you’re hosting a festive brunch, arrange them on a pretty platter alongside other pastries and fruits. They add a touch of homemade charm and their warm spices complement fruit salads beautifully. For dessert, these little gems are a delight after a hearty meal. Serve them with a scoop of vanilla bean ice cream for a simple yet decadent treat, or pair them with a glass of port or a warm mulled wine. And for those quiet, cozy evenings when you just need a little something sweet to lift your spirits, they’re perfect with a glass of cold milk or, my personal favorite, a steaming mug of rich hot chocolate. My family also loves to pack a few for a winter picnic – they travel so well and are such a comforting bite amidst the crisp air.
Top Tips for Perfecting Your Reindeer Treats
Flavor Boosters: Don’t shy away from the orange zest! It truly makes a difference. If you’re feeling adventurous, you can even add a tiny pinch of cardamom to the spice mix for an extra layer of warmth. When zesting, be sure to only get the colorful part of the peel and avoid the bitter white pith underneath. For the applesauce, using unsweetened is crucial so you have complete control over the final sweetness. If you only have sweetened applesauce on hand, you might want to slightly reduce the granulated sugar in the recipe.
Mixing Advice: The cardinal rule here is “do not overmix”! Once you combine the wet and dry ingredients, mix only until just combined. A few tiny streaks of flour are okay; they’ll disappear as you incorporate the applesauce. Overmixing develops the gluten in the flour, which leads to tough, dense cookies, and we definitely don’t want that. Gentle mixing is the key to that signature tender, cake-like texture.
Spice Balance: Feel free to adjust the spice blend to your personal preference. If you love cinnamon, add a little extra! If cloves are a bit strong for you, reduce them. The listed amounts are a great starting point, providing a balanced, warm flavor. I always taste my spice mixes before adding them to ensure they’re fragrant and just right. Freshly ground spices will always yield the best flavor!
Ingredient Swaps: If you don’t have applesauce, unsweetened pumpkin puree or even mashed ripe banana can work in a pinch, though they will alter the flavor slightly. For a dairy-free version, you can use vegan butter and a plant-based milk for the optional glaze. I’ve tested almond milk in the glaze, and it made it extra creamy! If you’re out of eggs, a flax egg (1 tablespoon flaxseed meal mixed with 3 tablespoons water, let sit for 5 minutes) can be used, though the texture might be slightly less tender.
Baking Tips: Keep an eye on your Reindeer Treats during the last few minutes of baking. Ovens can vary, and you want them to be lightly golden, not dark brown. The centers should look set but still slightly soft. If you accidentally overbake them, don’t despair! They’re still delicious, especially when paired with a drink to soften them up. Ensure your baking sheets aren’t overcrowded, as this can lead to uneven baking.
Glaze Variations: The simple powdered sugar glaze is lovely, but you can jazz it up! Add a touch of orange juice instead of milk for an extra citrus kick. A drop of red or green food coloring can make them extra festive. For a lighter touch, simply dust them with powdered sugar using a fine-mesh sieve once they’ve cooled. You could even add a tiny bit of maple syrup to the glaze for a different flavor profile.
Storing and Reheating Tips
These Reindeer Treats are wonderfully forgiving when it comes to storage. For room temperature storage, once completely cooled, store them in an airtight container for up to 3 days. They tend to stay quite soft and moist for a few days, which is fantastic! If you plan to keep them longer, I highly recommend the refrigerator. Placed in an airtight container, they’ll stay fresh and delicious for about a week. The cooler temperatures help maintain their texture. If you want to keep them for an extended period, freezing is your best bet. Wrap them tightly in plastic wrap, then place them in a freezer-safe bag or container for up to 3 months. When you’re ready to enjoy them from frozen, simply thaw them overnight in the refrigerator or at room temperature. For reheating, I usually just pop a few in a toaster oven for a minute or two at a low temperature (around 250°F/120°C) or even briefly in a microwave if I’m in a hurry, just to take the chill off and bring back that lovely soft texture. If you’ve glazed them, it’s best to do this after cooling or after reheating the plain cookie, so the glaze doesn’t get too melty.
Frequently Asked Questions
Final Thoughts
Honestly, these Reindeer Treats are more than just a recipe to me; they’re a little box of holiday cheer. They’re proof that you don’t need complicated techniques or exotic ingredients to create something truly magical. The way they fill the house with that warm, spicy aroma is just unmatched, and seeing the smiles they bring to faces, big and small, makes all the effort worthwhile. If you’re looking for a simple, heartwarming bake that captures the spirit of the season, I really hope you’ll give these Reindeer Treats a try. They’re perfect for sharing, a delightful treat for yourself, and an absolute must-have for any holiday gathering. You might even find, like I did, that they become a cherished tradition in your own home. Don’t forget to let me know how yours turn out in the comments below! I love hearing about your baking adventures and seeing how you put your own spin on recipes. Happy baking, everyone!

Reindeer Treats
Ingredients
Main Ingredients
- 12 ounces milk chocolate chips
- 10 pieces mini pretzels
- 10 pieces Wilton candy eyeballs
- 10 pieces small red M&M's
- 7 pieces peppermint candy crushed
Instructions
Preparation Steps
- Line a baking tray with parchment paper and set it aside.
- In a microwave-safe bowl, add the milk chocolate chips. Melt the chocolate in 30-second increments for 2 minutes, stirring in between each interval until the chocolate is completely melted and smooth.
- Meanwhile, cut the mini pretzels into halves, exactly in the middle, using a serrated knife for a smooth cut. Set them aside.
- Place the peppermint candy in a Ziploc bag and crush them until they are fine pieces. Set aside.
- Pour the melted chocolate onto the prepared baking tray with parchment paper. Spread the chocolate evenly and smoothly to approximately 1/8 inch thickness.
- Arrange the pretzel halves like antlers on the chocolate. Place the candy eyeballs below the antlers for the reindeer eyes, and then place the red M&M's for the nose.
- Dust the crushed peppermint candy over the chocolate. Place the baking tray in the fridge for at least 30 minutes to set the chocolate.
- Once the chocolate hardens, carefully cut it into pieces using a knife.
- Store the chocolate bark in an airtight container and enjoy.