Oh my goodness, where do I even begin with these Reese’s Peanut Butter Cookies? Honestly, I feel like I’m finally letting you in on a little secret, a recipe that’s practically magic in my kitchen. It’s the kind of cookie that makes people stop what they’re doing, inhale deeply, and then ask for the recipe before they’ve even taken their first bite. If you’ve ever dreamt of a cookie that perfectly captures that iconic Reese’s peanut butter cup flavor, but in a soft, chewy, melt-in-your-mouth cookie form, then you’ve landed in the right place. I’ve tried so many variations over the years, chasing that perfect balance of sweet, salty, and intensely peanut buttery goodness. This one? This is it. This is the one that my family devours, the one I’ve been asked to bring to every potluck and bake sale for the last decade. It’s just as satisfying as a no-bake cookie but with that comforting chew you get from a baked treat. It’s honestly my go-to when a serious sweet craving hits, and I need something amazing without a ton of fuss.
What is Reese’s Peanut Butter Cookies?
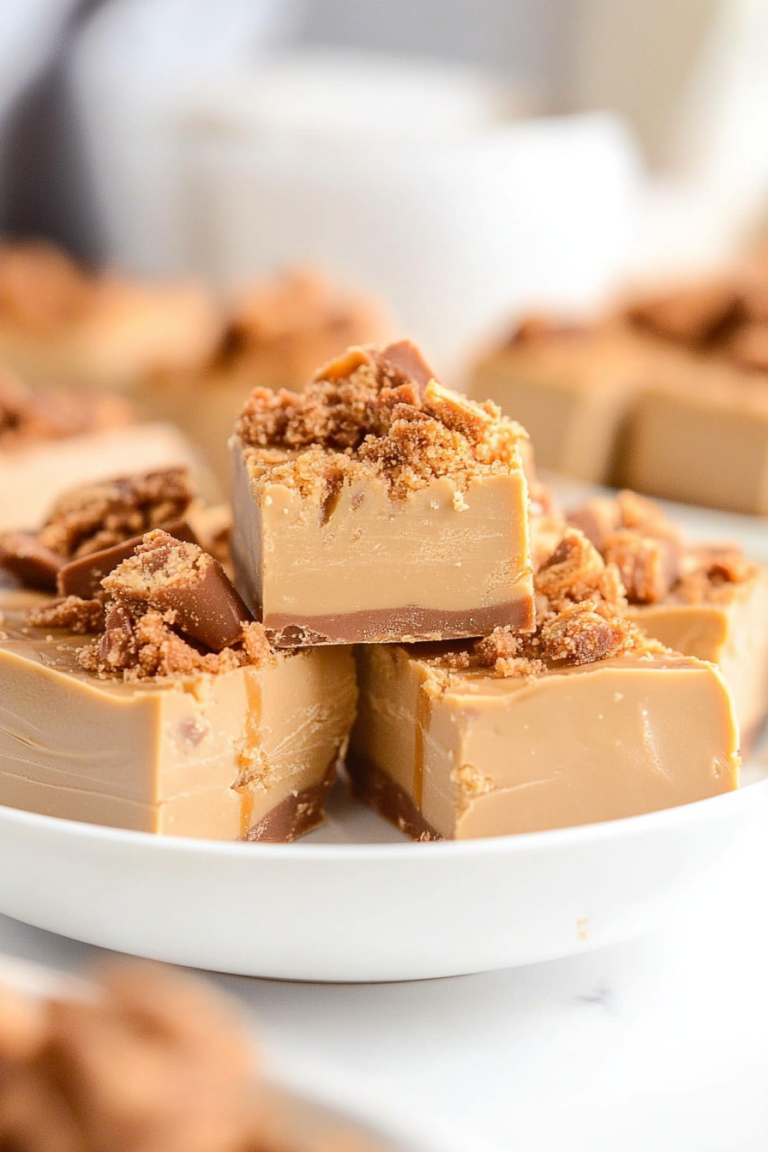
So, what exactly are these glorious Reese’s peanut butter cookies? Think of them as your favorite classic peanut butter cookie, but dialed up to eleven with all the best parts of a Reese’s Peanut Butter Cup. It’s not just about adding peanut butter to the dough; it’s about creating a cookie that *tastes* like a Reese’s. We’re talking about a cookie that’s soft and chewy, with a rich, nutty flavor that’s not too sweet and has just the right amount of salt to make everything pop. The magic often comes from a combination of creamy peanut butter in the dough itself, sometimes a little bit of peanut butter extract for an extra punch, and then, the pièce de résistance, often a swirl or chunks of actual Reese’s Peanut Butter Cups right in the dough, or a drizzle on top. It’s essentially a love letter to one of the most beloved candy bars in the world, translated into a perfectly baked cookie. It’s familiar, it’s comforting, and it’s utterly irresistible.
Why you’ll love this recipe?
There are so many reasons why this Reese’s Peanut Butter Cookies recipe has become my absolute favorite, and I just know you’re going to fall in love with it too. First off, let’s talk about that incredible flavor. It’s the perfect storm of sweet, salty, and creamy peanut butter. It’s not just a hint of peanut butter; it’s a full-on, glorious celebration of everything we adore about Reese’s. Every bite is rich, decadent, and deeply satisfying. What I also adore is how surprisingly simple it is to whip up. Even on a busy weeknight, I can have these cooling on the rack before the kids even finish their homework. The ingredients are all pantry staples for me, which is a huge bonus – no last-minute trips to the store needed! And the cost-efficiency? Fantastic. You get so many cookies from one batch, and they’re always a hit. But the versatility is what really seals the deal for me. These cookies are perfect on their own, of course, but they’re also amazing with a cold glass of milk, or even crumbled over ice cream for an instant sundae. They’re a fantastic contender when you want something sweet but maybe a bit more sophisticated than just grabbing a candy bar. They truly stand out from your average Peanut Butter Cookie because they hit all those nostalgic notes of the candy we grew up with, but in a delightfully fresh, homemade way. It’s a win-win-win!
How do you make Reese’s Peanut Butter Cookies?
Quick Overview
Making these amazing Reese’s Peanut Butter Cookies is a straightforward process that involves creaming butter and sugars, incorporating peanut butter and other wet ingredients, then gently folding in the dry ingredients. The real fun comes in adding those little bits of peanut butter cup magic. You’ll then scoop, bake until golden brown and slightly soft in the center, and let them cool before indulging. It’s designed to be simple enough for a beginner but rewarding enough for even the most seasoned baker. The key is not to overmix and to trust the visual cues for perfect doneness.
Ingredients
For the Main Batter:
* 2 ¼ cups all-purpose flour: I always use unbleached all-purpose flour for the best texture. Make sure it’s spooned and leveled, not scooped directly from the bag. This helps prevent dense cookies.
* 1 teaspoon baking soda: This is what gives our cookies their lift and chewiness. Fresh baking soda is key, so check the expiration date!
* ½ teaspoon salt: This is crucial for balancing the sweetness and enhancing the peanut butter flavor. Don’t skip it!
* 1 cup (2 sticks) unsalted butter, softened: Softened, not melted. This means you can easily indent it with your finger. This is vital for proper creaming.
* ¾ cup creamy peanut butter: I swear by Jif creamy peanut butter for this recipe. It has that classic flavor and texture that works so well. Natural peanut butter can be a bit oily and might change the texture.
* 1 cup granulated sugar: For that classic cookie sweetness.
* ½ cup packed light brown sugar: This adds moisture and a lovely caramel note.
* 2 large eggs: Make sure they’re at room temperature so they incorporate smoothly.
* 1 teaspoon vanilla extract: Pure vanilla extract is always best for flavor.
* ½ teaspoon peanut butter extract (optional, but recommended!): This really amplifies that unmistakable Reese’s flavor. You can usually find this in the baking aisle.
For the Filling/Mix-ins:
* 1 cup chopped Reese’s Peanut Butter Cups (mini or regular sized): This is where the real magic happens! Chop them into bite-sized pieces. You can also use Reese’s Pieces for a different kind of pop. I usually get a bag of mini cups and chop them up; it’s easier and more consistent.
For the Drizzle/Glaze (Optional):
* ½ cup chocolate chips (milk or semi-sweet): For melting down.
* 1 tablespoon vegetable oil or coconut oil: This helps create a smooth, dippable glaze.
Step-by-Step Instructions
Step 1: Preheat & Prep Pan
First things first, let’s get our oven preheated to 375°F (190°C). You’ll want to line your baking sheets with parchment paper or silicone baking mats. This is a lifesaver, trust me. It prevents sticking and makes cleanup a breeze. I usually prep about three baking sheets so I can bake them in batches without waiting too long between batches.
Step 2: Mix Dry Ingredients
In a medium bowl, whisk together the all-purpose flour, baking soda, and salt. Give it a good whisk until everything is evenly combined. This ensures the leavening agents are distributed properly, leading to evenly risen cookies. Set this bowl aside for now.
Step 3: Mix Wet Ingredients
In a large bowl, or the bowl of your stand mixer fitted with the paddle attachment, cream together the softened butter, creamy peanut butter, granulated sugar, and packed light brown sugar. Beat on medium speed until the mixture is light and fluffy, about 3-4 minutes. This step is super important for creating a tender cookie with a good texture. Scrape down the sides of the bowl as needed. Then, add in the eggs one at a time, beating well after each addition. Stir in the vanilla extract and the optional peanut butter extract until just combined.
Step 4: Combine
Gradually add the dry ingredients to the wet ingredients, mixing on low speed until just combined. Be very careful not to overmix here! Overmixing can lead to tough cookies. Stop mixing as soon as you no longer see streaks of flour. The dough will be thick and wonderfully fragrant.
Step 5: Prepare Filling
If you haven’t already, chop your Reese’s Peanut Butter Cups into roughly ½-inch pieces. Having them ready to go makes the next step super easy.
Step 6: Layer & Swirl
Gently fold in the chopped Reese’s Peanut Butter Cups into the cookie dough using a spatula. You want to distribute them evenly throughout the dough. Don’t overwork the dough at this stage. If you’re going for a more intense Reese’s flavor and appearance, you can reserve a few chopped pieces to press into the tops of the cookies just before baking.
Step 7: Bake
Drop rounded tablespoons of dough onto the prepared baking sheets, leaving about 2 inches between each cookie. They will spread. Bake for 9-11 minutes, or until the edges are golden brown and the centers look slightly underbaked. They will continue to cook as they cool on the baking sheet. I like my cookies a little on the chewy side, so I pull them out when the centers are still soft. If you prefer a firmer cookie, bake them a minute or two longer.
Step 8: Cool & Glaze
Let the cookies cool on the baking sheets for 5 minutes before transferring them to a wire rack to cool completely. While they are cooling, if you’re making the optional glaze, melt the chocolate chips with the oil in a microwave-safe bowl in 30-second intervals, stirring in between, until smooth. Once the cookies are completely cool, you can drizzle the melted chocolate over the tops. I like to use a spoon or a piping bag for this. This step is totally optional but adds an extra layer of deliciousness and visual appeal!
Step 9: Slice & Serve
Once the glaze has set (if you used it), your Reese’s Peanut Butter Cookies are ready to be devoured! I find they are best served at room temperature. They slice beautifully and are perfect for sharing… or not! Enjoy them with a tall glass of milk, a cup of coffee, or just on their own. They’re truly a delight.
What to Serve It With
These Reese’s Peanut Butter Cookies are so versatile, they can honestly be the star of any occasion! For breakfast, they’re a fantastic treat alongside a strong cup of coffee or a tall glass of cold milk. Imagine a lazy weekend morning with one of these warm (or room temp!) cookies and your favorite brew – pure bliss. For brunch, they add a fun, playful element to any spread. I love placing a few on a tiered stand with other pastries and fruits; they’re always the first to disappear! For dessert, oh boy, they are spectacular. Serve them as is, or crumble them over vanilla or chocolate ice cream for an instant, decadent dessert. A little dollop of whipped cream on top never hurt anyone, either! And for those cozy snacks? This is your go-to. Whether it’s a movie night, an afternoon pick-me-up, or just a “treat yourself” moment, these cookies hit the spot every single time. My kids adore them after school with a glass of chocolate milk. They’re also surprisingly good crumbled into yogurt parfaits for a little sweet crunch. Honestly, they’re just good anytime, anywhere!
Top Tips for Perfecting Your Reese’s Peanut Butter Cookies
I’ve made these Reese’s Peanut Butter Cookies more times than I can count, and I’ve definitely learned a few tricks along the way that I think will help you achieve cookie perfection. First, when it comes to the peanut butter, **use the creamy, commercial kind** like Jif or Skippy. Natural peanut butter has too much oil and can make your cookies spread too much and taste greasier. Trust me, I’ve tested this! For the sugars, **make sure your brown sugar is packed tightly** into the measuring cup; this adds the right amount of moisture and chewiness. And for the butter, **softened is the keyword**. If it’s too cold, it won’t cream properly, leading to dense cookies. Too warm and melted, and they’ll spread too much. Room temperature is your friend here. When it comes to mixing, the golden rule is **don’t overmix the dough** once you add the flour. Mix just until the flour streaks disappear. Overmixing develops the gluten too much, resulting in tough cookies instead of tender, chewy ones. I’ve definitely made that mistake before! For the Reese’s Peanut Butter Cups, **chopping them into smaller, even pieces** helps them distribute better and avoids huge pockets of just candy. Some people like to press a few extra pieces on top right before baking – it looks super professional and gives you an extra peanut butter cup hit. Baking is a crucial step. **Don’t overbake!** Pull them out when the edges are golden and the centers look slightly underdone. They’ll continue to bake on the hot baking sheet, giving you that perfect chewy texture. If you bake them until they look completely done in the oven, they’ll be dry by the time they cool. For the optional glaze, **use a little oil** (vegetable or coconut oil) when melting your chocolate chips. It makes the glaze incredibly smooth and easy to drizzle. And if you don’t like drizzling, you can totally skip the glaze, or just dust them with a little powdered sugar once they’re cool! These are just a few of the things I’ve learned, and they make a big difference.
Storing and Reheating Tips
One of the best things about these Reese’s Peanut Butter Cookies is how well they keep! For room temperature storage, I like to keep them in an airtight container. They’ll stay deliciously soft and chewy for about 3 to 4 days. Just make sure they’ve cooled completely before sealing them up, otherwise, you might get some condensation. If you’re making them for a special occasion and need them to last a bit longer, refrigerator storage is your best bet. They can be kept in an airtight container in the fridge for up to a week. Their texture will firm up slightly in the fridge, but they’re still delicious. When you’re ready to eat them, just let them sit out on the counter for about 15-20 minutes to soften up again. For longer storage, freezing is absolutely the way to go. You can freeze the baked cookies for up to 2 to 3 months. Make sure they are completely cool and then wrap them tightly in plastic wrap, then place them in a freezer-safe airtight container or a heavy-duty freezer bag. To reheat, you can simply let them thaw at room temperature, or pop them in a low oven (around 250°F / 120°C) for a few minutes until warmed through. If you’ve added a chocolate glaze, it might get a little soft during reheating, but it’s still delicious. I usually add the glaze only to cookies I plan to eat within a day or two, or to individual portions if I’m freezing them.
Frequently Asked Questions
Final Thoughts
So there you have it – my absolute favorite Reese’s Peanut Butter Cookies recipe. I truly believe this is the ultimate cookie for any peanut butter lover, and especially for anyone who adores the classic Reese’s flavor. It’s got that perfect balance of chewy texture and rich, satisfying taste that just makes you happy. It’s a recipe that’s become a staple in my home, bringing smiles and satisfied sighs with every batch. I hope you’ll give it a try and experience that same cookie joy. If you love Reese’s, you might also want to check out my recipe for Reese’s Peanut Butter Brownies – they’re another level of deliciousness! I can’t wait to hear how your Reese’s Peanut Butter Cookies turn out. Please leave a comment below to share your experience, any tips you discovered, or even your own fun variations. Happy baking!
Reese's Peanut Butter Cookies
Ingredients
Main Ingredients
- 1 large egg
- 1 cup light brown sugar packed
- 0.75 cup creamy peanut butter Do not use homemade or natural peanut butter (use Jif, Skippy, or similar)
- 0.5 cup unsalted butter softened
- 1 tablespoon vanilla extract
- 1.75 cups all-purpose flour
- 0.75 teaspoon baking soda
- pinch salt optional and to taste
- 1 cup Reese’s Pieces
- 1 cup semi-sweet chocolate chips
Instructions
Preparation Steps
- To the bowl of a stand mixer fitted with the paddle attachment (or large bowl and electric hand mixer), cream together the egg, brown sugar, peanut butter, softened butter, and vanilla extract on medium-high speed until light and fluffy, about 5 minutes.
- Stop, scrape down the sides of the bowl, and add the flour, baking soda, and optional salt. Mix on low speed until just incorporated, about 1 minute; do not overmix.
- Add the Reese’s Pieces and chocolate chips and blend until just incorporated.
- Using a medium 2-inch cookie scoop, form heaping two-tablespoon mounds. Place mounds on a large plate, flatten mounds slightly with your palm, cover with plastic wrap, and refrigerate for at least 2 hours, or up to 5 days, before baking. Do not bake with warm dough because cookies will spread and bake thinner and flatter.
- Preheat oven to 350F (175C). Line a baking sheet with a Silpat or spray with cooking spray. Place mounds on baking sheet, spaced at least 2 inches apart (bake 8 cookies per sheet).
- Bake for 8 to 9 minutes, or until edges have set and tops are just beginning to set, even if slightly undercooked, pale and glossy in the center. Do not bake longer than 10 minutes because cookies will firm up as they cool.
- Allow cookies to cool on the baking sheet for 5 minutes before removing and transferring to a rack to finish cooling.