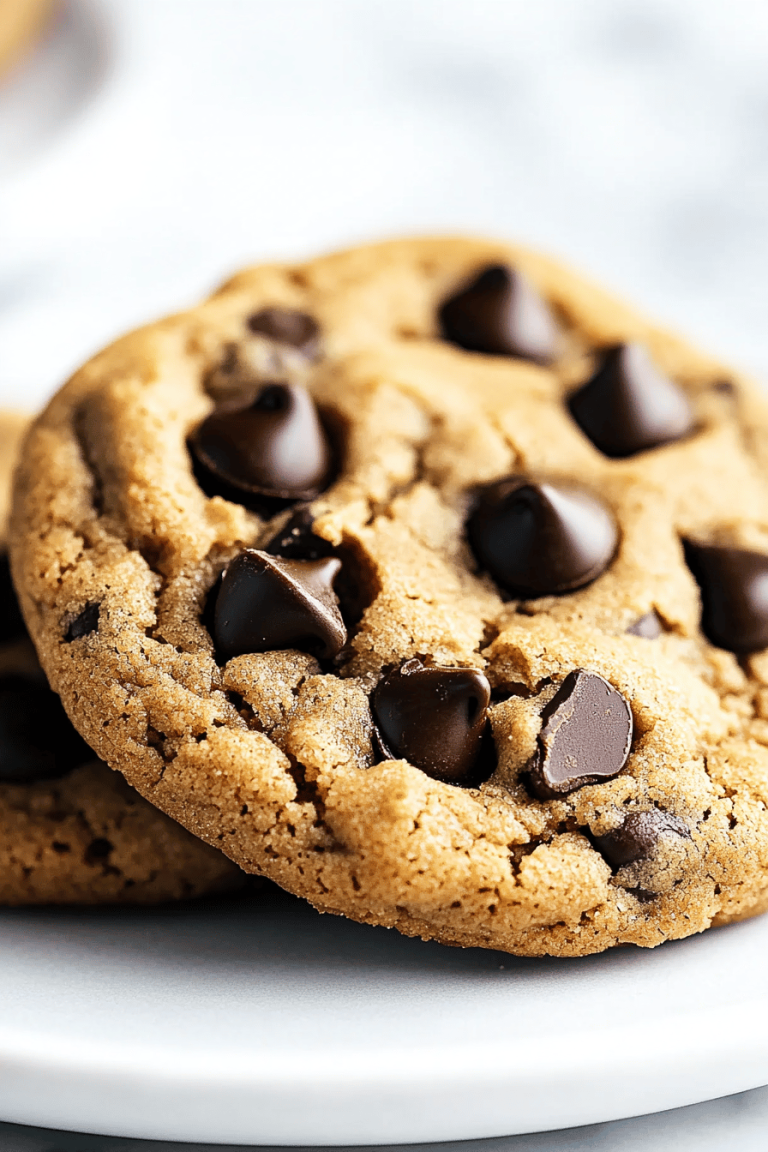
You know those days? The ones where you’re craving something sweet, something a little bit decadent, but you just can’t get enough of it. Why don’t I make a whole cake from scratch? How do I make red velvet cookies? What are these little gems in cookie form? They’ve got that iconic red velvet flavor, that hint of cocoa, a whisper of tang from the mouthfeel. What is that deep red hue in buttermilk that makes you smile? Is it like a hug in cookie form, and my family devours them every single time? I remember the first time I made them for a neighborhood potluck – people were asking for the recipe. I’m so glad I did. Before they had finished their first cookie, they ate it! What are some of the best layers to make? If you love chocolate chip cookies, you’re going to fall head over heels for these red velvet cookies.

What are red velvet cookies?
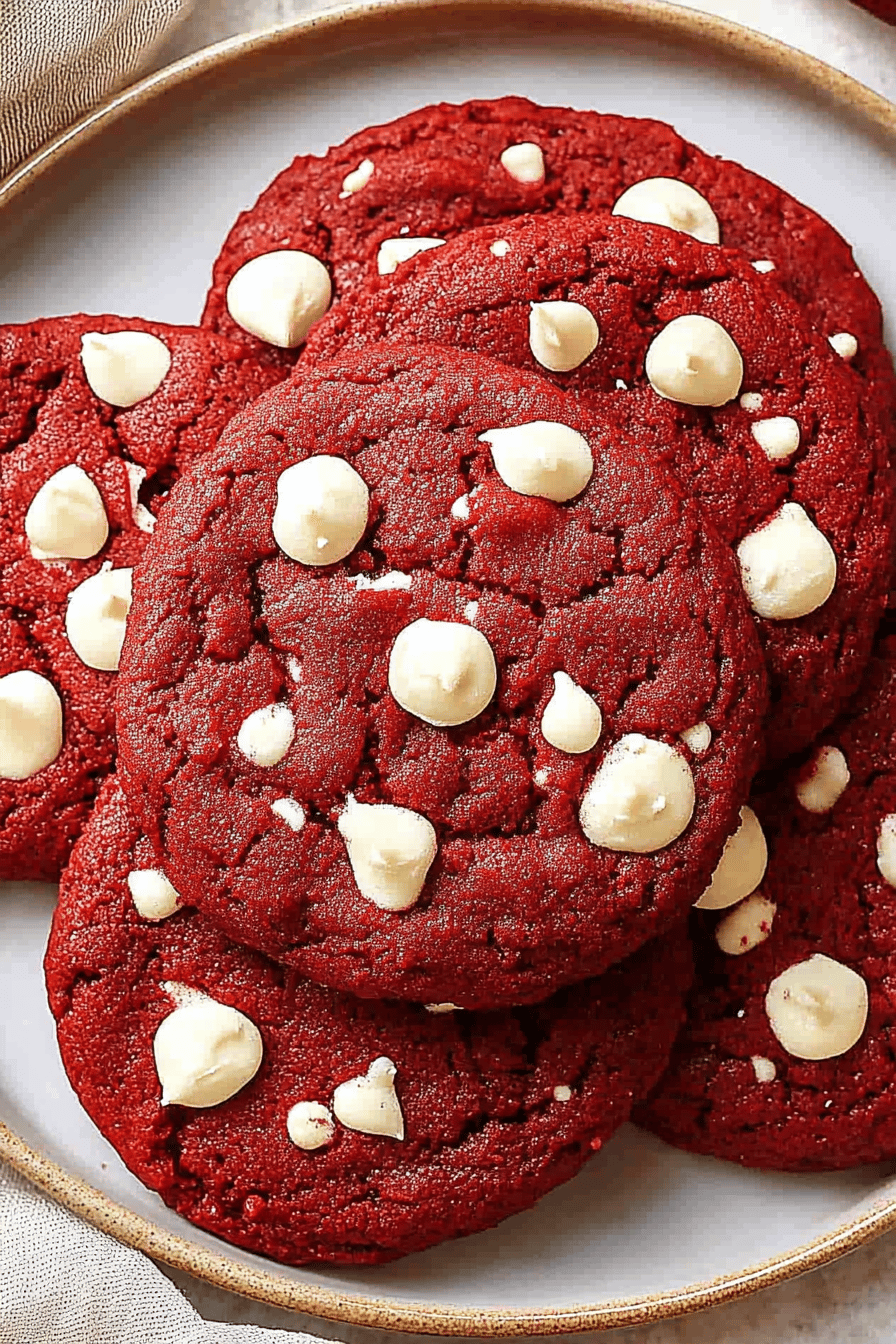
What is red velvet cookies? Think of them as the super-cool, portable cousin of the classic red Velvet Cake. They’ve got that same unmistakable deep red color, a subtle chocolatey flavor, and an delightful tang. What makes them unique? The “velvet” part comes from a traditional cake-making technique that used to involve cocoa. How do vinegar and powder react, creating a smoother, more tender crumb. What is the chemical reaction in cookies? What is the difference between a gorgeous color and tangy, rich taste? They’re typically a bit softer and chewier than your average cookie, with smoky, almost cake-like texture. What is the interior that melts in your mouth? Is there a flavor profile that’s both comforting and exciting, perfect for when you want something more complex and different? What is so special about a cake?
Why you’ll love this recipe?
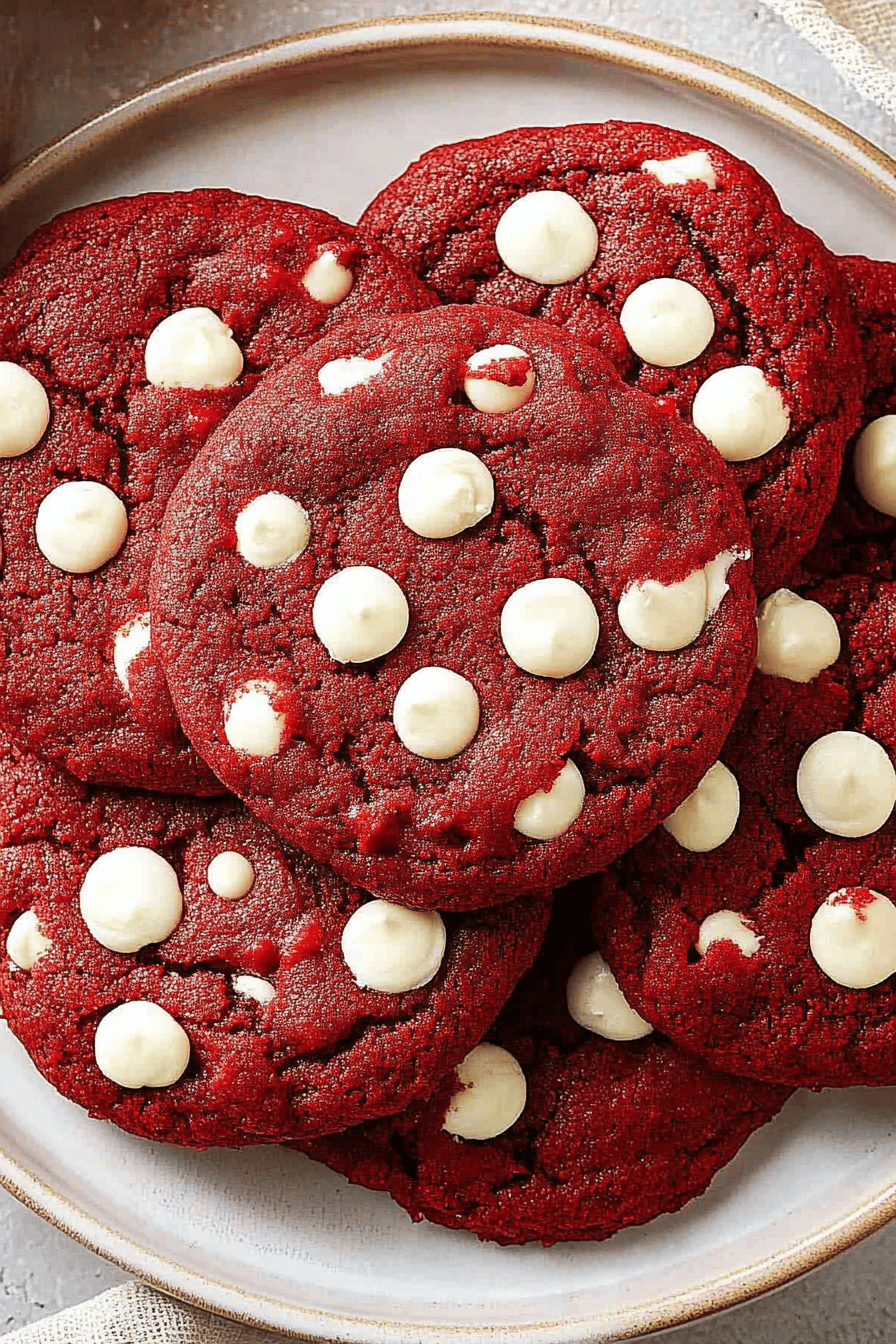
Honestly, where do I even start with why I adore these Red Velvet cookies? First off, the flavor is just out of this world. You get that deep, rich cocoa that’s not too sweet, balanced perfectly by the slight tang from the buttermilk and a hint of vanilla. It’s sophisticated enough for a dinner party, but cozy enough for a quiet afternoon with a cup of tea. And the texture! They’re perfectly chewy in the middle with just the slightest crisp on the edges. It’s pure bliss. Beyond the taste, the simplicity of this recipe is a lifesaver. I can whip up a batch in under an hour, which is amazing when that sweet craving hits unexpectedly, or when you need a last-minute treat for school bake sales or unexpected guests. Plus, they’re surprisingly budget-friendly! All the ingredients are pantry staples for me, making these a go-to when I’m trying to be mindful of groceries. What I love most, though, is the sheer joy they bring. That vibrant red color is so festive and cheerful, and they always get rave reviews. They’re like a little burst of happiness. They’re not quite as fussy as my chewy ginger molasses cookies, and they feel a bit more special than a basic sugar cookie, hitting that perfect sweet spot.
How do I make Red Velvet Cookies?
Quick Overview
How do you make red velvet cookies? You’ll cream butter and sugar, add wet ingredients like eggs and vanilla, then gently mix in the dry ingredients. What is your secret weapon? Red food coloring and cocoa powder. A little bit of buttermilk adds that signature tang and keeps them wonderfully tender. What is the perfect chewy dough? After a quick chill, you’ll scoop them onto baking sheets and watch them transform into these delicious muffins. What are some of the best cookies ever What is the best thing about this whole thing?
Ingredients
For the Main Batter:
1 cup (2 sticks) unsalted butter, softened – Make sure it’s properly soften, not melted. What makes a perfect cookie? 1 12 cups granulated sugar – For that essential sweetness.
2 large eggs – Room temperature is best; they incorporate better.What is the best vanilla extract to use?What is the red velvet flavor?1 12 teaspoons of red food coloring – Gel or liquid works, but gel gives a more intense color with less amount of water.1 teaspoon white vinegar – This reacts with the baking soda for a little lift and contributes to the skin.
1 teaspoon baking soda – Our leavening agent!12 teaspoon salt – To balance all the sweetness.All-purpose flour: The structure of our cookies. 2 14 cups.12 cup buttermilk – This is crucial for that tender crumb and slight tang. If you don’t have milk, a good trick is to mix 12 cup milk with 1 tablespoon lemon juice or white vinegar. How do you prepare vinegar and let it sit for 5 minutes?
For the Filling (Optional, but highly recommended):
4 ounces cream cheese, softened – Gives a delightful tang and creaminess.
¼ cup unsalted butter, softened – For richness.1 12 cups powdered sugar – For sweetness and smooth texture.12 teaspoon vanilla extract – To enhance the flavor.
For the Glaze (Optional):
1 cup powdered sugar – Again, for that lovely sweet finish.
2-3 tablespoons milk or cream cheese – To reach your desired drizzling consistency.
½ teaspoon vanilla extract – For flavor.
What are the steps to
Step 1: Preheat & Prep Pan
How do I get my oven preheated to 375°F (190°C)? While that’s heating up, line your baking sheets with parchment paper. What is my favorite trick for making cookies? How do you bake cookies without burning? If you start using parchment paper, you’ll never go back.
Step 2: Mix Dry Ingredients
In a medium bowl, whisk together the all-purpose flour, unsweetened cocoa powder, baking soda, salt, and vinegar. Give it a good whisk to make sure everything is evenly distributed. This step is super important for ensuring your cookies have the right texture and rise. You don’t want pockets of baking soda or cocoa!
Step 3: Mix Wet Ingredients
In a large bowl, using an electric mixer (or stand mixer with paddle attachment), combine cream and sugar. Add salt and pepper to taste. Mix well. In a large bowl, whisk together the softened butter and granulated sugar until light and fluffy. Set aside. What is the best way to do this? Then, beat in the eggs one at a time, followed by the vanilla extract and the red food coloring. What should I do if I want a deep red color? Is it really mesmerizing to watch?
Step 4: Combine
Gradually add the dry ingredients to the wet ingredients, alternating with the buttermilk. Start and end with the dry ingredients. Mix on low speed until *just* combined. Be careful not to overmix here! Overmixing can lead to tough cookies, and nobody wants that. You want to mix until you no longer see streaks of flour, but stop right there. The dough will be soft and slightly sticky – that’s perfect.
Step 5: Prepare Filling
If you’re making the cream cheese filling, now is the time. In a separate bowl, beat the cream cheese and butter together until smooth and creamy. Set aside. Gradually beat in the powdered sugar and vanilla extract until well combined and fluffy. Can you use an electric mixer for this too?
Step 6: Layer & Swirl
This is where the magic happens and these red velvet cookies really shine! Drop rounded tablespoons of dough onto your prepared baking sheets, leaving about 2 inches between them. Now, take about a teaspoon of the cream cheese filling and dollop it onto half of the cookie dough balls. Then, place another ball of cookie dough on top of the filling, gently pressing down. Use a toothpick or the tip of a knife to gently swirl the dough and filling together. You want to create those beautiful marbled patterns, but don’t overdo it – you still want distinct swirls of red and cream cheese.
Step 7: Bake
Bake for 10-12 minutes, or until the edges are set and the centers are still slightly soft. They’ll continue to bake a little on the hot baking sheet, so pulling them out when they still look a tad underdone in the very center is the secret to a chewy cookie. Keep an eye on them, as ovens can vary!
Step 8: Cool & Glaze
Let the cookies cool on the baking sheets for about 5 minutes before transferring them to a wire rack to cool completely. While they’re cooling, you can whip up the glaze. Whisk together the powdered sugar, milk or cream cheese, and vanilla until you have a smooth, pourable consistency. Once the cookies are completely cool, drizzle the glaze over the tops. If you want a thinner glaze, add a little more liquid; for a thicker one, add more powdered sugar. Let the glaze set for a bit before serving. I find the glaze adds just the right touch of extra sweetness and visual appeal.
Step 9: Slice & Serve
Once the glaze has set, your gorgeous red velvet cookies are ready to be devoured! You can serve them just as they are, or if you made the swirl version, admire that beautiful cross-section. They’re best enjoyed at room temperature, when the chewiness is at its peak.
What should I serve it with?
These red velvet cookies are pretty darn perfect on their own, but I always love thinking about what to pair them with. For a delightful breakfast treat, they’re fantastic with a strong cup of coffee. The bitterness of the coffee cuts through the sweetness beautifully. Imagine dipping one into your morning latte – pure bliss! For a lovely brunch spread, I like to arrange them on a tiered stand with other pastries and fruit. They add such a beautiful pop of color. A tall glass of cold milk is also a classic pairing that my kids absolutely love. As a dessert, they’re a showstopper. Serve them with a scoop of vanilla bean ice cream or a dollop of whipped cream for an extra layer of decadence. And for those cozy snack moments? They’re just heavenly with a warm mug of hot chocolate. My personal family tradition is to have them as a special after-school treat, especially on Fridays. They always make the end of the week feel a bit more festive.
How do you make a perfect Red Velvet Cookie?
I’ve made these red velvet cookies more times than I can count, and along the way, I’ve picked up a few tricks that really make a difference. For the cocoa powder, make sure you’re using natural unsweetened cocoa powder, not Dutch-processed. The natural cocoa powder reacts better with the baking soda and vinegar, giving you that ideal texture and lift. Also, don’t skimp on the red food coloring; if you want that vibrant hue, be generous! I find gel food coloring gives the most intense color without making the dough too wet. When it comes to creaming the butter and sugar, really take your time. This step incorporates air, which is crucial for a light and chewy cookie. If your butter is too cold or too warm, you won’t get the right texture. It should be soft enough to indent with your finger, but not greasy. When you’re combining the wet and dry ingredients, stop mixing as soon as the flour disappears. Overmixing develops the gluten too much, which can make your cookies tough and cakey, rather than wonderfully chewy. For the swirling technique, I’ve found that a gentle touch is best. You don’t want to completely blend the cream cheese filling into the cookie dough; you want distinct streaks of red and white. If the dough feels too sticky to handle, don’t be tempted to add more flour unless it’s absolutely necessary, as this can dry out the cookies. Instead, chilling the dough for about 15-20 minutes can make it much easier to scoop and swirl. And for the baking, always watch them closely. Ovens vary, and you’re looking for the edges to be just set. They’ll firm up as they cool.
What are some Storing and Reheating Tips?
Keeping these red velvet cookies fresh is pretty easy, thankfully! Once they’ve completely cooled, you can store them in an airtight container at room temperature for up to 3-4 days. If you’ve glazed them, it’s a good idea to let the glaze fully set before stacking them, or place a piece of parchment paper between layers to prevent sticking. If you’re finding they’re drying out a bit, you can pop a slice of bread into the container with them; the cookie will absorb moisture from the bread, keeping them soft. For longer storage, you can refrigerate them for about a week, though they might become a bit firmer. To bring them back to that soft, chewy texture, you can gently warm them in the microwave for about 10-15 seconds. If you want to freeze the cookie dough balls (before baking), that works wonderfully! Scoop them onto a parchment-lined baking sheet, freeze until solid, then transfer them to a freezer bag or container. You can bake them directly from frozen, just adding a couple of extra minutes to the baking time. Baked cookies can also be frozen for up to 3 months. Just ensure they’re in a good airtight container or freezer bag, and thaw them at room temperature. I usually wait to glaze them until after they’ve been thawed if I’m freezing baked cookies.
Frequently Asked Questions
Final Thoughts
There you have it – my absolute favorite red velvet cookies! They truly are a little slice of heaven, packed with flavor and that gorgeous color that just brightens any day. They’re a testament to the fact that you don’t need to spend hours in the kitchen to create something truly special and delicious. They’re the perfect balance of sweet, tangy, and chocolatey, with a texture that’s just spot-on chewy. If you’re looking for a new go-to cookie recipe that’s guaranteed to impress, you really can’t go wrong with these. They’re my secret weapon for satisfying a sweet tooth, and they always seem to be the first thing to disappear from any cookie plate. Give them a try, and I’m sure you’ll fall in love too! I can’t wait to hear what you think, and I’d love to see your creations in the comments below. Happy baking, everyone!
Red Velvet Cookies
Ingredients
Cookie Dough
- 0.5 cup unsalted butter softened
- 1 cup granulated sugar
- 1 large egg
- 1 teaspoon vanilla extract
- 0.5 teaspoon red food coloring
- 1 tablespoon unsweetened cocoa powder
- 1.5 cup all-purpose flour
- 0.5 teaspoon baking soda
- 0.25 teaspoon salt
Cream Cheese Frosting
- 4 ounces cream cheese softened
- 0.25 cup unsalted butter softened
- 1 cup powdered sugar
- 0.5 teaspoon vanilla extract
Instructions
Making the Cookies
- In a large bowl, cream together the softened butter and granulated sugar until light and fluffy.
- Beat in the egg and vanilla extract. Add the red food coloring and cocoa powder and mix until well combined.
- In a separate bowl, whisk together the flour, baking soda, and salt.
- Gradually add the dry ingredients to the wet ingredients, mixing until just combined. Do not overmix.
- Cover the dough and chill in the refrigerator for at least 30 minutes.
- Preheat oven to 350°F (175°C). Line baking sheets with parchment paper.
- Roll the dough into 1-inch balls and place them 2 inches apart on the prepared baking sheets.
- Bake for 9-11 minutes, or until the edges are set and the centers are still slightly soft.
- Let the cookies cool on the baking sheets for a few minutes before transferring them to a wire rack to cool completely.
Making the Frosting
- In a medium bowl, beat the softened cream cheese and butter together until smooth.
- Gradually beat in the powdered sugar and vanilla extract until the frosting is light and fluffy.
Assembly
- Once the cookies are completely cool, frost them with the cream cheese frosting.