What are some recipes that just feel like a warm hug on an autumn day? What’s your favorite recipe for pumpkin cheesecake bars? How did it all start a few years back, when I was desperately trying to recreate that perfect bite of bread. What is the best way to make a pumpkin cheesecake without the fuss of pans? I’d already perfected my favorite Pumpkin bread recipe – a recipe my kids practically demand weekly. But I didn’t have time to reinvent the wheel. I was craving something a little more decadent, something with that irresistible tang of cream cheese. After a few tries, (and yes, some slightly cracked cheesecakes that still tasted amazing, but didn’t crack), I decided to give it another try. I landed on these pumpkin cheesecake bars. They’re like the sophisticated cousin to pumpkin pie, with all the flavor but none of the stress. What are some of the best ways to enjoy a classic fall flavor without spending hours in the kitchen? If you have ever loved pumpkin bars, these are going to be your new obsession. Is it easier to serve a whole pie instead of one big pie?
What are pumpkin cheesecake bars?
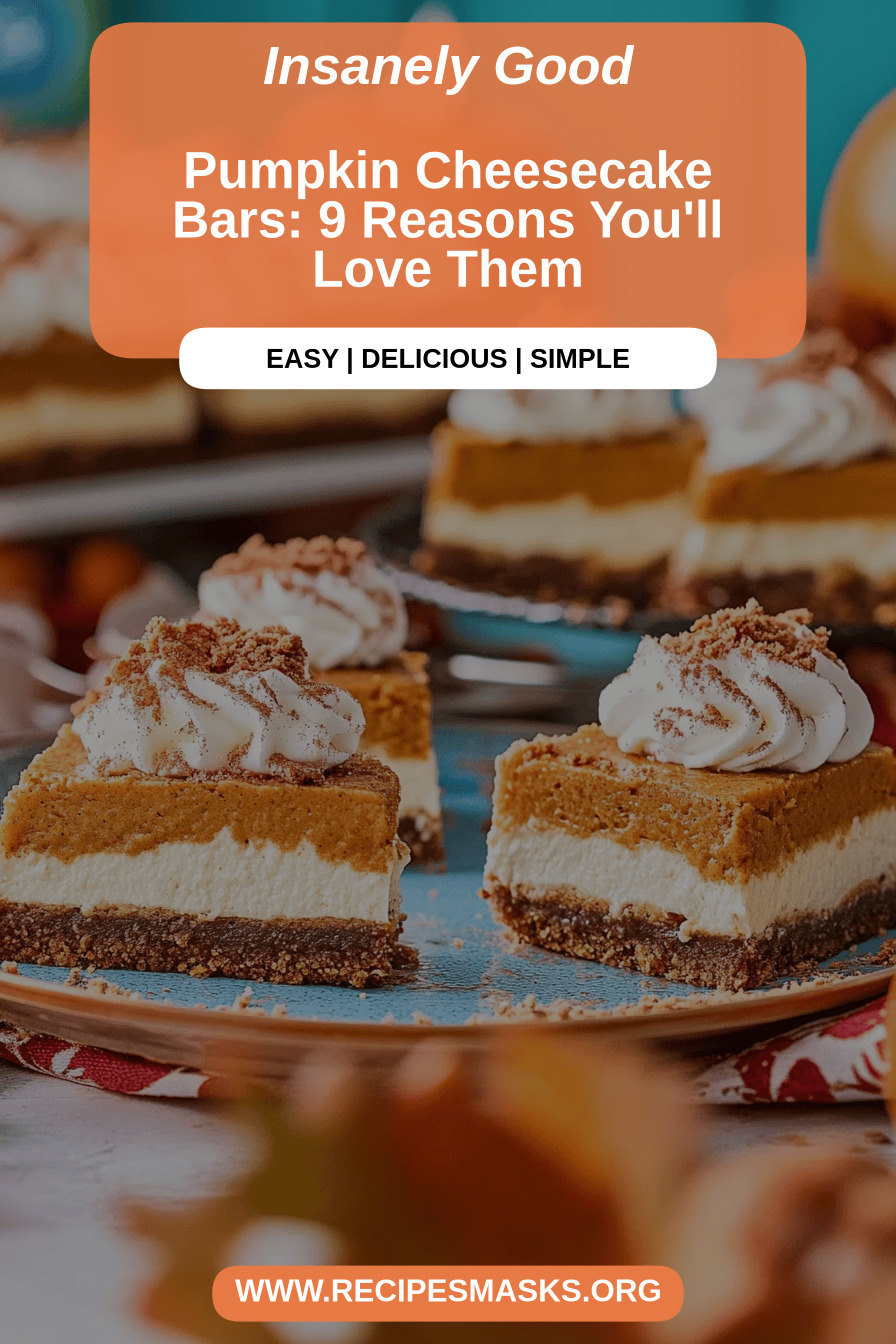
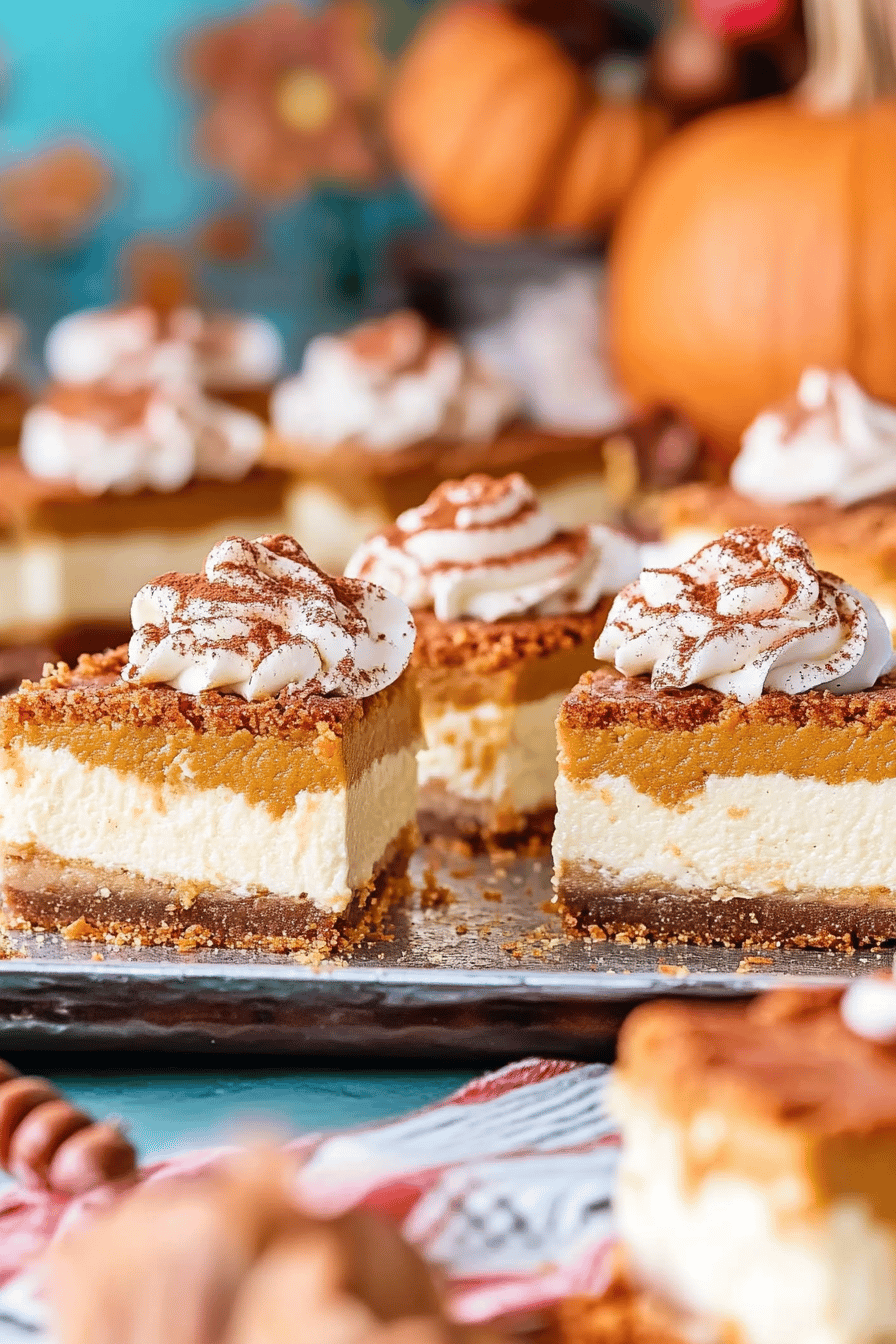
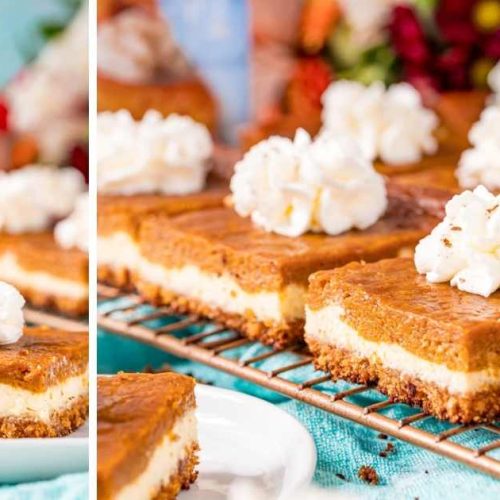
What are some of the best pumpkin cheesecake bars? Cheesecake, all conveniently baked into easy-to-handle squares. What are some of the best pumpkin spiced pumpkins? What’s the best Cheesecake Recipe? What I love most about these shortbreads is how they combine a simple, buttery crust with lusciously stuffed oats. They are delicious. Pumpkin cream cheese filling, often topped with a swirl of extra cream. Is it true that these are individual servings of pure autumn bliss, perfect for sharing, or, let’s be honest, a perfect dessert? What is the best way to enjoy all by yourself with a good book and tea? Is a cheesecake as dense as it sounds? Why or why not? What is the best flavor you’ve ever had? What’s in this dessert?
Why You’ll Love This Recipe?
There are so many reasons why this pumpkin cheesecake bar recipe has become a staple in my kitchen, and I just know you’re going to feel the same way. First off, the flavor is just out-of-this-world. It’s got that perfect balance of sweet pumpkin and tangy cream cheese, infused with all the warm spices like cinnamon, nutmeg, and cloves that just scream fall. It’s not overwhelmingly sweet, which I really appreciate, letting the natural flavors of the pumpkin and cream cheese really shine. Then there’s the simplicity of it all. Unlike a full cheesecake, there’s no water bath, no complicated cracking fears, and no tricky slicing of a whole round pie. You bake it all in one pan, cut it into bars, and you’re done! It’s honestly foolproof, even if you’re not a seasoned baker. I’ve even had friends who usually shy away from baking tackle this, and they were absolutely thrilled with the results. Plus, it’s surprisingly budget-friendly. You probably already have most of the ingredients in your pantry, and the star ingredient, pumpkin puree, is always affordable, especially this time of year. And don’t even get me started on the versatility! You can serve these for breakfast (yes, really!), as a festive dessert, or even as a fancy snack. They’re great chilled, at room temperature, or even slightly warmed. They hold up beautifully, which makes them perfect for potlucks or bake sales. Honestly, compared to other pumpkin desserts, these bars offer that wow factor with minimal effort. They’re a guaranteed crowd-pleaser and always leave me feeling like I’ve accomplished something truly delicious.
How to Make Pumpkin Cheesecake Bars
Quick Overview
Making these pumpkin cheesecake bars is a straightforward process that breaks down into a few simple stages: creating a buttery crust, mixing a luscious pumpkin cream cheese filling, swirling it artfully, baking until just set, and finishing with a simple glaze. You’ll combine your dry ingredients for the crust, then your wet ingredients, press the crust into the pan, whip up the creamy filling, pour it over the crust, swirl it for a beautiful finish, and then bake until it’s perfectly jiggly in the center but set around the edges. The cooling and glazing process is just as easy. It’s a recipe that’s forgiving and consistently delivers a delicious, homemade treat that looks as good as it tastes.
Ingredients
For the Crust:
This crust is less of a traditional pie crust and more of a delicious, slightly crumbly, buttery base that’s just perfect. I usually use all-purpose flour, but I’ve had great success with a gluten-free blend if you need it. Make sure your butter is cold; it’s the secret to that perfect texture. I always press it into the pan with the bottom of a measuring cup to get it nice and even.
- 1 and 1/2 cups All-Purpose Flour.
- 1/4 cup Granulated Sugar
- 1/2 teaspoon salt.
- 1/2 cup (1 stick) Unsalted Butter, cold and cubed.
For the Filling:
This is where the magic happens! Make sure your cream cheese is nice and soft – I usually leave it out on the counter for at least an hour, or you can gently microwave it for about 20-30 seconds. Using pure pumpkin puree is key here; make sure it’s not Pumpkin Pie filling, which already has spices and sugar added. I find using good quality vanilla extract really makes a difference in the overall flavor.
- 2 (8-ounce) Packages Cream Cheese, softened
- 3/4 cup Granulated Sugar. 1/4 cup.
- 1 large Egg
- 1 teaspoon Pure Vanilla Extract. 1 cup Pure vanilla extract.
- 1 cup pumpkin puree (not pie filling) (non-pizza)
- 1/2 teaspoon Ground Cinnamon. 1 Tbs
- 1/4 teaspoon Ground Nutmeg
- 1/8 teaspoon Ground Cloves. 1/16 teaspoon
- Pinch of Salt
For the Glaze (Optional but Highly Recommended!):
This glaze is super simple and adds a lovely touch of sweetness and a professional finish. You can adjust the amount of milk to get your desired consistency. If you like a thicker glaze, just use less milk; for a thinner drizzle, add a bit more. I sometimes add a tiny pinch of cinnamon to the glaze too, just for an extra burst of flavor.
- 1/2 cup powdered sugar. 1/2 cups gran
- 1-2 Tablespoons Milk (or heavy cream for richer glaze)
- 1/4 teaspoon vanilla extract. 1/4 cup nutmeg
What is the step by
Step 1: Preheat & Prep Pan
First things first, get that oven preheated to 350°F (175°C). What makes an even bake possible? Grab an 8×8 inch baking pan (a 9×9 works too, but your bars will be a bit thinner). I like to line it with parchment paper, leaving some overhang on the sides. What makes baking bars so much easier? Clean cuts and easy removal!
Step 2: Mix Dry Ingredients
In a medium bowl, whisk together the flour, granulated sugar, and salt for the crust. Make sure there are no clumps of flour. This simple mix forms the delicious base for our bars. Getting these dry ingredients well combined now means a more uniform crust later.
Step 3: Mix Wet Ingredients
In a separate bowl, add the cold, cubed butter to the dry ingredients. I usually use my fingers or a pastry blender to cut the butter into the flour mixture until it resembles coarse crumbs. You want some pea-sized pieces of butter still visible, as this helps create that lovely texture.
Step 4: Combine
Once you have that crumbly mixture, press it evenly into the bottom of your prepared baking pan. Use the bottom of a glass or a flat measuring cup to get a nice, compact, and even layer. Don’t skimp on this pressing step; a firm base is crucial!
Step 5: Prepare Filling
In a large bowl, beat the softened cream cheese until it’s smooth and creamy. This is your foundation for the cheesecake layer. Then, gradually beat in the granulated sugar until well combined. Add the egg and vanilla extract and mix until just combined. Be careful not to overmix at this stage, as it can incorporate too much air. Finally, fold in the pumpkin puree, cinnamon, nutmeg, cloves, and salt. Mix until everything is just blended and the color is uniformly orange. You want a smooth, luscious filling!
Step 6: Layer & Swirl
Gently spoon the pumpkin filling over the crust in the pan. Now for the fun part – the swirl! If you have any plain cream cheese mixture left over (sometimes I reserve a few spoonfuls before adding the pumpkin), you can dollop it on top. Then, using a knife or a skewer, gently swirl the pumpkin and cream cheese together. Don’t overdo it; a few gentle passes create beautiful marbled patterns. This makes them look so pretty!
Step 7: Bake
Bake in your preheated oven for 30-35 minutes. You’re looking for the edges to be set and slightly golden, while the center will still have a slight wobble. It should look mostly firm, not liquid. Overbaking can lead to a dry cheesecake layer, so err on the side of slightly underbaked in the center. The residual heat will continue to cook it as it cools.
Step 8: Cool & Glaze
Once baked, let the bars cool completely in the pan on a wire rack. This is important for the cheesecake layer to set properly. Once cooled, you can whisk together the powdered sugar, milk, and vanilla for the glaze until smooth. Drizzle this over the cooled bars. Let the glaze set for about 15-20 minutes before slicing.
Step 9: Slice & Serve
Using the parchment paper overhang, carefully lift the entire block out of the pan onto a cutting board. Use a sharp knife (wiping it clean between cuts helps for neat slices!) to cut the bars into your desired size. I usually get about 9 or 12 bars. Serve them chilled or at room temperature. Enjoy the deliciousness!
What to Serve It With
These pumpkin cheesecake bars are wonderfully versatile, fitting into any meal or occasion. For a truly delightful breakfast, I love pairing them with a hot cup of coffee or a chai latte. The warm spices in the bars complement the beverages perfectly. They’re not too sweet for the morning, especially if you go easy on the glaze. For a more festive brunch spread, I like to plate them nicely with some fresh berries, maybe a dollop of whipped cream, and a sprig of mint. They look so elegant, and they’re always a hit. As a dessert, they’re simply divine. They stand on their own beautifully, but you could also serve them with a scoop of vanilla bean ice cream or a drizzle of caramel sauce for extra indulgence. My family also loves these as a cozy snack, maybe with a glass of cold milk for the kids or a mulled cider for the adults. We often have them around during football games or movie nights; they’re just that comforting and easy to munch on. My favorite personal tradition is to have one with a steaming mug of Earl Grey tea after dinner when I want something sweet but not too heavy. They’re just that universally loved.
How do you make pumpkin cheesecake bars?
I’ve made these pumpkin cheesecake bars more times than I can count, and through all those batches, I’ve picked up a few tricks that really help ensure they turn out perfectly every single time. Let’s talk about the crust first. The key is to use cold butter and not overwork the dough. You want that crumbly texture, not a tough pastry. Press it in firmly and evenly, as this prevents it from falling apart when you slice the bars. For the filling, the most important thing is to make sure your cream cheese is truly softened. If it’s cold, you’ll end up with lumps, and nobody wants a lumpy cheesecake layer! I’ve even put slightly softened cream cheese in a bowl and used my hand mixer to whip it until smooth before adding other ingredients, and it works like a charm. When it comes to mixing, be gentle after adding the egg. Overbeating can incorporate too much air, which can lead to cracks during baking, though with bars, it’s less of a concern than with a whole cheesecake. I love the swirl! For a really pretty swirl, don’t over-swirl. Just a few gentle passes with a knife or toothpick will create beautiful marbling without making the layers muddy. For baking, ovens can be so different. Keep an eye on them after about 25 minutes. You want the edges to be set, but the center should still have a slight wobble. It will continue to firm up as it cools. If you accidentally overbake, don’t despair! A slightly overbaked cheesecake bar is still delicious, especially with that glaze. My favorite variation is a little extra spice in the glaze, or sometimes I’ll toast some pecans and sprinkle them over the top before the glaze sets for a delightful crunch. If you’re ever out of milk for the glaze, heavy cream works beautifully and makes it extra rich. Trust me on this one: letting them cool completely is crucial for clean slicing and the best texture. It’s tempting to dig in right away, but patience pays off!
What are some tips for Storing and Reheating
These pumpkin cheesecake bars are pretty forgiving when it comes to storage, which is another reason I adore them. If you’re keeping them at room temperature, I’d say they’re good for about 2-3 hours, especially if your kitchen is on the cooler side. Make sure to cover them loosely with plastic wrap or foil to prevent them from drying out. For longer storage, the refrigerator is your best friend. Store them in an airtight container, and they’ll stay wonderfully fresh and creamy for up to 4-5 days. I usually cut mine into individual portions and stack them with parchment paper in between layers to prevent sticking. They’re actually even better the next day, as the flavors meld together. If you’re planning to freeze them, which I sometimes do when I’ve had a particularly ambitious baking day, make sure they are completely cooled and the glaze is set. I like to wrap each bar individually in plastic wrap, then place them in a freezer-safe bag or container. They’ll keep well in the freezer for about 1-2 months. To thaw, just transfer them from the freezer to the refrigerator overnight. The glaze timing is important too! If you plan to freeze them without glaze, that’s perfectly fine. You can add the glaze after thawing. If you do glaze them before freezing, make sure it’s fully set, or the wrapping might stick to it.
Frequently Asked Questions
Final Thoughts
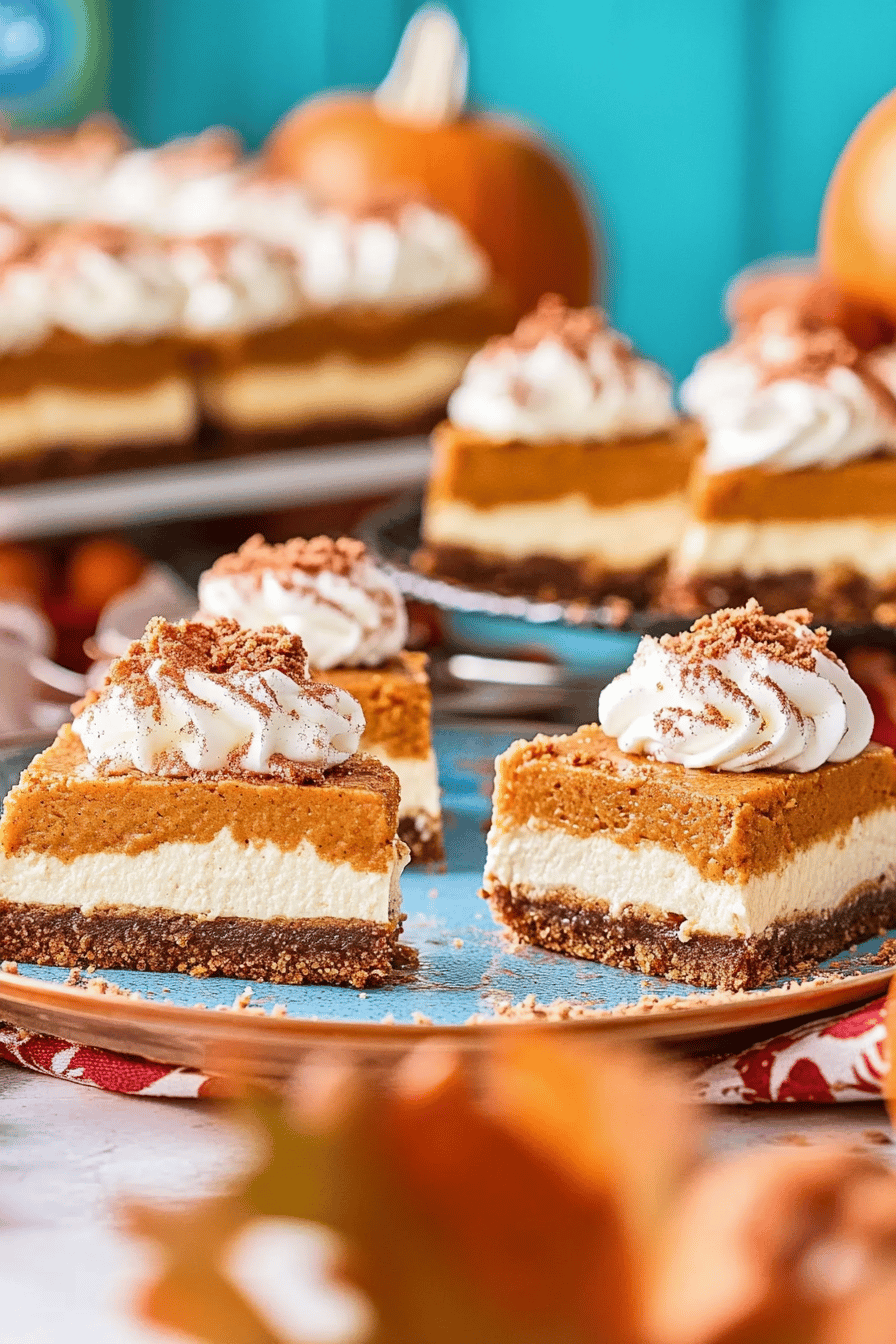
There you have it – my go-to recipe for the most delightful pumpkin cheesecake bars! I truly believe these are a winner because they capture all the cozy, comforting flavors of fall without any of the usual cheesecake drama. They’re incredibly easy to whip up, perfect for sharing (or not!), and the taste is just divine. The creamy pumpkin filling, the spiced notes, and that sweet, buttery crust all come together in a way that just feels like home. Whether you’re a seasoned baker or just starting out, I promise you can nail this recipe. They’re a fantastic way to celebrate the season, and I just know they’ll become a favorite for your family too. Don’t be afraid to experiment with toppings or even add a little extra cinnamon to the filling if you love a stronger spice profile. I can’t wait to hear how yours turn out! Let me know in the comments below if you try them, or if you have any fun variations you’ve discovered. Happy baking, everyone!
Pumpkin Cheesecake Bars
Ingredients
Crust
- 2.5 cups graham cracker crumbs
- 0.33 cup sugar
- 0.5 cup unsalted butter melted
Cheesecake Filling
- 24 oz cream cheese softened
- 0.75 cup granulated sugar
- 2 large eggs
- 1 cup pumpkin puree not pumpkin pie filling
- 1 tsp vanilla extract
- 0.5 tsp cinnamon
- 0.25 tsp nutmeg
- 0.13 tsp ground cloves
Instructions
Preparation Steps
- Preheat oven to 350°F (175°C). Line a 9x13 inch baking pan with parchment paper, leaving an overhang on the sides.
- In a medium bowl, combine graham cracker crumbs and sugar. Pour in melted butter and stir until combined.
- Press the crumb mixture evenly into the bottom of the prepared baking pan.
- In a large bowl, beat cream cheese and granulated sugar until smooth. Beat in eggs one at a time.
- Stir in pumpkin puree, vanilla extract, cinnamon, nutmeg, and cloves until just combined.
- Pour the pumpkin cheesecake mixture evenly over the crust.
- Bake for 30-35 minutes, or until the edges are set and the center is slightly jiggly.
- Let cool completely in the pan on a wire rack. Chill in the refrigerator for at least 2 hours before cutting into bars.