There are some recipes that just feel like home, aren’t there? The kind that fill your kitchen with the most incredible aroma and have everyone gathered around, just waiting. For me, that recipe is this Pineapple cheesecake. It’s not just a dessert; it’s a memory maker. I remember my Grandma Elsie making this for summer picnics, and the bright, tangy sweetness always felt like pure sunshine. It’s got that perfect balance of creamy, tangy, and sweet that just sings. Forget those super dense, overly complicated cheesecakes that take hours and leave you stressed. This pineapple cheesecake is surprisingly straightforward, but tastes like it came from a fancy bakery. Honestly, if you’re looking for a showstopper that doesn’t demand all your time and patience, you’ve landed in the right spot. It’s a lifesaver when you need something special without the fuss.
What is Pineapple Cheesecake?
So, what exactly is this glorious creation? Think of it as the best parts of a classic cheesecake – that unbelievably smooth, rich cream cheese filling – but with a vibrant, tropical twist. The “pineapple” part comes from incorporating crushed pineapple directly into the batter. This isn’t just about flavor; it adds a lovely moistness and a subtle, fruity tang that cuts through the richness of the cream cheese beautifully. It’s essentially a celebration of sunshine in every bite. My Grandma Elsie used to say it was like “eating a sweet, creamy cloud with a little bit of island breeze.” And honestly, she wasn’t wrong! It’s a straightforward, no-fuss approach to cheesecake that feels a bit more approachable than some of the more elaborate versions out there. It’s the kind of dessert that makes people close their eyes in delight after the first bite.
Why you’ll love this recipe?
Let me tell you, there are so many reasons why this pineapple cheesecake has become a staple in my recipe repertoire, and I just know you’re going to love it too. First off, the flavor is absolutely divine. That creamy, tangy cream cheese base is perfectly complemented by the sweet, slightly tart pineapple. It’s not cloyingly sweet; the pineapple provides this wonderful brightness that just makes everything sing. What I really love is how incredibly moist it is. The pineapple juice helps keep the cake tender and gives it this wonderfully soft texture that just melts in your mouth. And the simplicity! I’m always on the lookout for recipes that deliver big on taste without requiring a culinary degree, and this one totally fits the bill. You don’t need a water bath (hallelujah!), and the ingredients are all pretty standard. It’s also surprisingly cost-effective. A block of cream cheese and a can of pineapple go a long way, making this a fantastic option when you want to impress without breaking the bank. Plus, it’s so versatile! I’ve served this for everything from casual weekend brunches to more formal dinner parties, and it’s always a huge hit. It’s one of those rare desserts that manages to be both comforting and sophisticated. If you’re a fan of a good fruit-infused dessert, or just love a really well-balanced cheesecake, this is going to be your new best friend. It’s the perfect treat when you’re craving something sweet and satisfying but don’t want anything too heavy.
How do you make Pineapple Cheesecake?
Quick Overview
Making this pineapple cheesecake is all about bringing together a few key components for maximum flavor and ease. We’ll start with a simple, buttery crust, then whip up a luscious, pineapple-infused cream cheese batter, bake it until it’s just set, and finish with a simple, sweet glaze. The real magic happens as the pineapple bakes, infusing the whole cake with its tropical goodness. It’s designed to be as foolproof as possible, so don’t worry if cheesecake making has felt intimidating before. This method is designed for success and minimal stress, resulting in a wonderfully moist and flavorful cake.
Ingredients
For the Crust:
You’ll want about 1 ½ cups of crushed graham crackers. I like to get mine pretty fine, almost like sand, which makes for a really uniform crust. You can use a food processor or just pop them in a ziploc bag and go at them with a rolling pin – it’s surprisingly therapeutic! We’ll also need ¼ cup of granulated sugar to sweeten it up just a touch, and ½ cup of unsalted butter, melted. Make sure your butter is good quality; it really does make a difference in the richness of the crust.
For the Main Batter:
This is where the magic happens! You’ll need three 8-ounce blocks of cream cheese, softened to room temperature. This is super important; lumpy cream cheese is the enemy of a smooth cheesecake. I usually take mine out about an hour before I plan to start mixing. Then, we’ll need 1 ¼ cups of granulated sugar. For the eggs, you’ll need four large eggs, also at room temperature. Room temperature eggs incorporate much better and prevent the batter from curdling. A tablespoon of all-purpose flour helps give the cheesecake a little structure, and 1 teaspoon of vanilla extract adds that classic comforting flavor. And, of course, the star: one 20-ounce can of crushed pineapple, undrained. Don’t drain it! That juice is pure gold for flavor and moisture. I always make sure to use a good quality brand of crushed pineapple; sometimes the cheaper ones can be a bit too watery.
For the Glaze:
This is optional but highly recommended for that extra pop of flavor and visual appeal. You’ll need about 1 cup of powdered sugar, sifted to avoid any lumps. Then, we’ll use about 2-3 tablespoons of the reserved pineapple juice from the can. You might need a little more or less to get the right drizzling consistency. A tiny splash of lemon juice (about ½ teaspoon) can really brighten up the flavors, too, if you have some on hand.
Step-by-Step Instructions
Step 1: Preheat & Prep Pan
First things first, let’s get your oven warmed up to 350 degrees Fahrenheit (175 degrees Celsius). Grab a 9-inch springform pan – this is the best pan for cheesecakes because it makes them so easy to get out without damaging them. I like to grease the inside of the pan really well with butter or cooking spray. This not only helps prevent sticking but also gives us a nice surface for the crust to adhere to. You don’t need to line it with parchment paper for this particular recipe, but if you’re worried about sticking, a light dusting of flour after greasing can offer extra insurance. Make sure your oven rack is in the middle position.
Step 2: Mix Dry Ingredients
In a medium bowl, combine your finely crushed graham cracker crumbs with the ¼ cup of granulated sugar. Give it a good stir with a fork or a whisk until everything is evenly distributed. This ensures the sugar is spread throughout the crumbs, not just in clumps, which will help the crust brown evenly and taste consistent. It’s a simple step, but crucial for a great base!
Step 3: Mix Wet Ingredients
Now, pour the ½ cup of melted butter into the dry ingredients. Use your fork or a spatula to mix it all together until the crumbs are evenly moistened. They should look like wet sand. This is what holds your crust together. If it seems too dry and crumbly, you can add another tablespoon of melted butter, but usually ½ cup is perfect.
Step 4: Combine
Press the moistened graham cracker mixture firmly and evenly into the bottom of your prepared springform pan. I like to use the flat bottom of a measuring cup or glass to really pack it down. This creates a sturdy foundation that won’t crumble when you slice into your cheesecake. Make sure you get it right to the edges. Bake the crust for about 8-10 minutes, just until it’s lightly golden. This helps it set and gives it a nice toasted flavor. While the crust is baking, you can start on your filling!
Step 5: Prepare Filling
In a large bowl, beat the softened cream cheese with an electric mixer (a stand mixer or a hand mixer works great) on medium speed until it’s completely smooth and creamy. This is probably the most important step for a truly luscious texture. Scrape down the sides of the bowl often! Once it’s smooth, gradually add the 1 ¼ cups of granulated sugar and the tablespoon of flour. Beat again until just combined and there are no more streaks of sugar. Don’t overmix at this stage; we’re just incorporating.
Step 6: Layer & Swirl
Now it’s time for the eggs. Add them one at a time, beating on low speed just until each egg is incorporated before adding the next. Overbeating the eggs can lead to cracks in your cheesecake, so go easy here. Stir in the vanilla extract. Finally, gently fold in the undrained crushed pineapple. The batter will be thick and luscious, with little pockets of pineapple throughout. Pour this wonderful batter evenly over your pre-baked crust. Give the pan a gentle tap on the counter a couple of times to release any large air bubbles. You don’t need to swirl this one; the pineapple pieces distribute so beautifully on their own. It creates these lovely pockets of flavor and texture.
Step 7: Bake
Now for the bake! Carefully place the springform pan on the middle rack of your preheated oven. Bake for 50-60 minutes. How do you know it’s done? The edges should be set and lightly golden, but the center should still have a slight wobble, like Jell-O. It will continue to set as it cools. Resist the urge to overbake; this is key to preventing a dry or cracked cheesecake. If you notice the edges browning too quickly, you can loosely tent the top with aluminum foil.
Step 8: Cool & Glaze
Once baked, turn off the oven, but leave the cheesecake inside with the door slightly ajar for about an hour. This slow cooling process helps prevent sudden temperature changes that can cause cracks. After an hour, carefully remove the cheesecake from the oven and let it cool completely on a wire rack at room temperature. Once it’s totally cool, you can chill it in the refrigerator for at least 4 hours, or preferably overnight. This is crucial for the cheesecake to fully set and for the flavors to meld. For the glaze, whisk together the sifted powdered sugar, 2 tablespoons of pineapple juice, and the lemon juice until smooth. Add more pineapple juice, a teaspoon at a time, if needed, to reach a pourable but not watery consistency. Drizzle this over the chilled cheesecake before serving.
Step 9: Slice & Serve
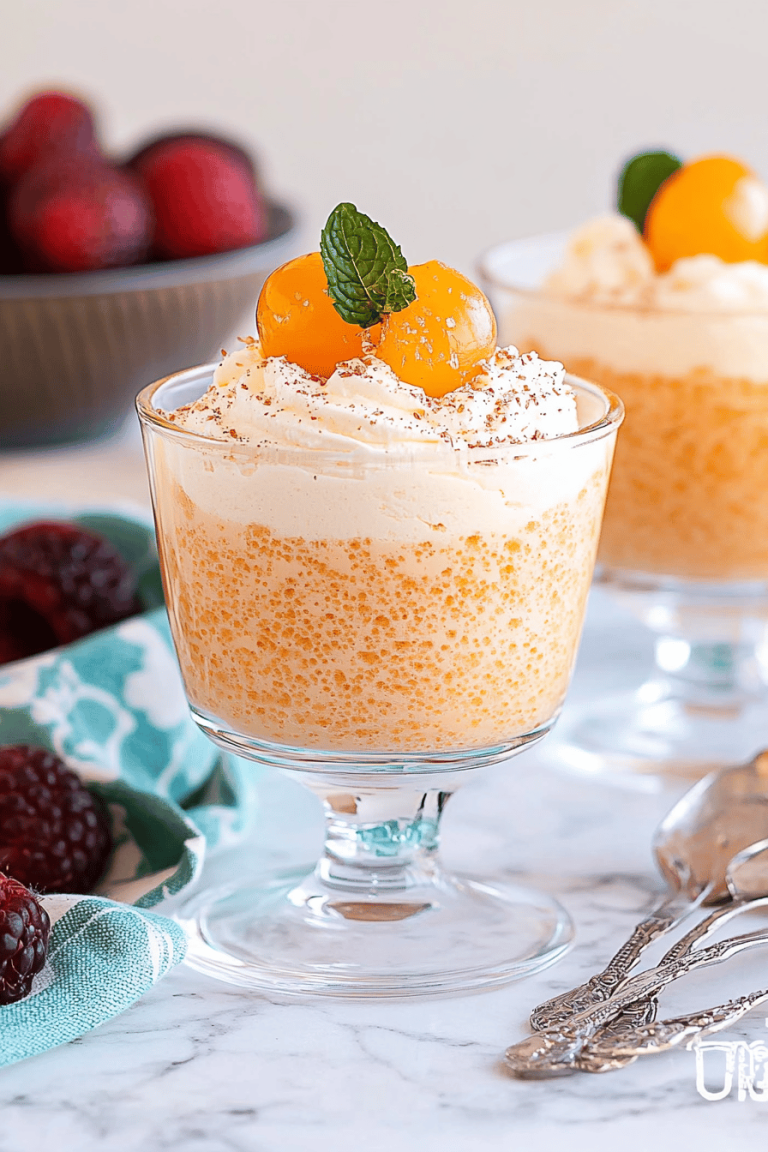
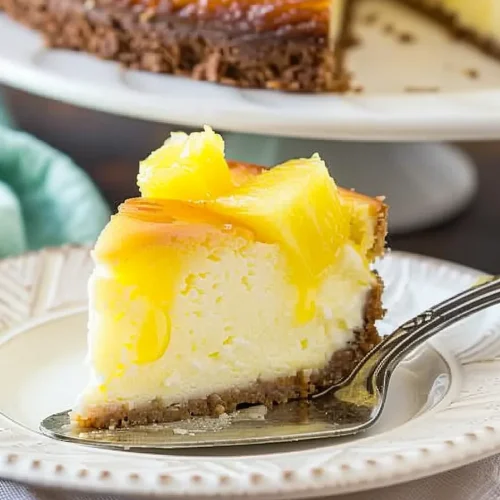
Once the cheesecake is well-chilled and glazed, it’s time for the best part! To get clean slices, run a thin, sharp knife under hot water, wipe it dry, and then slice. Repeat between each cut. This makes sure you get those lovely, clean edges. Serve chilled. A slice of this pineapple cheesecake is perfect on its own, or with a dollop of whipped cream or a few fresh berries if you’re feeling fancy.
What to Serve It With
This pineapple cheesecake is such a crowd-pleaser, and it’s amazing how versatile it is depending on the meal. For a lovely morning treat, I love serving a smaller slice alongside a strong cup of coffee. The tanginess of the cheesecake cuts through the bitterness of the coffee beautifully, and it’s just a perfect way to start the day. You could also add a few fresh berries on the side for a pop of color and freshness. When it comes to brunch, this cheesecake truly shines. I often serve it as part of a larger spread, perhaps with some fluffy scrambled eggs, crispy bacon, and maybe some fresh fruit salad. It adds that touch of elegance to the table. A mimosa or a sparkling cider is the perfect beverage pairing here. For dessert, it’s a no-brainer! It’s fantastic all on its own, but I sometimes like to serve it with a little extra whipped cream or even a scoop of vanilla bean ice cream if we’re feeling decadent. It’s also lovely with a light, fruity liqueur on the side. And for those cozy snack times? This is my go-to. A warm mug of tea or hot chocolate, a comfy blanket, and a generous slice of this pineapple cheesecake… pure bliss. My kids always ask for this when they want something special after school. It’s just pure comfort food in cheesecake form.
Top Tips for Perfecting Your Pineapple Cheesecake
Over the years, I’ve learned a few tricks that have really helped me nail this pineapple cheesecake every single time. Let’s talk about the pineapple first. When you’re using canned crushed pineapple, make sure you get the kind in juice, not syrup, if possible, as it’s less sweet and has a cleaner flavor. And absolutely, positively, do *not* drain all the juice! That liquid is packed with flavor and moisture that makes the cheesecake so wonderfully tender. I always try to use ripe, fresh pineapple if it’s in season, but good quality canned is a reliable option year-round. For the cream cheese, the room temperature rule is non-negotiable. Seriously, if your cream cheese is cold, you’ll end up with lumps, and no one wants a lumpy cheesecake. I usually take it out of the fridge about an hour beforehand. If I forget, I’ll cut the blocks into smaller cubes and let them sit on the counter for about 20-30 minutes – it speeds things up. When you’re mixing, remember that overbeating, especially after adding the eggs, can introduce too much air, which often leads to cracking. Beat just until combined, and scrape down your bowl frequently to ensure everything is incorporated evenly. For the crust, pressing it firmly into the pan is key. A loose crust will crumble and fall apart. I like to bake mine for a few minutes before adding the filling; it gives it a head start on browning and helps set it so it holds up better. My personal favorite little tweak is adding just a pinch of salt to the crust mixture; it really enhances the sweetness and cuts through the richness. If you’re not a fan of graham crackers, a crushed shortbread cookie or even a digestive biscuit crust works wonderfully too. The glaze is optional, but if you make it, remember that the consistency is everything. Too thick and it won’t drizzle; too thin and it will run right off. Start with the smaller amount of liquid and add more tablespoon by tablespoon until you get that perfect, pourable consistency. You can also play with adding a tiny drop of yellow food coloring to the glaze if you want that extra vibrant sunny color. And finally, patience is a virtue when it comes to cheesecake! Don’t rush the cooling process. That slow, gradual cooling is what gives you that incredibly smooth, crack-free surface. Trust me on this one; it’s worth the wait!
Storing and Reheating Tips
One of the best things about this pineapple cheesecake is how well it stores, making it perfect for making ahead of time or enjoying leftovers. If you find yourself with any (which is rare in my house!), you can keep it covered tightly at room temperature for up to 2 hours. After that, it really needs to be refrigerated to maintain its freshness and prevent spoilage, especially because of the cream cheese and eggs. In the refrigerator, a well-covered cheesecake will last for about 4-5 days. I usually use plastic wrap to cover it directly, pressing it gently against the surface to create a seal, and then maybe an additional layer of foil or an airtight container. This helps prevent it from absorbing any fridge odors. If you want to keep it for longer, freezing is a fantastic option. You can freeze the entire cheesecake (once it’s completely chilled) or individual slices. For freezing, it’s best to wrap it very tightly in a double layer of plastic wrap, followed by a layer of aluminum foil. This double barrier is crucial to prevent freezer burn. It can last in the freezer for about 2-3 months. To thaw, it’s best to transfer the cheesecake from the freezer to the refrigerator and let it thaw slowly overnight. This helps it retain its texture. For slices, you can thaw them in the fridge or even at room temperature for a shorter period, but overnight is always best for quality. I often wait to add the glaze until *after* the cheesecake has been thawed, especially if it’s been frozen. This ensures the glaze stays fresh and doesn’t get soggy. If you do store it with the glaze already on, make sure it’s very well covered to prevent the glaze from cracking or drying out.
Frequently Asked Questions
Final Thoughts
So there you have it – my go-to pineapple cheesecake recipe! It’s a dessert that brings so much joy, not just in the making, but in the sharing. It’s proof that you don’t need to be a pastry chef to create something truly spectacular for your loved ones. That perfect blend of creamy tang and tropical sweetness, all wrapped up in a simple, approachable recipe, is what makes it so special. I really hope you give this a try; it’s become a family favorite for a reason, and I’d be thrilled if it became one for you too! If you love this recipe, you might also enjoy my Easy Lemon Raspberry Tart or my Classic Chocolate Chip Cookie Bars – they’re other family-approved hits that are wonderfully straightforward. I can’t wait to hear how your pineapple cheesecake turns out! Please leave a comment below and let me know what you think, or share your own favorite tips and variations. Happy baking!
Pineapple cheesecake
Ingredients
Cheesecake Filling
- 8 ounces cream cheese softened
- 0.5 cup white sugar
- 2 cans crushed pineapple 15 oz each, well drained
- 1.75 cups frozen whipped topping thawed
- 1 each 9-inch graham cracker crust prepared
Instructions
Preparation Steps
- In a large bowl, blend the softened cream cheese and white sugar together until the mixture is smooth and creamy.
- Gently stir in one can of drained crushed pineapple and the thawed whipped topping. Mix until everything is well combined and the filling is light and fluffy.
- Transfer the cream cheese mixture into the prepared graham cracker crust. Spread it evenly with a spatula.
- Spread the second can of drained crushed pineapple over the top of the cheesecake filling, distributing it evenly.
- Cover the cheesecake with plastic wrap or a lid. Refrigerate for at least 2 hours to let it set and allow the flavors to meld together.