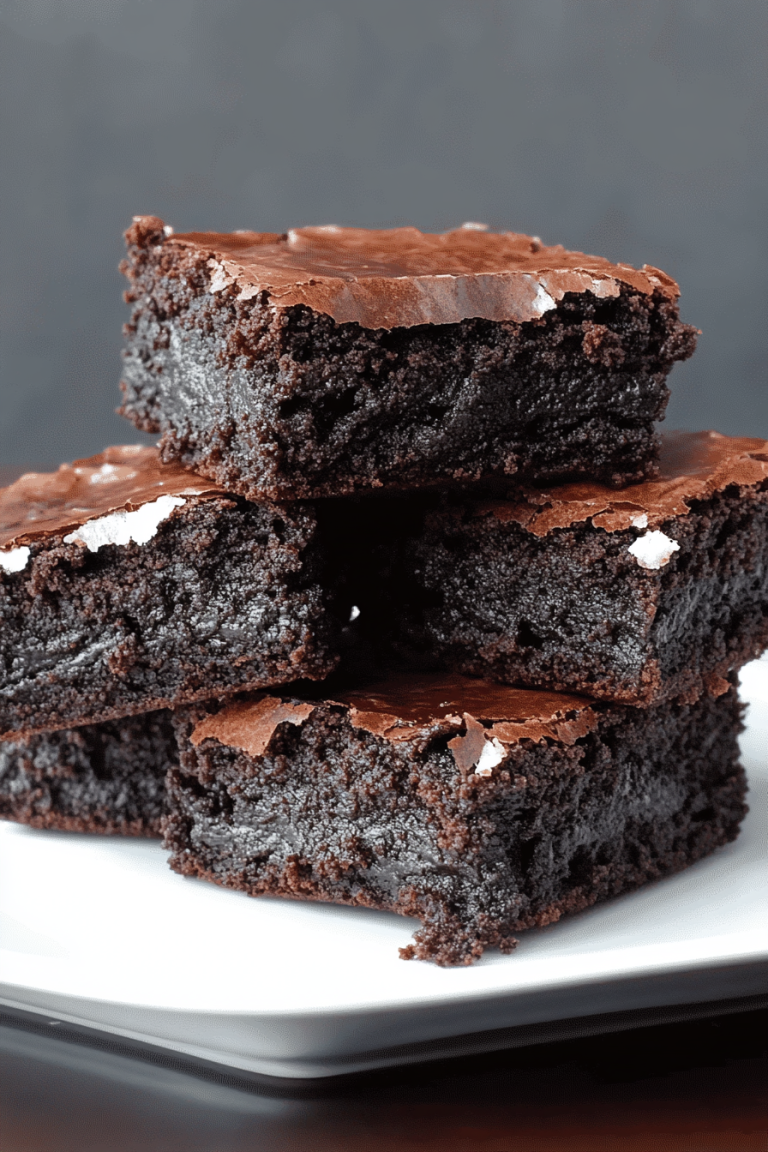
You know those recipes that just *feel* like a hug? The ones you can whip up on a whim and know, without a shadow of a doubt, that they’re going to be a showstopper? Well, this oreo Chocolate Cake is exactly that for me. It’s the kind of cake that makes my kitchen smell like heaven, the kind my kids beg for on birthdays (and sometimes, just because it’s Tuesday!), and the kind I’ve perfected over countless batches. It’s not just any chocolate cake; it’s an oreo chocolate cake, and let me tell you, the addition of those beloved cookies takes it to a whole new level of indulgence. Forget those fancy, fussy cakes that require a culinary degree; this beauty is all about rich, moist chocolate flavor with delightful little pops of crushed Oreos baked right in. It’s my go-to when I need something that screams “special occasion” without the overwhelming effort. If you’re a chocolate lover, and especially if you’re an Oreo enthusiast, you are going to fall head over heels for this.
What is Oreo Chocolate Cake?
So, what exactly *is* this glorious creation we’re talking about? Think of it as your classic, deeply satisfying chocolate cake, but with a serious upgrade. We’re not just talking about a drizzle of chocolate icing here. Oh no. We’re talking about folding chunks of crushed Oreos directly into the cake batter. As it bakes, they soften slightly, becoming little pockets of chocolatey goodness that are just divine. It’s essentially a love letter to both chocolate cake and Oreos, combined into one perfect dessert. The name is pretty straightforward, really – it’s a cake, it’s intensely chocolatey, and it’s loaded with Oreos. It’s not overly complicated, and that’s part of its charm. It’s the kind of cake that feels both familiar and excitingly new, all at once.
Why you’ll love this recipe?
Honestly, where do I even begin with why you’ll adore this oreo chocolate cake? Let’s break it down, because there are so many reasons this recipe has earned a permanent spot in my baking rotation. First and foremost, the flavor. It’s incredibly rich and deeply chocolatey, with that unmistakable hint of dark cocoa that true chocolate lovers crave. But then you get those little surprises – the crushed Oreos. They add a textural element that’s just fantastic, and they amp up the chocolate intensity in the most delightful way. And the moisture! This cake is incredibly moist and tender, never dry or crumbly, which is a big win in my book.
Secondly, the simplicity. I know, I know, “easy chocolate cake” can sometimes be an oxymoron, but I promise, this one truly is. It uses common pantry staples, and the steps are straightforward enough that you don’t need to be a seasoned baker to achieve spectacular results. It’s the kind of recipe that makes you feel like a baking superhero, even if you only pull out your mixer a few times a year. And let’s talk about cost-efficiency. Compared to some elaborate dessert recipes, this oreo chocolate cake is wonderfully budget-friendly, especially if you catch Oreos on sale (which, let’s be honest, happens pretty often!). You get so much flavor and satisfaction for the ingredients you use.
Finally, the versatility! This cake is perfect on its own, dusted with a little powdered sugar, or absolutely spectacular with a simple chocolate ganache or buttercream frosting. It’s also fantastic as a base for more elaborate desserts. What I love most about this particular recipe is that it strikes that perfect balance. It’s decadent enough for a special occasion, but simple enough for a spontaneous craving. It’s a crowd-pleaser that rarely disappoints, and it always gets rave reviews. Trust me, once you try it, it’ll become your go-to oreo chocolate cake too.
How do I make Oreo Chocolate Cake?
Quick Overview
Making this oreo chocolate cake is really a joy. You’ll start by whisking together your dry ingredients, then combine your wet ingredients, and finally, bring them all together. The magic happens when you fold in the crushed Oreos. After a quick bake and a cool down, you’ll finish it off with a simple glaze or your favorite frosting. What makes this method so great is that it minimizes overmixing, which is key to a tender cake. It’s designed to be foolproof, delivering that rich, moist, oreo-infused chocolatey goodness every single time.
Ingredients
For the Main Batter:
This is where we build that deep chocolate foundation. I always opt for good quality cocoa powder; it really makes a difference. Dutch-processed cocoa gives a smoother, richer flavor and a darker color, which I personally love for an oreo chocolate cake. You’ll need:
- 2 cups all-purpose flour
- 2 cups granulated sugar
- 3/4 cup unsweetened cocoa powder (Dutch-processed recommended)
- 2 teaspoons baking soda
- 1 teaspoon baking powder
- 1 teaspoon salt
- 1 cup buttermilk (or 1 cup milk mixed with 1 tablespoon white vinegar, let stand 5 minutes)
- 1/2 cup vegetable oil (or other neutral oil)
- 2 large eggs, at room temperature
- 1 teaspoon vanilla extract
- 1 cup hot water or hot brewed coffee (coffee really deepens the chocolate flavor!)
If you can’t find buttermilk, don’t stress! The milk and vinegar trick works like a charm and gives you that necessary acidity to activate the leaveners. And using hot coffee instead of water? It’s my secret weapon for making any chocolate cake taste even more intensely chocolatey.
For the Filling:
This is where the star of the show comes in! You can use regular Oreos, or get creative with double stuf for extra gooeyness. The key is to crush them to a good consistency – not powder, but not huge chunks either. About 1.5 cups of crushed Oreos are perfect for this recipe, which usually comes from about 15-20 cookies. I like to pulse them in a food processor, but a zip-top bag and a rolling pin works wonders too!
For the Glaze:
This is optional but highly recommended for that extra touch of decadence! A simple chocolate ganache or a quick powdered sugar glaze is divine. For a simple glaze:
- 1 cup powdered sugar
- 2-3 tablespoons milk or heavy cream
- 1/2 teaspoon vanilla extract (optional)
You want a consistency that’s pourable but not too thin. If it’s too thick, add a tiny bit more liquid; if it’s too thin, add a touch more powdered sugar.
Step-by-Step Instructions
Step 1: Preheat & Prep Pan
First things first, preheat your oven to 350°F (175°C). This is crucial for even baking. I usually grease and flour a 9×13 inch baking pan, or two 8 or 9-inch round cake pans if you prefer a layer cake. For a 9×13, I like to line the bottom with parchment paper too – it makes removing the cake so much easier, and who needs extra scrubbing? Make sure the parchment hangs over the sides a bit so you can lift it out like a sling.
Step 2: Mix Dry Ingredients
In a large mixing bowl, whisk together the flour, sugar, cocoa powder, baking soda, baking powder, and salt. Whisking thoroughly ensures that all the leavening agents are evenly distributed, which means your cake will rise beautifully. You don’t want any surprise pockets of baking soda! I usually give it a good whisk for about 30 seconds to aerate everything.
Step 3: Mix Wet Ingredients
In a separate medium bowl, whisk together the buttermilk (or your homemade version), vegetable oil, eggs, and vanilla extract. Beat them until they’re well combined and the mixture is smooth. Having your eggs at room temperature helps them incorporate better into the batter, leading to a smoother, more emulsified cake.
Step 4: Combine
Pour the wet ingredients into the dry ingredients. Mix on low speed (or with a spatula) until just combined. Don’t overmix! Seriously, this is the golden rule for tender cakes. Overmixing develops the gluten in the flour too much, resulting in a tough cake. Once it’s mostly mixed, slowly pour in the hot water or hot coffee and mix on low speed until the batter is smooth and liquidy. It will be quite thin, and that’s exactly what you want! This thin batter is what leads to that incredibly moist crumb. It should look like rich, dark chocolate soup.
Step 5: Prepare Filling
While the batter is still warm, stir in your crushed Oreos. I usually do this right at the end, after the batter is made. Just give them a gentle fold in. You don’t need to overmix, just ensure they are dispersed throughout the batter. This step is so simple, yet it’s what makes this cake so special. The Oreos will be suspended in the rich chocolate batter, ready to bake into delightful little treasures.
Step 6: Layer & Swirl
If you’re using two round pans, divide the batter evenly between them. If you’re using a 9×13 pan, pour all the batter in. Gently tap the pan on the counter a couple of times to release any large air bubbles. If you’re feeling fancy and want a bit of a visual swirl effect, you can sometimes reserve a few whole Oreo cookies, crush them a bit more finely, and sprinkle them on top, then gently swirl with a knife. However, for this recipe, I usually just let the crushed Oreos be the star within the batter itself.
Step 7: Bake
Bake for 30-35 minutes for round pans, or 35-40 minutes for a 9×13 pan. You’ll know it’s done when a wooden skewer or toothpick inserted into the center comes out clean, or with a few moist crumbs attached (but no wet batter). Be careful not to overbake, as that’s the fastest way to a dry cake. Ovens vary, so start checking around the 30-minute mark.
Step 8: Cool & Glaze
Let the cake cool in the pan for about 10-15 minutes before inverting it onto a wire rack to cool completely. If you used parchment paper, you can carefully lift it out. Once the cake is completely cool, you can add your glaze or frosting. For the simple glaze, whisk together the powdered sugar, milk, and vanilla until smooth and pourable. Drizzle it over the top of the cooled cake, letting it drip down the sides. It’s so satisfying to watch!
Step 9: Slice & Serve
Once the glaze has set a bit (or if you skipped the glaze!), slice your oreo chocolate cake and serve. This cake is wonderful served at room temperature. I like to use a sharp knife and cut clean slices. The cross-section with all those little Oreo bits is just beautiful to see.
What to Serve It With
This oreo chocolate cake is so versatile, it can be a star player at almost any meal or occasion.
For Breakfast: Yes, you read that right! While it’s a decadent treat, a small slice with your morning coffee can be pure bliss. Think of it as a special weekend treat. I love pairing it with a strong black coffee to cut through the richness. Sometimes, I’ll even cut a smaller piece and have it with a dollop of plain Greek yogurt for a little something extra.
For Brunch: Elevate it! Serve it on a pretty platter. If you’re feeling ambitious, a few fresh raspberries on top add a pop of color and tartness that contrasts beautifully with the sweet chocolate. A glass of chilled sparkling cider or even a mimosa wouldn’t go amiss. It looks and tastes impressive without requiring a whole lot of fuss.
As Dessert: This is its natural habitat! Serve a generous slice with a scoop of good quality vanilla bean ice cream. The contrast in temperatures and textures is heavenly. A drizzle of raspberry coulis or a dollop of whipped cream also works wonders. It’s the perfect end to a hearty meal and is always a guaranteed hit at dinner parties.
For Cozy Snacks: Sometimes, you just need a chocolate fix in the afternoon or late at night. This cake is perfect for that. A simple slice with a glass of cold milk is pure comfort. My family often gravitates towards this cake when we’re having a movie night. It’s that ultimate comfort food that everyone can agree on. I’ve also found that a small piece can be incredibly satisfying when you’re craving something sweet but don’t want to commit to a whole dessert. It’s just pure, unadulterated joy in cake form!
Top Tips for Perfecting Your Oreo Chocolate Cake
I’ve made this oreo chocolate cake more times than I can count, and through those batches, I’ve picked up a few tricks that I think really elevate it from good to absolutely phenomenal. These are the little things that make a big difference.
Oreo Prep: When you’re crushing your Oreos, aim for a mix of fine crumbs and small cookie pieces. Too fine, and they can sometimes disappear. Too chunky, and you might get a weird texture or a patch that’s just too much cookie. I usually pulse them in a food processor for a few seconds until they’re mostly broken down but still have some texture. If you don’t have a food processor, a zip-top bag and a rolling pin are your best friends. Just be careful not to pulverize them into dust!
Mixing Advice: As I mentioned, overmixing is the enemy of a tender cake. Once you add the wet ingredients to the dry, mix *just* until they’re combined. That thin batter stage after adding the hot liquid is perfect – it should be smooth and pourable. Don’t be tempted to over-beat it to make it thicker; that’s just not how this cake works, and you’ll end up with a tougher texture.
Oreo Distribution: Gently fold the crushed Oreos into the batter. You want them to be evenly distributed so you get that delightful cookie crunch in every bite, but you don’t want to beat them in. A gentle fold with a spatula is all it takes. This also helps prevent you from overmixing the batter.
Ingredient Swaps: If you find yourself without buttermilk, the milk and vinegar substitute (1 cup milk + 1 tbsp white vinegar, let sit for 5 minutes) is a lifesaver and works beautifully. For the oil, any neutral-flavored oil like canola or sunflower oil is fine. You can also try melted coconut oil for a subtle flavor twist, but it might alter the texture slightly. And as I always say, using hot brewed coffee instead of hot water in the batter truly amplifies the chocolate flavor. Don’t worry, it won’t taste like coffee, just richer chocolate!
Baking Tips: The thinness of this batter means it bakes relatively quickly. My oven tends to run a little hot, so I often start checking for doneness a few minutes before the recipe suggests. A wooden skewer should come out with moist crumbs attached – not totally clean (that means it’s overbaked!) and definitely not with wet batter. If you’re making this as a layer cake, ensure the pans are evenly greased and floured, or use parchment paper circles to prevent sticking. Cooling time in the pan is also important; it allows the cake to set properly before you attempt to move it.
Glaze Variations: If you’re not a fan of a pouring glaze, a simple chocolate buttercream is fantastic. Or, for something even easier, just dust the cooled cake with a generous amount of powdered sugar through a sieve. For a richer glaze, you can make a chocolate ganache: heat 1 cup of heavy cream until just simmering, then pour it over 1 cup of chopped dark chocolate. Let it sit for a minute, then whisk until smooth and glossy. Let it cool slightly before drizzling.
Storing and Reheating Tips
Knowing how to store your delicious oreo chocolate cake properly ensures you can enjoy its wonderful flavor and texture for days.
Room Temperature: If your cake is unfrosted or has a simple powdered sugar dusting or ganache that sets up nicely, it can be stored at room temperature. Keep it in an airtight container to prevent it from drying out. It should stay fresh and delicious for about 2-3 days. I find it’s often best on day two, once the flavors have really melded.
Refrigerator Storage: For cakes frosted with buttercream or cream cheese frosting, or if you live in a particularly warm climate, refrigeration is best. Store it in an airtight container. It will keep well in the fridge for up to 5 days. Be aware that refrigeration can sometimes dry out cake slightly, so letting it come back to room temperature before serving is ideal. Just take it out of the fridge about 30-60 minutes before you plan to eat it.
Freezer Instructions: This cake freezes beautifully, which is a lifesaver when you want to bake ahead. Wrap the completely cooled cake (unfrosted is best for freezing) tightly in a layer of plastic wrap, followed by a layer of aluminum foil. It can be stored in the freezer for up to 2-3 months. To thaw, unwrap it and let it come to room temperature on the counter. If you want to add a glaze or frosting after thawing, make sure the cake is fully at room temperature.
Glaze Timing Advice: If you’re storing your cake at room temperature, a simple ganache or powdered sugar glaze is ideal. If you’re refrigerating, buttercream or ganache are usually best. For frosting a cake that’s been frozen and thawed, ensure it’s completely at room temperature; otherwise, your frosting might melt or become greasy.
Frequently Asked Questions
Final Thoughts
So there you have it – my absolute favorite oreo chocolate cake recipe. I genuinely hope you give this a try. It’s more than just a cake; it’s a little slice of happiness that brings people together. It’s that perfect balance of rich chocolate, delightful Oreo crunch, and a wonderfully moist crumb, all wrapped up in a recipe that’s surprisingly easy to manage. It’s the kind of cake that makes your kitchen smell incredible and leaves everyone asking for seconds. If you love chocolate, and you love Oreos, this cake is going to be your new best friend.
If you enjoyed this oreo chocolate cake, you might also love my recipes for my Fudgy Brownies or my Classic Chocolate Chip Cookies. They’re all about bringing that homemade comfort and incredible flavor to your table. I can’t wait to hear what you think of this cake! Let me know in the comments below how it turns out for you, what variations you try, and any special occasions you bake it for. Happy baking, and enjoy every single delicious bite!
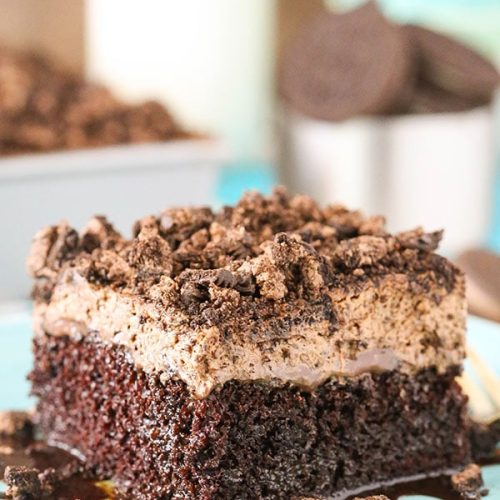
Oreo Chocolate Poke Cake
Ingredients
For the Cake
- 1.75 cups all purpose flour
- 2 cups sugar
- 0.75 cup natural unsweetened cocoa powder
- 2.25 tsp baking soda
- 0.5 tsp baking powder
- 1 tsp salt
- 1 cup milk
- 0.5 cup vegetable oil
- 1.5 tsp vanilla extract
- 2 large eggs
- 1 cup hot water
For the Ganache Filling
- 14 oz sweetened condensed milk
- 1 cup semi sweet chocolate chips
For the Oreo Whipped Cream Topping
- 2 cups heavy whipping cream, cold
- 0.75 cup powdered sugar
- 0.25 cup natural unsweetened cocoa powder
- 1 tsp vanilla extract
- 2 cups chopped Oreos and crumbs Plus extra for topping
Instructions
Preparation Steps
- Preheat oven to 350°F (176°C) and prepare a 9x13 inch cake pan with non-stick baking spray.
- Add the flour, sugar, cocoa, baking soda, baking powder and salt to a large mixer bowl and combine. Set aside.
- Add the milk, vegetable oil, vanilla extract and eggs to a medium sized bowl and combine.
- Add the wet ingredients to the dry ingredients and beat until well combined.
- Slowly add the hot water to the batter and mix on low speed until well combined. Scrape down the sides of the bowl as needed to make sure everything is well combined.
- Pour the batter into the prepared cake pan and bake for 29-32 minutes, or until a toothpick comes out with a few moist crumbs.
- Remove cake from oven. Using the end of a spatula, straw or something similar, poke holes all over the cake.
- In another bowl, combine the chocolate chips and sweetened condensed milk. Heat in the microwave until hot, about 1 minute.
- Whisk the chocolate mixture until smooth, heating for additional time if needed. Pour the chocolate mixture over the cake and spread it into the holes. Allow the cake to cool.
- To make the whipped cream topping, add the heavy whipping cream, powdered sugar, cocoa and vanilla extract to a large mixer bowl. Whip on high speed until stiff peaks form.
- Gently fold in the 2 cups of chopped Oreos and crumbs.
- Spread the whipped cream on top of the cooled cake, then top with additional crushed Oreos.
- Refrigerate cake until ready to serve.