There are certain flavors that just transport you, aren’t there? For me, the combination of rich, creamy cheesecake and the iconic crunch of an Oreo cookie is pure magic. It’s the kind of dessert that feels like a warm hug on a chilly evening, or a celebratory treat that makes any day feel a little bit special. I remember the first time I ever tried making an Oreo cheesecake from scratch. I was convinced it would be a complicated, fussy affair, something best left to professional bakers. Oh, how wrong I was! This recipe, my friends, is an absolute game-changer. It’s surprisingly straightforward, ridiculously delicious, and has become my absolute go-to whenever I need to impress guests, satisfy a serious sweet tooth, or just want to fill the house with the most incredible aroma. Forget those fancy, intimidating desserts; this Oreo cheesecake is the real deal, the kind of crowd-pleaser that will have everyone asking for the recipe. It’s so good, it often disappears faster than I can even snap a decent photo for Instagram, which is saying something!
What is oreo cheesecake?
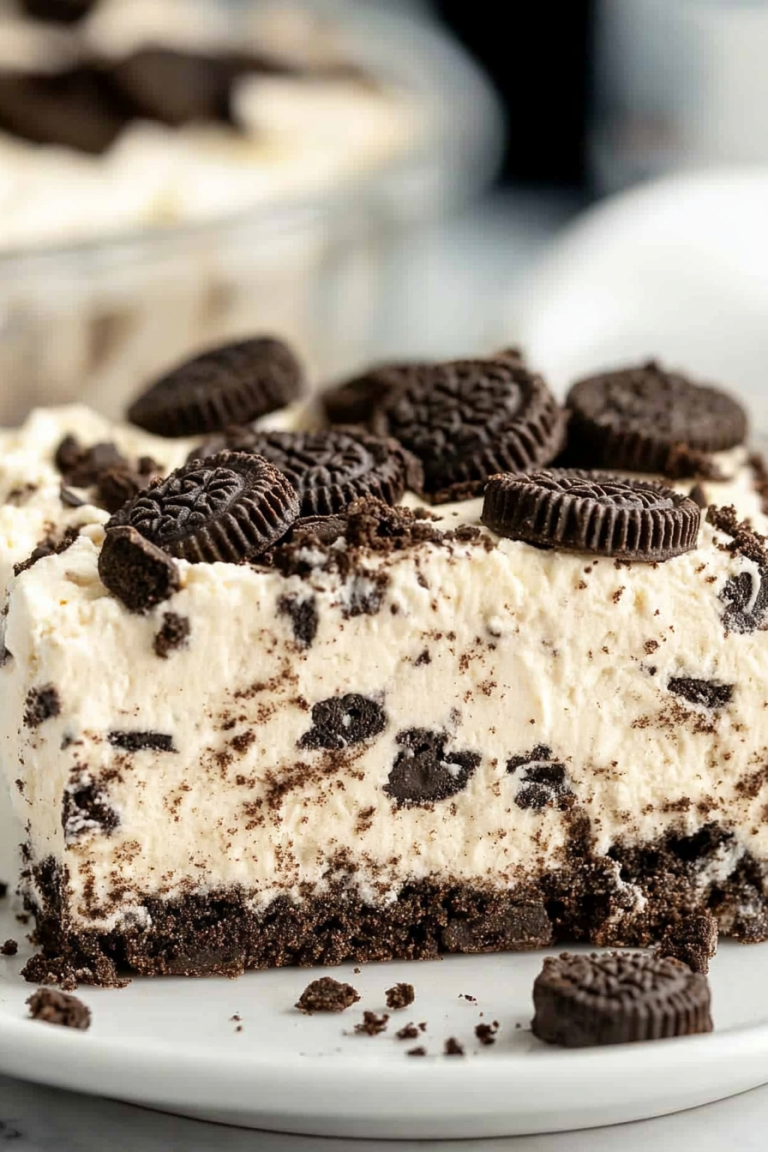
So, what exactly is this magical creation we’re talking about? At its heart, an Oreo cheesecake is exactly what it sounds like: a decadent, creamy, baked cheesecake that’s infused with everyone’s favorite chocolate sandwich cookie. Think of it as the best of both worlds – the smooth, velvety texture of a classic New York-style cheesecake meets the irresistible, chocolatey goodness of Oreos. We’re not just talking about a few cookies crumbled on top, either. These cookies are layered into the crust, mixed into the filling, and sometimes even generously sprinkled on top for that extra punch. It’s essentially a love letter to the Oreo, elevated into a sophisticated yet utterly comforting dessert. It’s the kind of dessert that doesn’t need any fancy garnishes because the star of the show is already so perfect on its own. It’s familiar, it’s nostalgic, and it’s utterly divine.
Why you’ll love this recipe?
What are some of the reasons why I love Oreo cheesecake?flavor is just out of this world. You get that tangy, rich creaminess from the cheesecake base, perfectly balanced by the deep, dark chocolate notes of the Oreos. It’s not overly sweet, which I really appreciate. What I love most about this is its sheer simplicity. Seriously, if you can stir a few things together, you can make this. There are no weird ingredients or complicated techniques involved, which is a lifesaver on busy weeknights or when unexpected guests pop over. It’s also surprisingly cost-efficient. Oreos are readily available and relatively inexpensive, and the other ingredients are pantry staples for most bakers. You get a truly restaurant-worthy dessert for a fraction of the cost. And let’s talk about versatility! While this recipe is fantastic as is, it’s also a brilliant base. You can easily adapt it, maybe by adding a swirl of chocolate ganache or a sprinkle of chopped nuts. It’s a bit like my tried-and-true chocolate chip cookie recipe – always a winner, always adaptable. Compared to other cheesecakes I’ve tried, this one strikes that perfect balance of ease and incredible flavor. It’s the dessert that makes everyone happy, no matter their age or taste preference.
How do you make Oreo Cheesecake?
Quick Overview
The process for this glorious Oreo cheesecake is refreshingly simple. We’ll start by making a crumbly, chocolatey Oreo crust that gets pressed into the bottom of our pan. Then, we whip up a luscious, creamy cheesecake filling, folding in plenty of chopped Oreos for those delightful pockets of cookie goodness. It all gets baked until it’s just set, then cooled to perfection. Finally, we’ll add a simple, elegant glaze or just a generous dusting of cookie crumbs. The magic is in the layering and the baking, and I’ll walk you through every step so you can achieve that perfect, creamy texture every single time. It’s really quite forgiving, which is a huge plus!
Ingredients
For the Crust:
2 cups (about 24 cookies) Oreo cookie crumbs (you can pulse whole Oreos in a food processor until fine)
6 tablespoons unsalted butter, melted
1 tablespoon granulated sugar (optional, if you like your crust a little sweeter)
For the Filling:
24 ounces cream cheese, softened to room temperature (this is crucial for a smooth filling!)
1 ¼ cups granulated sugar
3 large eggs, at room temperature
1 teaspoon vanilla extract
½ cup sour cream or full-fat Greek Yogurt, at room temperature
1 ½ cups finely chopped Oreo cookies (about 12-15 cookies, depending on size)
For the Glaze (Optional but Recommended!):
½ cup powdered sugar, sifted
1-2 tablespoons milk or cream
½ teaspoon vanilla extract
Step-by-Step Instructions
Step 1: Preheat & Prep Pan
First things first, let’s get our oven preheated to 325°F (160°C). I like to use a 9-inch springform pan for cheesecakes because it makes removing them so much easier. To help prevent any leaks and make cleanup a breeze, I usually wrap the bottom of the springform pan tightly with a couple of layers of heavy-duty aluminum foil. This is especially important if you’re planning on using a water bath, which I highly recommend for the creamiest texture. Set your prepared pan aside.
Step 2: Mix Dry Ingredients
In a medium bowl, combine your Oreo cookie crumbs and the optional granulated sugar. Give it a good stir to make sure everything is evenly distributed. This ensures that every bite of the crust has that perfect sweet and chocolatey balance. Don’t overthink this step; a simple whisk or fork will do the trick!
Step 3: Mix Wet Ingredients
In a separate, larger bowl, add the melted butter to the cookie crumb mixture. Stir it all together until the crumbs are evenly moistened and clump together when you press them. It should resemble wet sand. This is the key to a crust that holds its shape beautifully. If it seems too dry, you can add another tablespoon of butter.
Step 4: Combine
Now, take about two-thirds of this moistened crumb mixture and press it firmly and evenly into the bottom and slightly up the sides of your prepared springform pan. I like to use the flat bottom of a measuring cup or a glass to get a nice, compact layer. This helps prevent a crumbly crust. Reserve the remaining one-third of the crumbs for scattering on top later, or for another use (like a quick ice cream topping!). Place the pan with the crust into the freezer for about 10-15 minutes while you prepare the filling. This chilling step helps the crust set up nicely before baking.
Step 5: Prepare Filling
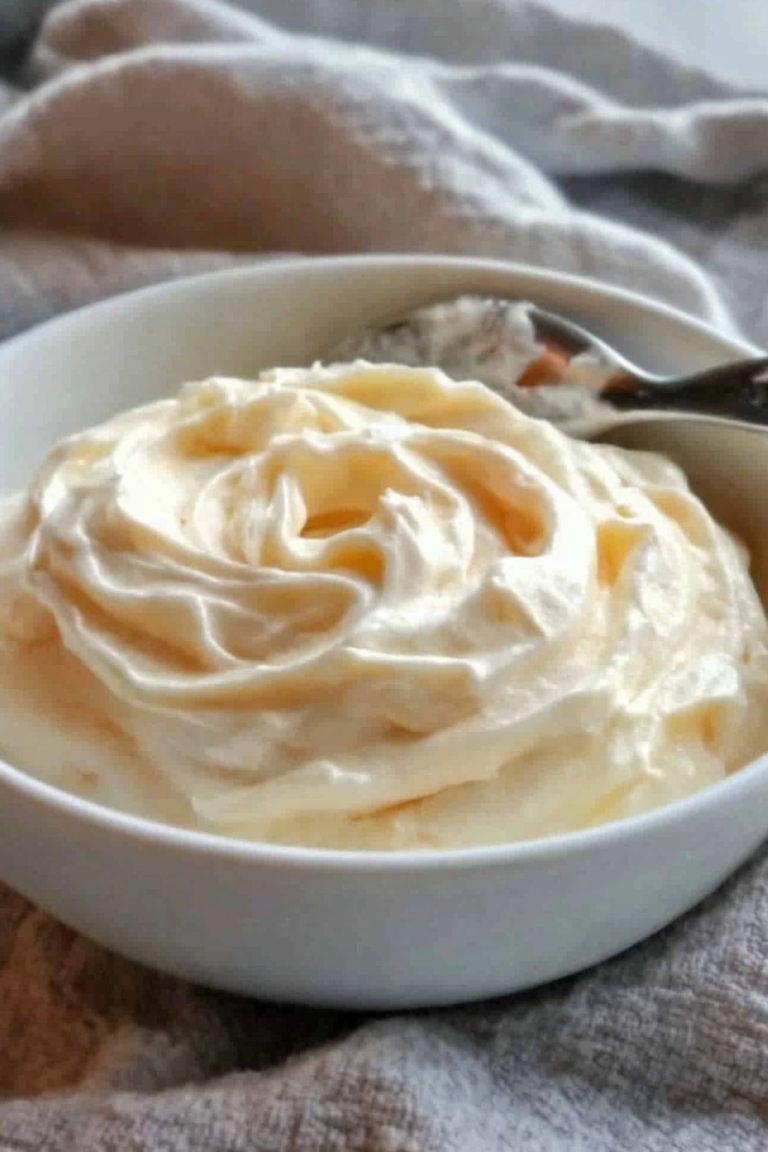
In a large bowl, using an electric mixer (stand mixer or hand mixer), beat the softened cream cheese on medium speed until it’s completely smooth and creamy, with no lumps. This is so important for a silky texture! Gradually add the granulated sugar and continue beating until well combined and smooth. Now, add the eggs one at a time, beating on low speed after each addition until just incorporated. Be careful not to overmix here; overbeating can incorporate too much air, which can lead to cracks. Stir in the vanilla extract and the sour cream (or Greek yogurt). Mix until everything is just combined and smooth. Finally, gently fold in the chopped Oreo cookies. You want to see those dark cookie pieces scattered throughout the creamy filling!
Step 6: Layer & Swirl
Pour the cream cheese filling over the chilled Oreo crust in the springform pan. Smooth the top with an offset spatula or the back of a spoon. If you want extra Oreo goodness on top, now’s the time to sprinkle that reserved one-third of the crumbs over the filling. For an extra touch, you can even add a few more whole or halved Oreos to the top for decoration. Don’t worry if the surface isn’t perfectly smooth; a few ripples add character!
Step 7: Bake
If you’re using a water bath (highly recommended for preventing cracks and ensuring even baking), carefully place your foil-wrapped springform pan into a larger roasting pan. Pour enough hot water into the roasting pan to come about halfway up the sides of the springform pan. This creates a humid environment that helps the cheesecake bake gently and evenly. Bake for 50-65 minutes, or until the edges are set but the center still has a slight jiggle when you gently shake the pan. The internal temperature should be around 150°F (65°C). Don’t be tempted to overbake it; it will continue to set as it cools.
Step 8: Cool & Glaze
Once baked, turn off the oven and crack the oven door open slightly. Let the cheesecake cool in the oven for about an hour. This gradual cooling process helps prevent cracking. After an hour, carefully remove the cheesecake from the oven (and water bath, if used) and let it cool completely on a wire rack. Once it’s at room temperature, cover it loosely with plastic wrap and refrigerate for at least 4-6 hours, or preferably overnight. This chilling time is crucial for the cheesecake to firm up and develop its full flavor. For the glaze, whisk together the sifted powdered sugar, milk (start with 1 tablespoon and add more as needed to reach desired consistency), and vanilla extract until smooth. Drizzle it over the chilled cheesecake just before serving. You can also skip the glaze and just top with extra cookie crumbs!
Step 9: Slice & Serve
When you’re ready to serve, carefully run a thin knife around the edge of the cheesecake to loosen it from the pan before unlatching the springform. For the cleanest slices, use a sharp knife dipped in hot water and wiped dry between each cut. Serve chilled, and prepare for the applause! This cheesecake is absolute perfection on its own, but a dollop of whipped cream or a drizzle of chocolate sauce never hurt anyone.
What to Serve It With
This Oreo cheesecake is so incredibly versatile, it’s a star at pretty much any occasion. For a simple breakfast treat (because who says cheesecake is only for dessert?), a thin slice with a steaming mug of strong black coffee is pure bliss. The bitterness of the coffee cuts through the richness beautifully. When it comes to brunch, this cheesecake really shines. I love to plate a generous slice with some fresh berries – raspberries or strawberries add a lovely pop of color and tartness. A mimosa or a sparkling rosé pairs wonderfully. As a show-stopping dessert, it’s a natural fit after a hearty meal. I often serve it with a scoop of vanilla bean ice cream or a small side of raspberry coulis to complement the chocolate. For those moments when you just need a comforting cozy snack, a slice enjoyed on the couch with a glass of cold milk is pure happiness. My family loves it with a side of warm, homemade hot chocolate on movie nights. It’s the kind of dessert that brings everyone together, no matter how you choose to enjoy it.
Top Tips for Perfecting Your Oreo Cheesecake
Over the years, I’ve picked up a few tricks that I think make a world of difference when making this Oreo cheesecake, and I want to share them with you! When it comes to the Oreo prep, make sure your cookies are finely chopped or processed for the filling; you want those little pockets of cookie, not big chunks that could disrupt the smooth texture. For the crust, pressing it firmly into the pan is key. I’ve learned that a loose crust can be really disappointing, so use the back of a spoon or a measuring cup to really compact it. For the mixing advice, this is crucial: don’t overmix the batter once the eggs are added! Beat on low speed until just combined. Overmixing incorporates air, which can lead to cracks and a less dense, creamy texture. Scrape down the sides and bottom of the bowl often to ensure everything is evenly mixed. When it comes to swirl customization, if you want that marbled look, you can reserve a little of the plain cheesecake batter and swirl it in with the Oreo-filled batter before pouring it into the pan, or just scatter extra chopped Oreos on top. The ingredient swaps are pretty straightforward here. If you don’t have sour cream, full-fat Greek yogurt is a fantastic substitute and can even make it a touch creamier. For the crust, if you can’t find Oreos, chocolate graham crackers or chocolate wafer cookies can work, though the flavor will be slightly different. My biggest baking tip is to trust the water bath and the cooling process. Baking it gently in a water bath ensures even cooking and prevents those dreaded cracks. And letting it cool in the oven with the door ajar is non-negotiable in my book for achieving that perfect, uncracked surface. For the glaze variations, if you want a richer glaze, use heavy cream instead of milk. You can also add a tiny bit of cocoa powder to the glaze for an even more intense chocolate flavor.
Storing and Reheating Tips
Storing this delicious Oreo cheesecake is pretty straightforward, but a few tips can ensure it stays as fresh and delicious as possible. If you have any leftovers (which is rare in my house!), you can store the cheesecake, uncovered, at room temperature for up to two hours. After that, it’s best to cover it. For refrigerator storage, once it’s completely cooled, cover the cheesecake tightly with plastic wrap or foil. It will keep well in the fridge for about 4-5 days. Make sure it’s well-covered to prevent it from absorbing other fridge odors. I like to use a cake carrier if I have one; they’re perfect for keeping it fresh and protected. If you find yourself with an abundance of cheesecake (a good problem to have!), you can freeze it. For freezer instructions, it’s best to freeze it unfrosted. Wrap the completely chilled cheesecake tightly in a layer of plastic wrap, then in a layer of aluminum foil. You can freeze the whole cheesecake or individual slices. It should stay good in the freezer for up to 2-3 months. To thaw, transfer the frozen cheesecake to the refrigerator and let it thaw overnight. If you’re freezing slices, you can thaw them in the fridge or at room temperature for a couple of hours. For the glaze timing, it’s always best to add the glaze right before serving if possible, especially if you plan to store leftovers. If you know you’ll be freezing it, wait to glaze until after it has thawed and is ready to be served. This prevents the glaze from cracking or becoming sticky in the freezer.
Frequently Asked Questions
Final Thoughts
So there you have it – my beloved Oreo cheesecake recipe! It’s a dessert that truly embodies comfort and joy for me. It’s the perfect combination of textures and flavors, a real showstopper that’s surprisingly achievable for home bakers. I just know you’re going to fall in love with it, just like my family and friends have. The way the creamy filling melts in your mouth, punctuated by those satisfying bites of Oreo cookie, is just pure bliss. If you’re looking for other chocolatey delights, you might also enjoy my decadent chocolate lava cakes or my surprisingly easy one-bowl brownies. Both are guaranteed crowd-pleasers! I can’t wait to hear what you think of this Oreo cheesecake. Please let me know in the comments below how yours turns out, if you made any fun variations, or if you have any questions. Happy baking, and enjoy every single bite!
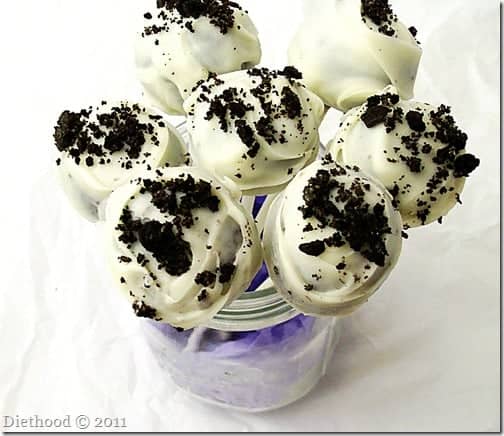
Oreo Cheesecake Pops
Ingredients
Main Ingredients
- 11.25 ounce package Oreo cookies divided
- 8 ounces Cream cheese softened
- 1 White chocolate wafers melted
- 1 Lollipop sticks
- 1 Styrofoam block
Instructions
Preparation Steps
- Make oreo cookie crumbs. Put 5 Oreo cookies in a food processor, or food chopper, and grind the cookies to a fine crumb. Set aside.
- Process the cookies and cream cheese. Take the rest of the cookies and break them into pieces, then put them in your food processor’s bowl. Add in the cream cheese. Process until well blended. Put the mixture in the fridge for 1 hour.
- Shape the cookie dough balls. Take the mixture out of the fridge and mold the cookie dough into 1-inch balls. Then, put them back in the fridge for 20 minutes.
- Melt the wafers. Melt the chocolate according to the package directions.
- Make the cake pops. Remove the cake pops from the fridge. Dip the lollipop stick in the melted candy, then stick the lollipop stick in the cheesecake pop halfway up, and dip the cake pop in the melted candy wafers.
- Add the cookie crumbs. Sprinkle the cheesecake cake pop with some of the reserved cookie crumbs.
- Let them rest. Stick the cheesecake pop into the styrofoam block until the chocolate is solid. Continue with the rest of the cake pops and refrigerate until ready to serve. You can also put them in the freezer for 2 hours before serving - they taste like ice cream!