You know those nights, right? The ones where the clock is ticking, the kids are circling like tiny, hungry sharks, and the thought of making anything complicated feels like climbing Mount Everest in flip-flops. Yeah, those nights. This is my secret weapon for those moments: honey garlic Chicken Thighs. Honestly, it’s probably the most requested dish in our house, and for good reason! It’s ridiculously flavorful, ridiculously easy, and uses ingredients I almost always have on hand. Forget those fussy baked chicken breasts that can turn dry in a nanosecond; these thighs are fall-apart tender and coated in this sticky, sweet, savory glaze that makes you want to lick your plate clean. It’s like the best parts of takeout, but made with love, right in your own kitchen, and honestly, it tastes a million times better than anything you’d get delivered. If you’re looking for a reliable, crowd-pleasing meal that won’t have you stressed, you’ve found it. These honey garlic chicken thighs are pure comfort food magic.
What is honey garlic chicken thigh?
So, what exactly are we talking about when I say “honey garlic chicken thighs”? Think of it as a culinary hug in a pan. It’s a dish where tender, juicy chicken thighs are simmered or baked in a luscious, sticky glaze made from the perfect marriage of honey and garlic. The name itself is pretty straightforward, and that’s part of its charm! It’s not trying to be fancy or overly complicated. The magic happens in the simplicity: the natural sweetness of honey balanced by the pungent kick of garlic, creating a flavor profile that’s universally loved. It’s the kind of dish that coats your mouth in the most delightful way, leaving you with a craveable, savory-sweet finish. It’s essentially comfort food elevated, proving that sometimes, the most delicious things come from the most straightforward combinations. It’s the kind of recipe that makes you feel like a kitchen wizard, even if you’re just stirring a few things together.
Why you’ll love this recipe?
There are so many reasons why this honey garlic chicken thighs recipe has become a staple in my kitchen, and I have a feeling it’ll become one in yours too! First off, let’s talk flavor. Oh. My. Goodness. The glaze is absolutely divine. It’s that perfect balance of sweet from the honey and savory-spicy from the garlic, with a little tang from soy sauce that just makes everything sing. When it caramelizes on the chicken thighs, it creates this incredible sticky, slightly crispy coating that is pure heaven. It’s the kind of flavor that makes your taste buds do a happy dance.
Then there’s the simplicity. Seriously, this is a lifesaver on busy weeknights. Most of the ingredients are pantry staples, and the prep time is minimal. You can literally have this on the table in under an hour, which is a win in my book any day of the week. And the chicken thighs themselves? They are so forgiving! Unlike chicken breasts that can go from perfectly cooked to dry and sad in seconds, chicken thighs stay incredibly moist and tender, even if you slightly overcook them. They just soak up all that delicious glaze.
And let’s not forget about cost-efficiency! Chicken thighs are usually more budget-friendly than breasts, and with pantry staples like honey, garlic, and soy sauce, you’re not breaking the bank. It’s a meal that feels indulgent but is surprisingly economical. Plus, the versatility is fantastic. You can serve this with pretty much anything – rice, roasted vegetables, noodles, a simple salad – and it’s always a hit. What I truly love most is the reaction it gets. My kids devour it, my husband always asks for seconds, and when we have friends over, it disappears faster than you can say “more please!” It’s a true crowd-pleaser, and that’s why it gets top marks in my recipe book.
How do I make Honey Garlic Chicken Thighs?
Quick Overview
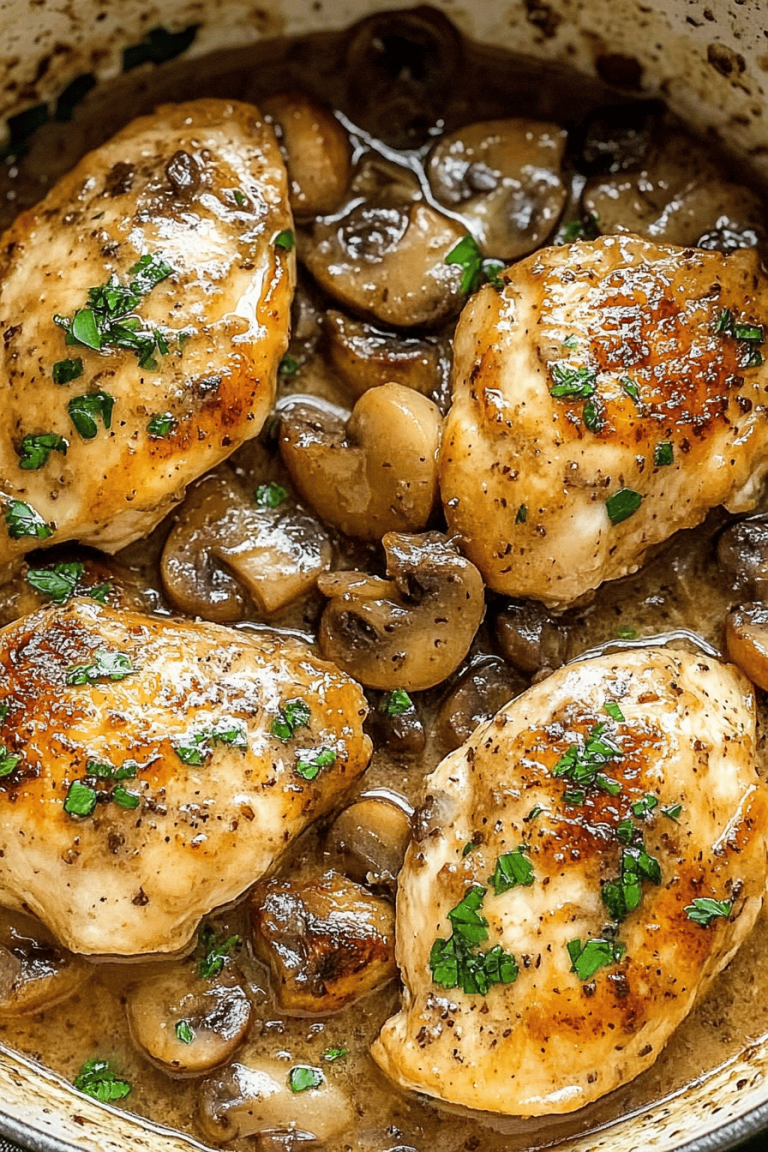
This recipe is all about building incredible flavor with minimal effort. We’re going to pan-sear the chicken thighs for a lovely golden crust, then let them simmer in a homemade honey garlic sauce until they’re fall-apart tender and coated in that irresistible sticky glaze. It’s a straightforward process that yields incredibly delicious results, perfect for even the most novice cooks. Trust me, the aroma alone will have everyone flocking to the kitchen!
Ingredients
For the Chicken:
6-8 boneless, skinless chicken thighs (about 1.5 – 2 lbs). I always opt for boneless, skinless because they’re easier to eat and cook through evenly in the sauce. Make sure they’re roughly the same size so they cook uniformly. If they’re extra large, you can always give them a little trim.
1 tablespoon Olive oil or your favorite cooking oil. Just enough to get the pan shimmering.
Salt and freshly ground black pepper, to taste. Don’t be shy with the seasoning; it’s the foundation of flavor!
For the Honey Garlic Glaze:
1/2 cup honey. The star of the show! Use a good quality honey if you can; it makes a difference.
1/4 cup soy sauce (or tamari for gluten-free). This adds that essential savory depth and umami.
4-6 cloves garlic, minced. This is where the ‘garlic’ in honey garlic chicken truly shines! The more garlic, the more intense the flavor, so adjust to your liking. I’m a garlic fiend, so I often go for 6.
1 tablespoon rice vinegar (optional, but highly recommended). It adds a lovely brightness and cuts through the sweetness just a bit.
1 teaspoon grated fresh ginger (optional, but it adds a wonderful warmth). If you have it, use it!
1/2 teaspoon red pepper flakes (optional, for a little kick). This is my secret to adding just a hint of heat without making it spicy. You can always add more if you like it hot!
Step-by-Step Instructions
Step 1: Preheat & Prep Pan
Grab a large skillet or a Dutch oven. We want something with a good surface area so the chicken can get a nice sear. Place it over medium-high heat. Add the olive oil and let it heat up until it shimmers. While the pan is heating, pat your chicken thighs completely dry with paper towels. This is super important for getting a good sear and preventing them from steaming instead of browning. Season them generously on both sides with salt and freshly ground black pepper. Don’t skip this step – it’s crucial for flavor!
Step 2: Sear the Chicken
Carefully place the seasoned chicken thighs into the hot skillet in a single layer. You might need to do this in batches if your pan isn’t large enough to avoid overcrowding, as overcrowding will steam the chicken instead of searing it. Let them sear for about 3-4 minutes per side, or until they’re beautifully golden brown and have a nice crust. Don’t fuss with them too much; let them develop that color. Once seared, remove the chicken from the pan and set it aside on a plate for a moment.
Step 3: Sauté Aromatics
Reduce the heat to medium. If there’s a lot of excess oil in the pan, you can drain some of it off, leaving just about a tablespoon. Add your minced garlic (and grated ginger, if using) to the pan. Sauté for about 30-60 seconds, stirring constantly, until fragrant. Be careful not to burn the garlic, as it can become bitter very quickly. This step infuses the oil with that delicious garlic flavor, which will form the base of our sauce.
Step 4: Deglaze and Make the Glaze
Pour in the soy sauce (or tamari) and the rice vinegar (if using). Scrape up any browned bits from the bottom of the pan with your spoon – that’s where all the extra flavor is hiding! Let this mixture simmer for about a minute. Now, whisk in the honey and red pepper flakes (if using). Stir everything together until well combined and the sauce is smooth. Let it bubble gently for another minute to thicken slightly.
Step 5: Simmer the Chicken
Return the seared chicken thighs back into the skillet, nestling them into the sauce. Spoon some of the glaze over the top of each thigh. Lower the heat to low, cover the skillet, and let the chicken simmer gently for about 15-20 minutes, or until the chicken is cooked through and tender. The exact time will depend on the size of your thighs. You can check for doneness by cutting into the thickest part; the juices should run clear.
Step 6: Thicken and Reduce the Sauce (Optional but Recommended!)
Once the chicken is cooked through, remove the chicken from the pan and set it aside on a clean plate. Increase the heat to medium-high and let the sauce simmer uncovered for another 5-7 minutes, stirring occasionally, until it has reduced and thickened to your desired consistency. You want it to be nice and syrupy, coating the back of a spoon. This is the key to that irresistible sticky glaze!
Step 7: Glaze and Serve
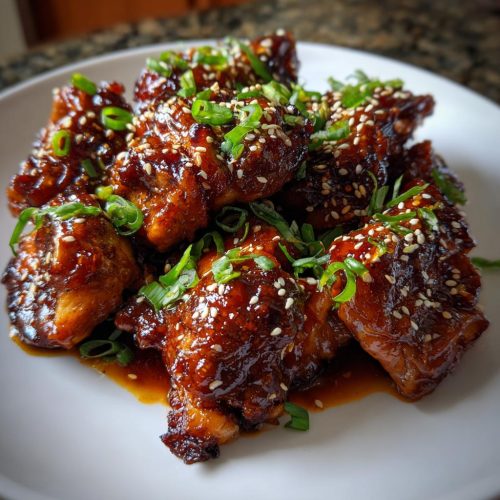
Pour the thickened honey garlic glaze back over the chicken thighs. Toss them gently in the pan to ensure they are thoroughly coated. Serve immediately, spooning extra glaze over the top. Garnish with sesame seeds and chopped green onions if you have them – they add a lovely pop of color and fresh flavor!
What to Serve It With
This honey garlic chicken is so versatile, it fits into almost any Meal Plan! For a quick and satisfying breakfast (yes, I’ve done it!), a couple of thighs alongside some scrambled eggs and a slice of toast is surprisingly delicious, with the leftover glaze making your toast extra special. When it comes to brunch, I love to serve it with fluffy jasmine rice or a simple white rice, perhaps with a side of steamed broccoli or stir-fried snap peas for a pop of green. It feels a little more refined, especially if you garnish with those toasted sesame seeds and fresh green onions.
For a comforting dinner, this is my absolute go-to. It’s fantastic with fluffy white rice to soak up all that glorious sauce. I often serve it with a side of roasted asparagus, sautéed green beans, or a simple mixed green salad with a light vinaigrette to balance the richness. If you’re feeling a bit more adventurous, it’s also amazing with noodles – think lo mein or even just plain spaghetti. For a lighter option, a generous serving of cauliflower rice works beautifully. And for cozy snacks? Leftovers are amazing tucked into wraps or even enjoyed cold straight from the fridge (don’t judge me!). I’ve also found it’s a fantastic addition to packed lunches; the flavors meld beautifully overnight. My family loves it so much, we’ve even had it as a “build your own bowl” night with various toppings like shredded carrots, cucumber, and avocado.
Top Tips for Perfecting Your Honey Garlic Chicken Thighs
I’ve made these honey garlic chicken thighs countless times, and over the years, I’ve picked up a few tricks that really make a difference. First off, for the chicken itself, don’t skip patting them dry! I learned this the hard way early on. If they’re wet, they’ll just steam in the pan, and you won’t get that beautiful, golden-brown sear that adds so much texture and flavor. Make sure your pan is nice and hot before adding the chicken, and give it space – don’t overcrowd it, or you’ll end up with steamed chicken, not seared.
When it comes to the glaze, fresh garlic is non-negotiable for me. Jarred minced garlic just doesn’t have the same punch. Sautéing it gently until fragrant is key; if you burn it, your whole sauce will taste bitter. I also highly recommend adding a splash of rice vinegar. It’s a small addition, but it really brightens up the sauce and cuts through the sweetness, preventing it from being cloying. If you’re feeling brave and love a little heat, a pinch of red pepper flakes is wonderful. It doesn’t make it spicy, per se, but it adds a subtle warmth that complements the sweet and savory notes beautifully.
For thickening the sauce, patience is a virtue. I like to remove the chicken and let the sauce reduce on its own over medium-high heat. This concentrate all the flavors and creates that lovely syrupy consistency that clings to the chicken. If you’re in a rush, you *can* make a cornstarch slurry (about 1 teaspoon cornstarch mixed with 1 tablespoon cold water) and whisk it into the simmering sauce, but I find the reduction method gives a richer flavor. Also, don’t be afraid to taste and adjust the seasoning of the sauce before you add the chicken back. Does it need a little more honey? A touch more soy sauce? A tiny squeeze of lime? Go with your taste buds! Finally, when it comes to serving, those little garnishes like toasted sesame seeds and thinly sliced green onions are more than just pretty; they add a lovely textural contrast and freshness that really elevates the dish. Trust me, these little tweaks make a world of difference!
Storing and Reheating Tips
This honey garlic chicken is fantastic as leftovers, which is another reason I love it so much. If you find yourself with extra (a rare occurrence in my house!), storing it properly is key to maintaining its deliciousness. For room temperature storage, I generally wouldn’t leave cooked chicken out for more than two hours, according to general food safety guidelines. It’s best to get it into the fridge or freezer relatively quickly after it’s cooled slightly.
In the refrigerator, I store leftover chicken thighs and any extra glaze in an airtight container. They’ll stay good for about 3-4 days. The flavors actually tend to meld and deepen a bit overnight, making it even tastier for lunch the next day! For the freezer, I like to store them in freezer-safe bags or containers. You can freeze the chicken coated in the glaze, or even just the plain cooked chicken and add a fresh glaze when reheating if you prefer. Properly stored, they should be good in the freezer for about 2-3 months.
When it comes to reheating, my preferred method is on the stovetop. I’ll place any leftover chicken and sauce in a skillet over medium-low heat, adding a tablespoon or two of water or chicken broth if the sauce seems too thick. Let it simmer gently until the chicken is heated through and the sauce is re-warmed and slightly syrupy again. This usually takes about 5-10 minutes. If you don’t have time for that, the microwave works too, but be sure to cover it loosely with a damp paper towel to help retain moisture. For frozen leftovers, it’s best to thaw them in the refrigerator overnight before reheating. You can also reheat them directly from frozen in a saucepan over low heat, adding a little extra liquid to help them cook through evenly. The key with reheating is to be gentle; you don’t want to overcook the chicken and make it tough. The glaze might separate a bit upon reheating, but a quick stir will bring it back together beautifully.
Frequently Asked Questions
Final Thoughts
So there you have it – my absolute favorite recipe for honey garlic chicken thighs. It’s a dish that consistently brings smiles to faces at my table, and I really hope it does the same for yours. It’s proof that you don’t need a ton of fancy ingredients or hours in the kitchen to make something truly spectacular. The combination of sweet honey, pungent garlic, and tender chicken thighs is just pure comfort and joy. It’s the kind of meal that makes a busy weeknight feel like a special occasion, and that’s a pretty wonderful thing, don’t you think? If you give this recipe a try, please let me know how it turns out! I love hearing about your kitchen adventures and seeing your photos. Leave a comment below or tag me on social media – I can’t wait to see your delicious creations. Happy cooking, and may your dinners always be this delicious!
honey garlic chicken thighs
Ingredients
Main Ingredients
- 2 pounds boneless, skinless chicken thighs
- 0.5 cup honey
- 0.5 cup low sodium soy sauce
- 4 cloves garlic minced
- 2 tablespoons rice vinegar
- 1 teaspoon sesame oil
- 0.25 teaspoon black pepper
- 2 tablespoons cornstarch
- 4 tablespoons water for slurry
- 2 tablespoons green onions sliced, for garnish
- 1 teaspoon sesame seeds for garnish
Instructions
Preparation Steps
- Pat chicken thighs dry with paper towels. Season lightly with salt and pepper (optional, as soy sauce is salty).
- In a medium bowl, whisk together honey, soy sauce, minced garlic, rice vinegar, sesame oil, and black pepper until well combined.
- Place the chicken thighs in the slow cooker. Pour the honey garlic sauce evenly over the chicken.
- Cover and cook on low for 4-6 hours or on high for 2-3 hours, or until the chicken is tender and cooked through.
- About 30 minutes before serving, in a small bowl, whisk together cornstarch and water to create a slurry. Stir the slurry into the sauce in the slow cooker. Cook on high for an additional 20-30 minutes, or until the sauce has thickened to your desired consistency.
- Remove chicken from the slow cooker and shred or serve whole. Spoon the thickened sauce over the chicken. Garnish with sliced green onions and sesame seeds before serving with rice or your favorite side dish.