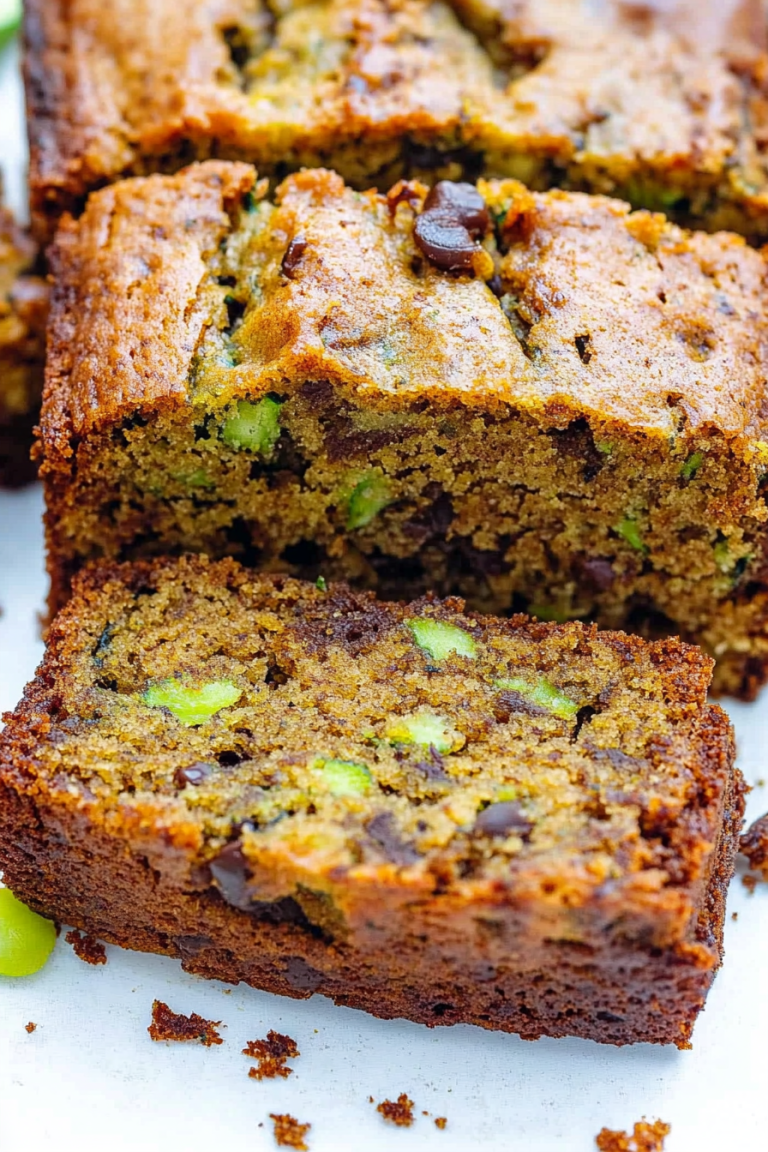
I remember the first time I truly understood the magic of homemade whipped cream. It was at my grandma’s house, a special occasion, and she brought out this incredible strawberry shortcake. The topping wasn’t just white; it was ethereal, impossibly light, and tasted like pure, sweet bliss. I’d grown up with the stuff from a can, or the tubs that tasted faintly of chemicals, so this was a revelation. It tasted like… well, cream. Just pure, unadulterated cream, kissed with a hint of sweetness. Since then, I’ve been on a lifelong quest to recreate that perfection, and I’m so excited to share my go-to method for the most wonderful, foolproof, truly homemade whipped cream. Forget those stabilizers and emulsifiers; this is the real deal, and it’s ridiculously easy. Honestly, once you try it, you’ll never go back. It’s the secret weapon for elevating everything from a simple bowl of berries to a decadent Chocolate Cake.
What is a homemade whipped cream?
So, what exactly *is* this magical concoction we’re talking about? At its heart, homemade Whipped cream is simply heavy cream that’s been agitated until it incorporates air and transforms into soft, fluffy peaks. Think of it as nature’s fluffiest cloud, but edible! It’s not about fancy ingredients or complicated techniques; it’s about understanding the simple science behind cream and sugar. The fat molecules in the heavy cream create a network that traps air bubbles as you whip, giving it that glorious volume and texture. It’s essentially the purest form of dairy dessert topping, a blank canvas for flavor, and a testament to how incredible simple, quality ingredients can be when treated just right. It’s the opposite of those pre-packaged versions that often have a list of ingredients longer than my arm and a taste to match. This is real. This is pure. This is what whipped cream is *supposed* to taste like.
Why you’ll love this recipe?
There are so many reasons why this homemade whipped cream recipe has become an absolute staple in my kitchen. First and foremost, the flavor is just unparalleled. It’s incredibly rich and creamy, with a pure, sweet dairy taste that you just can’t get from anything store-bought. It’s not overly sweet, allowing the natural goodness of the cream to shine through. And the texture! Oh, the texture. It can be light and airy for a delicate dollop, or it can be stiffer and more stable for piping, depending on exactly how long you whip it. What I truly adore is its sheer simplicity. You only need a few ingredients, and the process takes mere minutes. Seriously, you can go from a carton of cold cream to a bowl of fluffy perfection in under five minutes, which is a lifesaver on busy nights when you need a last-minute dessert topping. It’s also surprisingly budget-friendly compared to buying specialty dessert toppings. A carton of heavy cream and a bit of sugar costs a fraction of what you’d pay for those tubs that just don’t hit the same. Plus, its versatility is off the charts. We’ll get into all the ways to use it later, but honestly, it’s good enough to eat with a spoon straight from the bowl. It’s my go-to when I’m craving something sweet but don’t want to bake a whole cake, or when I need to add that extra special touch to a simple Fruit salad. It’s truly a kitchen superhero!
How do I make homemade whipped cream?
Quick Overview
This recipe is wonderfully straightforward. You’ll chill your bowl and whisk (a little trick I swear by!), then whip cold heavy cream with a touch of sugar and vanilla until it forms soft, luscious peaks. It’s that simple! This method ensures maximum fluffiness and a beautiful, stable whipped cream that’s ready to adorn any dessert in just minutes. No fuss, no fancy equipment, just pure, creamy delight.
Ingredients
For the Main Event:
2 cups heavy whipping cream, very cold (this is crucial! Don’t use half-and-half or light cream here; you need at least 35% fat content for it to whip properly.)
1/4 cup powdered sugar (also called confectioners’ sugar or icing sugar) – I prefer powdered sugar because it dissolves completely and doesn’t make the cream grainy. If you only have granulated sugar, you can use it, but make sure it dissolves really well, or even pulse it in a blender for a minute to make it finer.
For a Hint of Magic:
1 teaspoon pure vanilla extract (use the good stuff if you can! It makes a difference.)
Optional Flavor Boosters (for later!):
A pinch of salt to enhance sweetness, a tablespoon of cocoa powder for chocolate whipped cream, or a swirl of fruit puree.
Step-by-Step Instructions
Step 1: Chill Everything
This is arguably the most important step, and it’s so simple! Pop your mixing bowl (preferably metal or glass) and your whisk attachment (if using a stand mixer) or your hand mixer’s beaters into the freezer for at least 10-15 minutes. Cold cream whips up faster and gets fluffier because the fat solids are more stable when cold. Seriously, don’t skip this. It makes a huge difference.
Step 2: Pour the Cream
Once your bowl and whisk are nice and frosty, take them out. Pour the very cold heavy whipping cream into the chilled bowl. Make sure your cream is straight from the fridge, not even a little bit warm.
Step 3: Add Sweetener and Flavoring
Add the powdered sugar and the pure vanilla extract to the cream. I usually add them early on so they have plenty of time to incorporate evenly as the cream whips. If you’re using granulated sugar, add it now too, just be mindful it might take a tiny bit longer to fully dissolve.
Step 4: Start Whipping
Begin whipping on a low speed. You’ll see the cream start to get a little frothy. Gradually increase the speed to medium-high. As you whip, the cream will start to thicken and become opaque. Keep an eye on it! You’re looking for it to transform from liquid to something that holds its shape.
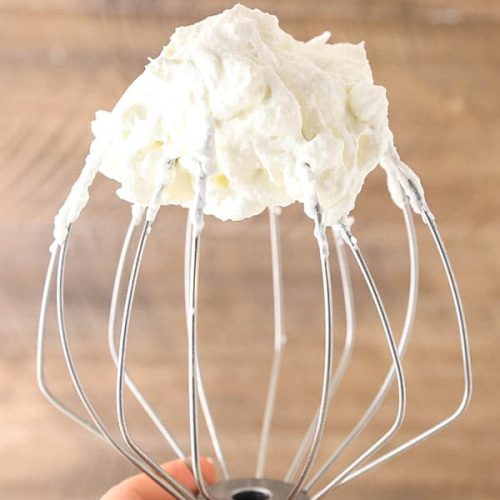
Step 5: Watch for Peaks
Continue whipping until the cream thickens enough to form soft peaks. This means when you lift the whisk or beaters out, a peak will form, but the tip will gently curl over. This is typically what most people consider “perfect” for topping desserts like pies or cakes. If you want stiffer peaks for piping, keep going for another 30-60 seconds, but be very careful not to over-whip.
Step 6: Avoid Over-Whipping!
This is where many people make a mistake. If you whip for too long, the fat will start to separate from the liquid, and you’ll end up with grainy whipped cream, or worse, butter! If you see it starting to look a bit lumpy or curdled, stop immediately. A tiny bit of over-whipping can sometimes be rescued by whisking in a tablespoon or two of *very* cold liquid cream, but it’s best to avoid it altogether.
Step 7: Taste and Adjust (If Needed)
Give your whipped cream a quick taste. If you prefer it a little sweeter, you can whip in another tablespoon of powdered sugar. If you want more vanilla flavor, add another splash. Do this gently and just until combined.
Step 8: Serve Immediately or Store
Your beautiful, fluffy homemade whipped cream is ready! Serve it immediately over your favorite desserts. It’s best enjoyed fresh, but it will hold up in the refrigerator for a day or two if stored properly.
Serving Suggestions
Oh, the possibilities are endless when it comes to serving this glorious homemade whipped cream! It’s truly the finishing touch that takes ordinary to extraordinary.
For Breakfast: Think about a fluffy stack of pancakes or waffles. A generous dollop of this whipped cream, maybe with some fresh berries, is pure morning bliss. It’s also fantastic on French Toast! I often make a small batch just for a special weekend breakfast treat; it makes everyday feel like a celebration.
For Brunch: Elevate your brunch spread with this luxurious topping on fruit parfaits layered with yogurt and granola, or dollop it on top of scones or muffins. It adds an elegant touch without being fussy, and it pairs beautifully with a mimosa or a good cup of coffee.
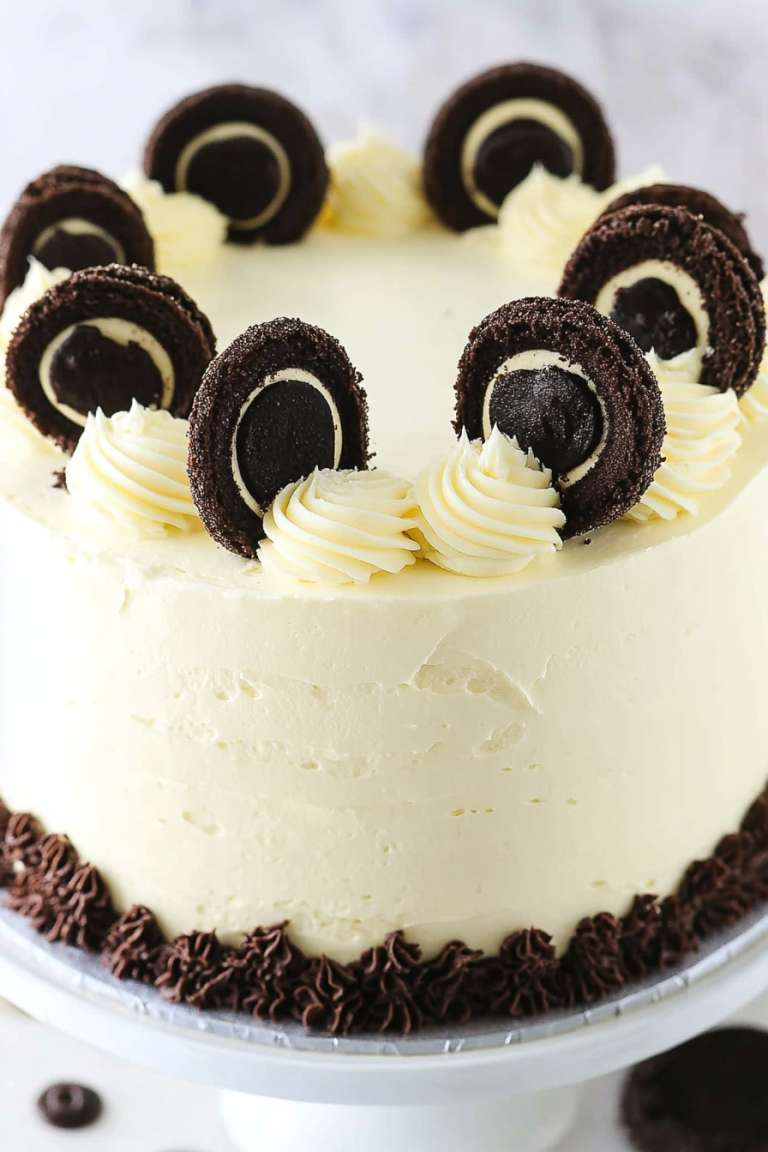
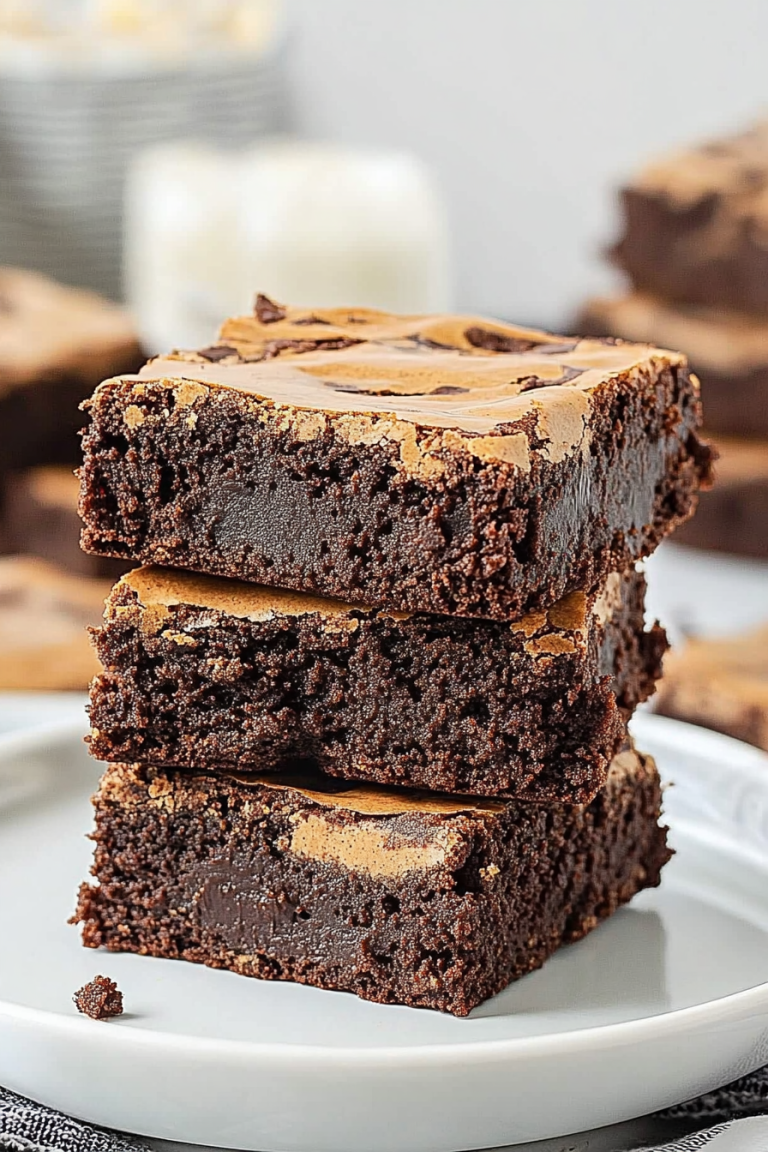
As Dessert: This is where it truly shines! It’s a classic on pies, cobblers, crisps, and shortcakes. But don’t stop there! It’s divine over a warm brownie, a rich chocolate lava cake, or even just a simple bowl of fresh fruit. I also love swirling it into hot chocolate for an extra layer of decadence.
For Cozy Snacks: Feeling like a little treat in the evening? A spoonful of this whipped cream with a few chocolate chips or a drizzle of caramel sauce is the perfect, light indulgence. It satisfies that sweet craving without being heavy. My kids always ask for this when they’re looking for something special after dinner but we don’t have any dessert prepared.
Top Tips for Perfecting Your Homemade Whipped Cream
I’ve whipped up more bowls of cream than I can count over the years, and I’ve definitely learned a few things along the way that make the process even smoother and the results even better. These aren’t complicated, just little nuggets of wisdom that really make a difference.
Chill, Chill, Chill: I can’t emphasize this enough. Cold cream, cold bowl, cold whisk/beaters. It’s the foundation of fluffy whipped cream. If your kitchen is particularly warm, you can even toss an ice cube into the bowl and let it chill for a few minutes, then dump out the water before adding the cream. This extra step guarantees success, especially in the summer.
Don’t Rush the Whipping: Start on a low speed to break up the cream and incorporate the sugar, then gradually increase to medium-high. This helps the fat globules arrange themselves properly to trap air. Trying to whip it on high speed from the get-go can sometimes lead to over-whipping because it happens so fast, you miss that sweet spot.
Know Your Peaks: Understanding soft peaks versus stiff peaks is key. Soft peaks are perfect for dolloping; they hold their shape but have a gentle curl. Stiff peaks are what you want if you plan to pipe the whipped cream. They stand up straight and firm. Keep a close eye on the cream as you whip; it can go from perfect to over-whipped in seconds. It’s better to stop a moment too early and have slightly softer peaks than to go too far and end up with butter.
Powdered Sugar is Your Friend: While granulated sugar *can* work, powdered sugar is king for whipped cream. It contains cornstarch, which helps to stabilize the cream slightly, and it dissolves instantly, ensuring a smooth, silky texture. If you do use granulated sugar, make sure it’s super fine, or whip the cream with just the sugar and vanilla for a minute *before* it starts to thicken, allowing the sugar more time to dissolve.
Vanilla Extract Quality Matters: A good quality pure vanilla extract makes a noticeable difference. It adds a depth of flavor that artificial vanilla just can’t replicate. If you’re feeling adventurous, try adding a tiny pinch of salt along with the vanilla – it really makes the sweetness pop and balances the richness of the cream.
Flavor Variations: Don’t be afraid to get creative! For chocolate whipped cream, sift in 1-2 tablespoons of unsweetened cocoa powder along with the sugar. For a fruit-kissed version, gently fold in a tablespoon or two of a thick fruit puree (like raspberry or strawberry) after the cream has reached soft peaks. You can also add a splash of liqueur, like Grand Marnier or Kahlua, for an adult twist. Just remember, liquids can affect the consistency, so add them sparingly.
Storing and Reheating Tips
Homemade whipped cream is best enjoyed fresh, but it’s good to know how to store any leftovers so you don’t waste a single delicious drop. The key to good storage is keeping it cold and sealed.
Refrigerator Storage: The most common way to store it is in the refrigerator. Transfer the whipped cream to an airtight container. A glass bowl with a tight-fitting lid is ideal, or you can use a good quality plastic container. Make sure it’s sealed well to prevent it from absorbing odors from other foods in the fridge. It should stay fresh and fluffy for about 1-2 days. After a day, you might notice it deflates slightly; a quick re-whipping on low speed for about 10-15 seconds will often bring back its loftiness.
Room Temperature: I generally don’t recommend leaving homemade whipped cream at room temperature for very long. Due to its high dairy content, it’s best to keep it chilled to prevent spoilage. If you’ve just made it and need it to sit out for a brief period (say, for serving), that’s fine, but try to get it back into the fridge as soon as possible.
Freezer Instructions: While it’s possible to freeze whipped cream, it’s not my preferred method as the texture can change quite a bit upon thawing. The fat can separate, and it may become watery or grainy. If you *must* freeze it, spoon it into dollops onto a parchment-lined baking sheet, freeze until solid, then transfer to a freezer-safe container or bag. It will last for about 1-2 months. To thaw, place it in the refrigerator overnight. You’ll likely need to re-whip it thoroughly to regain some of its original texture. For this reason, I always aim to use it up within a couple of days.
Glaze Timing Advice: If you’re adding a glaze *to* your whipped cream (like a chocolate ganache swirl or a fruit syrup), it’s usually best to do this just before serving or storing. If you swirl in a liquid like syrup too early, it can start to break down the whipped cream’s structure over time. For the best results, I tend to serve it plain or add glazes just before it hits the plate.
Frequently Asked Questions
Final Thoughts
There you have it – the simplest, most delightful way to make homemade whipped cream. It’s one of those recipes that feels like a culinary superpower, transforming simple ingredients into something truly special. It’s proof that you don’t need to be a pastry chef to create magic in your own kitchen. The pure flavor, the airy texture, the sheer joy it brings to any dessert – it’s all worth those few minutes of whipping. I hope you give this a try and experience the difference yourself. It’s perfect for topping pies, cakes, fruit, or even just for a little spoonful of happiness on its own. If you try it, please let me know in the comments below how it turned out and what delicious creations you topped with it! I can’t wait to hear all about your whipped cream adventures. Happy whipping!
Homemade Whipped Cream
Ingredients
Main Ingredients
- 1.25 cup heavy whipping cream or heavy cream, cold
- 0.5 cup powdered sugar
- 0.75 tsp vanilla extract
Instructions
Preparation Steps
- Add the heavy whipping cream, powdered sugar and vanilla extract to a large mixer bowl fitted with a whisk attachment.
- Whip on high speed until stiff peaks form.
- Use the whipped cream on any number of desserts including ice cream, cake, cupcakes, cheesecakes, trifles and more. Whipped cream will stay stable when stored in the fridge for at least 5-7 days after piping onto a dessert. I suggest piping it onto your dessert shortly after making it.