There are some recipes that just feel like coming home, aren’t there? This one, for homemade sandwich cookies, is absolutely one of those for me. I can still vividly remember my grandma making these when I was a little thing, the entire house filling with the most incredible buttery, vanilla scent. She’d always let me help stir the batter (even though I probably made more mess than anything!) and then the hardest part: waiting for them to bake and cool. Now, my own kids beg for them, especially when they have friends over. They’re like little edible hugs, perfect for any occasion, and honestly, they’re so much better than anything you can buy in a store. Forget those fancy, complicated desserts for a moment; sometimes, the simple things, made with love right in your own kitchen, are the absolute best. They’re my go-to for impromptu bake sales, teacher gifts, or just when a serious sweet craving hits and I need something reliable and utterly delicious.
What are homemade sandwich cookies?
So, what exactly are we talking about when I say homemade sandwich cookies? Think of two perfectly baked, slightly crisp yet tender cookies, sandwiched together with a lusciously creamy filling. It’s that simple, and yet, that magical. The beauty lies in the contrast: the delicate cookie and the dreamy filling. This isn’t about a complex layered cake or a fussy pastry. It’s about creating a little moment of joy, bite-sized and completely satisfying. The “sandwich” aspect is key – it’s the perfect vehicle for that irresistible filling. It’s essentially the classic, comforting cookie we all grew up loving, but elevated just a touch because *you* made it from scratch. It’s the kind of treat that makes people’s eyes light up when they take that first bite, and you can proudly say, “Yep, I made that!”
Why you’ll love this recipe?
Oh, where do I even begin with why this recipe is a lifesaver and a guaranteed crowd-pleaser? Let’s start with the flavor, because that’s always paramount, right? The cookies themselves are delicately sweet with a hint of vanilla, perfectly buttery without being greasy. And that filling? It’s pure creamy bliss. It’s not overly sweet, which I really appreciate; it balances the cookie so beautifully. Then there’s the simplicity. Honestly, this is one of those recipes that looks way more impressive than it actually is to make. You don’t need fancy equipment or a culinary degree. I’ve made these on busy weeknights when I needed a quick treat, and they’ve always turned out beautifully. The ingredients are pantry staples for the most part, making it incredibly cost-effective too. No need to splurge on expensive store-bought cookies when you can whip up a batch of these for a fraction of the price. And the versatility! While I adore the classic vanilla-on-vanilla, I’ve experimented so much. You can easily swap out extracts, add citrus zest to the Cookie Dough, or even tint the filling. These are fantastic for holidays, birthdays, or just a Tuesday afternoon pick-me-up. What I love most about this recipe is its reliability and its sheer deliciousness. It’s the kind of cookie that people remember and ask for again and again. It’s a genuine taste of homemade goodness.
How do I make homemade sandwich cookies?
Quick Overview
Making these homemade sandwich cookies is a straightforward process that yields incredible results. We’ll start by whipping up a simple, tender cookie dough, then chill it to make it easy to handle. While that chills, we’ll prepare a divine, smooth filling. Once the cookies are baked and cooled, we’ll pair them up and fill them for that perfect sandwich cookie experience. It’s all about gentle mixing, proper chilling, and patient cooling to achieve that signature texture and taste. Trust me, the aroma that will fill your kitchen is worth every second!
Ingredients
For the Main Batter:
You’ll want good quality unsalted butter, softened but not melted. I always use European-style butter if I can find it; it has a higher fat content and really makes a difference in richness. For the sugar, granulated is standard, but I sometimes use a mix of granulated and a little superfine sugar for an extra tender crumb. Eggs should be at room temperature – it helps them emulsify better. And of course, pure vanilla extract is non-negotiable. Please, no imitation stuff here! For the flour, all-purpose is perfectly fine, and a pinch of salt balances the sweetness. Baking powder gives them just enough lift without making them cakey.
For the Filling:
This is where the magic happens! Again, softened unsalted butter is key. We’ll use powdered sugar – make sure it’s sifted if you have lumps, it makes for a smoother filling. More pure vanilla extract is essential, and a tiny splash of milk or cream helps get it to that perfect, spreadable consistency. Some people like a pinch of salt in their filling too, to cut through the sweetness, and I’m definitely one of them! You can also play around with other extracts here, like almond or lemon.
For the Glaze:
This is entirely optional, but I love a simple glaze. It’s usually just powdered sugar, a little bit of milk or water, and a touch more vanilla extract. You can also add a drop of food coloring if you’re feeling festive! The key is to get the consistency just right – thick enough to coat, but thin enough to drip nicely.
Step-by-Step Instructions
Step 1: Preheat & Prep Pan
First things first, let’s get our oven ready. Preheat it to 350°F (175°C). I always recommend using parchment paper on your baking sheets. It prevents sticking like a charm and makes cleanup a breeze. You don’t need to grease the pan if you’re using parchment. Just lay a sheet down on each baking tray.
Step 2: Mix Dry Ingredients
In a medium bowl, whisk together your all-purpose flour, baking powder, and salt. Give it a good whisk for about 30 seconds to make sure everything is evenly distributed. This simple step ensures your cookies have a uniform texture and rise properly. Set this aside for now.
Step 3: Mix Wet Ingredients
In a large bowl, or the bowl of your stand mixer fitted with the paddle attachment, cream together the softened butter and granulated sugar. Beat them on medium speed until they’re light and fluffy, usually about 3-4 minutes. This is crucial for a tender cookie. Scrape down the sides of the bowl as needed. Then, beat in the egg and vanilla extract until well combined. It might look a little curdled at first, but that’s totally normal.
Step 4: Combine
Gradually add the dry ingredients to the wet ingredients, mixing on low speed until just combined. Be careful not to overmix here! Overmixing develops the gluten too much, which can lead to tough cookies. Stop mixing as soon as you no longer see streaks of flour. The dough will be soft and a bit sticky.
Step 5: Prepare Filling
While the dough is chilling, let’s make that glorious filling. In a clean bowl, beat the softened butter until it’s super smooth and creamy. Gradually add the sifted powdered sugar, about a cup at a time, beating well after each addition. Once all the sugar is incorporated, add the vanilla extract, milk/cream, and salt. Beat on medium-high speed until the filling is light, fluffy, and perfectly smooth. If it’s too thick, add another teaspoon of milk; if it’s too thin, add a little more powdered sugar.
Step 6: Layer & Swirl
Now for the fun part! Roll the cookie dough into small balls, about 1-inch in diameter. Place them on your prepared baking sheets, leaving about 2 inches between each cookie because they will spread. I like to use a small cookie scoop to ensure uniform size. You can gently press them down with the bottom of a glass if you want flatter cookies, or leave them as balls for a more domed shape. This is also where you could add any mix-ins to the dough itself if you’re feeling adventurous!
Step 7: Bake
Bake for 10-12 minutes, or until the edges are lightly golden brown and the centers look set. They might seem a little soft in the middle, but they’ll firm up as they cool. Don’t overbake them, or they’ll be hard! Let them cool on the baking sheet for about 5 minutes before transferring them to a wire rack to cool completely. This is important – trying to fill warm cookies is a recipe for disaster!
Step 8: Cool & Glaze
Once the cookies are completely cool, it’s time to assemble! Take two cookies that are roughly the same size. Spread a generous spoonful of filling onto the flat side of one cookie. Then, gently press another cookie on top, twisting slightly to spread the filling to the edges. If you’re adding a glaze, whisk together the powdered sugar, liquid, and vanilla until smooth. Drizzle or dip the tops of the assembled cookies into the glaze. Let the glaze set before moving them.
Step 9: Slice & Serve
These are best served at room temperature. You can stack them on a platter, arrange them in a pretty tin, or just dive right in! They’re perfect on their own, with a glass of cold milk, or a hot cup of coffee. Enjoy the fruits of your labor!
What to Serve It With
These homemade sandwich cookies are so wonderfully adaptable, making them perfect for any moment you want a little sweet treat. For breakfast, imagine pairing one with a strong, freshly brewed coffee as a little morning indulgence. They’re not overly sweet, so they don’t feel out of place with my morning routine! For a more elegant brunch spread, I love presenting them on a tiered stand with other pastries and fruits. A light, crisp sparkling wine or a mimosa pairs beautifully. As a dessert, they’re a dream. They’re wonderful served after a rich meal, perhaps alongside a scoop of vanilla bean ice cream, or just on their own with a steaming cup of tea. And for those cozy, quiet moments – perhaps curled up with a book or catching up with a friend – they are the ultimate comfort snack. A glass of warm milk, maybe with a sprinkle of cinnamon, is my personal favorite pairing for these times. My family also loves them as part of a “dessert board” with fresh berries and a chocolate dip. It’s amazing how such a simple cookie can fit into so many different occasions!
Top Tips for Perfecting Your Homemade Sandwich Cookies
I’ve been making these cookies for years, and I’ve picked up a few tricks along the way that I think make a world of difference. For the cookies themselves, make sure your butter is *truly* softened but not melted. If it’s too soft, the cookies will spread too much. If it’s too cold, they’ll be dense. I learned this the hard way after a batch spread into one giant cookie! For mixing the dough, resist the urge to overmix once the flour is added. Just mix until it comes together. Seriously, just a few more seconds could turn those delicate cookies into something tough. When you’re making the filling, don’t rush the creaming of the butter and powdered sugar. That step is what gives it that super light and airy texture. If your filling seems too stiff, add your milk or cream a teaspoon at a time; it’s easier to add more than to take away! For a beautiful swirl effect if you’re adding color or different flavors to the dough, just gently marble them together. Don’t over-swirl, or you’ll lose the distinct patterns. When it comes to baking, ovens can be finicky. I always keep an eye on them for the last few minutes. The edges should be just barely golden. If they look done, they probably are, and they’ll continue to cook a bit on the hot baking sheet. For ingredient swaps, if you need to go gluten-free, I’ve had success using a good quality 1:1 gluten-free baking flour blend. You might need to adjust the liquid slightly, so keep an eye on the dough consistency. And for the glaze, if it’s too thick, add liquid by the drop; if it’s too thin, add powdered sugar by the tablespoon until it’s just right for drizzling.
Storing and Reheating Tips
One of the best things about these homemade sandwich cookies is how well they store. Once they’re completely cooled and assembled, I like to store them in an airtight container. At room temperature, they’ll stay fresh and delicious for about 3-4 days. I usually put a piece of parchment paper between layers if I’m stacking them, just to prevent the filling from sticking to the cookies above. If you need them to last a bit longer, the refrigerator is your friend. Pop them in an airtight container, and they should be good for about a week. I find that the texture remains fantastic, and the filling stays nice and firm. If you plan on freezing them, I recommend freezing them *before* filling, if possible. Wrap individual cookie halves tightly in plastic wrap, then place them in a freezer-safe bag or container. They can be frozen for up to 3 months. To thaw, let them come to room temperature on the counter. Once thawed, you can assemble them with fresh filling. If you have already assembled cookies you want to freeze, wrap them very well, and they should be okay for about 1-2 months, though the filling might soften slightly upon thawing. For the glaze, it’s always best to add it just before serving if you’re storing them for more than a day, as it can sometimes become a bit sticky or soggy if left on for too long.
Frequently Asked Questions
Final Thoughts
I really hope you’ll give these homemade sandwich cookies a try. They’re more than just a recipe to me; they’re a reminder of simple joys, family connections, and the incredible magic that happens when you bake with a little bit of love. They are consistently delicious, surprisingly easy, and oh-so-rewarding. Whether you’re a seasoned baker or just starting out, I promise you’ll find success and delight with these little gems. They’re proof that the best things in life truly are homemade. If you love these, you might also enjoy my Classic Chocolate Chip Cookie Recipe or my Fudgy Brownies for more comforting classics. I can’t wait to hear what you think, and I’d absolutely love to see your creations! Tag me on social media or leave a comment below with your own variations and how yours turned out. Happy baking, my friends!
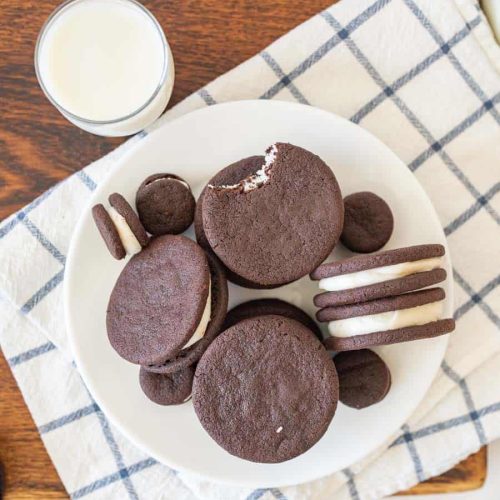
Homemade Sandwich Cookies (Oreo Style)
Ingredients
Chocolate Cookie Ingredients
- 1.25 cup Butter, softened at room temperature
- 2 cup Powdered sugar
- 1 cup Dutch processed cocoa powder or dark cocoa powder
- 0.5 teaspoon Salt
- 1 teaspoon Vanilla extract
- 1.625 cup All-purpose flour Adjust between 1.5 to 1.75 cups for desired dryness
Vanilla Cream Filling Ingredients
- 4 cup Powdered sugar
- 0.5 cup Butter, melted and cooled
- 1 tablespoon Vanilla extract
- 1 tablespoon Water or as needed
Instructions
Preparation Steps
- For the cookies: In a stand mixer with a cookie paddle, cream the butter and 2 cups of powdered sugar until light and fluffy (about 2 minutes).
- Add the cocoa powder, salt, and vanilla extract; mix until incorporated. Add half of the flour and mix.
- Gradually add the remaining flour, 1/4 cup at a time, until the dough is dry but still holds together. Avoid a sticky dough.
- Divide the dough into 3 equal balls, flatten each into a disk, wrap in plastic, and refrigerate for at least 15 minutes.
- Preheat your oven to 350°F (175°C). Roll out one disk of dough thinly (about 1/8 to 1/4 inch thick) between two pieces of parchment paper.
- Use a 2-inch circle cutter to cut out the cookies. Place them on a baking sheet.
- Bake for 8-9 minutes. Monitor closely as dark cookies can burn easily. Cool the cookies completely on a wire rack.
- While cookies cool, make the filling: Mix the 4 cups of powdered sugar, melted butter, and vanilla in a stand mixer until crumbly. Add water, 1 teaspoon at a time, until the mixture resembles thick, pliable dough.
- Divide the filling in half, form each into a 2-inch wide log, wrap in plastic, and chill while cookies finish cooling.
- Assemble the cookies: Slice the chilled filling log into 1/4 to 1/2 inch thick rounds. Place a cream slice between two cooled cookies and gently press together.
- Repeat assembly with the remaining cookies and filling. Store in an airtight container.