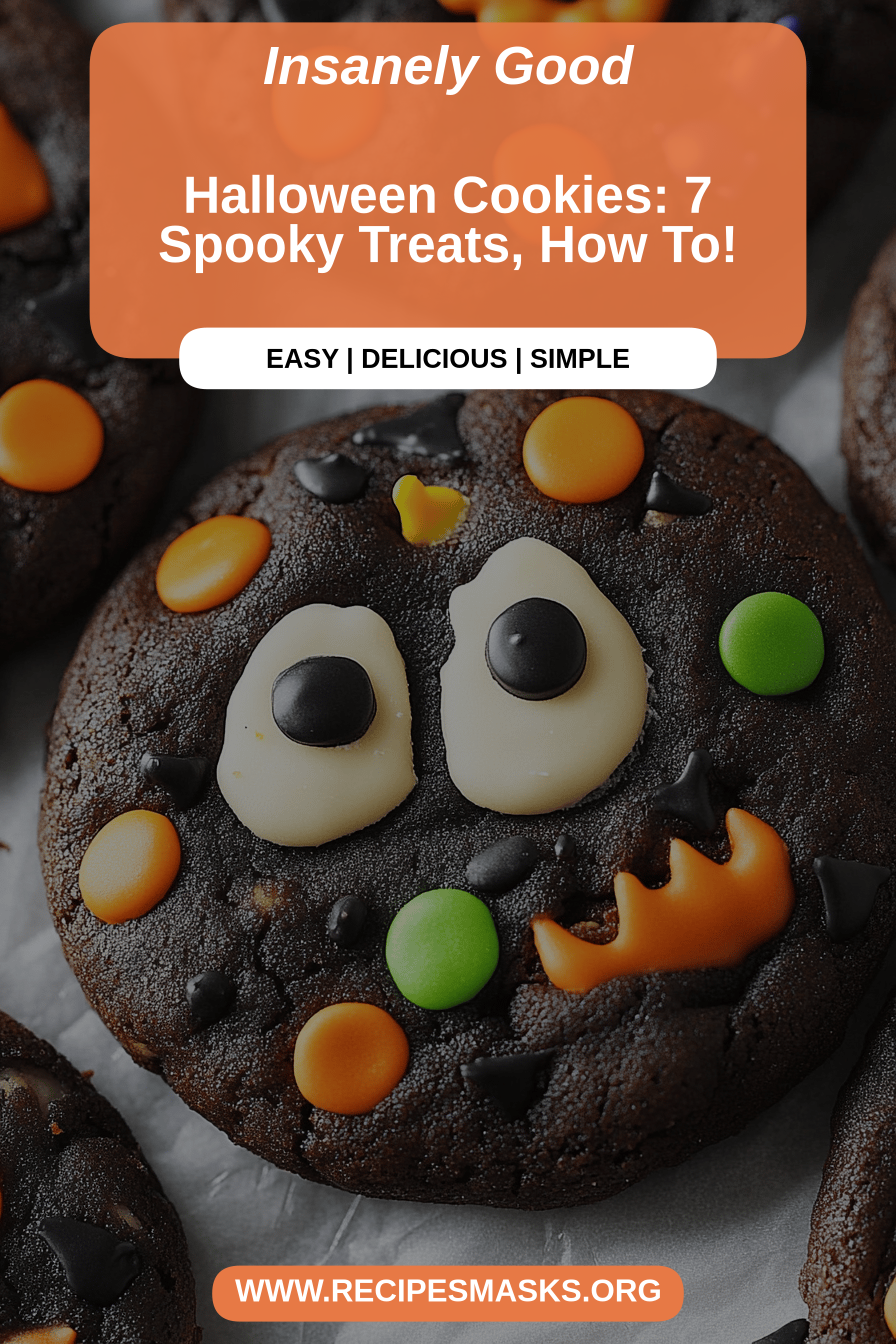
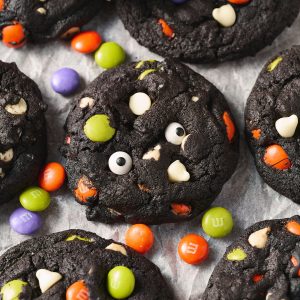
You know, there’s something truly magical about autumn. The crisp air, the colorful leaves, and of course, the sheer joy of all things spooky! Every year, as soon as September rolls around, I start getting this pull, this undeniable urge to bake. And for me, no fall season is complete without a batch of my famous Halloween cookies. These aren’t just any cookies, mind you. They’re like little edible masterpieces, bursting with flavor and just the right amount of festive fun. I’ve tried so many different cookie recipes over the years, from intricate gingerbread to simple Sugar Cookies, but these Halloween cookies? They hold a special place in my heart (and my recipe box!). They’re somehow both comforting and exciting, a perfect balance that makes them a hit with everyone, from my littlest trick-or-treaters to my grown-up friends. They’re honestly way more impressive looking than they are difficult to make, which is always a win in my book.
What are Halloween cookies?
So, what exactly are these celebrated Halloween cookies? Think of them as a soft, slightly chewy base, almost like a wonderfully rich sugar cookie, but with a hint of spice that just screams autumn. What really sets them apart, though, is the swirl. It’s a decadent, often vibrantly colored, creamy filling that gets swirled right into the cookie dough before baking. This creates these gorgeous, marbled patterns that look so impressive once they’re out of the oven. The name “Halloween cookies” is really just a testament to their perfect timing and the fun, spooky colors we often use for the swirl – think deep purples, eerie greens, and spooky oranges. It’s essentially a decorated cookie without all the fuss of royal icing and intricate piping. It’s that perfect blend of simple elegance and playful spirit that just makes them scream “Halloween!”
Why you’ll love this recipe?
Honestly, there are so many reasons why this recipe has become my absolute go-to for Halloween. First and foremost, the flavor is just divine. The cookie itself has a lovely, subtle sweetness with just a touch of cinnamon and nutmeg, which warms you up from the inside out. The swirl is typically a cream cheese or sweet vanilla bean filling, and when it bakes into the cookie, it creates this incredibly tender, almost fudge-like texture in pockets throughout. It’s just pure bliss! Then there’s the simplicity of it all. I know, they look like something you’d find in a fancy bakery, but I promise you, they’re surprisingly easy to whip up. You don’t need a million special tools or a degree in pastry arts. I’ve even made them when I’ve had unexpected guests pop by, and they’ve been a lifesaver. Plus, they’re incredibly budget-friendly! The ingredients are all pantry staples for me, so I rarely have to make a special trip to the store. And the versatility! While they’re perfect for Halloween, you can easily swap out the swirl colors and flavors for any holiday or occasion. I’ve made them with red and green for Christmas, pastel swirls for Easter, and even just plain vanilla for a simple, elegant treat. What I love most about this recipe, though, is the reaction it gets. Every single time I bring these out, people are amazed by how beautiful they look and how delicious they taste. It makes me feel like a baking superstar, even though it’s honestly all thanks to this fantastic recipe. It’s that perfect combination of visual appeal, delicious taste, and effortless execution that truly makes it a winner.
How do you make these Halloween cookies?
Quick Overview
The magic of these Halloween cookies lies in their beautiful swirl. You’ll simply prepare a delicious cookie dough, then divide it and mix in your vibrant swirl components. After a gentle layering and swirling technique, they bake up into stunning marbled treats. It’s a straightforward process that yields absolutely breathtaking results, proving that you don’t need to be a professional baker to create showstopping desserts. The key is not to overmix, which keeps the cookies tender and allows the swirl to really shine.
Ingredients
For the Main Cookie Batter:
You’ll need 2 and 1/2 cups of all-purpose flour, plus a little extra for dusting. Make sure your flour is fresh; sometimes old flour can make baked goods a bit flat. I always use unsalted butter, softened to room temperature, about 1 cup (two sticks). You want it soft enough to cream easily but not melted. For sweetness, we’ll use 1 and 1/4 cups of granulated sugar, which gives them that perfect sweet cookie flavor without being overpowering. Two large eggs are essential for binding and richness, and I always make sure they’re at room temperature too – it helps them incorporate better. A teaspoon of pure vanilla extract is a must for that classic cookie aroma and taste. And for a bit of that autumnal warmth, 1 teaspoon of baking powder for lift and a half teaspoon of salt to balance the sweetness. A whisper of cinnamon, about half a teaspoon, adds that cozy, fall spice note.
For the Swirl Filling:
This is where the magic happens! You’ll need 4 ounces of cream cheese, softened to room temperature. Full-fat cream cheese gives the best texture here. For sweetness, we’ll use 1/4 cup of powdered sugar, sifted to avoid any lumps. Another half teaspoon of vanilla extract will enhance the flavor beautifully. And, of course, food coloring! I love using gel food coloring because it gives such vibrant colors without adding too much liquid. For Halloween, I usually have some spooky orange, a deep purple, and an eerie green on hand. You can also do black and orange, or any combination that strikes your fancy!
For the Glaze (Optional but Recommended!):
This is super simple and really makes the cookies pop. You’ll need 1 cup of powdered sugar, sifted. Then, about 1 to 2 tablespoons of milk or heavy cream. Milk keeps it lighter, while cream makes it richer and slightly thicker. A dash of vanilla extract (about 1/4 teaspoon) adds a little extra flavor. I sometimes add a tiny pinch of salt to the glaze too, just to cut through the sweetness a little.

Step-by-Step Instructions
Step 1: Preheat & Prep Pan
First things first, get your oven preheated to 350 degrees Fahrenheit (175 degrees Celsius). I always find it’s best to get the oven nice and hot before you start mixing, so it’s ready when you are. Line a couple of baking sheets with parchment paper. This is a lifesaver for easy cleanup, and it prevents the cookies from sticking. You can also use silicone baking mats if you have them!
Step 2: Mix Dry Ingredients
In a medium bowl, whisk together your 2 and 1/2 cups of all-purpose flour, 1 teaspoon of baking powder, half a teaspoon of salt, and half a teaspoon of cinnamon. Give it a good whisk until everything is well combined. This ensures that your leavening agents and salt are evenly distributed, which is key for consistent cookies. Don’t skip this step!
Step 3: Mix Wet Ingredients
In a large bowl, cream together 1 cup (2 sticks) of softened unsalted butter and 1 and 1/4 cups of granulated sugar until light and fluffy. This usually takes about 3-4 minutes with an electric mixer. Beat in the two large eggs, one at a time, making sure each is fully incorporated before adding the next. Then, stir in 1 teaspoon of vanilla extract. Your mixture should look smooth and creamy.
Step 4: Combine
Gradually add the dry ingredients to the wet ingredients, mixing on low speed until just combined. Be careful not to overmix here! Overmixing develops the gluten in the flour, which can lead to tough cookies. You want to stop as soon as you don’t see any streaks of dry flour. The dough will be soft, but it should hold together.
Step 5: Prepare Filling
While the dough chills slightly, let’s whip up that colorful swirl. In a small bowl, beat 4 ounces of softened cream cheese with 1/4 cup of sifted powdered sugar and 1/4 teaspoon of vanilla extract until smooth. Divide this mixture into small bowls – one for each color you plan to use. Add a few drops of gel food coloring to each bowl and stir until you achieve your desired vibrant Halloween hues. I usually aim for about 2-3 colors.
Step 6: Layer & Swirl
Now for the fun part! Divide your cookie dough into two equal portions. On a lightly floured surface, gently roll out one portion of the dough into a rectangle, about 1/4 inch thick. Don’t worry about perfection here; rustic is good! Now, dollop spoonfuls of your colored cream cheese filling randomly over the surface of the dough. Then, gently roll out the second portion of dough to the same size and carefully place it on top of the filling. Using a knife or a pizza cutter, slice the layered dough into strips about 1 inch wide. Then, gently twist each strip a few times to create a beautiful swirl pattern. Don’t twist too tightly, or the colors might blend too much. Arrange the twisted dough logs onto your prepared baking sheets, leaving about 2 inches between them.
Step 7: Bake
Bake for 10-14 minutes, or until the edges are lightly golden and the centers are set. They won’t spread a ton, but you want them to look cooked through. Keep an eye on them, as oven temperatures can vary. I usually check mine around the 10-minute mark.
Step 8: Cool & Glaze
Let the cookies cool on the baking sheets for about 5 minutes before transferring them to a wire rack to cool completely. While they’re cooling, whip up your glaze if you’re using one. Whisk together 1 cup of sifted powdered sugar with 1 to 2 tablespoons of milk or cream and 1/4 teaspoon of vanilla until smooth and drizzly. You want a consistency that’s pourable but not too thin. Once the cookies are completely cool, drizzle the glaze over them in a decorative pattern. Let the glaze set before serving.
Step 9: Slice & Serve
Once the glaze is set, these Halloween cookies are ready to be admired and devoured! I like to cut them into manageable squares or rectangles, but you can certainly leave them as is. They’re perfect for Halloween parties, lunchboxes, or just a cozy afternoon treat. The swirls inside are always a delightful surprise!
What to Serve It With
These Halloween cookies are so versatile, they really shine on their own, but here are a few ideas on how to make them even more special depending on the occasion.
For Breakfast: While they are a sweet treat, a single cookie with a strong cup of coffee or a mug of hot chocolate makes for a delightful start to the day, especially on a chilly autumn morning. The cinnamon and vanilla notes pair wonderfully with warm beverages.
For Brunch: Serve these alongside some fresh fruit salad and maybe some mini quiches. The colorful swirls add a festive touch to any brunch spread. A mimosa or a sparkling cider would be a perfect pairing to complement the sweetness.
As Dessert: These cookies are fantastic on their own, but you can elevate them by serving them with a scoop of vanilla bean ice cream or a dollop of whipped cream. They also make a wonderful addition to a dessert platter alongside brownies or mini cheesecakes.
For Cozy Snacks: Honestly, these are my absolute favorite for a cozy afternoon snack with a glass of cold milk. They’re comforting, satisfying, and just make you feel good. They’re perfect for those moments when you want something sweet but don’t want to go through the hassle of baking a whole cake. My family devours them during movie nights!
Top Tips for Perfecting Your Halloween Cookies
I’ve been making these cookies for years, and along the way, I’ve picked up a few tricks that really make a difference. Here are my top tips to help you achieve cookie perfection:
Cookie Dough Consistency: The most important thing is not to overwork the dough. When you add the dry ingredients to the wet, mix until just combined. If you see a little flour still, that’s okay; it will incorporate as you handle it. Overmixing means tougher cookies, and we definitely don’t want that! If the dough seems too sticky to handle after mixing, chilling it for about 15-20 minutes can make it much more manageable.
Swirl Technique: When you’re layering the dough and the filling, be gentle. You want distinct swirls, not a muddy mess. I find that using a light hand when twisting the dough logs prevents the colors from bleeding too much. Also, don’t overload the dough with filling. A little goes a long way to create that beautiful marbled effect without making the cookie too gooey.
Color Vibrancy: Gel food coloring is definitely the way to go here. Liquid food coloring can add too much moisture to the filling and dilute the color. Start with just a few drops and add more until you get that intense Halloween hue. Remember, the colors often bake a little lighter, so don’t be afraid to go a bit bolder than you think!
Baking Time: Ovens are notoriously finicky, aren’t they? I always recommend starting to check your cookies a couple of minutes before the suggested time. You’re looking for the edges to be lightly golden brown and the center to look set, not wet. They will continue to cook slightly on the baking sheet after you remove them from the oven.
Ingredient Swaps: For the cookie batter, if you’re feeling adventurous, you can try substituting a portion of the all-purpose flour with a gluten-free blend. I’ve had success with a 1:1 gluten-free baking flour. For the swirl, if you’re not a fan of cream cheese, you could try a thick vanilla buttercream or even a sweetened condensed milk-based filling, though the texture will be slightly different. For the glaze, if you prefer a simple dusting, confectioners’ sugar is a great option. Just sift it evenly over the cooled cookies using a fine-mesh sieve.
Glaze Consistency: Achieving the right glaze consistency is key. You want it thick enough to drizzle without running off the cookie completely, but thin enough to spread easily. I always start with the lower amount of liquid (milk or cream) and add more, a teaspoon at a time, until it’s just right. It should fall off the spoon in a steady stream.
Storing and Reheating Tips
Keeping these Halloween cookies fresh and delicious is pretty straightforward, but there are a few things I’ve learned that help them last:
Room Temperature: Once completely cooled and the glaze has set, you can store these cookies in an airtight container at room temperature for up to 3-4 days. I usually just use a regular cookie tin or a plastic container with a lid. They tend to stay nice and soft this way, which is how I like them!
Refrigerator Storage: If your kitchen is particularly warm or you live in a humid climate, you might want to store them in the refrigerator. Place them in an airtight container with parchment paper between layers to prevent sticking. They’ll be good in the fridge for about a week, though their texture might become a little firmer. I always bring them back to room temperature for about 15-20 minutes before serving if they’ve been refrigerated.
Freezer Instructions: These cookies freeze beautifully, which is great if you want to get ahead of the holiday baking. You can freeze them either before or after baking. For unbaked dough logs, wrap them tightly in plastic wrap and then place them in a freezer-safe bag for up to 2 months. Thaw overnight in the refrigerator and then slice and bake as usual. For baked cookies, wrap each cookie individually in plastic wrap, then place them in a freezer-safe container or bag. They’ll keep well for up to 3 months. Thaw them at room temperature.
Glaze Timing Advice: For the best results when storing, I recommend glazing the cookies right before serving, especially if you plan to freeze them or store them for more than a day. If you do glaze them ahead of time and store them at room temperature, make sure the glaze is completely set, otherwise, they might stick together. For refrigerator or freezer storage, it’s best to store them un-glazed and then drizzle the glaze on once they’ve thawed and reached room temperature.
Frequently Asked Questions
Final Thoughts
I truly hope you give these Halloween cookies a try! They’re more than just a recipe to me; they’re a collection of happy memories, from countless baking sessions with my kids to sharing them with friends at our annual spooky get-togethers. They embody everything I love about baking: creativity, deliciousness, and the joy of bringing smiles to people’s faces. The way the colors swirl and blend, creating a unique design in every cookie, is just so satisfying. Plus, the taste is just incredible – soft, chewy, and perfectly sweet. If you love these, you might also enjoy my Spiced Apple Cider Doughnuts or my Easy Pumpkin Bread recipe for more fall-themed baking fun! I can’t wait to hear what you think. Please leave a comment below and let me know how your Halloween cookies turned out, and don’t forget to share your own creative color combinations! Happy baking, and have a spooktacular Halloween!
Spooky Halloween Sugar Cookies
Ingredients
For the Cookies
- 1 cup unsalted butter softened
- 1.5 cup granulated sugar
- 2 large eggs
- 1 teaspoon vanilla extract
- 4 cup all-purpose flour
- 1 teaspoon baking powder
- 0.5 teaspoon salt
For the Royal Icing
- 3 cup powdered sugar sifted
- 0.25 cup milk
- 0.5 teaspoon almond extract optional
- food coloring orange, black, purple (for Halloween)
Instructions
Cookie Preparation
- Cream together softened butter and granulated sugar until light and fluffy.
- Beat in eggs one at a time, then stir in vanilla extract.
- In a separate bowl, whisk together flour, baking powder, and salt.
- Gradually add the dry ingredients to the wet ingredients, mixing until just combined.
- Divide the dough in half, flatten into discs, wrap in plastic wrap, and chill for at least 1 hour.
- Preheat oven to 350°F (175°C). Line baking sheets with parchment paper.
- On a lightly floured surface, roll out one disc of dough to about 1/4-inch thickness. Cut out Halloween shapes using cookie cutters.
- Place cookies on the prepared baking sheets, about 1 inch apart.
- Bake for 8-10 minutes, or until the edges are lightly golden.
- Let cookies cool on the baking sheets for a few minutes before transferring them to a wire rack to cool completely.
Icing Preparation and Decoration
- In a medium bowl, whisk together powdered sugar and milk until smooth.
- Stir in almond extract, if using.
- Divide the icing into separate bowls and tint with food coloring as desired.
- Once the cookies are completely cool, decorate them with the royal icing using piping bags or spatulas.
- Let the icing dry completely before storing the cookies.