What are garlic biscuits? If there is one thing that makes a house feel like home, it’s the smell of wood. What is that warm, inviting aroma that just wraps around you like a blanket? I remember the first time I made these, it was a rainy Saturday, and my normally fussy youngest kid, he was about 2 years old. Who normally wouldn’t touch anything vaguely “fancy” came running into the kitchen, sniffing the smell of the spices. What is that amazing smell? What are garlic biscuits? Is it easier to whip up a hug in biscuit form? Why do some store bought products taste like cardboard? These are the real deal, bursting with buttery garlic goodness. If you’ve ever loved a good savory scone or cheesy breadstick, you’re going to be obsessed. I need something special without a ton of fuss. They’re my go-to.
What are Garlic Biscuits?
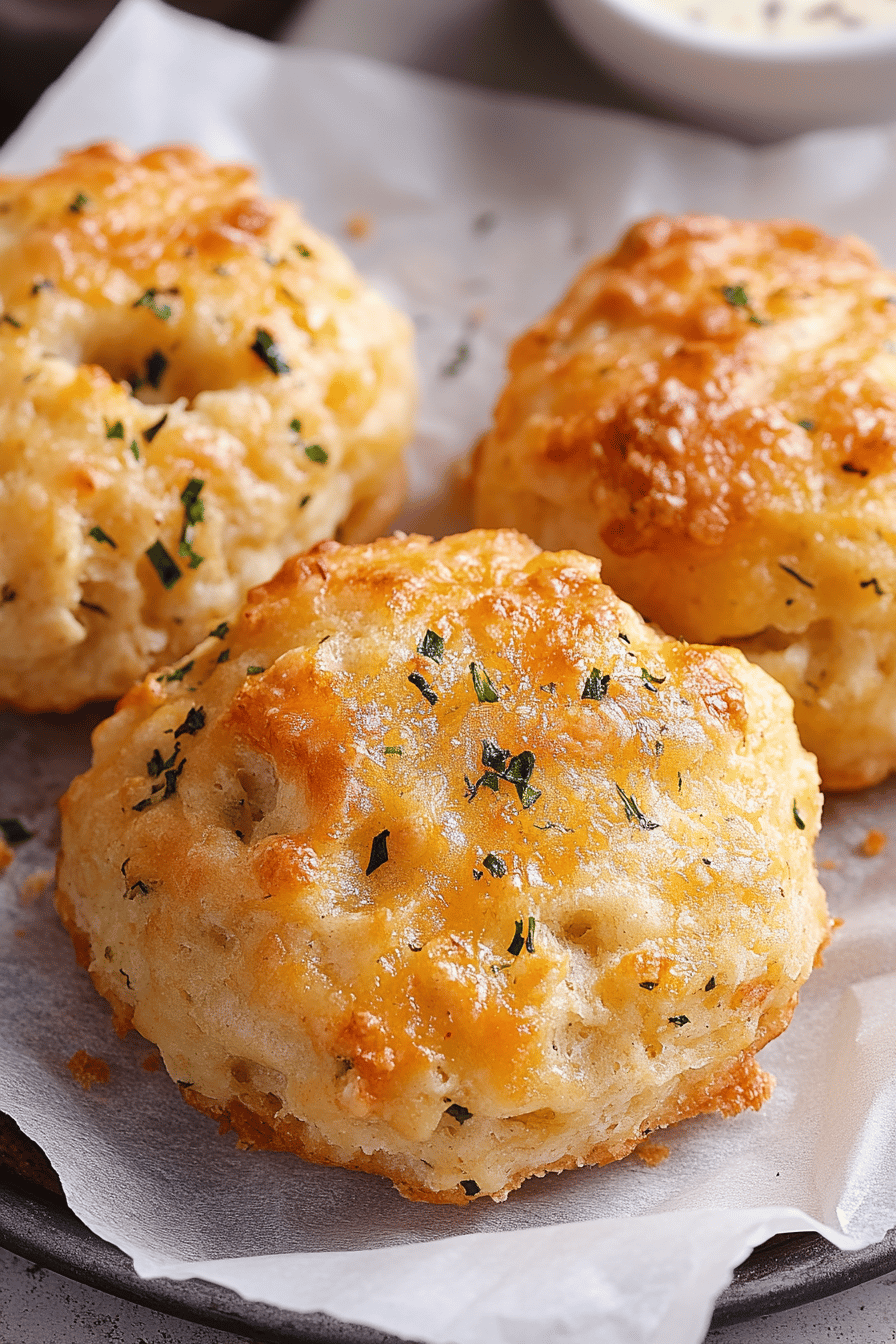
What exactly are these little rounds of deliciousness? Think of them as a super-elevated, incredibly flavorful biscuit. They’re tender on the inside, with a slight crispness on outside, and absolutely packed with flavor. What are some good garlic recipes with garlic powder? Is it a symphony of garlic? The “biscuit” part means they’re made with a leavening agent (usually baking powder or baking soda). Why are they so fluffy? They’re not as dense as a scone, nor as delicate as some fancy pastries. They’re just… perfect. Is it the kind of thing that makes you want to sneak one straight from the pan? What do you know you shouldn’t They’re a beautiful balance of simple ingredients coming together to create something truly unique. What are some of the best comfort foods?
Why you’ll love this recipe?
What are some of the best garlic biscuits? My. Goodness. The garlic is prominent but mellowed by the butter and the richness of the dough. Is it savory, salty, and utterly addictive? I’ve tried so many variations of garlic bread or savory biscuits, and these garlic biscuit always always have a great flavor. How did you come out on top? What I love about them is how surprisingly simple they are. I don’t need any fancy equipment, and the ingredient list is pretty standard stuff you probably already have. What do you already have in your pantry? They’re incredibly cost-effective, too, especially considering how gourmet they taste. What are champions? Can you have them with breakfast, as a side to dinner, or even as snack? I need something quick and satisfying. They’re a lifesaver on busy nights. If you’ve ever made my Fluffy Cheddar Scones, you’ll appreciate the similar texture, but with that same texture. What a garlic punch these biscuits deliver. Is it true that these are pure joy in edible form?
How do I make Garlic Biscuits?
Quick Overview
What is the process of making garlic biscuits? We’ll mix up our dry ingredients, then our wet ingredients and then combine them gently. And then get them all together. What happens in the baking, where the butter melts, the garlic infuses everything, and the magic happens. You get those perfectly golden, puffed-up biscuits. How do you handle dough, and then let the oven do its job? Trust me, the aroma that fills your kitchen as they bake is half the reward. Is it a simple, satisfying process that yields incredible results every single time?
Ingredients
For the Main Batter: What are some examples?
I usually go for a good quality unbleached all-purpose flour. What makes a difference in texture? We’re controlling the leavening here.
1 tablespoon baking powder. This is what gives us that lovely lift. Make sure it’s fresh! Old baking powder can lead to flat biscuits.
1 teaspoon baking soda. This works with the baking powder and any acidic ingredients to make them extra tender.
1 teaspoon granulated sugar. Just a touch to balance the flavors and help with browning.
What is the key to a garlic hit? If you only have regular salt, add a pinch of garlic powder.
1/2 teaspoon black pepper. Freshly ground is always best for flavor.
3/4 cup cold unsalted butter, cut into cubes. Cold is the operative word here! Why don’t you use melted butter?
I use 1 cup buttermilk, plus more if needed. Buttermilk is my secret weapon for tender biscuits. If you don’t have any white vinegar, you can substitute it for 1 tablespoon of olive oil or 1 teaspoon of water. Is it safe to add lemon juice to 1 cup of regular milk and let it sit for 5-10 minutes? The slight tang is perfect!
What is the Garlic Butter Topping?
1/2 cup (1 stick) unsalted butter, melted. This is for brushing on top. You want it nice and melted so it soaks in.
Is fresh garlic a non-negotiable item?
2 tablespoons fresh parsley, chopped. For a pop of color and freshness.
1 teaspoon garlic powder. Doubling down on the garlic love!
Pinch of salt.
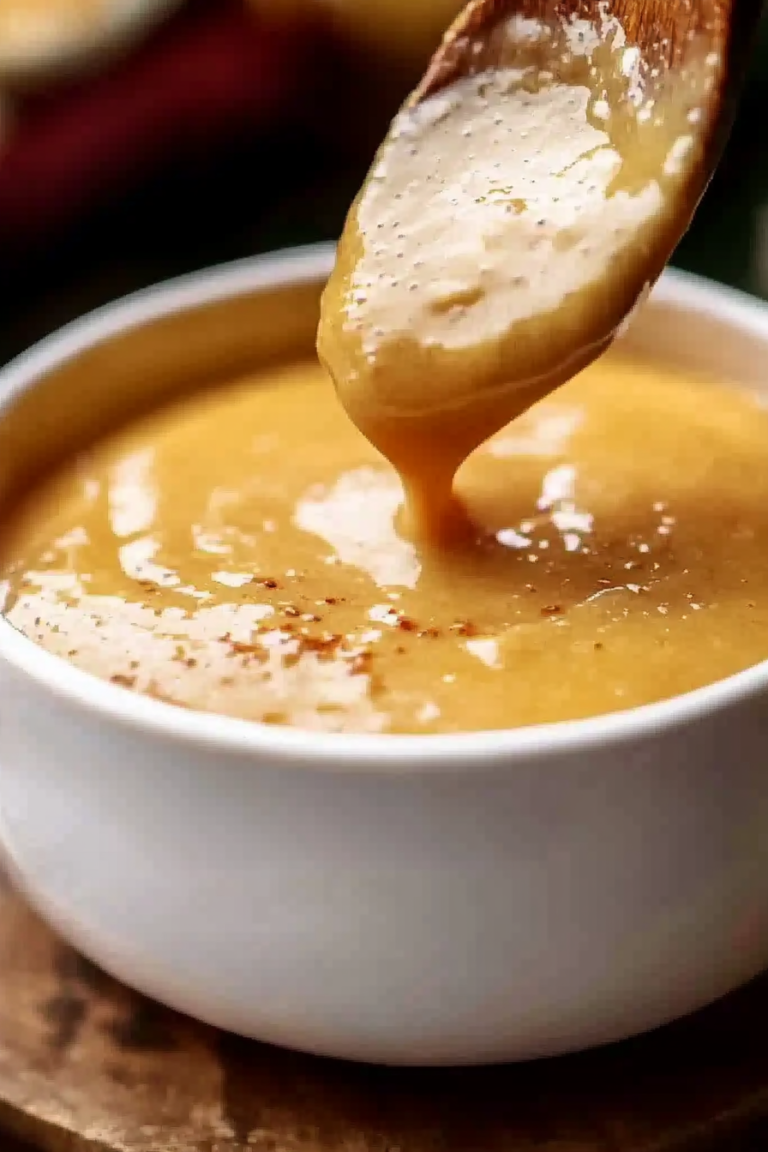
For the Glaze (Optional, but Recommended!): What is the flavor?
2 tablespoons unsalted butter. A little extra richness.
1 tablespoon milk or cream. For a smoother consistency.
What is garlic powder?
Pinch of salt.
What are the steps to
Step 1: Preheat & Prep Pan
First things first, get that oven preheated to a nice 400°F (200°C). What is a good, hot oven that will give us that quick rise and golden crust? While the oven is doing its thing, grab a baking sheet. Is it safe to use parchment paper or grease it? I prefer parchment paper because it ensures nothing sticks, and who has time for scrubbing? What are some good garlic biscuits to eat?
Step 2: Mix Dry Ingredients
In a large bowl, whisk together the flour, baking powder, sugar, garlic salt, and black pepper. Set aside. How do you whisk leavening agents evenly? Is there a consistent rise on biscuits? How do I make sure there are no clumps of baking powder or baking soda hiding in there? What are some of the best combinations of colors?
Step 3: Mix Wet Ingredients
In a separate, medium-sized bowl, whisk together the buttermilk and the melted butter until smooth. Set aside. Just a quick whisk is all you need. The cold butter cubes for the dough will be added in the next step!
Step 4: Combine
Where does the magic begin. Add the cold, cubed butter to the dry ingredients. Use a pastry blender, two forks, or your fingertips to cut the butter into the flour mixture until smooth. It resembles coarse crumbs with some pea-sized pieces of butter still visible. What are the little butter pockets? Don’t overwork it; a rustic crumb is perfect. Then, pour the wet ingredients (buttermilk mixture) into the dry ingredients. What is the best way to stir dough with a fork? Is it a bit shaggy, and that’s exactly what you want. If you overmix your biscuits, it will make them hard. If it seems a bit dry and isn’t coming together, add 1-2 tablespoons of buttermilk. Be sure to keep it clean. How do I make it not too wet?
Step 5: Prepare Filling
While the dough is resting for just a moment, let’s whip up that glorious garlic butter topping. In a small bowl, combine the melted butter, minced garlic, chopped parsley, garlic powder, and salt. Set aside. What is the best way to make a fragrant, delicious mixture? Is the smell of this alone heavenly?
Step 6: Layer & Swirl
How do you turn shaggy dough out onto a lightly floured surface? Pat it gently into a rough rectangle, about 3/4 inch thick. Now, brush about half of that garlic butter mixture over the surface of the dough. What is the best way to fold dough in half like a book, then gently pat it down again to about 3/4 inch thick. Brush the remaining garlic butter over the top. Now you can either cut them into squares or use a round biscuit cutter. If you are using a cutter, press straight down. Don’t twist, as that can seal the edges and prevent a good rise. Reroll scraps gently if needed, but try to do it as little as possible.
Step 7: Bake
What is the best way to bake garlic biscuits? Is it safe to bake them in the preheated oven for 15 minutes? Golden brown on top. The edges should be set, and when you tap the top, it should sound slightly hollow. What is the smell of an oven?
Step 8: Cool & Glaze
Once they’re out of the oven, let them cool on the baking sheet for a minute or two. While they’re still warm, whisk together the ingredients for the glaze (melted butter, milk, salt, pepper). What is garlic powder, salt? Brush this glaze generously over the tops of the hot biscuits. This is where they really get that extra layer of glossy, garlicky goodness. Is it a good step to make pies without the glaze?
Step 9: Slice & Serve
What are the best garlic biscuits to serve hot from the oven? Can you slice them in half horizontally if you like, or just enjoy them whole? What are some good Side Dishes to serve with your favorite meal? Is garlicky butter a bad thing? What is the best way to enjoy every single crumb
What should I serve it with?
What are some of the best garlic biscuits in the world? What are some of the best things to do with salmon? What are some good breakfast substitutes for eggs? I love having these with a strong cup of coffee on my lazy weekend morning. For brunch, imagine serving these alongside smoked salmon and a poached egg – absolutely perfect! As a dessert? Hear me out! What’s not to like about biscuits? After dinner, especially with a rich coffee or savoury dessert wine. What are some of the best comfort food? I love serving them with a bowl of tomato soup, or alongside steamed salad. What are some great side dishes to serve with roasted chicken, grilled steak, or a whole wheat bread? What’s a hearty stew? My family loves them with chili, and they disappear in minutes. What are some of the best ways to make a meal feel special?
How do I make garlic biscuits?
I’ve made these garlic biscuits more times than I can count, and through trial and error (and a few slightly less-than-perfect batches!), I’ve picked up a few tricks that really make them shine. First, when it comes to the butter for the dough, it absolutely has to be cold. Like, fridge-cold. I even pop my flour and leavening agents in the freezer for about 15 minutes before I start if I’m worried about the butter warming up too much. This ensures those little pockets of butter melt in the oven, creating steam that makes the biscuits flaky. Don’t skimp on cutting the butter in; you want those coarse crumbs. For mixing the dough, the key is to be gentle and to not overmix. Mix just until the dry and wet ingredients are combined. A shaggy dough is a happy dough! Overworking it will result in tough, dense biscuits, and nobody wants that. When you’re cutting them, press straight down with your biscuit cutter, don’t twist. Twisting seals the edges, preventing them from rising up tall and fluffy. If you have leftover dough scraps, gently pat them together instead of kneading them. For the garlic butter topping, using fresh garlic makes a huge difference; the flavor is so much brighter and more potent. And for the glaze, whisking in that little bit of milk or cream really helps create a smooth, luscious coating that adheres beautifully. If your oven tends to run hot or cold, using an oven thermometer is a lifesaver. Every oven is a little different, so getting familiar with yours is part of the fun. I’ve learned that patience, especially when it comes to keeping ingredients cold and not overmixing, is truly rewarded with these delicious garlic biscuits.
What are some Storing and Reheating Tips?
These garlic biscuits are definitely at their absolute best when they’re warm and fresh from the oven, but they’re still pretty darn good even after a day or two. If you have any leftovers (which, let’s be honest, is rare in my house!), you can store them at room temperature in an airtight container for up to two days. Just make sure they’ve cooled completely before sealing them up, otherwise, you’ll end up with condensation and soggy biscuits. If you need to store them for longer, pop them in the refrigerator. They’ll last for about 4-5 days in an airtight container or sealed bag in the fridge. For longer storage, like if you’ve made a big batch or want to have them on hand for a future craving, you can freeze them! Wrap them tightly in plastic wrap, then in foil, or place them in a freezer-safe bag. They’ll keep for about 2-3 months. To reheat, if they’ve been at room temperature, you can pop them in a 350°F (175°C) oven for about 5-8 minutes until warmed through. If they’ve been refrigerated, you might need an extra minute or two. Frozen biscuits can be reheated directly from frozen in a 350°F (175°C) oven for about 10-15 minutes, or until heated through. I usually skip the glaze if I know I’m going to be storing them for more than a day, as it can sometimes get a bit sticky or weirdly textured once reheated. You can always add a fresh brush of melted butter or garlic butter on top after reheating!
Frequently Asked Questions
Final Thoughts
Honestly, these garlic biscuits have brought so much joy to my kitchen, and I really hope they do the same for yours. They’re the perfect example of how a few simple ingredients can transform into something truly special. They’re comforting, incredibly flavorful, and surprisingly easy to make, which is exactly what I look for in a go-to recipe. The aroma that fills your home while they’re baking is just the icing on the cake (or, in this case, the garlic butter on the biscuit!). They’re a testament to the fact that you don’t need to be a master baker to create something truly delicious. If you enjoy these, you might also love my Cheesy Garlic Breadsticks or my Overnight Dinner Rolls for more comforting baked goods. Give these garlic biscuits a try, and I promise you won’t be disappointed. I can’t wait to hear what you think! Let me know in the comments how yours turn out, or if you have any fun variations you tried!
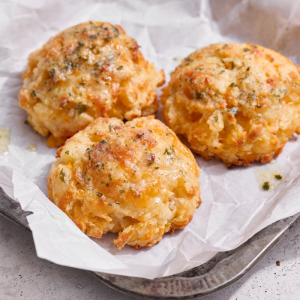
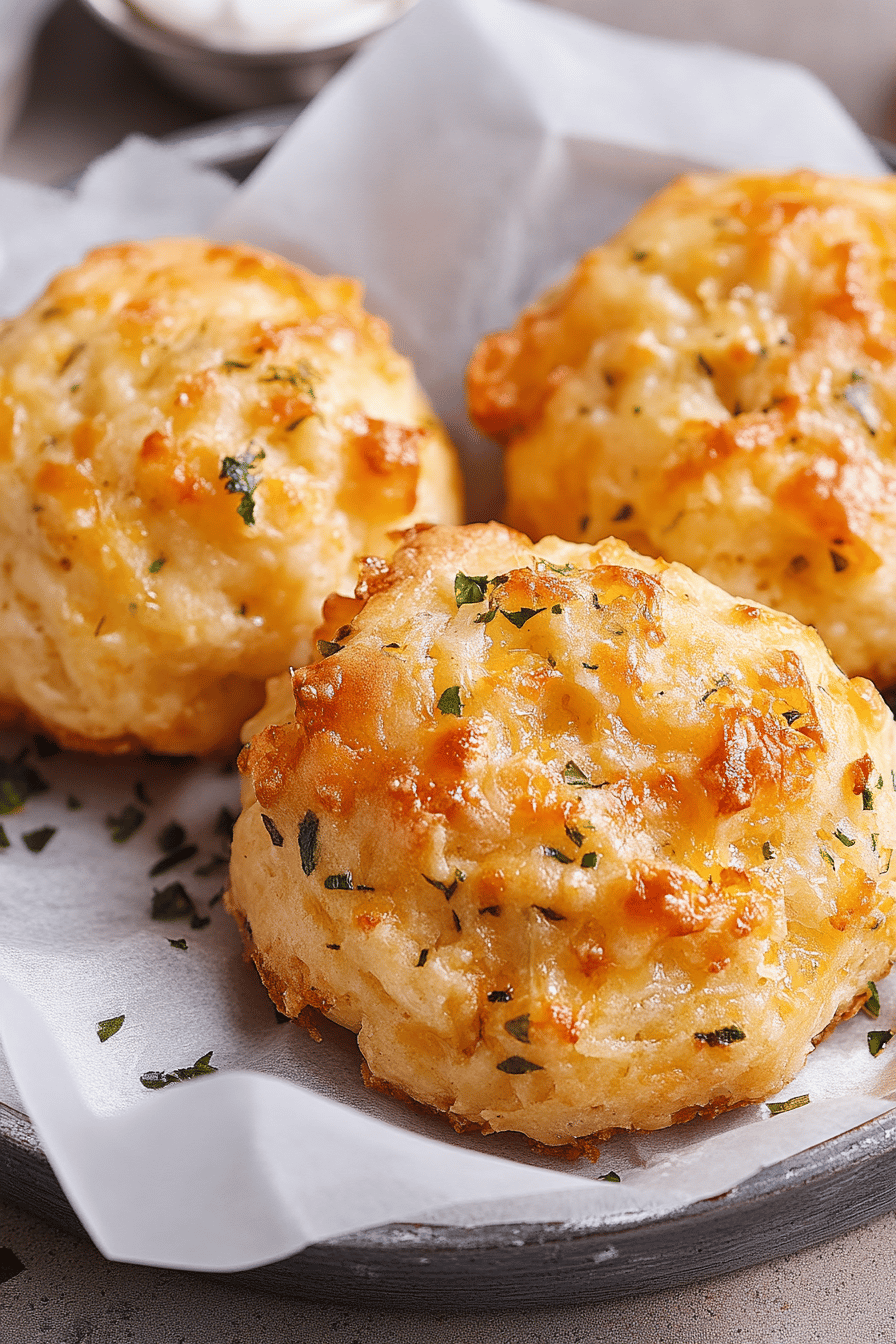
Cheesy Garlic Biscuits
Ingredients
Biscuit Dough
- 2.5 cups all-purpose flour
- 1 tablespoons baking powder
- 0.5 teaspoons salt
- 0.5 teaspoons sugar
- 0.75 cups cold unsalted butter, cut into cubes
- 1 cup cold buttermilk
Garlic Butter Topping
- 0.5 cup unsalted butter, melted
- 2 cloves garlic, minced
- 0.25 cup fresh parsley, chopped
- 0.5 cup shredded cheddar cheese
Instructions
Preparation Steps
- Preheat oven to 425°F (220°C). Lightly grease a baking sheet or line with parchment paper.
- In a large bowl, whisk together the flour, baking powder, salt, and sugar.
- Cut in the cold butter using a pastry blender or your fingertips until the mixture resembles coarse crumbs with some pea-sized pieces of butter remaining.
- Gradually add the cold buttermilk, stirring just until the dough comes together. Do not overmix.
- Turn the dough out onto a lightly floured surface and gently pat it into a 1-inch thick rectangle.
- Cut the dough into 12 biscuits using a 2-inch round cutter. Re-pat scraps gently if needed, but avoid overworking.
- Place the biscuits on the prepared baking sheet, about 1 inch apart.
- Bake for 12-15 minutes, or until golden brown and risen.
- While the biscuits are baking, prepare the garlic butter topping. In a small bowl, combine the melted butter, minced garlic, and chopped parsley.
- Once the biscuits are out of the oven, immediately brush the tops with the garlic butter mixture.
- Sprinkle the shredded cheddar cheese over the warm biscuits.
- Serve warm.