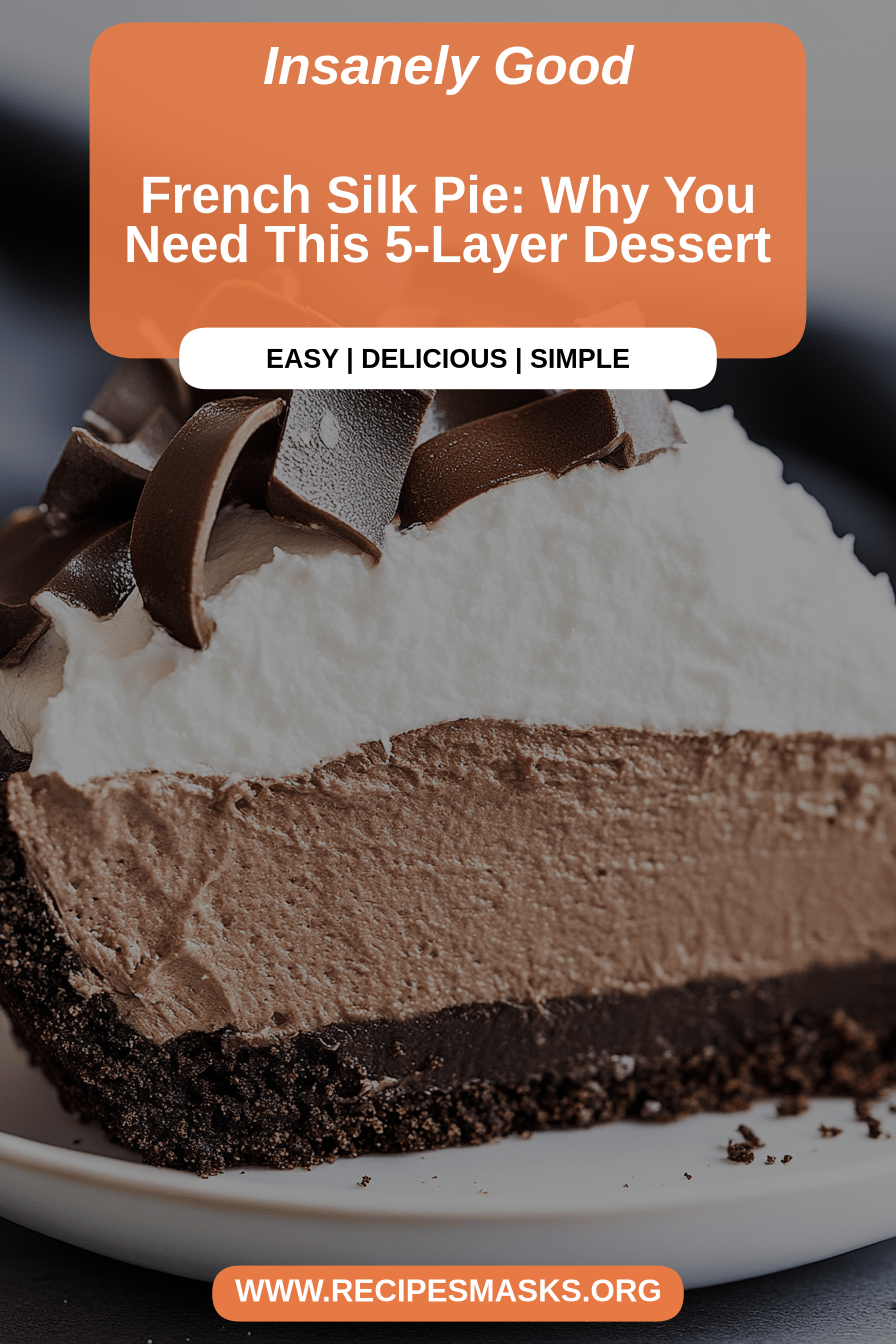
There are some desserts that just feel like a hug in a dish, and for me, that’s always been the French silk pie. It’s that decadent, impossibly smooth chocolate dream that takes me right back to Grandma’s kitchen. She used to make it for every single birthday, and the anticipation of that first, melt-in-your-mouth bite was almost as good as the pie itself. While I adore a good chocolate cake, there’s something uniquely elegant and comforting about a perfectly executed french silk pie. It’s not just a dessert; it’s an experience. Forget those store-bought versions that taste more like sweetened air – this is the real deal, the kind that makes people ask for the recipe immediately. And honestly, it’s surprisingly easy to make, which is always a huge win in my book.
What is French Silk Pie?
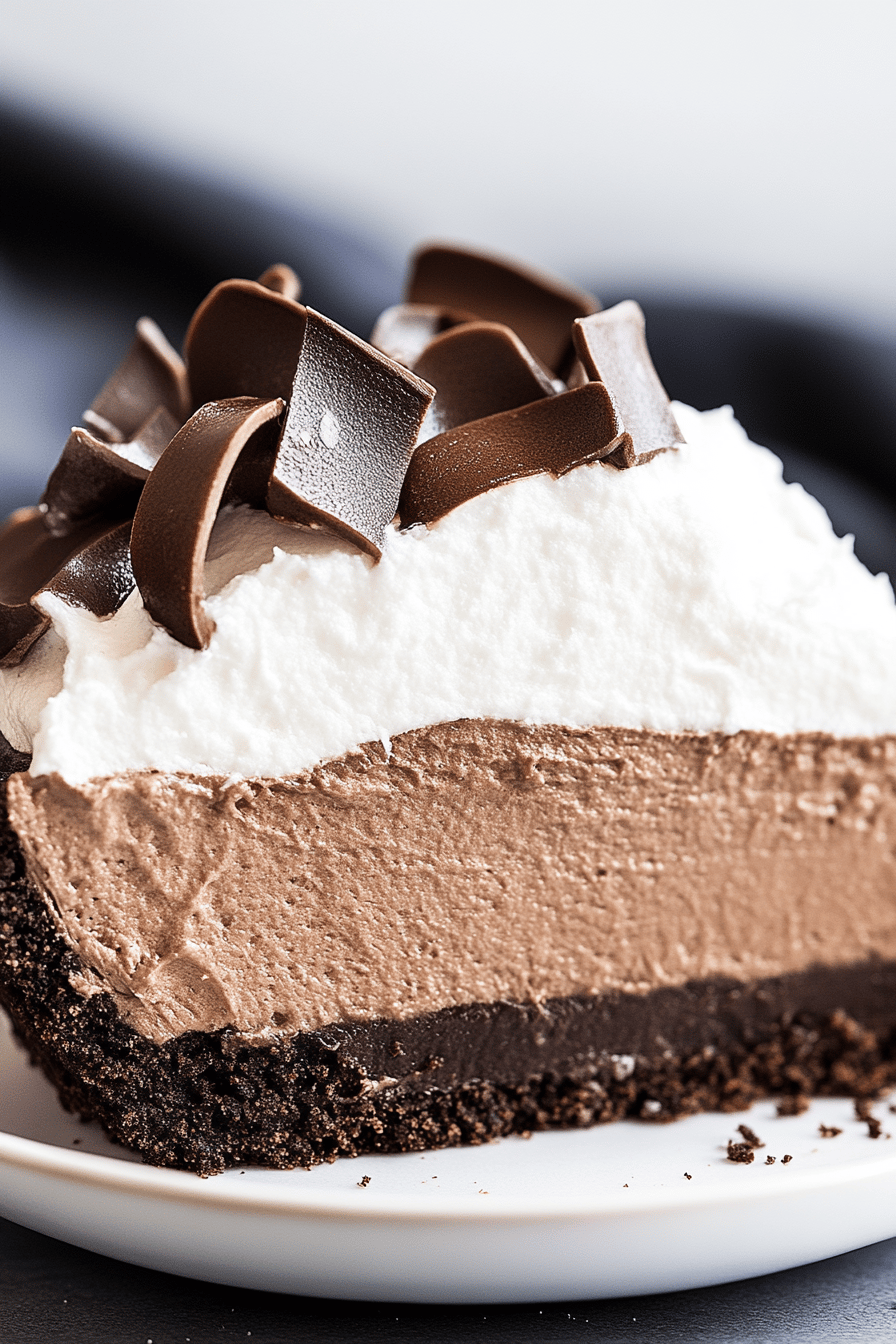
So, what exactly is this magical creation we call french silk pie? At its heart, it’s a no-bake pie with a rich, intensely chocolatey filling that’s unbelievably smooth and creamy. Think of it as the ultimate Chocolate Mousse transformed into a pie. It typically sits in a crisp, buttery crust, often a pre-baked pastry shell or a cookie crust, which provides the perfect textural contrast to the silken filling. The “silk” part really comes from the way the filling is made – usually involving a combination of melted chocolate, butter, eggs, and sugar, whipped to an airy, luxurious consistency. It’s a bit like a ganache met a cloud, and the result is pure indulgence. It doesn’t involve any baking for the filling itself, which is one of the reasons it’s so wonderfully forgiving!
Why you’ll love this recipe?
Honestly, where do I even begin with why this french silk pie is a staple in my kitchen? First off, the flavor is just out of this world. It’s intensely chocolatey, but not overwhelmingly sweet. The subtle richness from the butter and the deep cocoa notes create a perfectly balanced taste that’s pure bliss. Then there’s the texture – oh my gosh, the texture! It’s so velvety, so smooth, it literally melts on your tongue. It’s like eating a cloud of chocolate. And the best part? It’s surprisingly simple to make. I’ve had nights where I’m craving something truly special, but I don’t have hours to spend baking. This recipe is my lifesaver for those moments. Plus, it’s incredibly budget-friendly. You likely have most of the ingredients in your pantry already. It’s also super versatile. You can serve it in a traditional pastry crust, a graham cracker crust, or even an Oreo crust for an extra chocolatey punch. My family devours this, and I often get asked to make it for potlucks and gatherings because it’s always a crowd-pleaser. It’s that perfect combination of elegant and comforting, making it suitable for everything from a casual weeknight treat to a fancy dessert for guests. It really stands out from other chocolate desserts because of its unique, incredibly smooth texture.
How do I make French Silk Pie?
Quick Overview
Making this french silk pie is a straightforward process that requires just a bit of careful mixing and chilling. We’ll start by preparing a pre-baked Pie crust (you can use store-bought or make your own – my favorite is a simple buttery pastry crust). Then, we’ll melt the chocolate and combine it with butter, eggs, and sugar until it’s super smooth and glossy. This mixture is then whipped until it’s light and airy, creating that signature silken texture. Finally, we pour this glorious filling into the prepared crust, chill it until firm, and top it with whipped cream. It’s a dessert that looks impressive but is surprisingly manageable, even for beginner bakers. Trust me, you’ll feel like a pro when you pull this out of the fridge!
Ingredients
For the Pie Crust: What is the recipe?
1 pre-baked 9-inch pie crust (either homemade or a good quality store-bought one. If you’re making your own, a classic flaky pastry crust is divine, but a crushed graham cracker or Oreo cookie crust works wonderfully too!)
*My tip: If you’re making a pastry crust from scratch, make sure it’s fully baked and completely cooled before adding the filling. A soggy bottom is the enemy of a great pie!
For the Chocolate Filling:
8 ounces semi-sweet or bittersweet chocolate, finely chopped (using good quality chocolate makes a huge difference here – I love Ghirardelli or Guittard)
1 cup (2 sticks) unsalted butter, softened to room temperature
4 large eggs, separated (use fresh eggs for the best results!)
1 1/2 cups granulated sugar, divided
1 teaspoon vanilla extract
1/4 teaspoon salt
*For the eggs: I know some folks are hesitant about raw eggs. The FDA states that consuming raw eggs increases your risk of foodborne illness. If this is a concern for you, you can use pasteurized eggs, which are readily available in most grocery stores. Alternatively, you can gently temper the egg yolks by whisking them with a little of the hot chocolate mixture before adding them to the rest of the filling, though I find the classic method works perfectly fine for my family.*
For the Whipped Cream Topping:
2 cups heavy whipping cream, very cold
1/4 cup powdered sugar
1 teaspoon vanilla extract
Optional: Chocolate shavings or curls for garnish
*Make sure your heavy cream is super cold. I even pop my whisk attachment in the freezer for a few minutes before I start whipping. It helps achieve the perfect fluffy consistency faster!
Step-by-Step Instructions
Step 1: Preheat & Prep Pan
If you are making a homemade pastry crust, preheat your oven to 375°F (190°C). Blind bake your pie crust until it’s golden brown and fully cooked. This typically takes about 15-20 minutes with pie weights or dried beans, then another 5-10 minutes without. Let it cool completely on a wire rack before proceeding. If you’re using a pre-made crust or a cookie crust, you can usually skip this baking step, just ensure it’s ready to go. I usually have my crust ready to rock and roll before I even start on the filling.
Step 2: Mix Dry Ingredients
In a medium bowl, whisk together 1 cup of the granulated sugar, the salt, and the egg yolks. Whisk until the mixture is pale yellow and slightly thickened. This helps to break down any lumps in the sugar and ensures the yolks are evenly distributed. It’s a simple step, but it’s key to getting that super smooth texture.
Step 3: Mix Wet Ingredients
Melt the chopped chocolate and the softened butter together. You can do this gently in a double boiler over simmering water, or in the microwave at 30-second intervals, stirring well between each, until smooth. Be careful not to scorch the chocolate! Once melted and smooth, let it cool slightly for a few minutes. Then, stir in the vanilla extract.
Step 4: Combine
Gradually add the slightly cooled chocolate mixture to the egg yolk and sugar mixture, whisking constantly until everything is well combined and incredibly smooth. This is where the magic starts to happen, and you’ll see that gorgeous chocolatey base forming.
Step 5: Prepare Filling
In a separate, clean bowl (make sure it’s squeaky clean and dry!), whip the egg whites with the remaining 1/2 cup of granulated sugar using an electric mixer until stiff, glossy peaks form. This takes a few minutes, and you want to make sure the egg whites are properly whipped – this is what gives the filling its airy, silken quality. Be patient with this step!
Step 6: Layer & Swirl
Now, gently fold the whipped egg whites into the chocolate mixture in two additions. Be careful not to overmix; you want to keep as much air in the mixture as possible. Fold until just combined, with no streaks of egg white remaining. The mixture should be light and airy. Spoon this glorious filling into your cooled, pre-baked pie crust, smoothing the top with a spatula.
Step 7: Bake
This pie doesn’t actually get baked in the oven for the filling! The filling sets up in the refrigerator. So, once the filling is in the crust, cover it loosely with plastic wrap (try not to let the wrap touch the surface of the filling if you can help it) and refrigerate for at least 4-6 hours, or preferably overnight, until it’s firm and set. This chilling time is crucial for achieving that perfect, sliceable texture.
Step 8: Cool & Glaze
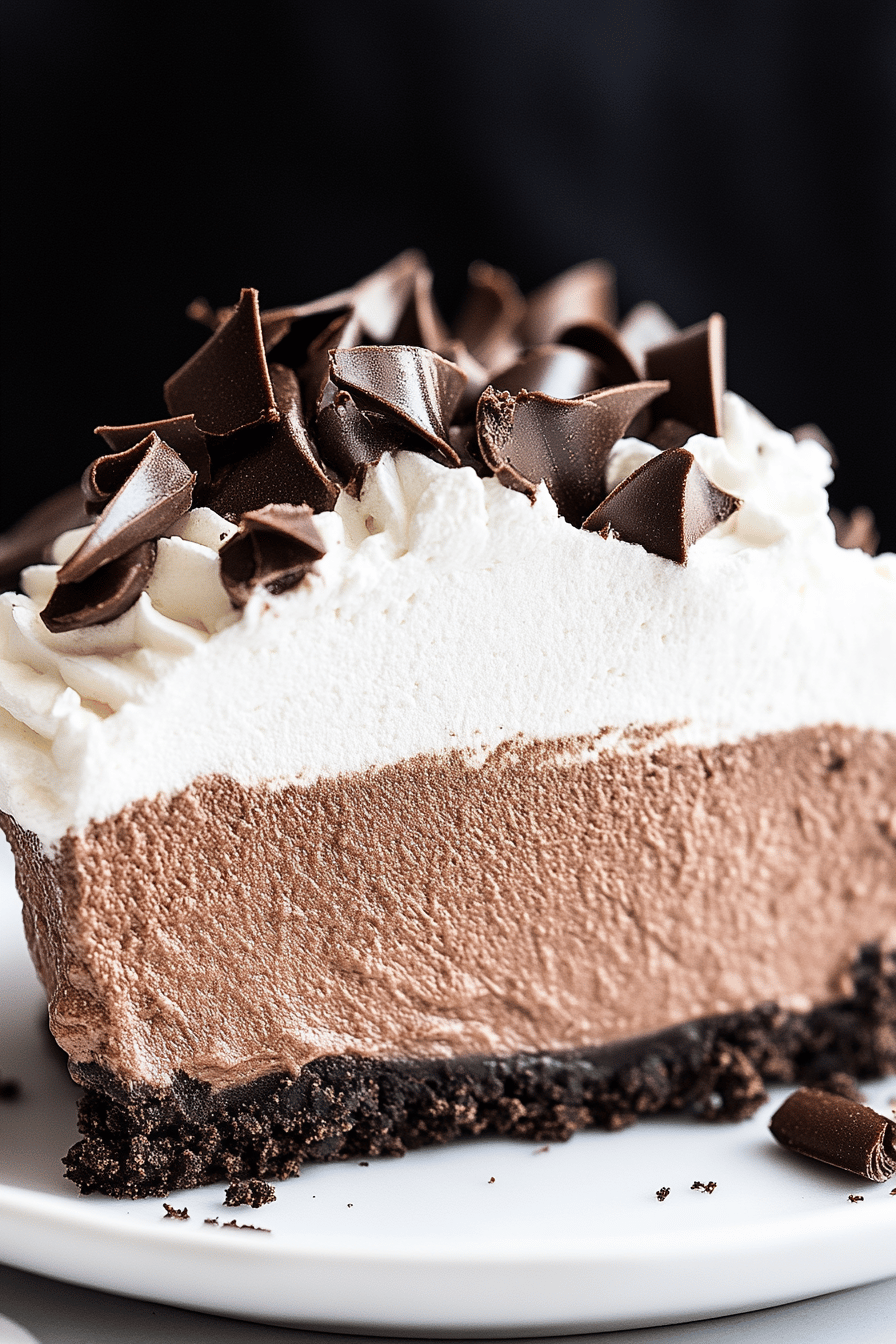
While the pie is chilling, prepare the whipped cream topping. In a chilled bowl, whip the heavy cream with the powdered sugar and vanilla extract until stiff peaks form. Once the pie is completely chilled and firm, spread the whipped cream evenly over the top. You can make pretty swirls with the back of a spoon or a spatula. If you’re feeling fancy, sprinkle some chocolate shavings or curls over the top.
Step 9: Slice & Serve
To slice the pie cleanly, dip a sharp knife in hot water and wipe it dry between each cut. This helps get those beautiful, clean slices. Serve chilled. The combination of the crisp crust, the rich, velvety chocolate filling, and the fluffy whipped cream is absolutely divine. Enjoy every single bite!
What to Serve It With
This french silk pie is pretty much a standalone superstar, but if you want to elevate the experience or create a full dessert spread, I have a few ideas! For a simple, elegant breakfast treat (because who says you can’t have pie for breakfast on a special occasion?), a strong, dark coffee or a creamy latte pairs wonderfully. The bitterness of the coffee cuts through the richness of the chocolate perfectly. For brunch, I love to serve it with a side of fresh berries – raspberries or strawberries add a lovely tartness and vibrant color. A sparkling rosé or a moscow mule is also a fantastic pairing for a boozy brunch vibe. As a classic dessert, it’s divine on its own, but if you want to go all out, a small scoop of raspberry sorbet or a dollop of crème fraîche on the side can add another layer of deliciousness. For cozy, casual nights, honestly, just a tall glass of cold milk is pure perfection. My kids always opt for milk, and I can’t blame them! It’s just comforting and nostalgic.
Top Tips for Perfecting Your French Silk Pie
Over the years, I’ve learned a few tricks that make this french silk pie absolutely foolproof. Firstly, for the chocolate filling, don’t skimp on the quality of your chocolate. Using good quality semi-sweet or bittersweet chocolate really makes a difference in the depth of flavor. If you use milk chocolate, it can sometimes be too sweet and lack that intense chocolate punch. Secondly, when it comes to the eggs, ensure they are at room temperature if you’re not using pasteurized eggs. This helps them emulsify better with the sugar and butter. I’ve learned the hard way that cold eggs can sometimes lead to a slightly grainy texture, so room temperature is key! For the whipped cream topping, I can’t stress enough how important it is to use very cold heavy cream and a chilled bowl and whisk. This helps the cream whip up faster and achieve those lovely stiff peaks without becoming grainy or turning into butter. It’s a small step that pays off big time! If you find your chocolate mixture is a bit too stiff after melting, gently warming it for just a few seconds more can help loosen it up, but be careful not to overheat it. When folding in the egg whites, use a light hand. The goal is to incorporate them without deflating all that air you just whipped in. Think gentle, lifting motions. If you’re making your own crust, make sure it’s completely cooled before filling. A warm crust will start to melt the filling before it has a chance to set, and nobody wants a runny french silk pie! I once tried making it with a slightly warm crust, and it was a disaster – the filling never quite firmed up properly. Lesson learned!
Storing and Reheating Tips
Once your beautiful french silk pie is made and chilled, proper storage is key to keeping it tasting its absolute best. Since the filling contains raw eggs and butter, it really needs to be kept refrigerated. You can store the pie, covered loosely with plastic wrap or in an airtight container, in the refrigerator for up to 3 days. I find the texture is best within the first 2 days. If you’ve already topped it with whipped cream, make sure the cover isn’t directly touching the cream, or the cream might get flattened. If you plan to store it for longer, or if you just want to have some on hand, you can freeze the pie *before* adding the whipped cream topping. Wrap the un-topped pie very tightly in a layer of plastic wrap, followed by a layer of aluminum foil. It should keep well in the freezer for up to 1 month. To thaw, remove the pie from the freezer and let it defrost in the refrigerator overnight. Once thawed, then you can top it with fresh whipped cream. Reheating isn’t really necessary or recommended for french silk pie, as it’s best served chilled. The richness and smooth texture are what make it so special, and that’s best enjoyed cold. Just remember to bring it out of the fridge for about 10-15 minutes before slicing if you prefer it not to be rock-solid cold – this can slightly soften the filling and make it even more luxurious.
Frequently Asked Questions
Final Thoughts
There you have it – my absolute favorite french silk Pie Recipe! I truly believe this is a dessert that everyone should try at least once. It’s that perfect blend of rich, decadent flavor and unbelievably smooth texture that just makes your taste buds sing. It’s the kind of dessert that feels like a real treat, but it’s so approachable to make. Whether you’re a seasoned baker or just starting out, I’m confident you’ll achieve amazing results with this recipe. It’s become such a beloved part of my family’s traditions, and I hope it becomes one of yours too. If you give this french silk pie a try, please let me know how it turns out! I’d love to hear about your experience in the comments below, or even better, share your own tips and variations. Happy baking, and enjoy every single luxurious bite!

French Silk Pie
Ingredients
For the Crust
- 1.5 cups all-purpose flour
- 0.5 teaspoon salt
- 0.625 cup unsalted butter cold, cubed
- 0.3 cup ice water
For the Filling
- 5 ounces bittersweet chocolate finely chopped
- 0.5 cup unsalted butter softened
- 0.5 cup granulated sugar
- 3 large eggs separated
- 1 teaspoon vanilla extract
- 0.5 teaspoon espresso powder (optional)
For Garnish
- 1 cup heavy cream whipped
- 1 tablespoon chocolate shavings
Instructions
Prepare the Crust
- In a large bowl, whisk together flour and salt. Cut in the cold butter with a pastry blender or your fingertips until the mixture resembles coarse crumbs with some pea-sized pieces of butter. Gradually add ice water, 1 tablespoon at a time, mixing until the dough just comes together. Do not overmix.
- Gather the dough into a ball, flatten it into a disc, wrap in plastic wrap, and refrigerate for at least 30 minutes.
- Preheat oven to 375°F (190°C). On a lightly floured surface, roll out the dough into a 12-inch circle. Carefully transfer the dough to a 9-inch pie plate and crimp the edges. Prick the bottom of the crust with a fork.
- Line the crust with parchment paper and fill with pie weights or dried beans. Blind bake for 15 minutes. Remove parchment paper and weights, and bake for another 5-7 minutes, or until lightly golden brown. Let cool completely.
Prepare the Filling
- Melt the chopped bittersweet chocolate in a heatproof bowl set over a saucepan of simmering water (double boiler), stirring until smooth. Remove from heat and set aside.
- In a large bowl, beat the softened butter and granulated sugar until light and fluffy.
- Beat in the egg yolks one at a time, until well combined.
- Stir in the melted chocolate, vanilla extract, and espresso powder (if using). Mix until smooth.
- In a separate clean bowl, beat the egg whites until stiff peaks form. Gently fold the beaten egg whites into the chocolate mixture until just combined.
- Pour the filling into the cooled pie crust and spread evenly.
Chill and Serve
- Refrigerate the pie for at least 4 hours, or until firm. The pie needs to be thoroughly chilled for the filling to set properly.
- Before serving, top the pie with whipped cream and chocolate shavings.