There’s something about the smell of something baking with buttermilk that instantly brings me back to my grandmother’s kitchen. The warmth of freshly baked zucchini cake drifting through the air, rich with that subtle tang only buttermilk can provide—it’s pure comfort in every bite. This zucchini cake isn’t just any old vegetable bake; it’s an unexpected treat that’s as moist and tender as your favorite lemon pound cake, with a hint of garden-fresh goodness tucked inside. I always keep buttermilk on hand just for this recipe, and honestly, it’s a lifesaver on those busy weekdays when you want something sweet but wholesome. Plus, my kids actually ask for seconds, claiming it’s their secret to “disguised veggie” success. If you’ve ever wondered what buttermilk makes possible in the kitchen, this recipe will be your new best friend.
What is Buttermilk Zucchini Cake?
Think of this buttermilk zucchini cake as a love letter to humble ingredients brought to life by a little magic. Essentially, it’s a soft, tender cake that celebrates shredded zucchini, balanced with the bright acidity of buttermilk. “Buttermilk zucchini cake” might sound fancy or niche, but it’s really just a straightforward, homestyle dessert that’s moist, slightly tangy, and full of flavor. The buttermilk adds that signature creaminess and a gentle tang that makes each slice feel fresh and lively. Originating from home cooks who wanted to sneak veggies into sweets without sacrificing flavor, it’s a cozy, no-fuss treat you can whip up any time. Plus, the lemon glaze on top gives it the kind of zing that pulls everything together perfectly. If you’ve ever enjoyed carrot cake, just swap in zucchini and buttermilk, and you’re on the right track!
Why you’ll love this recipe?
What I love most about this buttermilk zucchini cake is how it manages to be both indulgent and wholesome at the same time. First off, the flavor is a subtle dream—moist crumb with just enough tanginess from the buttermilk to keep it from being too sweet or heavy. It’s that perfect balance that makes it a little unexpected but totally addictive. From a simplicity standpoint, this cake couldn’t be easier. A handful of pantry staples, a little zip from fresh lemon, and buttermilk that you probably already have chilling in your fridge make it quick to throw together. Plus, it’s cost-friendly—zucchini is usually cheap or free if you grow your own, and buttermilk is affordable too.
Then there’s the versatility. This cake is just as good for breakfast slathered with a little butter and coffee, as it is dressed up for a brunch spread or served as a cozy afternoon snack with a cup of tea. If you’re like me, you’ll find yourself experimenting—try swapping out the lemon glaze for a cinnamon cream cheese frosting or adding walnuts for crunch. This recipe has stuck around for years in my kitchen because it never feels boring. Honestly, compared to other veggie-laden cakes, this one’s lighter, fresher, and consistently a crowd-pleaser. It’s my go-to when I want something homemade but fuss-free, and I’m betting you’ll feel the same!
How do I make Buttermilk Zucchini Cake?
Quick Overview
This zucchini cake is a simple two-part process: first, mixing your dry and wet ingredients separately, then folding them together gently to keep that fluffy texture intact. The shredded zucchini sneaks in quietly but packs a moist punch while the buttermilk amps up the softness and adds that signature tang that’s impossible to fake. You’ll bake it until it’s golden and springy, then finish with a quick lemon glaze that sets up just right, giving you a slight zing and a little shine on top. It’s the kind of recipe that feels fancy but is totally doable for any home cook, even if you’re throwing it together on a weeknight.
Ingredients
For the Main Batter:
- 1 ¾ cups all-purpose flour – fresh, sifted for lightness
- 1 teaspoon baking soda – helps the cake rise just right
- ½ teaspoon baking powder – for gentle lift
- ¼ teaspoon salt – balances sweetness
- 1 teaspoon ground cinnamon – warms the flavor (optional but so worth it)
- ¾ cup granulated sugar – I sometimes do half brown sugar for a deeper flavor
- 2 large eggs, room temperature – for the tender crumb
- 1 cup buttermilk – the star here, adds moisture and that slight tang
- ½ cup vegetable oil – keeps it moist without heaviness
- 1 teaspoon vanilla extract – for a soft, sweet undertone
- 2 cups finely shredded zucchini (about 2 medium zucchinis) – fresh and firm, not watery
For the Filling:
- ½ cup sugar mixed with 1 teaspoon ground cinnamon – classic cinnamon swirl that melts into the cake
- Optional: ½ cup chopped walnuts or pecans for crunch
For the Glaze:
- 1 cup powdered sugar, sifted – helps keep the glaze silky smooth
- 2 tablespoons freshly squeezed lemon juice – fresh for the perfect zesty kick
- 1 teaspoon lemon zest (optional but adds brightness)
- Water or milk to thin – just a teaspoon or two until you get a nice drizzle consistency
Step-by-Step Instructions
Step 1: Preheat & Prep Pan
First things first: preheat your oven to 350°F (175°C). Grease a 9×5-inch loaf pan generously with butter and then lightly dust it with flour, or use parchment paper for easy removal. I always like to line the bottom with parchment; it just gives me that extra peace of mind that my cake’s coming out in one piece. Let’s get this ready before your batter is mixed so you’re not scrambling.
Step 2: Mix Dry Ingredients
In a large bowl, whisk together the flour, baking soda, baking powder, salt, and cinnamon until well combined. This step is crucial to distribute the raising agents evenly, so the cake bakes up light and fluffy. Take a moment to appreciate how the warm scent of cinnamon starts to tease your senses here—such a cozy start.
Step 3: Mix Wet Ingredients
In a separate bowl, beat the sugar and eggs together until pale and slightly fluffy. Then whisk in the buttermilk, vegetable oil, and vanilla extract. You’re looking for a smooth, slightly glossy mix that’s ready to bring life to the dry ingredients. The buttermilk adds this velvety texture that you can almost see right away, making your batter feel silky.
Step 4: Combine
Pour the wet ingredients into the dry and gently fold them together just until there are no dry spots left—don’t overdo it, or your cake might get tough. You’ll notice the batter will be thick but light, and that’s perfect. Fold in the shredded zucchini last, making sure it’s evenly dispersed but not bruised or overworked.
Step 5: Prepare Filling
Mix together the sugar and cinnamon for the filling in a small bowl. If you’re adding nuts, stir them in now too. This simple combo creates that little surprise layer of sweetness and texture when you swirl it into your batter.
Step 6: Layer & Swirl
Pour half the batter into your prepared pan. Then sprinkle about half of the cinnamon sugar mixture evenly over the top. Carefully spoon the remaining batter over this layer. Finish by sprinkling the remaining cinnamon sugar evenly atop the batter. Now, take a butter knife or skewer and swirl it gently through the batter in random patterns—this is the fun part! Don’t swirl too much or you’ll lose the lovely marbling effect.
Step 7: Bake
Pop the pan into the oven and bake for about 50-60 minutes. Ovens vary, so start checking at 50 minutes. Use a toothpick or cake tester inserted in the center—it should come out clean or with just a few moist crumbs attached, never wet batter. You’ll know it’s done when the top is golden and springy to the touch. Don’t rush this step or your cake might be gummy inside.
Step 8: Cool & Glaze
Allow the cake to cool in the pan for about 15 minutes, then gently lift it out onto a wire rack to cool completely before glazing. The glaze should be poured when the cake is mostly cool but not cold, so it sets beautifully without sliding off. Drizzle the lemon glaze evenly over the cake and let it slowly drip down the sides, and watch the glaze set into a lovely sheen.
Step 9: Slice & Serve
When you’re ready to serve, use a serrated knife for clean cuts—this cake is moist, so a sawing motion helps keep those slices perfect. Serve at room temperature or slightly chilled. I love it with a dollop of whipped cream or a scoop of vanilla ice cream for dessert, but it also disappears in minutes plain with a hot cup of coffee or tea.
What to Serve It With
For Breakfast: Nothing beats a warm slice with a smear of butter alongside a strong morning coffee or chai latte. My kids adore it this way—simple and quick to eat before school.
For Brunch: Dress it up with fresh berries and a sprinkling of powdered sugar, alongside a sparkling mimosa or a freshly squeezed orange juice for a light, elegant touch.
As Dessert: Warmed slightly and topped with whipped cream or vanilla ice cream, this cake shines as a cozy after-dinner treat. A drizzle of honey or extra lemon zest on the side elevates it beautifully.
For Cozy Snacks: Serve it alongside herbal tea (I love chamomile) during lazy afternoons or after school—the perfect companion to a good book or a little catch-up chat with friends. In our house, it’s a go-to for snack cravings without feeling guilty.
This cake has become a part of our family traditions, from casual weekday treats to a staple at holiday brunch, and I bet it’ll find a little corner in your routine too.
Top Tips for Perfecting Your Buttermilk Zucchini Cake
Zucchini Prep: Always grate your zucchini finely and then squeeze out excess moisture in a clean kitchen towel or cheesecloth. Too much liquid can turn your cake soggy, which I learned the hard way the first time I tried this recipe. Fresh zucchini from the store or garden works best—avoid ones with soft spots.
Mixing Advice: Never overmix your batter once the wet and dry ingredients meet; fold gently just until combined. You want to keep that light crumb that buttermilk helps create, not tough gluten. Little lumps are perfectly okay!
Swirl Customization: Use a thin skewer or butter knife to swirl the cinnamon sugar mixture in gentle, random spirals—not too fast and not too much—to get those beautiful marbled ribbons that make every slice picture-perfect.
Ingredient Swaps: I’ve tried swapping half the all-purpose flour with whole wheat pastry flour for extra fiber—still lovely, just a bit denser. Coconut oil works as an oil substitute, adding a subtle tropical twist. I even tested almond milk with a splash of vinegar in place of the buttermilk and it yielded an even creamier crumb, so feel free to experiment!
Baking Tips: Position your rack in the middle of the oven for even heat. If your oven runs hot, lower the temperature slightly and expect a longer bake time. Keep the door closed as much as possible to avoid collapsing.
Glaze Variations: Try adding cream cheese to your glaze for a frosting-like finish or use orange juice instead of lemon for a sweeter, gentler flavor. For a thinner drizzle, add more liquid slowly until you get that perfect pour. Applying the glaze while the cake is just warm helps it absorb better.
Over the years, I’ve tweaked this recipe countless times, always with the same happy result—a cake that’s reliably moist, flavorful, and comforting. Trust me, these little tips will save you from the mistakes I made and ensure the perfect slice every time.
Storing and Reheating Tips
Room Temperature: Store your cake tightly wrapped or in an airtight container for up to 2 days. It stays wonderfully moist, and the glaze keeps it sealed but slightly soft.
Refrigerator Storage: For longer life (up to a week), keep it covered in a cake dome or airtight container in the fridge. The chilled cake tastes amazing, especially if you love that denser texture in cooler desserts.
Freezer Instructions: Wrap the cake well in plastic wrap and then foil before freezing. It preserves freshness for up to 3 months. Thaw in the fridge overnight or at room temperature for a few hours. I usually add glaze fresh after thawing for the best shine.
Glaze Timing Advice: If freezing, I recommend skipping the glaze until after you thaw the cake. It keeps the glaze from cracking or becoming too hard. For room temp or refrigerated storage, once glazed, it will keep its lovely sheen for days without fuss.
Frequently Asked Questions
Final Thoughts
This buttermilk zucchini cake is the kind of recipe that seems to sneak into your heart in the most subtle way—moist but light, sweet but not cloying, and with that little veggie twist that makes you feel a bit virtuous while enjoying a treat. It’s stood the test of time in my kitchen because it’s satisfying without being fussy, and because every batch fills the house with cozy, warm smells that turn any day a little brighter. If you find yourself loving this one, check out my collection of other buttermilk-based cakes and quick breads—they all share that same tender crumb and comforting flavor that buttermilk so generously imparts. Can’t wait to hear how yours turns out—don’t forget to drop a comment or share your own delicious twists. Happy baking!
buttermilk
Ingredients
Main Ingredients
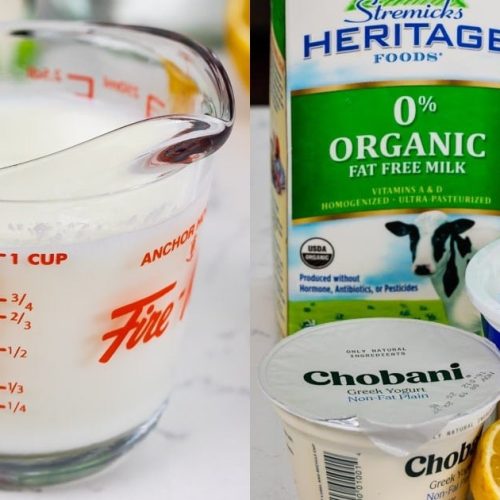
- 1 tablespoon white vinegar
- 1 cup milk (2% or whole) scant cup is acceptable
Instructions
Preparation Steps
- Add 1 tablespoon of white vinegar to a measuring cup.
- Pour milk into the measuring cup up to the 1 cup line.
- Let the mixture sit at room temperature for 5 minutes until it thickens and curdles slightly.
- Use this homemade buttermilk as a substitute in recipes that require buttermilk.