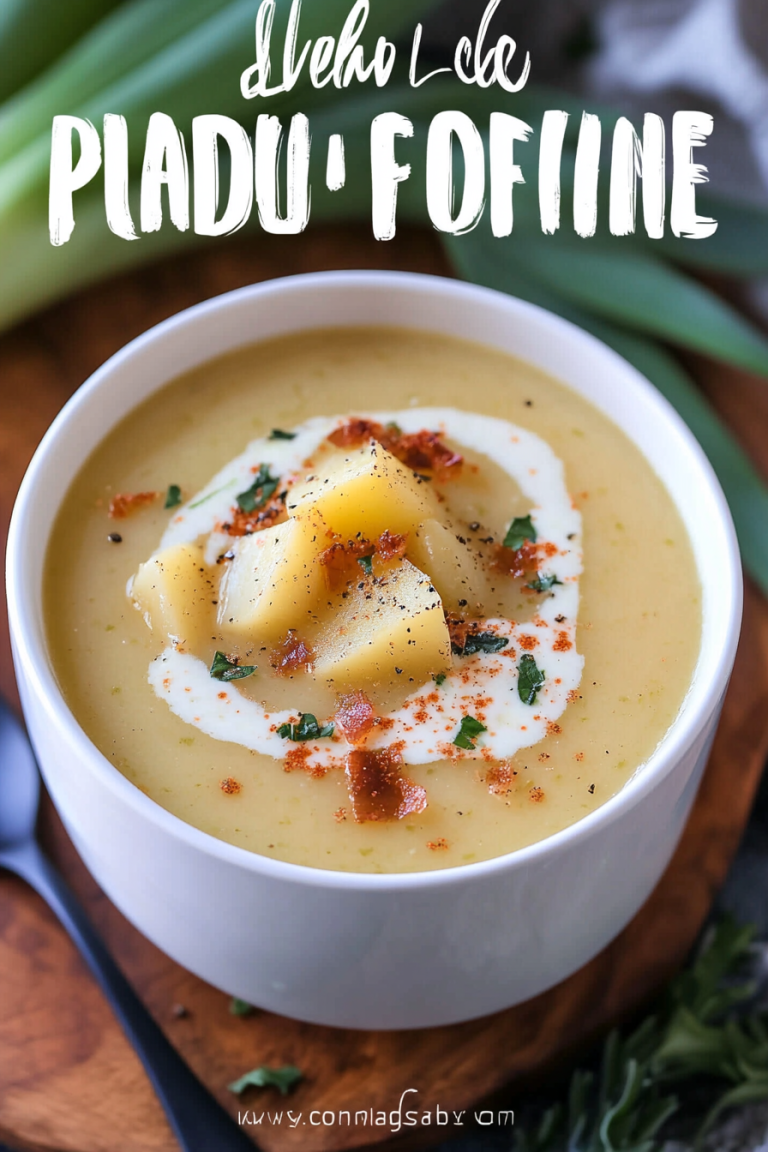
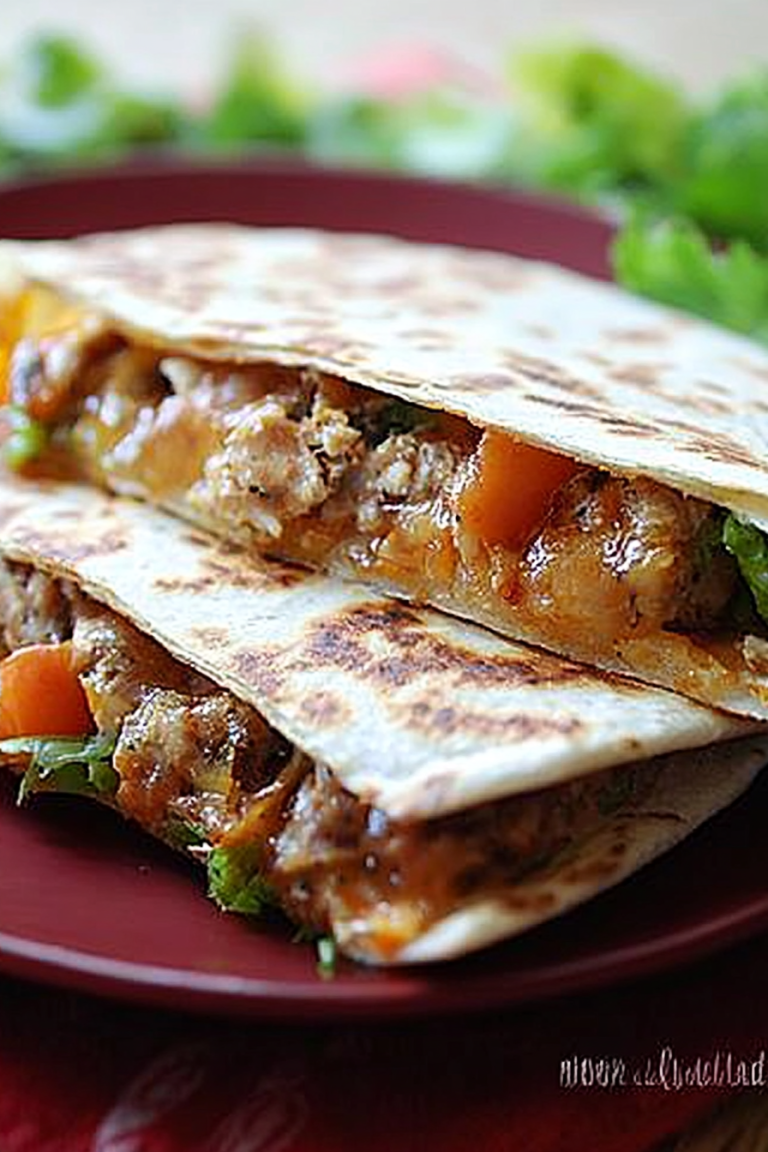
Oh, honey, let me tell you about the magic that happens on my stovetop when I need dinner on the table fast but refuse to serve anything bland. We’re talking about the absolute simplest, most flavorful way to cook chicken breast, and it all comes down to mastering the art of the perfect What are some good ways to cook poached chicken?. Forget dry, stringy chicken that tastes like cardboard—the kind you dread eating in a sad desk lunch. This method? It yields meat so unbelievably tender it practically dissolves when you touch it with a fork. I first learned this technique years ago when I was trying to eat lighter, and honestly, it spoiled me for every other method. It’s not flashy, it doesn’t require a dozen fancy spices, but the result is pure, moist comfort food. If you’ve ever looked at a raw chicken breast and thought, “How can I make this edible and exciting?” then pull up a chair. This is the answer you’ve been waiting for. It’s even better than a quick pan-sear sometimes, especially when you need that pristine white meat for salads or future meal prep.
What is poached chicken?
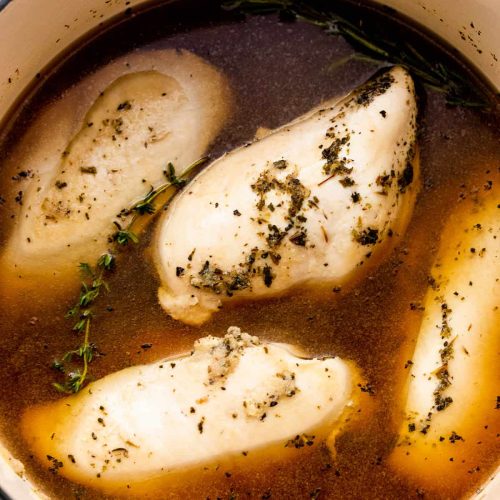
What is the meaning of “what is a word?”What are some good ways to cook poached chicken?? At its core, it’s cooking chicken gently submerged in simmering liquid—usually water, stock, or broth—at a very low temperature. Think of it as a spa day for your poultry. Instead of the harsh, dry heat of an oven or the aggressive sizzle of a frying pan, we’re treating the chicken with respect. This gentle environment keeps all those precious juices locked inside. It’s essentially the opposite of boiling; boiling is aggressive, where the water is rolling rapidly. Poaching means the liquid is barely trembling, just a few small bubbles breaking the surface, maybe around 160°F to 180°F. This slow, controlled heat transfer prevents the muscle fibers from seizing up and squeezing out all the moisture. The best part? The poaching liquid itself becomes a flavorful bonus. I often use chicken stock infused with aromatics, so the resulting chicken isn’t just moist, it’s subtly seasoned from the inside out. It’s the foundation for so many other dishes, making it a true kitchen workhorse.
Why You’ll Love This Recipe
Why do I keep coming back to this? Because life is too short for mediocre dinner protein! This technique is a total game-changer, and I’ve honed it over years of trial and error.
First and foremost, the flavor and texture are unbeatable. When you get the temperature right, the meat stays incredibly silky. It’s perfect sliced cold over a fresh green salad or shredded warm into tacos. I swear, my kids—who are usually skeptical of plain chicken—actually ask for seconds when it’s made this way because it’s just that juicy. It tastes seasoned, even if you just use water and salt, but trust me, adding a bay leaf and some peppercorns elevates it instantly.
Second, simplicity reigns supreme. This one’s a lifesaver on busy nights when I realize at 5 PM that I haven’t thawed anything. You can cook frozen chicken breasts using this method (though I’ll note the time change below!), and you barely have to watch it. You set the timer, and you can simultaneously chop vegetables or set the table. It requires zero specialized equipment—just a pot deep enough to cover the chicken. It’s honestly less active cooking time than scrambling eggs!
Third, it’s incredibly cost-effective. Chicken breasts are often on sale, and this method ensures you use every ounce of meat without any shrinkage or waste due to dryness. Plus, that leftover poaching liquid? That becomes the base for an incredible, quick gravy or even the start of a soup stock later in the week. Talk about stretching your grocery budget!
It’s also ridiculously versatile. If you’re planning meals for the week, this is your best friend. You can poach it, shred it for chicken salad sandwiches on Tuesday, dice it for stir-fries on Wednesday, and use the remaining bits in Friday night ramen. I tried using coconut milk once instead of water for a different flavor profile—it made the poached chicken almost creamy on the outside. While delicious, I usually stick to the classic savory broth because it pairs with everything. This is my baseline recipe, the one I fall back on when everything else fails, and it never, ever lets me down.
How to Make Poached Chicken
Quick Overview
The whole process is delightfully hands-off once you get the initial temperature right. We’re going to gently bring a flavorful liquid to a low simmer, add the chicken breasts, cover the pot, turn the heat way down—almost off—and let the residual heat do the work. This slow, steady cooking prevents drying out the outside before the center is cooked through. It takes about 15 to 20 minutes total for fresh breasts. The secret lies in the resting period; letting the chicken sit in the hot liquid off the heat ensures maximum tenderness. You’re essentially slow-cooking it gently in flavored water!
Ingredients
For the Main Poaching Liquid:
4 large boneless, skinless chicken breasts (about 1.5 lbs total)
8 cups low-sodium chicken broth (I always use low-sodium so I can control the salt)
1 medium yellow onion, halved (no need to peel, just wipe clean)
2 carrots, roughly chopped
2 celery stalks, roughly chopped
3 sprigs fresh thyme (or 1 teaspoon dried)
2 bay leaves
1 teaspoon whole black peppercorns
1 tablespoon kosher salt (adjust based on your broth)
For Optional Flavor Boost:
1 lemon, halved and squeezed into the liquid
A few slices of fresh ginger (great if you plan to shred it for Asian dishes)
For Finishing:
Freshly ground black pepper to taste
Step-by-Step Instructions
Step 1: Preheat & Prep Pan
Grab your largest, deepest pot or Dutch oven—you need something that can fully submerge the chicken breasts without being crowded. Pour in the 8 cups of chicken broth. Add the halved onion, carrots, celery, thyme, bay leaves, peppercorns, and salt. We aren’t bringing this to a rolling boil; we are aiming for a gentle simmer. Turn your burner to medium-high and bring the liquid just to the point where small bubbles are starting to dance across the surface. This usually takes about 8-10 minutes. If you see big, rolling bubbles, turn the heat down immediately!
Step 2: Mix Dry Ingredients
In this case, there aren’t “dry ingredients” in the traditional sense, but this step is about prepping the chicken itself. Pat your chicken breasts very dry with paper towels. This might seem counterintuitive since they’re going into liquid, but drying the surface helps them better absorb the aromatics as they sit on the bottom of the pot before the liquid fully heats up. Make sure they are relatively uniform in thickness; if you have one really thick one and one skinny one, pound the thick end lightly with a mallet or the bottom of a sturdy pan until they are even. This ensures they finish cooking at the same time, which is crucial for perfect texture.
Step 3: Mix Wet Ingredients
Once your poaching liquid is gently simmering (look for tiny, nervous bubbles, not a chaotic boil), add your optional flavor boosters, like the squeezed lemon halves. This acid brightens the whole flavor profile beautifully. Taste the liquid now—it should taste slightly saltier than you’d normally eat soup, as the chicken will absorb some of that saltiness. If it tastes bland here, it will taste bland when cooked.
Step 4: Combine
Carefully slide the patted-dry chicken breasts into the hot, simmering liquid. They should be completely submerged. If they aren’t, add a little more broth or water. As soon as they go in, the temperature of your liquid will drop significantly. This is normal! Bring the liquid back up to that very gentle simmer—that barely-there bubble state.
Step 5: Prepare Filling
Since we are poaching, there is no separate filling in the traditional sense, but this is where I want you to think about what you plan to use the chicken for later. If it’s for tacos, maybe stir a teaspoon of cumin into the poaching liquid now. If it’s for creamy chicken salad, maybe add a few cloves of lightly smashed garlic. Think ahead! This is the easiest way to inject hidden flavor.
Step 6: Layer & Swirl
Once the liquid returns to that gentle simmer, cover the pot tightly with a lid. This is the most important step: immediately turn the heat setting down to the absolute lowest setting your stove allows—just enough to maintain that low temperature, or even turn the heat completely off if your stovetop retains heat well (like a gas stove). We are poaching, not boiling! Let it sit, covered, for 15 minutes. Don’t peek! Peeking lets out the steam and heat we need for gentle cooking.
Step 7: Bake
After 15 minutes, check the internal temperature of the thickest part of the largest breast using an instant-read thermometer. You’re looking for 160°F. If it’s not there yet, leave the lid on and let it sit for another 3 to 5 minutes on very low heat. If it hits 160°F but you want it even more tender, turn the heat off completely, leave the lid on, and let it rest in the hot liquid for another 10 minutes. This resting period is where the internal juices redistribute, making the meat unbelievably moist. I learned this trick after years of pulling it out right at 165°F and finding it slightly tight.
Step 8: Cool & Glaze
Once the chicken reaches 160°F and has rested, carefully remove the chicken from the liquid and place it on a clean cutting board or plate. If you’re serving it immediately, a little sprinkle of fresh cracked black pepper is all it needs. If you’re planning to chill it for salads, let it cool on the board for about 20 minutes before refrigerating. Do not cover it tightly while it cools on the counter, as the trapped steam will start to sweat the exterior, making it slimy.
Step 9: Slice & Serve
Whether you’re slicing it thinly against the grain for sandwiches or shredding it with two forks for soup, let the chicken rest for at least 10 minutes after removing it from the liquid. This allows the final resting juices to settle. Slicing hot chicken right off the bat leads to weeping and dryness. Serve warm with a drizzle of olive oil if you like, or let it chill completely. This is perfect when you’re craving something simple and clean.
What to Serve It With
Honestly, because the poached chicken is so wonderfully neutral and moist, it’s the ultimate blank canvas. My family has about four standard ways we rotate through every week!
For Breakfast: Believe it or not, I sometimes slice leftover cold poached chicken thinly and serve it alongside soft scrambled eggs and avocado toast. It adds serious protein without the heaviness of bacon or sausage. A light dusting of everything bagel seasoning on the chicken takes it over the top.
For Brunch: This is the star of my quick “Cobb Lite.” I arrange the sliced chicken beautifully over mixed greens, add some hard-boiled eggs, tomatoes, and a light lemon vinaigrette. It feels elevated but takes five minutes to assemble if the chicken is already cooked.
As Dessert: Okay, not *dessert*, but my favorite late-night snack often involves warm, shredded poached chicken mixed with a tiny bit of Greek yogurt, a dash of hot sauce, and served on simple rice crackers. It hits that savory craving when I don’t want sugar.
For Cozy Snacks: The classic shredded application is unbeatable for simple chicken noodle soup. Just add the shredded meat back into your broth right before serving so it heats through without overcooking. My kids ask for this soup all the time because the chicken is so soft.
I’ve also found it pairs brilliantly with vibrant side dishes, like quick-pickled red onions or a bright cucumber salad. The simplicity of the chicken contrasts wonderfully with something acidic or crunchy on the side. Trust me on this one—don’t feel like you have to cover it in sauce; let the quality of the poaching shine!
Top Tips for Perfecting Your Poached Chicken
I’ve made a lot of rubbery chicken in my early days, so I’ve gathered some tried-and-true wisdom to save you the trouble. Pay attention to these details; they make the difference between good and absolutely incredible poached chicken.
Liquid Temperature Control: This is non-negotiable. If you see active, rolling bubbles, you are boiling, not poaching. Boiling violently rips apart the meat fibers. You want that gentle, barely-there shimmer. If your burner is too hot, just lift the pot off the heat for a minute until it calms down, then put it back on the lowest setting. I often find that after putting the chicken in, I have to turn my dial down about three notches from where it was when I brought the liquid to temperature.
Don’t Skip the Rest: That resting period off the heat is critical. When you pull chicken from high heat, the internal temperature is higher than the final resting temperature will be, and the juices are unsettled. Resting allows the muscle fibers to relax and reabsorb those flavorful liquids. I usually let it sit, covered, for a full 10 minutes after the thermometer reads 160°F. If you’re in a huge rush, 5 minutes is the minimum, but 10 is my sweet spot.
Uniformity Matters: If you’re cooking more than two breasts at once, or if they are unevenly shaped, always pound them to the same thickness. If you have a huge thick end and a thin tail, the tail will be dry and stringy before the thick part even hits 155°F. A meat mallet or even a heavy rolling pin works wonders here. Just lay them between two sheets of plastic wrap first.
Ingredient Swaps: If you don’t have broth, water works, but you MUST compensate with salt, peppercorns, and herbs. My favorite non-broth liquid is water mixed with a bouillon cube and the juice of half a lemon. For herbs, if you don’t have thyme, rosemary is a good substitute, but use less, as it’s much stronger. I tried using a splash of white wine in the poaching liquid once—it was fantastic, adding a nice acidity, but you need to let it cook down for about five minutes before adding the chicken so the alcohol evaporates.
Glaze Timing Advice: Since this recipe doesn’t rely on a sugar glaze, this is simpler. If you plan on using the chicken cold later in the week, don’t let it sit in the poaching liquid for more than 30 minutes total after turning the heat off. Leaving it submerged too long, even off the heat, can start to turn the exterior slightly spongy. Remove it, cool it down, then store.
Storing and Reheating Tips
One of the reasons I love this technique so much is the phenomenal shelf life and reheating potential of the resulting meat. It holds up so much better than oven-baked chicken, which often turns chalky when reheated.
Room Temperature: If you are planning to eat the chicken within an hour or two of poaching, you can leave it loosely tented with foil on the counter to cool down completely. Don’t cover it tightly or it traps moisture and can get gummy. For a quick meal later that day, this is fine.
Refrigerator Storage: This is my go-to for meal prepping. Once the chicken is completely cooled (about an hour on the counter), transfer it to an airtight container. I prefer glass containers because they don’t retain odors. Stored this way, the poached chicken stays wonderfully moist for up to 4 days. If you plan to shred it, wait until it’s cold; it shreds much more cleanly when chilled.
Freezer Instructions: If you’re not going to use the chicken within 4 days, definitely freeze it. For whole breasts, wrap each one tightly first in plastic wrap, pressing out as much air as possible, then place them in a heavy-duty freezer bag. They keep beautifully for up to 3 months. When thawing, move them to the fridge the night before you plan to use them.
Reheating Tips: If you’re reheating slices for a quick dinner, the best way is in a skillet over medium-low heat with just a tiny splash of water or broth—maybe a tablespoon per breast—and covered. This steams them gently rather than drying them out with direct heat. It takes just 3-4 minutes total. If you’re reheating shredded chicken for soup, just drop it into the simmering soup base, and it heats up instantly!
Frequently Asked Questions
Final Thoughts
There’s something so reassuring about mastering a simple technique like this. This gentle method for poached chicken has been the backbone of my weekday meals for years. It’s not complicated, it’s not fussy, and it delivers foolproof results every single time, which is the greatest gift a recipe can give a busy home cook. The next time you’re staring down those pale chicken breasts wondering how to make them interesting, skip the oven and try this low-and-slow simmer. I promise, the tenderness will blow you away.
If you love this foundational cooking method, you might also enjoy diving into my tutorial on making perfect slow-cooker pulled pork—it shares that same philosophy of low, slow heat doing all the heavy lifting! Seriously, give this a shot tonight. Let me know in the comments how your liquid temperature felt—did you get that perfect gentle shimmer? Don’t forget to leave a star rating if this becomes your new favorite way to cook chicken!
poached chicken
Ingredients
Main Ingredients
- 4 pieces boneless skinless chicken breasts about 1 to 1.5 pounds total
- 4 cups chicken broth enough to cover the chicken
- 0.5 tablespoons garlic powder
- 1 tablespoons dried herbs such as thyme or parsley
- 1 teaspoons salt or to taste
- 1 teaspoons freshly ground black pepper or to taste
Instructions
Preparation Steps
- Place the chicken breasts in a large pot or Dutch oven.
- Pour chicken broth into the pot, adding enough to fully cover the chicken breasts. Stir in garlic powder, dried herbs, salt, and pepper.
- Set the pot over high heat and bring to a boil, then reduce the heat to low and simmer gently for 12 to 15 minutes, or until the chicken reaches an internal temperature of 165°F.
- Remove chicken breasts from the broth. Reserve 1 cup of the broth for moisture, discard the rest.
- Shred the chicken using two forks or a stand mixer paddle. Add some reserved broth if the chicken seems dry.
- Serve immediately or cool and store in an airtight container in the fridge.