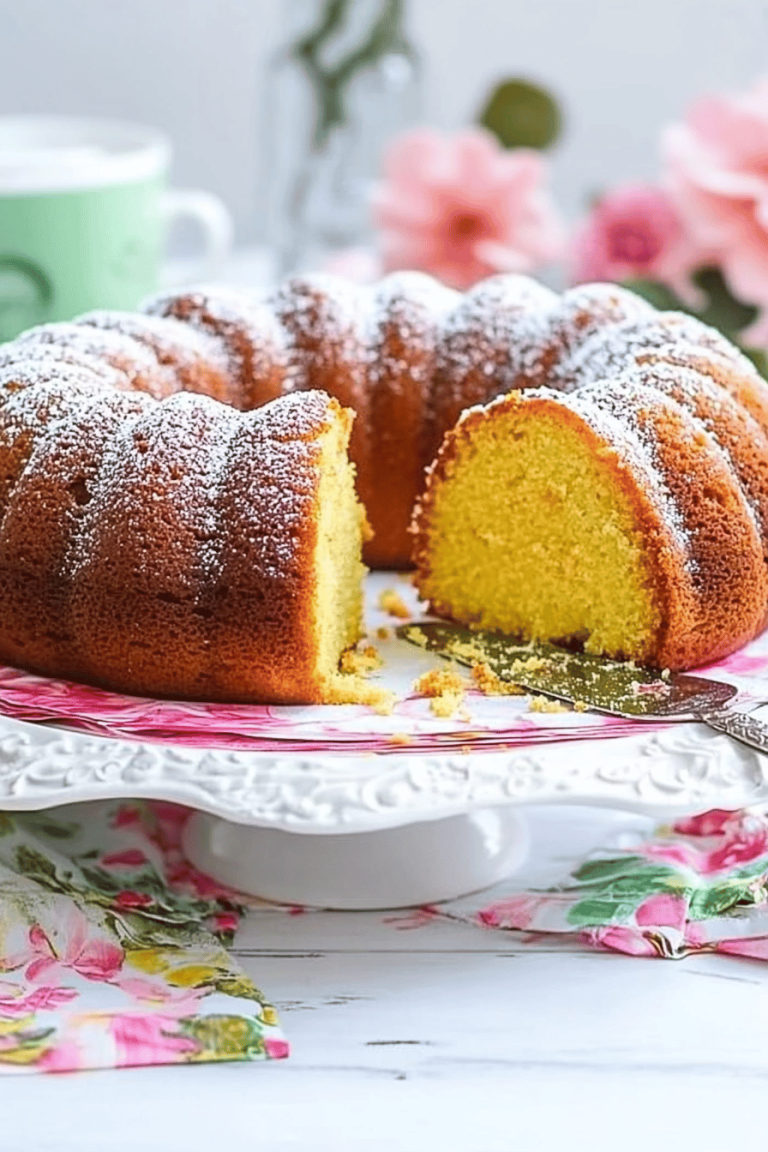
There’s something utterly magical about cake balls. I remember making these little delights with my grandma on rainy Sunday afternoons—the warmth of the kitchen, the sweet vanilla smell drifting around, and feeling that little burst of joy when I popped one into my mouth. Unlike a typical slice of cake, cake balls are these perfectly bite-sized morsels of happiness that come together in a snap. If you’ve ever been too tempted to bake an entire cake just because you wanted a quick, sweet treat, cake balls are your lifesaver. They’re a fantastic way to get that incredible cake flavor with zero waste and minimal fuss. Plus, my kids literally ask for these all the time—they’re great for a party, an after-school snack, or just a sweet moment when you need it most.
What is cake ball?
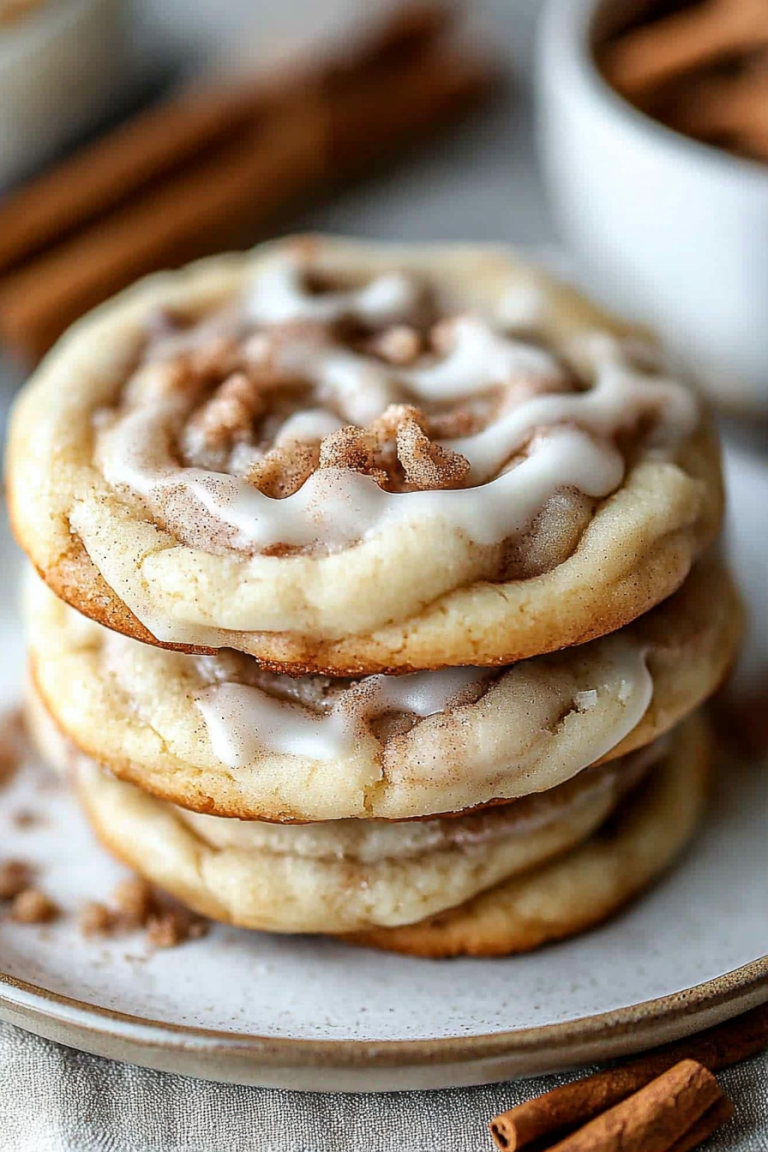
Okay, so cake balls are essentially little balls made from crumbled cake mixed with frosting and then dipped in chocolate or glaze. Think of it as a mash-up between truffles and cake — it’s like leftover cake found its perfect new life. The name is pretty straightforward: cake + balls, because well, that’s exactly what it is! They started popping up everywhere as a clever way to reuse cake scraps or even to transform a boxed cake mix into something fun and fancy. The best part? You don’t just eat cake, you get this rich, creamy, tender bite that’s coated in a glossy, often colorful layer that feels a little like candy. It’s a simple, no-fail delight that anyone can make — no fancy bakery skills necessary.
Why you’ll love this recipe?
What I love most about cake balls is their seriously indulgent flavor with almost zero effort. You get that melt-in-your-mouth texture, rich from the cake crumbs and silky frosting, all wrapped up in a smooth chocolate shell — it’s the perfect sweet balance. Plus, the simplicity is what sold me. You just mix, roll, dip, and chill. No layers to ice, no crumb coats, no worrying about perfect slices or messy crumbs everywhere. It’s budget-friendly, too; you can use any leftover cake or even a boxed mix and whip up a batch without splurging on expensive ingredients.
They’re super versatile, too — you can swap the cake flavor, change the frosting, drizzle over white chocolate, add sprinkles, or even candied nuts. I’ve made everything from classic vanilla cake balls while chatting with my kids, to rich chocolate versions when I want that extra cocoa hit. If you’ve ever made brownies or cookies and wished for a little something different, cake balls hit that sweet spot between creativity and tradition, and take less time than a full dessert. Honestly, these little guys have become my go-to when I want a fuss-free sweet fix that still feels super special.
How do I make cake balls?
Quick Overview
Here’s the scoop: you bake your cake (or use a box, no judgment here!), crumble it up, mix it with luscious frosting, roll into little balls, then dip them in melted chocolate or glaze. The chill time is key — it helps everything set up so each bite is perfectly firm but still tender inside. What makes this method so great? You get all that rich cake flavor packed into a fun, poppable shape that’s easier to handle than a fork and almost impossible to resist. I promise, even if you feel unsure about rolling or dipping, this process is surprisingly straightforward, and you’ll feel like a pro in no time.
Ingredients
For the Main Batter:
- 1 box of your favorite cake mix (vanilla, chocolate, or yellow) — homemade works just as well, but boxed is a shortcut I swear by
- Ingredients needed for the cake mix (usually eggs, oil, water) or homemade equivalents
For the Filling:
- 1 cup of frosting — cream cheese or buttercream both work beautifully. I like cream cheese for a tangy twist and buttercream for richness
- Optional: a splash of vanilla or almond extract for extra flavor boost
For the Glaze:
- 12 ounces of chocolate chips or melting wafers — semi-sweet or milk chocolate are my go-tos
- 1 tablespoon coconut oil or vegetable shortening to smooth the glaze
- Optional: Sprinkles, crushed nuts, or coconut flakes for decorating
Step-by-Step Instructions
Step 1: Preheat & Prep Pan
Start by heating your oven to 350°F (175°C). Grease a cake pan or line it with parchment paper — I always opt for parchment because it makes cleanup so much easier! If you’re using a homemade cake recipe, follow the directions as you normally would here.
Step 2: Mix Dry Ingredients
Whether you’re baking from scratch or using a box mix, sift together your dry ingredients to prevent lumps and ensure a smooth batter. This step is key for a soft, even crumb. If you’re making it from scratch, mix your flour, baking powder, and salt thoroughly before adding in liquids.
Step 3: Mix Wet Ingredients
In a separate bowl, whisk your eggs, oil, and water (or milk). When I’m feeling fancy, I sometimes swap out the water for almond milk — trust me, it adds a lovely creaminess that’s a little unexpected but oh so good. Just mix until the blend looks smooth and glossy.
Step 4: Combine
Slowly add the wet ingredients to the dry, folding gently to combine. You want a fluffy, smooth batter without overmixing — if you mix too much, the cake can get tough and dry, and that’s the last thing we want for cake balls. The batter should be a little thick but spreadable.
Step 5: Prepare Filling
Once your cake is baked and cool, crumble it into a large bowl using your hands or a fork. Next, mix in the frosting a little at a time. The goal is to create a moist, sticky dough that holds together when rolled but isn’t too gooey. You can tweak the frosting amount based on how fresh or dry your cake is. My tip? Add frosting gradually so you don’t end up with a mess.
Step 6: Roll & Chill
Roll the mixture into 1-inch balls and place them on a parchment-lined baking sheet. Once shaped, pop them in the fridge to chill for at least 1 hour. This cooling step firms them up, which makes dipping so much easier and cleaner.
Step 7: Melt & Dip
While the cake balls chill, melt your chocolate chips with the coconut oil in a microwave-safe bowl. Heat in short bursts, stirring often, until silky smooth. Using a fork or dipping tool, coat each ball evenly in the chocolate, tapping off excess before placing back on the parchment. This part can get a little messy, but that’s part of the fun.
Step 8: Cool Again
Once dipped, return the cake balls to the fridge to set the glaze. If you like, sprinkle with chopped nuts or colorful sprinkles right after dipping so they stick. This final chill is magic—it gives the cake balls that perfect snap when you bite in.
Step 9: Serve & Enjoy
Pop them on a cute tray or plate, and serve them at room temperature so the edges stay firm but the inside is luxuriously tender. Cake balls are party-ready, but they’re also just as wonderful to eat two at a time mid-afternoon while no one’s looking.
What to Serve It With
For Breakfast: A hot cup of coffee or chai tea pairs beautifully with the sweetness and richness of cake balls. I like to set out a small platter with fresh fruit slices to balance the indulgence.
For Brunch: Dress up by arranging cake balls alongside a cheese board or fresh yogurt parfaits. Sparkling water with lemon or a light mimosas works wonders here—fancy without fuss.
As Dessert: Serve cake balls after dinner with a drizzle of espresso or a glass of dessert wine. I’ve found that a subtle dusting of sea salt on the chocolate glaze brings out surprising layers of flavor.
For Cozy Snacks: These are absolute favorites during movie nights or weekend afternoons. My kids love them paired with a tall glass of cold milk or even hot cocoa if it’s chilly outside. Nothing beats them for that comfort-food vibe.
In our family, cake balls have become a bit of a tradition when guests come over — they’re quick to make, ridiculously tasty, and always scoop up smiles. We’ve tried them with everything from lemon cake and cream cheese filling to carrot cake with spiced cream cheese frosting. How you serve them really depends on the mood, but no matter what, these little gems never disappoint.
Top Tips for Perfecting Your Cake Balls
Cake Prep: Whether homemade or boxed, be sure your cake is fully cooled before crumbling. Warm cake can make the mixture too slippery and difficult to work with.
Mixing Advice: Don’t dump all the frosting in at once. Adding it slowly lets you gauge the right sticky-but-not-wet texture. I learned this after a batch turned too dense and damp – balancing is key!
Rolling Technique: Use just your hands. If the mixture sticks too much, chill it a bit longer. Wet hands help if the cake feels too dry. Aim for smooth balls, but don’t stress if they’re not perfectly round — rustic charm is part of the appeal.
Dipping Tips: Warm your chocolate gently and stir often. If it’s too thick, add a tiny bit of coconut oil or shortening to thin it out. When dipping, tap off the excess chocolate gently on the side of the bowl to avoid drippy messes.
Decoration: Add fun with sprinkles, crushed nuts, or a drizzle of contrasting chocolate while the glaze is still wet. It adds texture and a pop of color, especially for parties or gifts.
Ingredient Swaps: Out of chocolate chips? Try white chocolate, peanut butter chips, or even colored candy melts for a festive spin. For a dairy-free option, coconut oil and dairy-free chocolate work wonders.
Over time, I’ve learned that chilling the balls twice — once before and once after dipping — makes all the difference for neat, professional-looking treats. Trust me on this; skipping a chilling step is a rookie move that leads to sticky fingers and smudged chocolate robes, and nobody wants that!
Storing and Reheating Tips
Room Temperature: Store cake balls in an airtight container at room temp for 2-3 days. Keep them out of direct sunlight to prevent the glaze from sweating or melting.
Refrigerator Storage: For longer life, place them in a sealed container and refrigerate up to a week. Just remember to bring them back to room temp before serving so the interior is soft and rich.
Freezer Instructions: Cake balls freeze beautifully! Wrap them tightly in plastic wrap then tuck into an airtight container or freezer bag. Freeze for up to 3 months. Thaw overnight in the fridge or for a few hours at room temperature.
Glaze Timing: If freezing, wait to glaze your cake balls until after thawing. Glazing before freezing can cause condensation that dulls the chocolate’s finish. For short-term storage, glaze before refrigerating.
I’ve tested all these storage techniques, and the key to freshness is airtight containers and correct chilling times. It’s amazing how cake balls hold their flavor and texture compared to regular cake, and honestly, that means more sweet moments for you down the line without re-baking!
Frequently Asked Questions
Final Thoughts
These cake balls have become a little treasure in my kitchen — always stirring up smiles and sparking nostalgia. They’re proof that sometimes, the simplest ideas turn into your favorite go-to treats. When you bite into one, you get that perfect blend of cake’s warmth and frosting’s creamy richness, all wrapped in a chocolate hug. I hope you find joy in making (and eating!) these as much as my family does. If you give them a whirl, please drop a comment or share your hacks — I’m always excited to hear how others personalize this sweet classic. Happy baking, and here’s to many cozy, delicious moments ahead!
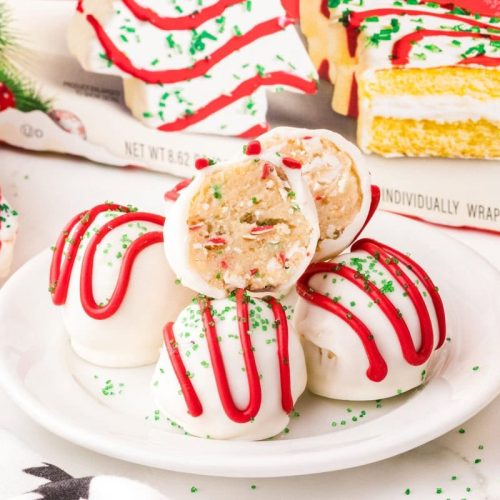
Little Debbie Christmas Cake Balls
Ingredients
Main Ingredients
- 10 pieces Little Debbie vanilla Christmas tree snack cakes Unwrapped from 2 boxes (8.62 oz. each)
- 8 ounce cream cheese Softened to room temperature
- 20 ounce white chocolate melting wafers Ghirardelli brand recommended
- 6 ounce red vanilla flavored melting candy wafers Wilton brand recommended
- 1 tablespoon green sanding sugar sprinkles
Instructions
Preparation Steps
- Line two large baking sheets with parchment paper or silicone mats and set aside.
- Beat the softened cream cheese in a large bowl on medium speed using a handheld mixer until fluffy and smooth, about 1-2 minutes.
- Break the vanilla Christmas tree snack cakes into smaller pieces and add to the cream cheese. Mix on low speed until fully combined but still slightly textured.
- Using a small cookie scoop, scoop out 1 tablespoon-sized portions of the mixture and roll gently into smooth balls using your hands.
- Place each cake ball on one of the prepared baking sheets. Repeat until all mixture is used.
- Freeze the cake balls for 30 to 45 minutes until solid to make coating easier.
- Melt the white chocolate wafers in a medium bowl following package instructions and stir until smooth.
- In a separate bowl, melt the red vanilla candy wafers and transfer to a piping bag with the tip cut off.
- Dip each cake ball in the melted white chocolate to coat completely. Lift out with a fork and let excess drip back into the bowl.
- Place coated cake balls on the second prepared baking sheet. Pipe red candy in a ziz-zag pattern on each and sprinkle with green sanding sugar to mimic the Christmas tree design.
- Allow cake balls to set for 15 to 20 minutes until white chocolate coating is firm before serving.