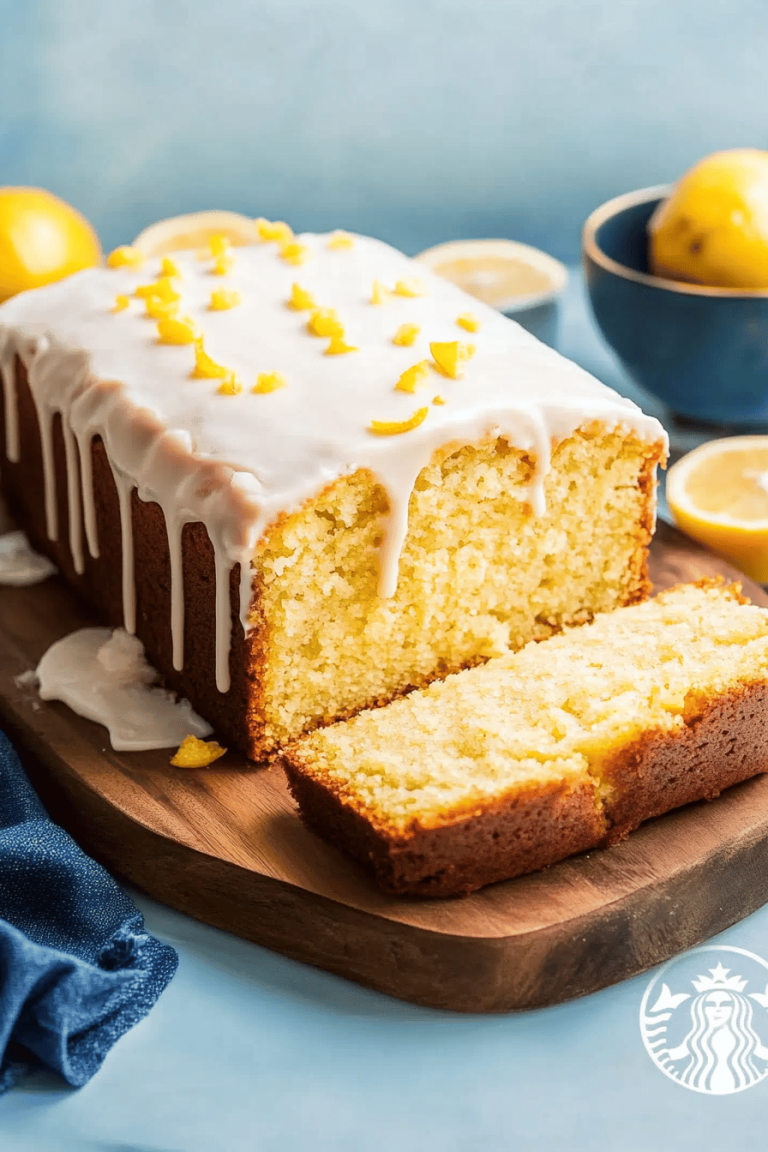
Oh, hey there! Come on in, grab a mug. I’ve been dying to share this recipe with you. It’s something I whip up probably more often than I should admit, especially when that late-afternoon craving hits or when I just need a little slice of sunshine in my day. This Easy banana cream. swirl loaf is, hands down, one of my absolute favorites. It’s got that perfect balance of sweet, moist Banana Bread with a luscious, creamy swirl that just melts in your mouth. Honestly, it’s the kind of thing that makes your whole kitchen smell like pure happiness. Forget those complicated cakes or fussy pies; this loaf is your new best friend when you want something incredibly delicious without spending hours in the kitchen. It’s like a hug in cake form, and my family devours it every single time.
What is easy banana cream swirl loaf?
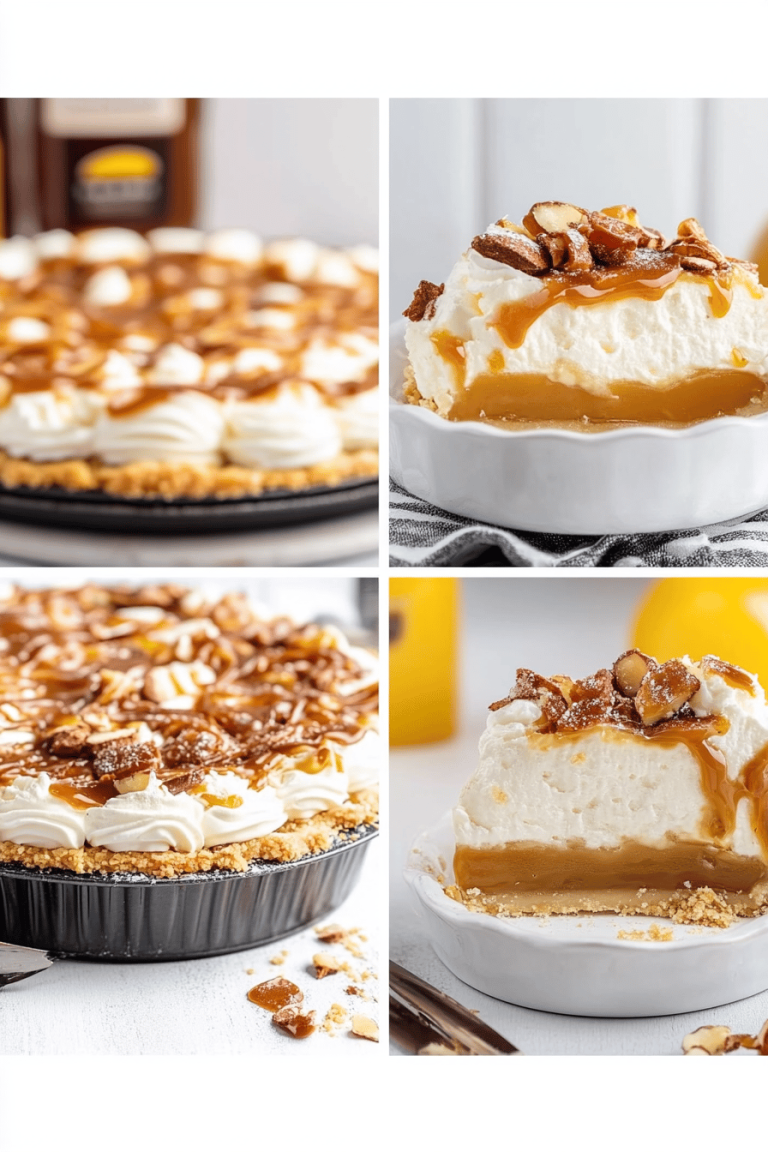
So, what exactly *is* this magical concoction? Think of it as the ultimate upgrade to your classic Banana Bread. We take all the comforting, familiar flavors of ripe bananas, warm spices, and a tender crumb, but we elevate it with a decadent, creamy swirl that runs all the way through. It’s not quite a cheesecake swirl, and it’s not quite a custard, but somewhere perfectly in between – rich, smooth, and with just the right amount of tanginess to cut through the sweetness. The “cream” in Easy banana cream. refers to this divine layer that gets swirled in, creating beautiful marbling and an extra layer of moistness. It’s essentially the best of both worlds: the soul-soothing goodness of banana bread and the elegant indulgence of a creamy dessert, all baked into one easy-to-make loaf. It’s approachable for even the most novice baker, which is a huge part of why I adore it.
Why you’ll love this recipe?
Honestly, there are so many reasons why this easy banana cream swirl loaf has earned a permanent spot in my recipe binder. First off, the flavor is just out of this world. You get the deep, sweet notes of perfectly ripe bananas, which are always a winner, enhanced by a hint of cinnamon and vanilla. Then, that creamy swirl? It’s a revelation. It adds this luxurious texture and a subtle, delightful richness that makes you feel like you’re eating something incredibly fancy, even though it’s ridiculously simple. And speaking of simple, that’s the next big win here. This recipe is genuinely easy. I’ve tested it on days when I’m rushing, and it still turns out perfectly. The ingredients are all pantry staples, which means you can likely whip this up right now without a trip to the grocery store. Plus, it’s incredibly budget-friendly. You’re using up those ripe bananas that might otherwise go to waste, and the other ingredients are so common. It’s also super versatile. I’ll talk more about serving ideas later, but the fact that it works for breakfast, dessert, or a midday treat makes it a total lifesaver. What I love most about this is the sheer joy it brings. It’s a crowd-pleaser, a comfort food, and a guaranteed way to make everyone’s day a little brighter. It stands out from regular banana bread because the swirl adds that extra wow factor without adding any real difficulty.
How to Make Easy Banana Cream Swirl Loaf
Quick Overview
This loaf comes together in just a few straightforward steps. You’ll mash your bananas, mix up a simple batter, prepare a quick and dreamy cream filling, swirl it all together in a loaf pan, and bake until golden. The magic really happens in the swirling, which creates those beautiful ribbons of cream throughout the tender banana cake. It’s truly as simple as it sounds, and the results are so worth it!
Ingredients
For the Main Banana Batter:
* 3-4 very ripe bananas, mashed (about 1 ½ cups) – the browner, the better for maximum sweetness and flavor! Don’t throw out those spotty guys!
* ½ cup unsalted butter, softened – make sure it’s truly softened, not melted, for the best texture.
* ¾ cup granulated sugar – you can adjust this slightly, but it’s the sweet spot for me.
* 2 large eggs, at room temperature – room temp eggs incorporate better.
* 1 teaspoon vanilla extract – pure vanilla extract makes a difference!
* 1 ½ cups all-purpose flour – sifted if you like, but not essential for this rustic loaf.
* 1 teaspoon baking soda – for that perfect lift.
* ½ teaspoon ground cinnamon – adds that cozy warmth.
* ¼ teaspoon salt – to balance all the sweetness.
* ½ cup buttermilk (or ½ cup milk mixed with ½ tablespoon lemon juice or white vinegar, let sit for 5 minutes) – the tanginess adds moisture and helps tenderize the crumb. I’ve even tested this with plain yogurt thinned with milk in a pinch, and it worked!
For the Cream Swirl:
* 4 ounces cream cheese, softened – this is the base for our creamy goodness. Make sure it’s really soft!
* ¼ cup powdered sugar – for a smooth, sweet swirl.
* 1 large egg yolk – this adds richness and helps bind the swirl.
* ½ teaspoon vanilla extract – to echo the flavors in the batter.
* A pinch of salt – again, balancing sweetness.
For the Optional Glaze:
* ½ cup powdered sugar
* 1-2 tablespoons milk or cream
* ½ teaspoon vanilla extract
Step-by-Step Instructions
Step 1: Preheat & Prep Pan
First things first, get your oven preheated to 350°F (175°C). Grab a standard 9×5 inch loaf pan. I like to grease it really well with butter or non-stick spray, and then lightly flour it. This ensures your beautiful loaf slides out without any drama. You can also line it with parchment paper, leaving some overhang on the sides, which makes lifting it out even easier.
Step 2: Mix Dry Ingredients
In a medium bowl, whisk together your all-purpose flour, baking soda, cinnamon, and salt. Just give them a good whisk until they’re well combined. This ensures everything is evenly distributed, so you don’t get pockets of baking soda or salt. It’s a small step, but it makes a difference in the final texture.
Step 3: Mix Wet Ingredients
In a large bowl, cream together the softened butter and granulated sugar until it’s light and fluffy. This is where you’ll add your eggs, one at a time, beating well after each addition. Then, stir in the vanilla extract and your mashed bananas. Make sure those bananas are really mashed up – no one wants big chunks unless that’s your jam! The mixture might look a little lumpy from the bananas, and that’s perfectly fine.
Step 4: Combine
Now, we’re going to add the dry ingredients to the wet ingredients, alternating with the buttermilk. Start by adding about a third of the dry ingredients and mix until just combined. Then add half of the buttermilk and mix. Repeat, ending with the dry ingredients. Be careful not to overmix here! Overmixing develops the gluten too much, which can lead to a tough loaf. Mix just until you no longer see streaks of flour. A few lumps are okay!
Step 5: Prepare Filling
While the batter is resting, whip up the cream swirl. In a small bowl, beat the softened cream cheese with the powdered sugar until it’s smooth and creamy. Then, beat in the egg yolk, vanilla extract, and that tiny pinch of salt. You want this filling to be thick but pourable, almost like a soft frosting. It should be smooth and luscious.
Step 6: Layer & Swirl
Pour about half of the banana batter into your prepared loaf pan. Dollop about half of the cream cheese mixture evenly over the batter. Then, pour the remaining banana batter on top, and dollop the rest of the cream cheese mixture over that. Now for the fun part! Take a knife or a skewer and gently swirl the cream cheese mixture into the banana batter. Don’t overdo it; you want distinct swirls, not a muddy mess. Just a few passes through is usually enough to create beautiful patterns.
Step 7: Bake
Pop that beautiful loaf into your preheated oven. Bake for about 50-65 minutes, or until a wooden skewer or toothpick inserted into the center comes out clean, with perhaps a few moist crumbs attached, but no wet batter. The top should be golden brown. If the top starts to get too dark before the inside is cooked, you can loosely tent it with foil.
Step 8: Cool & Glaze
Once it’s done baking, let the loaf cool in the pan on a wire rack for about 10-15 minutes. This allows it to firm up a bit. Then, carefully remove it from the pan and let it cool completely on the wire rack. This is crucial! If you try to glaze it while it’s warm, the glaze will just melt off. Once completely cool, you can mix up the optional glaze by whisking together the powdered sugar, milk/cream, and vanilla until smooth. Drizzle it over the top and let it set. This glaze adds a lovely finishing touch, but honestly, it’s amazing even without it.
Step 9: Slice & Serve
Once the glaze (if you used it) has set, it’s time to slice and enjoy! I like to use a serrated knife for clean slices. Serve it at room temperature for the best texture and flavor. The swirls should be beautifully visible, a creamy contrast to the moist banana cake. Prepare for rave reviews!
What to Serve It With
This easy banana cream swirl loaf is incredibly versatile, which is one of the things I love about it! It’s not just for dessert. Here’s how we enjoy it:
For Breakfast: This is my go-to on a lazy weekend morning. A thick slice alongside a steaming mug of coffee or a glass of fresh orange juice is pure bliss. I often toast a slice lightly, which makes the swirls even more gooey and delicious. It’s a much more exciting start to the day than plain old toast!
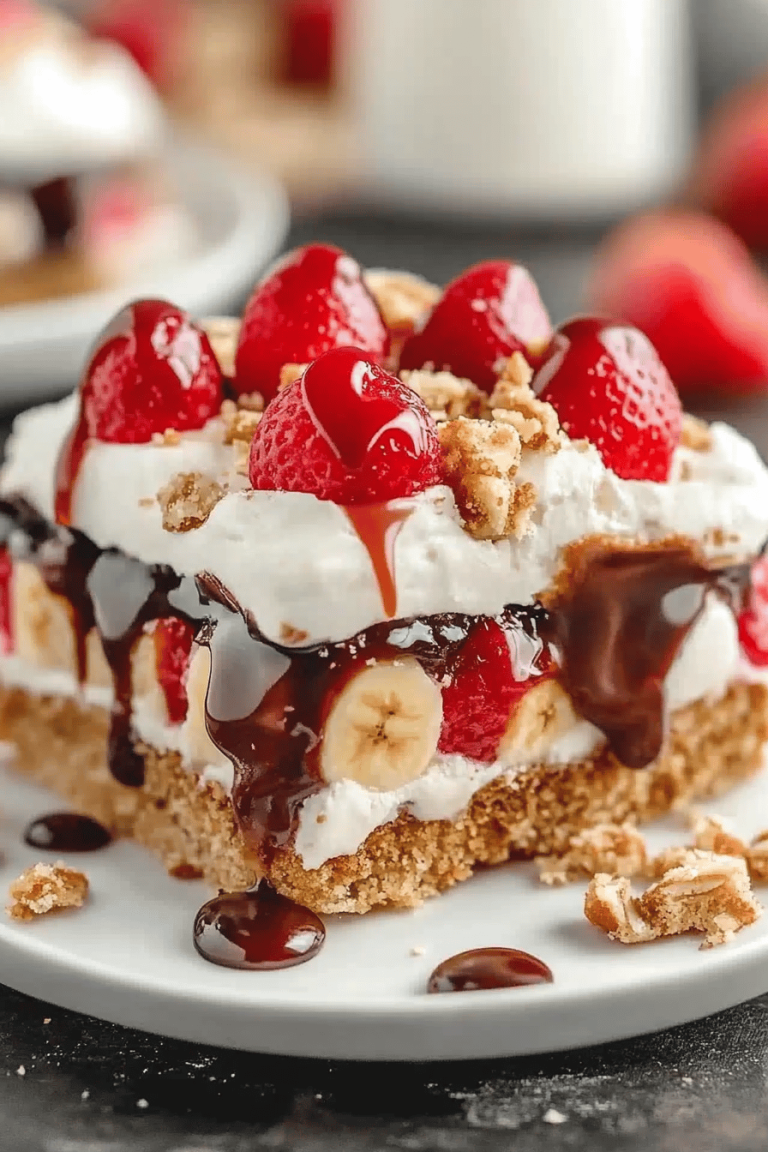
For Brunch: For a more elegant brunch spread, I’ll slice it a little thinner and arrange it on a pretty platter. It pairs wonderfully with fresh berries like raspberries or blueberries, a dollop of whipped cream, or even a light yogurt parfait. It feels special without requiring any extra effort on my part. A sparkling cider or a mimosa would be delightful alongside it.
As Dessert: This is where it truly shines as a treat. Serve a generous slice warm (just pop it in the microwave for 10-15 seconds if it’s cooled) with a scoop of vanilla bean ice cream or a drizzle of caramel sauce. The contrast of the warm, moist loaf with cold ice cream is heavenly. It’s much lighter than a dense cake but just as satisfying.
For Cozy Snacks: Honestly, my kids just grab slices of this whenever they can! It’s perfect for an after-school snack with a glass of cold milk, or when I need a little something sweet to get me through the late-night hours without resorting to a whole bag of cookies. It’s comforting and satisfying, and the fact that it has fruit in it makes me feel just a *tiny* bit better about the sugar!
Top Tips for Perfecting Your Easy Banana Cream Swirl Loaf
I’ve made this loaf so many times that I’ve picked up a few tricks along the way that I swear by. Here are my top tips to ensure your easy banana cream swirl loaf is absolutely perfect:
Banana Prep: Seriously, use those super ripe bananas. The ones with brown spots all over them are your best friends here. They have more sugar and more banana flavor. Mash them really well with a fork – I like to leave a few tiny bits for texture, but no big chunks! And don’t peel your bananas and let them sit in the freezer; they get watery when thawed, which can mess with the moisture balance. Freshly ripe is best.
Mixing Advice: The biggest mistake I see people make with quick breads and muffins is overmixing. Once you add the flour, mix *just* until it’s combined. A few streaks of flour remaining are better than overmixing. Overmixing develops the gluten in the flour, which results in a tough, dense loaf instead of a tender, moist one. So, gentle and quick is the name of the game.
Swirl Customization: When you’re swirling, don’t go crazy trying to make it perfectly uniform. The beauty of this loaf is in its rustic, marbled appearance. Just a few gentle passes with a knife or skewer will do the trick. You want to see distinct ribbons of the cream swirl peeking through the banana batter. If you swirl too much, it all just blends together.
Ingredient Swaps: I’ve experimented a bit! If you don’t have buttermilk, the milk and vinegar/lemon juice trick is a lifesaver and works perfectly. For the butter, you could potentially use a neutral oil (like vegetable or canola) in the same quantity, but butter really adds that classic flavor. For the cream cheese swirl, if you’re not a fan of cream cheese, you could try a thick Greek yogurt mixed with a little more powdered sugar, but the texture won’t be quite as rich.
Baking Tips: Every oven is a little different, so keep an eye on your loaf. If the top is browning beautifully but the center isn’t cooked, just loosely tent the pan with aluminum foil. This will prevent the outside from burning while the inside finishes baking. Also, avoid opening the oven door too early in the baking process, as the sudden temperature change can cause the loaf to sink.
Glaze Variations: While the simple powdered sugar glaze is lovely, feel free to experiment! Add a little lemon zest for a tangy kick, a drop of almond extract for a different flavor profile, or even a bit of cocoa powder for a chocolatey swirl. If you prefer something lighter, a simple dusting of powdered sugar through a sieve looks elegant too. Just make sure the loaf is *completely* cool before glazing!
Storing and Reheating Tips
This easy banana cream swirl loaf is best enjoyed fresh, but it does store quite well, which makes it great for meal prepping or having on hand. Here’s how I keep it tasting delicious:
Room Temperature: Once the loaf is completely cooled, you can store it at room temperature. I like to wrap it tightly in plastic wrap or place it in an airtight container. It will stay fresh and moist for about 2-3 days this way. The swirls might become a little less defined as it sits, but the flavor is still wonderful.
Refrigerator Storage: If your kitchen is particularly warm, or if you want it to last a bit longer, you can refrigerate it. Store it in an airtight container. It should keep well in the fridge for up to 5 days. The texture might become a little firmer when cold, but I actually enjoy it that way sometimes, especially the cream swirls.
Freezer Instructions: This loaf freezes beautifully! Once it’s completely cooled and glazed (or un-glazed, if you prefer), wrap it tightly in plastic wrap, then in aluminum foil, or place it in a freezer-safe bag. It will keep in the freezer for up to 2-3 months. To thaw, unwrap it and let it come to room temperature on the counter. You can also gently reheat slices in a low oven or toaster oven.
Glaze Timing Advice: I always recommend glazing the loaf *after* it has completely cooled, especially if you plan to store it at room temperature or in the refrigerator. If you freeze it with glaze, the glaze might crack slightly upon thawing. It’s often best to freeze it plain and glaze it once it’s thawed and ready to serve.
Frequently Asked Questions
Final Thoughts
So there you have it – my absolute favorite easy banana cream swirl loaf. I truly hope you give this recipe a try. It’s the kind of bake that feels special enough for company but is easy enough for a Tuesday afternoon. It’s a testament to how simple ingredients can come together to create something truly memorable. The moist banana cake with that luscious, creamy swirl is just pure comfort and joy. It’s a recipe that has brought smiles to my family’s faces countless times, and I’m so excited for it to do the same for yours.
If you end up making this, please, please, please let me know how it turns out! I’d love to hear about your swirling adventures or any little twists you add. Leave a comment below or share a picture if you’re feeling inspired. Happy baking, and enjoy every delicious bite!
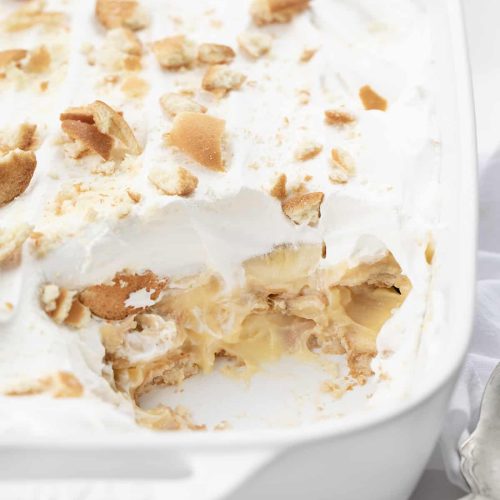
easy banana cream
Ingredients
Main Ingredients
- 3.4 ounce box vanilla instant pudding mix
- 2 cup whole milk cold
- 48 cookies vanilla wafer cookies divided
- 4 large ripe bananas thinly sliced, divided
- 8 ounce container whipped cream
Optional Garnish
- extra bananas and cookies for garnish
Instructions
Preparation Steps
- In a large mixing bowl, combine the instant vanilla pudding mix and cold milk. Using a hand mixer at medium-low speed, beat the mixture until well blended (about 2 minutes).
- Chill the pudding mixture in the refrigerator while you prepare the next step.
- In an 11x7-inch baking dish, arrange a single layer of vanilla wafer cookies with the flat side down. Use 24 cookies for this layer.
- Pour half of the chilled pudding mixture (about 1 cup) over the cookies in the baking dish.
- Add half of the thinly sliced bananas in a single layer over the pudding.
- Repeat with another layer of cookies, pudding, and bananas.
- Top the final layer with whipped cream, spreading it evenly over the pudding.
- If desired, garnish with extra sliced bananas and cookies.
- Chill the dessert in the refrigerator for at least 4 hours, up to overnight before serving.