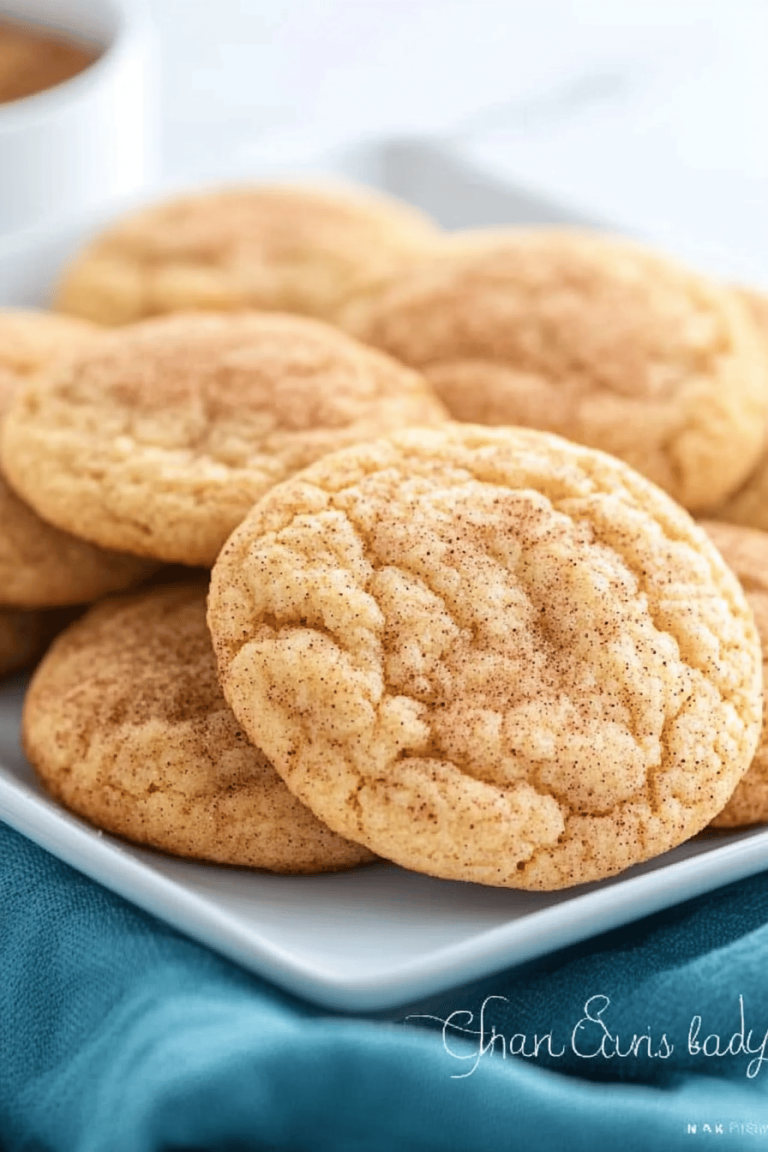
Oh, where do I even begin with these cookies? Honestly, if I had to pick just one cookie to eat for the rest of my life, it would probably be these. They’re just… perfect. I remember my Grandma Betty used to make a batch every Sunday afternoon, and the smell would just fill our little house, making everyone a little bit happier. It wasn’t just the sweet, comforting aroma, but the anticipation of that first bite – the perfect balance of chewy, crispy, and packed with goodness. These aren’t your average chocolate chip cookies, though they share some DNA. Think of them as the ultimate upgrade, the cookies that have it all. If you’re a fan of classic oatmeal cookies but wish they had a little more pizzazz, or if you adore a good chocolate chip but want something with more texture, then my absolute favorite cowboy cookie recipe is about to become your new go-to. Seriously, they’re a crowd-pleaser and a lifesaver when unexpected guests pop over!
What is a cowboy cookie?
So, what exactly *is* a cowboy cookie? The name itself conjures up images of the Wild West, right? Open range, campfires, and hearty meals. And in a way, that’s fitting. These cookies are substantial, satisfying, and packed with everything you could want in a baked treat. They’re essentially a glorious mash-up of several classic cookie personalities. Imagine a really delicious, chewy oatmeal cookie base, then pile on the goodness: chocolate chips (because, duh!), pecans for that delightful crunch and nutty depth, and sometimes, if I’m feeling extra adventurous, a sprinkle of shredded coconut. It’s that generous mix-in that really defines it. It’s not just a cookie; it’s a treasure trove of textures and flavors all rolled into one perfect bite. They’re hearty enough to fuel a day’s work (or at least a serious Netflix binge!) and decadent enough to feel like a real treat. It’s the kind of cookie that doesn’t ask for much but gives back tenfold.
Why you’ll love this recipe?
There are so many reasons why this particular cowboy cookie recipe holds such a special place in my heart, and I just know you’re going to fall in love with it too. First off, the flavor is absolutely out of this world. You get the comforting warmth of the oats, the rich sweetness of the brown sugar, the satisfying chewiness from just the right amount of flour and butter, and then BAM – those little bursts of melty chocolate and crunchy pecans. It’s a symphony of textures and tastes in every single bite. What I truly adore about this recipe, though, is how surprisingly simple it is to whip up. Even if you’re not a seasoned baker, you can absolutely nail these. The ingredients are all pantry staples, and the steps are straightforward. No fancy techniques required! And let’s talk cost-efficiency. These cookies are incredibly budget-friendly to make, especially considering how many you get out of a single batch. They’re perfect for feeding a crowd without breaking the bank. Plus, their versatility is fantastic! They’re amazing on their own, of course, but they also pair wonderfully with a glass of cold milk, a cup of coffee, or even a scoop of vanilla ice cream. Honestly, they’re a step up from your standard chocolate chip, offering that delightful oatmeal texture and nutty crunch that just elevates the whole cookie experience. They’re the kind of cookies that get asked for by name!
How do you make cowboy cookies?
Quick Overview
Making these Cowboy cookies is a breeze, and I promise you’ll be so proud of the results. We’re essentially creaming butter and sugars, adding eggs and vanilla, then gently folding in our dry ingredients along with all those wonderful mix-ins. The key is not to overmix, which keeps them wonderfully tender. You’ll scoop them onto a baking sheet, give them a little space, and bake them until they’re golden brown around the edges but still wonderfully soft in the center. It’s a straightforward process that yields incredibly rewarding results. You’ll feel like a baking pro in no time!
Ingredients
For the Main Batter:
This is where all the magic starts! You’ll need:
- 2 1/4 cups all-purpose flour: I usually just grab whatever’s in the pantry. Make sure it’s not self-rising!
- 1 teaspoon baking soda: This gives them that perfect lift.
- 1 teaspoon baking powder: A little extra help for a nice texture.
- 1/2 teaspoon salt: Essential for balancing the sweetness and bringing out all the other flavors.
- 1 cup (2 sticks) unsalted butter, softened: I always opt for unsalted so I can control the saltiness myself. Make sure it’s truly softened – not melted! This is crucial for creaming properly.
- 1 cup granulated sugar: For that classic cookie sweetness.
- 1 cup packed light Brown Sugar: This is what gives them that amazing chewy texture and caramel-like depth. Don’t skimp on packing it in!
- 2 large eggs: Room temperature eggs incorporate better. If you forget to take them out, just pop them in a bowl of warm water for about 10 minutes.
- 2 teaspoons vanilla extract: A good quality vanilla makes a noticeable difference.
For the Mix-Ins (The Best Part!):
This is where you can really customize and make them your own, but here’s my tried-and-true combination:
- 1 1/2 cups old-fashioned rolled oats: These give you that lovely chew and texture. Quick oats can get a bit mushy, so I stick to the old-fashioned kind.
- 1 cup semi-sweet chocolate chips: Milk chocolate is great too, or a mix! Whatever your heart desires.
- 1 cup chopped pecans: Toasted pecans add an extra layer of flavor, but raw are perfectly fine too. Walnuts are also a delicious substitute if pecans aren’t your favorite.
- *(Optional but highly recommended!)* 1/2 cup shredded sweetened coconut: This adds a lovely tropical note and extra chewiness.
Step-by-Step Instructions
Step 1: Preheat & Prep Pan
First things first, let’s get your oven ready. Preheat it to 350 degrees Fahrenheit (175 degrees Celsius). I like to line my baking sheets with parchment paper. It makes cleanup a breeze and helps prevent the cookies from sticking or getting too browned on the bottom. If you don’t have parchment, a lightly greased baking sheet will do, but I really swear by the parchment paper!
Step 2: Mix Dry Ingredients
In a medium bowl, whisk together the flour, baking soda, baking powder, and salt. This ensures that all the leavening agents and salt are evenly distributed, which is important for consistent cookies. Give it a good whisk until everything looks well combined. Set this aside for now.
Step 3: Mix Wet Ingredients
In a large bowl, cream together the softened butter, granulated sugar, and brown sugar. Use an electric mixer (handheld or stand mixer) for this. Beat them until the mixture is light and fluffy, about 2-3 minutes. This step incorporates air, which is key to the cookie’s texture. Scrape down the sides of the bowl as needed. Then, beat in the eggs one at a time, making sure each is fully incorporated before adding the next. Stir in the vanilla extract.
Step 4: Combine
Now it’s time to bring the wet and dry ingredients together. Gradually add the flour mixture to the wet ingredients, mixing on low speed until just combined. Be careful not to overmix here! Overmixing can develop the gluten too much, leading to tough cookies. Stop mixing as soon as you no longer see streaks of dry flour. It’s better to have a few tiny pockets of flour than to overmix.
Step 5: Prepare Filling
This isn’t really a separate step for these cookies since we’re just folding everything in, but it’s where you get your hands on all those goodies! Make sure your chocolate chips, chopped pecans, and coconut (if using) are ready to go. Having them all measured out and within easy reach makes the next step super smooth.
Step 6: Layer & Swirl
Now for the best part – adding all the good stuff! Add the rolled oats, chocolate chips, chopped pecans, and shredded coconut (if using) to the cookie dough. Gently fold them in with a spatula or wooden spoon until they are just evenly distributed throughout the dough. Again, try not to overmix; you just want everything to be incorporated.
Step 7: Bake
Drop rounded tablespoons of dough onto the prepared baking sheets, leaving about 2 inches between each cookie to allow for spreading. I usually get about 12-15 cookies per batch. Bake for 9-12 minutes, or until the edges are lightly golden brown and the centers look set but still slightly soft. The exact time will depend on your oven and the size of your cookies, so keep an eye on them. They’ll continue to firm up as they cool.
Step 8: Cool & Glaze
Once baked, let the cookies cool on the baking sheets for about 5 minutes before transferring them to a wire rack to cool completely. This is really important for them to set properly. As for the glaze, I find these cookies are absolutely divine without any glaze at all! But if you *really* want one, a simple drizzle of melted chocolate or a very thin vanilla glaze can be lovely. For this recipe, I usually skip the glaze to let the cookie itself shine. If you do decide to glaze, wait until the cookies are completely cool.
Step 9: Slice & Serve
Once they’re completely cooled, they’re ready to be devoured! These are best served at room temperature. If you’re cutting them (though they’re already perfectly portioned!), I find a gentle approach is best. Just admire them, pick one (or two!), and enjoy! They look beautiful piled high on a plate.
What to Serve It With
These cowboy cookies are so versatile, they fit into pretty much any occasion! For a relaxed breakfast, I love to pair them with a strong cup of coffee or a tall glass of cold milk. They’re hearty enough to keep you satisfied until lunch. If you’re hosting a brunch, these cookies are a fantastic addition to any spread. I like to arrange them on a pretty tiered stand with some fresh berries and other pastries. They look so inviting! As a dessert, they’re a showstopper. Serve them warm or at room temperature alongside a scoop of good quality vanilla bean ice cream for a truly decadent experience. Or, just have them as a cozy afternoon snack with a cup of tea – pure comfort! My family has a tradition of making a big batch for movie nights, and they always disappear faster than popcorn. They’re just universally loved, and that’s the beauty of them!
Top Tips for Perfecting Your Cowboy Cookies
Over the years, I’ve picked up a few tricks and learned from a few (minor!) mishaps that I’m happy to share, so your cowboy cookies turn out absolutely perfect every single time. First, when it comes to the oats, always use old-fashioned rolled oats. They hold their shape and give you that signature chewy texture. Quick oats tend to break down too much and can make the cookies a bit gummy. For creaming the butter and sugars, make sure your butter is truly softened – not melted, not rock-hard. It should yield to gentle pressure from your finger. This creates that essential light and fluffy base. When you’re combining the wet and dry ingredients, resist the urge to overmix. Seriously, just mix until the flour disappears. A few small streaks of flour are fine; they’ll bake out. Overmixing develops the gluten too much, resulting in a tougher cookie, and we want these to be tender and chewy!
When it comes to the mix-ins, feel free to play around! If you don’t have pecans, walnuts are a great substitute. You can also adjust the amount of chocolate chips to your liking – I sometimes add more if I’m feeling particularly indulgent. For baking, I always recommend lining your baking sheets with parchment paper. It prevents sticking and helps achieve a more even bake. Keep an eye on your cookies during the last few minutes of baking; ovens can vary, and you want them golden brown around the edges but still soft in the center. They’ll continue to cook slightly as they cool on the baking sheet, which is exactly what we want for that perfect chewy texture. Don’t try to move them too soon after they come out of the oven; let them set up for a few minutes on the sheet first.
If you’re thinking about ingredient swaps, I’ve experimented quite a bit. For a dairy-free option, I’ve had success using a good quality vegan butter stick and plant-based milk (like almond or oat) for a slightly richer dough. The texture might be a *tiny* bit different, but still delicious. For a gluten-free version, I recommend a good gluten-free all-purpose flour blend that contains xanthan gum. You might need to adjust the liquid slightly, as GF flours can be thirsty. The key to a great cookie, in my opinion, is always about balance and not overdoing it with any one component. These cookies are fantastic just as they are, but these little tweaks can help ensure success even if you’re a beginner baker!
Storing and Reheating Tips
One of the best things about these cowboy cookies is how well they keep! If you have any leftovers (which is rare in my house!), you can store them at room temperature in an airtight container for up to 3-4 days. I find they actually taste even better on the second day as the flavors meld together. Just make sure the container is sealed tightly to keep them from drying out. If you need them to last a bit longer, you can refrigerate them. Place them in an airtight container or wrap them well in plastic wrap and then foil. They’ll stay good in the fridge for about a week. When you want to enjoy them, you can eat them cold, or if you prefer them a little warm, you can gently reheat them in a low oven (around 300°F or 150°C) for a few minutes until they’re just warmed through.
For long-term storage, these cookies freeze beautifully! Once they’re completely cooled, you can freeze them in a single layer on a baking sheet until they’re firm, then transfer them to a freezer-safe bag or container. They’ll keep well in the freezer for up to 2-3 months. Thaw them overnight in the refrigerator, or at room temperature for a few hours. If you’re planning to freeze them, I definitely recommend doing so *without* any glaze, as glaze can sometimes get a bit sticky or lose its sheen when frozen and thawed. If you absolutely love a glaze, it’s always best to add it after the cookies have been thawed and are ready to be served.
Frequently Asked Questions
Final Thoughts
There you have it – my absolute favorite cowboy cookie recipe! I truly believe these cookies are a testament to how simple ingredients, combined with a little love and care, can create something truly spectacular. They’re the perfect blend of comforting, chewy, and delightfully crunchy, packed with all those irresistible mix-ins that make every bite an adventure. Whether you’re baking them for a special occasion, a weeknight treat, or just because you need a little joy in your day, I’m confident these will become a cherished recipe in your own kitchen, just like they have in mine. Don’t be afraid to experiment with the mix-ins; that’s part of the fun! If you give these a try, please let me know how they turn out in the comments below! I’d love to hear about your own twists and your family’s reactions. Happy baking, everyone!