There’s something about the smell of blondies baking in the oven that instantly takes me back to cozy afternoons in my grandma’s kitchen. She always had a pan cooling on the counter, and the golden, buttery aroma would fill the whole house. If you’re a fan of brownies but itching for something a little lighter, sweeter, and downright addictive, these blondies are going to be your new favorite. Unlike the classic chocolate-rich brownie, blondies have this dreamy caramel-like flavor that wraps around you like a warm hug. Trust me, they’re a lifesaver when you want a sweet fix but don’t want to deal with too much fuss or heavy chocolate. My kids demand these for snacktime – then sneak handfuls when they think I’m not looking!
What is a Blondie?
Think of blondies as brownies’ sweet cousins — they’re essentially dense, chewy bars made without cocoa powder. Instead of chocolate, they lean into rich brown sugar and butter, creating a toffee-like depth that’s both comforting and crave-worthy. The name “blondie” is just a nod to their golden color, thanks to all that melted butter and light cane sugars working their magic. It’s like a buttery cookie bar that brings all the cozy vibes without the dark chocolate punch. And honestly? They’re one of those classics you learn to love because they feel nostalgic and fresh at the same time. They’re approachable for any home cook and crazy easy to customize with nuts, chocolate chips, or even swirls of peanut butter!
Why you’ll love this recipe?
I can’t stress enough how perfect this blondies recipe is for whipping up something sweet without sweating over complicated steps. What I love most about this is how it manages to hit that magical balance between rich and light, chewy but soft. The flavor sings of brown butter and vanilla — so comforting, it’s like biting into a warm cookie that melts in your mouth rather than a cake. And don’t get me started on the texture: these blondies have the slightest crisp edges with a gooey center that’s just begging for a slap of ice cream or a drizzle of caramel.
Beyond the taste, this recipe is insanely easy. I always have brown sugar, butter, and a handful of pantry staples on hand, so it feels like magic to pull something delicious together in under 40 minutes. Budget-wise, it’s a winner — no fancy ingredients or expensive chocolates needed, yet it still feels indulgent and impressive when shared. You can dress it up with chopped pecans, white chocolate chips, or a swirl of cream cheese for variety. It’s like a Swiss Army knife of desserts that adapts to your mood.
Honestly, I’ve tried a lot of blondie recipes over the years, but this one never fails. It’s kind of the “go-to” recipe I turn to when friends pop over or when my kids beg for something sweet after school. Compared to other bars or brownies, these blondies have a warmth and subtlety that feels homemade in the best way possible — no fussy ingredients, just pure comfort on a plate.
How do I make a Blondie?
Quick Overview
In a nutshell, this recipe is all about simple, straightforward mixing and baking — nothing fancy but packed with flavor. You melt the butter to get that golden nuttiness, whisk in the sugars and eggs, then fold in the dry ingredients gently so you don’t lose that tender texture. I always sneak in a handful of chocolate chips or walnuts at this stage. Pour it all into a greased pan, slide it into the oven, and wait for that magical smell to take over your kitchen. Once out, I let it cool just right before slicing to get those perfect, chewy squares. No weird tricks here — just classic, reliable comfort food you can make on a whim.
Ingredients
For the Main Batter:
- 1 cup unsalted butter (high-quality, the better the butter, the richer the flavor)
- 1 1/2 cups light brown sugar (packed – it’s the secret to that caramel-y depth)
- 2 large eggs (room temperature for best mixing)
- 2 tsp pure vanilla extract (don’t skimp—real vanilla really shines here)
- 2 cups all-purpose flour (sifted for lightness)
- 1 tsp baking powder
- 1/2 tsp salt (balances the sweetness perfectly)
For the Filling:
- 1 cup semi-sweet chocolate chips (or chopped nuts, like pecans or walnuts for crunch)
- Optional: 1/2 cup white chocolate chips for extra sweetness
For the Glaze:
- 1 cup powdered sugar (for that dreamy, no-fuss drizzle)
- 2-3 tbsp milk (or almond milk if you want a slight twist and creamier glaze)
- 1/2 tsp vanilla extract (to keep it smooth and aromatic)
- Optional: pinch of salt to balance
Step-by-Step Instructions
Step 1: Preheat & Prep Pan
Set your oven to 350°F (175°C), and line an 8×8-inch baking pan with parchment paper or generously grease it with butter. I like to let the parchment hang over the sides a bit so it’s easier to lift the blondies out without crumbling. This little trick makes cutting and cleanup a breeze.
Step 2: Mix Dry Ingredients
In a medium bowl, whisk together the flour, baking powder, and salt until everything looks evenly distributed. This keeps your blondies light and ensures that the raising agents are spread evenly so you don’t get odd lumps or dense spots.
Step 3: Mix Wet Ingredients
In a small saucepan (or microwave-safe bowl), melt the butter gently until golden and fragrant — watch closely so it doesn’t burn; that golden-brown nuttiness is the key. Pour it into a large mixing bowl, then whisk in the brown sugar until smooth and glossy. Add eggs one at a time, beating after each addition, then mix in the vanilla. The batter will be thick but shiny and smooth here, which is what you want.
Step 4: Combine
Slowly add the dry ingredients to the wet, folding gently. Don’t overmix; a few streaks of flour are okay. Overworking the batter will make the blondies tough, and nobody wants that chewy leather texture! The batter should be thick and glossy.
Step 5: Prepare Filling
Stir in your chocolate chips and nuts gently into the batter. Feel free to swap in or add more of your favorites here—this step is all about personalizing!
Step 6: Layer & Swirl
Pour half the batter into your prepared pan and spread evenly. If you want, you can swirl a bit of peanut butter or cream cheese over the batter for that marbled effect — just dollop small spoonfuls and lightly run a knife through them.
Top with remaining batter and smooth out the top with a spatula. I always do a quick tap on the counter to settle the batter evenly before popping it in the oven.
Step 7: Bake
Bake for about 25-30 minutes, starting to check at 22 minutes. You want the edges to be golden and set, but the center should still look slightly soft — they firm up as they cool. The classic toothpick test works here; just a few moist crumbs (not wet batter) is perfect for that chewy vibe.
Step 8: Cool & Glaze
Let the blondies cool in the pan for 20-30 minutes before your glaze goes on. If you glaze too early, it melts right off, and your kitchen might end up stickier than your blondies! Whisk powdered sugar with milk and vanilla until smooth and pourable but thick enough to coat the back of a spoon. Drizzle over the cooled blondies, then let it set before slicing.
Step 9: Slice & Serve
Use a sharp knife (warm it in hot water then dry) to get clean cuts. Wipe it clean between slices if you want those perfect squares. I like to warm mine for a few seconds before serving, especially if it’s been refrigerated — that gooey richness shines right through!
What to Serve It With
For Breakfast: Pair with a creamy latte or a bold black coffee. These blondies have that buttery sweetness that pairs beautifully with a strong brew — my weekend morning ritual includes savouring a square alongside my steaming mug, perfect to jumpstart the day with a cozy touch.
For Brunch: Serve on a wooden board with fresh fruit, whipped cream, and a pot of herbal tea or sparkling wine if you’re feeling fancy. A sprinkle of toasted nuts adds a nice crunch, making it an elegant yet approachable option.
As Dessert: Top with a scoop of vanilla ice cream or fresh berries. If you’re hosting friends, a drizzle of caramel or chocolate sauce ups the decadence. I’ve found that a dollop of whipped cream sprinkled with a pinch of cinnamon is a quick way to impress without a lot of extra effort.
For Cozy Snacks: A cold glass of milk or hot cocoa is a classic combo. This snack is the ultimate comfort food, perfect when you want a little pick-me-up on a rainy afternoon or post-homework fuel for the kids. It’s the kind of treat that turns ordinary moments into tiny celebrations.
Top Tips for Perfecting Your Blondies
Butter Use: Don’t rush the browning step — letting the butter get a light golden color before mixing deepens the caramel flavor more than just melted butter. Just keep stirring so it doesn’t burn, and you’ll have that rich nuttiness that’s the recipe’s backbone.
Mixing: Fold dry ingredients gently to avoid tough blondies. Trust me, the first time I messed this up, I ended up with dense, chewy bars that were more like chewy bricks. The batter should be a bit lumpy but not entirely mixed — it’s all about texture.
Swirling: If you want a visual knockout, swirl in cream cheese or peanut butter right after pouring half the batter in. Less is more here; swirl lightly with a knife and don’t overdo it, or the bars won’t bake evenly.
Ingredient Swaps: Try substituting half the brown sugar with coconut sugar for a deeper, earthier flavor. Or swap all-purpose flour with a 1:1 gluten-free baking flour mix for a gluten-free version that still bakes up beautifully.
Baking Position: Bake in the center rack for even heat. If your oven runs hot, you may want to lower the temperature by 10 degrees and extend baking time slightly. Also, I learned that opening the oven door too early caused my blondies to sink — patience pays off!
Glaze: The glaze can be adjusted by adding a pinch of salt or a splash of lemon juice to cut sweetness. I’ve even mixed in a tiny bit of espresso powder to give it complexity that plays nicely with the brown sugar base.
Overall, a little patience is key! Letting the blondies cool completely before glazing and slicing makes all the difference in getting those perfect squares without crumbling. And don’t be shy—experiment and make it your own!
Storing and Reheating Tips
Room Temperature: You can keep blondies in an airtight container at room temp for up to 3 days. I usually place a sheet of parchment between layers to keep them from sticking together and keep them nice and fresh.
Refrigerator Storage: Wrap them tightly in plastic wrap or keep in a sealed container. They’ll last about 5-7 days in the fridge, but make sure to bring them back to room temp or warm gently before serving for that chewy feel.
Freezer Instructions: Blondies freeze beautifully. Wrap tightly in plastic wrap and then foil, or store in an airtight freezer bag. They’ll keep for up to 3 months. When ready, thaw overnight in the fridge or at room temperature. Heating for 10-15 seconds in the microwave brings back that fresh-baked warmth.
Glaze Timing Advice: I recommend glazing just before serving if you plan to freeze or refrigerate. The glaze can get soggy or crack when stored for too long. If you want to prepare fully ahead, keep glaze separate and drizzle fresh on slices.
Frequently Asked Questions
Final Thoughts
If you’re someone who treasures that perfect combination of chewy, soft, and buttery with a touch of caramel sweetness, these blondies will quickly find a special spot in your recipe collection. They’re so forgiving, so versatile, and above all, just downright delicious. Whether it’s a lazy weekend afternoon or a last-minute treat to brighten a busy week, these blondies have warmed my kitchen and my family’s hearts more times than I can count.
Even if you’ve made blondies before, give this recipe a shot — the browned butter and easy glaze make all the difference. Don’t hesitate to play with fillings or glazes to make it your own. If you make them, please drop a comment, share your tips, or tell me about your favorite twist. I can’t wait to hear how yours turn out!
Happy baking and sweet snacking!
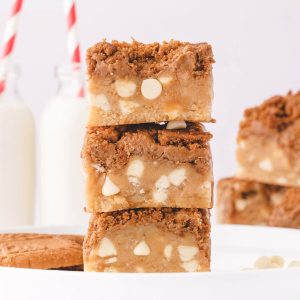
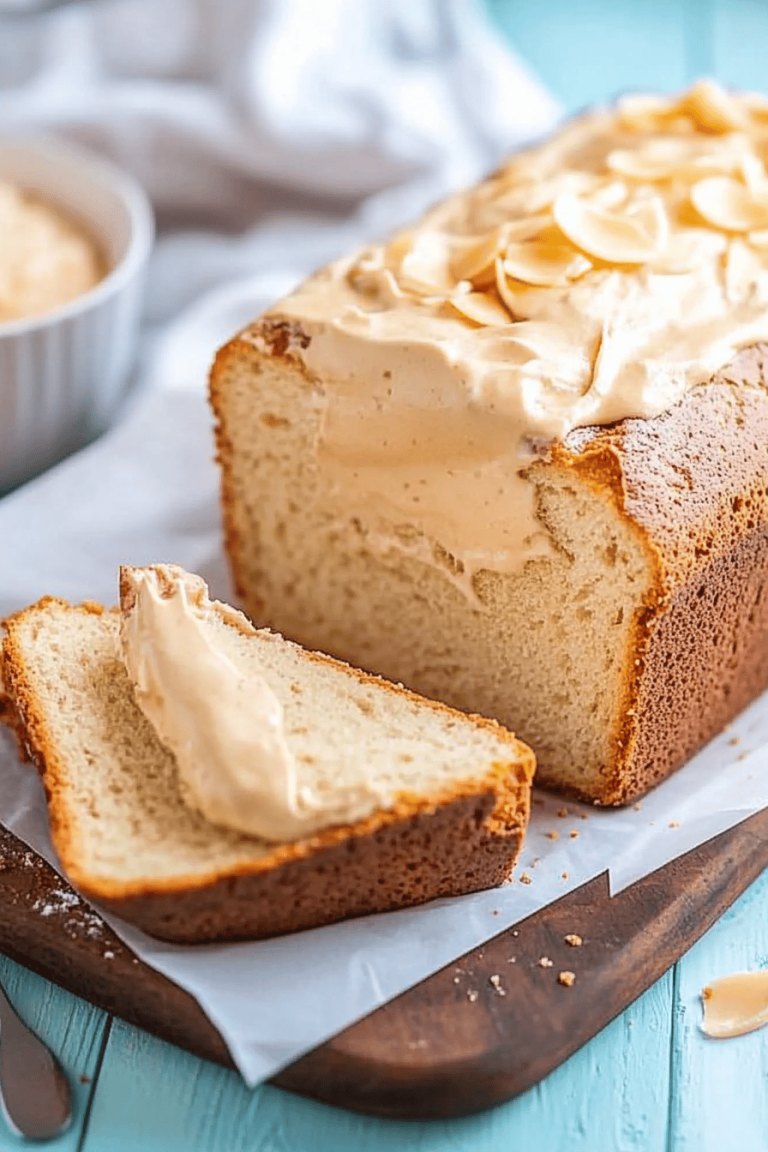
Biscoff Blondies
Ingredients
Main Ingredients
- 0.75 cup unsalted butter melted
- 0.75 cup white sugar
- 1 cup light brown sugar
- 2 large eggs
- 1 teaspoon vanilla extract
- 2 cups all-purpose flour spooned and leveled
- 1 cup white chocolate chips
- 1 cup Biscoff spread plus extra for serving
- 10 cookies Biscoff cookies chopped
Instructions
Preparation Steps
- Preheat the oven to 350°F and line an 8-inch square baking pan with parchment paper.
- In a large mixing bowl, combine the melted butter, white sugar, and brown sugar; beat on high speed until smooth.
- Add the eggs and vanilla extract and beat again on high speed until fully combined and voluminous.
- Gradually add the flour and beat on low speed until the batter is fully combined.
- Fold the white chocolate chips into the blondie batter using a spatula.
- Transfer the batter to the prepared pan and spread it evenly with the back of a spoon or an offset spatula.
- Warm the Biscoff spread in the microwave for about 30 seconds, then pour it over the blondie batter.
- Use a knife to gently swirl the Biscoff spread into the blondie mixture.
- Sprinkle the chopped Biscoff cookies on top and gently press them down with your hands.
- Bake in the center of the preheated oven for 30 minutes.
- Allow the blondies to cool completely in the pan before removing and slicing into 12 equal squares.
- Serve drizzled with warm Biscoff spread and enjoy!