Oh, friends, I am so incredibly excited to share this one with you! You know those treats that just transport you back in time? The ones that taste like pure childhood joy and comfort? This is one of them for me. It’s my Grandma’s famous chocolate wafer candy, and honestly, it’s the simplest thing in the world, but it tastes like it took hours of painstaking work. Every time I make a batch, the aroma fills my kitchen and suddenly I’m back in her cozy little house, watching her stir this magical mixture on the stove. It’s so much easier than, say, making a full-blown Chocolate Cake from scratch, but it delivers that same deep, satisfying chocolate hit. My kids devour these, and frankly, so do I. This chocolate wafer candy is seriously my go-to when that late-night craving hits but I just can’t face turning on the oven.
What is chocolate wafer candy?
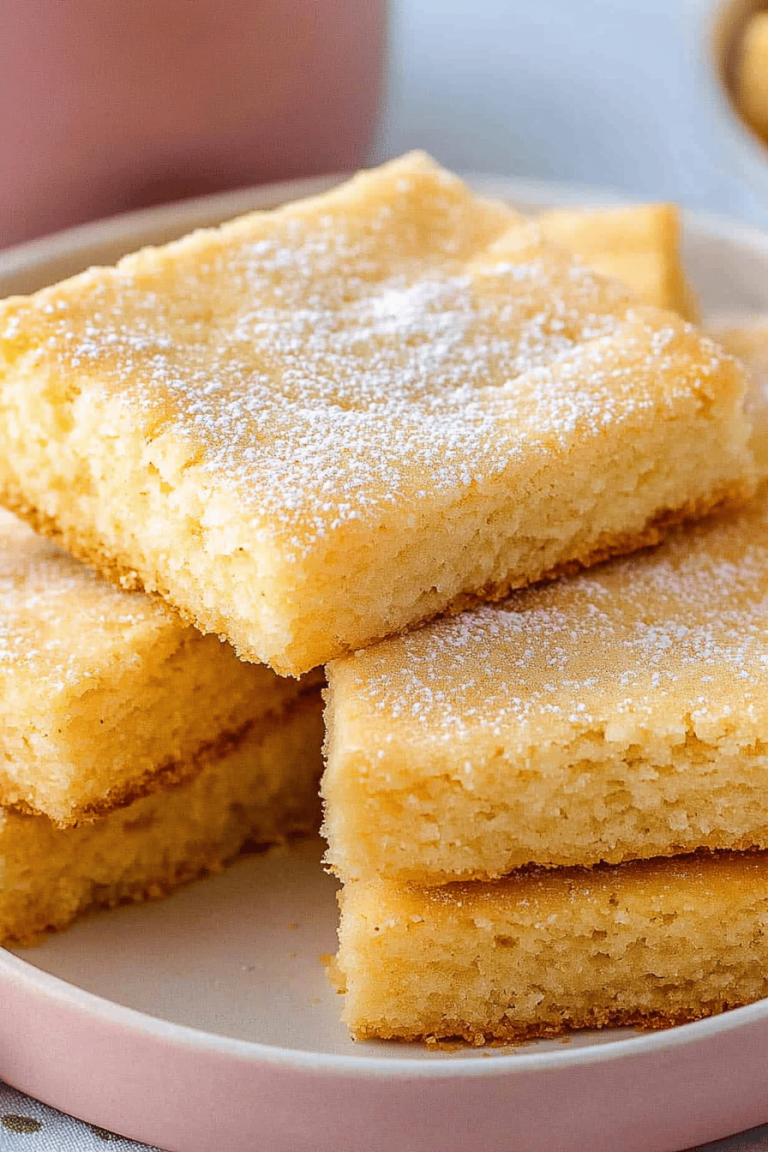
So, what exactly is this “chocolate wafer candy” we’re talking about? Well, think of it as a no-bake, intensely chocolatey, slightly fudgy, slightly chewy confection that’s held together by the magic of crushed chocolate wafers. It’s not a hard candy, and it’s not a soft fudge either – it’s perfectly in between, with a delightful texture that just melts in your mouth. The “wafer” part comes from those classic, crisp chocolate wafers you might remember from your own childhood, or perhaps from making ice cream sandwiches. We crush them up until they’re a fine crumb, and they become the backbone of this treat, absorbing all the rich chocolatey goodness. It’s a recipe that’s been passed down in my family, and while the name is simple, the taste is anything but. It’s truly a slice of happy.
Why you’ll love this recipe?
Honestly, there are so many reasons why I think this chocolate wafer candy is going to become a favorite in your home too. First off, the flavor is just out of this world. It’s got this deep, rich chocolate taste that’s not overly sweet, and when you bite into it, there’s this subtle crunch from the wafer crumbs that’s just divine. It’s like the best of a chocolate cookie and a creamy fudge had a delicious baby. And simplicity? You bet. This is a lifesaver when you’re short on time or energy. No complicated steps, no tempering chocolate, no baking required – just simple ingredients combined and set. Plus, it’s incredibly budget-friendly. The main ingredients are pantry staples, which is always a win in my book. And the versatility! You can dress this up or down. Serve it at a fancy dessert buffet, or just grab a square with your afternoon coffee. What I love most about this recipe, though, is the pure nostalgia it brings. It reminds me of simpler times and a lot of love. It’s a comfort food that truly satisfies that sweet tooth without being heavy. You might also find it similar to a no-bake cookie bar or a type of penuche, but with that unmistakable chocolate wafer flair.
How do I make chocolate wafer candy?
Quick Overview
This chocolate wafer candy comes together in a flash, truly! You’ll melt some butter and sugar, stir in cocoa powder and milk, boil it for just a few minutes until it thickens slightly, then mix in your crushed chocolate wafers and vanilla. Pour it into a prepared pan, let it set up, and that’s pretty much it! The magic happens as it cools, transforming into that perfect fudgy-chewy texture we all adore. It’s so straightforward, even the most novice baker can nail it on the first try. The key is really just not overcooking the syrup and getting those wafers mixed in quickly before it starts to set too much.
Ingredients
For the Main Batter:
Butter: 1 cup (2 sticks) unsalted butter. Using unsalted gives you better control over the saltiness of your candy. I always use good quality butter here because it really makes a difference in the richness.
Granulated Sugar: 2 cups. Standard white sugar is perfect for this. It provides the sweetness and structure we need.
Unsweetened Cocoa Powder: 1/2 cup. Please, please use a good quality cocoa powder! It’s where all the deep chocolate flavor comes from. Dutch-processed will give a darker color and smoother taste, but regular works too.
Milk: 1/2 cup. Whole milk is my preference for its richness, but I’ve tested this with 2% milk, and it works just fine. Even a non-dairy milk like almond milk can work in a pinch, though it might make it a touch less fudgy.
Vanilla Extract: 2 teaspoons. Pure vanilla extract is a must. It just elevates all those chocolate flavors.
For the Wafer Crumbs:
Chocolate Wafer Cookies: 36 cookies (about 2 sleeves). You want those classic, crisp chocolate wafers. Nabisco Famous Chocolate Wafers are what my Grandma always used, and they’re perfect. Don’t use soft sandwich cookies; you need the crisp ones for the right texture.
Step-by-Step Instructions
Step 1: Preheat & Prep Pan
First things first, get your pan ready. I like to use an 8×8 inch square baking pan. Line it with parchment paper, leaving some overhang on the sides. This makes it super easy to lift the whole block of candy out later. You can also grease the pan well if you don’t have parchment, but parchment is definitely my preferred method for easy cleanup and perfect removal.
Step 2: Mix Dry Ingredients
In a medium saucepan (a heavy-bottomed one is best to prevent scorching), combine the granulated sugar and the unsweetened cocoa powder. Whisk them together thoroughly. This step is important to make sure there are no cocoa lumps and that the sugar and cocoa are evenly distributed before you add any liquid.
Step 3: Mix Wet Ingredients
Add the butter and the milk to the saucepan with the sugar and cocoa. Place the saucepan over medium heat. Stir continuously until the butter is completely melted and everything is well combined. Bring the mixture to a boil, stirring constantly.
Step 4: Combine & Boil
Once it reaches a rolling boil, reduce the heat slightly to maintain a steady, gentle boil. This is the crucial part: you need to let it boil for exactly 3 minutes, stirring constantly. I always use a timer for this! Boiling it for the right amount of time is what ensures it sets up properly. Too short, and it will be too soft; too long, and it can get too hard.
Step 5: Prepare Wafer Crumbs
While the sugar mixture is boiling (or just before you start), get your chocolate wafers ready. You can put them in a resealable plastic bag and bash them with a rolling pin, or pulse them a few times in a food processor. You want fine crumbs, but not quite powder. A few slightly larger pieces are actually nice for texture!
Step 6: Mix in Wafers & Vanilla
As soon as your 3-minute boil is up, remove the saucepan from the heat. Immediately stir in the vanilla extract. Then, add your crushed chocolate wafer crumbs to the hot mixture. Stir everything together quickly and thoroughly until all the crumbs are moistened and evenly distributed. It will thicken up pretty fast.
Step 7: Pour & Spread
Working quickly, pour the mixture into your prepared baking pan. Use a spatula or a greased spoon to spread it out evenly into the pan. Try to get it as smooth as possible on top, but don’t stress too much about perfection; rustic is good too!
Step 8: Cool & Set
Now comes the hardest part: waiting! Let the candy cool completely at room temperature for at least 2 hours, or until it’s firm to the touch. Resist the urge to put it in the fridge to speed things up; it can sometimes make the texture a bit too hard or grainy. Patience is key for that perfect melt-in-your-mouth consistency.
Step 9: Slice & Serve
Once it’s completely set, use the parchment paper overhang to lift the whole block of chocolate wafer candy out of the pan. Place it on a cutting board and slice it into squares. I usually cut mine into about 1-inch squares, but you can make them bigger or smaller depending on your preference. Enjoy!
What to Serve It With
This chocolate wafer candy is a chameleon when it comes to serving! For breakfast? Honestly, a small square with my morning coffee is pure indulgence. It’s not too heavy, and it gives me that little chocolate boost to start the day. For a casual brunch, I like to serve it alongside fresh fruit salad and maybe some mini muffins. The richness of the candy balances out the lightness of the fruit beautifully. As a dessert, it’s a showstopper. I’ll often cut it into smaller, bite-sized pieces and arrange them on a pretty platter with some fresh raspberries or a dollop of Whipped cream. It’s the perfect ending to a meal, especially when you want something satisfying but not overly complicated. And for those cozy snack times? This is the star! It’s perfect for sharing with a friend over a cup of tea, or just for a quiet moment of self-care with a glass of cold milk. My absolute favorite way to serve it is actually just straight from the pan, still slightly warm, with a scoop of vanilla ice cream. Talk about heaven!
Top Tips for Perfecting Your Chocolate Wafer Candy
Over the years, I’ve learned a few little tricks that I think make this chocolate wafer candy even better. Here are some of my top tips:
Wafer Prep: For the best texture, don’t pulverize your wafers into dust. A few slightly larger pieces add a delightful chewiness and bite. If you’re using a food processor, pulse them just a few times. If you’re bagging them, give them a good whack with something heavy but avoid making them super fine. I find that the texture is just right when it’s somewhere between coarse sand and breadcrumbs.
Mixing Advice: Once you add the crushed wafers to the hot sugar mixture, stir quickly and thoroughly. You want to make sure all those crumbs are coated and moistened. If you let it sit for too long, it can start to set up in the pan, making it difficult to spread evenly. My rule of thumb is to get it into the prepared pan within 2-3 minutes of removing it from the heat.
Boiling Time is Key: Seriously, use a timer for that 3-minute boil. This is the most critical step for achieving the right consistency. I’ve messed this up before – let it boil for too little time, and you end up with candy that’s too soft and won’t set properly. Boil it for too long, and it can turn out hard and brittle. That 3-minute mark is golden.
Ingredient Swaps: While the classic recipe is amazing, I’ve experimented a bit. For a slightly richer flavor, I’ve tried using dark chocolate wafers, and it adds a wonderful depth. If you can’t find chocolate wafers, you *could* try crushed chocolate graham crackers, but the texture will be slightly different – a bit softer. For the cocoa, I highly recommend a good quality Dutch-processed cocoa for that deep, dark color and smooth flavor. It really makes a difference.
Baking Tips: Okay, so there’s no baking involved here, but the ‘setting’ time is just as important! Don’t rush it by putting it in the fridge. Letting it cool at room temperature for a good 2-3 hours ensures that perfect, slightly fudgy, melt-in-your-mouth texture. If it’s humid where you live, it might take a little longer to set, so just be patient.
Vanilla Boost: Adding the vanilla extract right after removing from the heat helps preserve its delicate flavor. Some people even like to add a pinch of espresso powder along with the cocoa to really enhance the chocolate notes – try it if you’re a coffee lover!
Storing and Reheating Tips
Storing this delicious chocolate wafer candy is thankfully as easy as making it! Once it’s fully set, I like to keep it at room temperature. Just make sure it’s in an airtight container. It should stay perfectly fresh and delicious for about 3-4 days. The texture is best when it’s not too cold; I find that refrigerating it can sometimes make it a bit too firm, though it’s still edible if you prefer it chilled. If you do refrigerate it, just let it sit out on the counter for about 15-20 minutes before serving to take the chill off.
If you find yourself with an abundance (which happens at my house!), it freezes beautifully. Wrap the entire block or individual squares tightly in plastic wrap, then place them in a freezer-safe bag or container. It will keep well in the freezer for up to 2 months. To thaw, simply remove it from the freezer and let it come to room temperature on the counter. It’s like a surprise treat waiting for you!
Glaze Timing Advice: Since this recipe doesn’t typically involve a glaze, the storage is pretty straightforward. However, if you *do* decide to add a drizzle of chocolate or a sprinkle of something on top after it sets, I’d recommend doing that just before serving for the best visual appeal and texture. For freezing, it’s best to leave off any decorative toppings until after thawing.
Frequently Asked Questions
Final Thoughts
There you have it – my Grandma’s cherished chocolate wafer candy! It’s a recipe that proves you don’t need a million fancy ingredients or hours in the kitchen to create something truly special and utterly delicious. This candy is more than just a sweet treat; it’s a little bite of happiness, a connection to my past, and a reliable crowd-pleaser. I hope you’ll try it and that it brings as much joy to your home as it does to mine. If you love this recipe, you might also enjoy my Easy No-Bake Chocolate Peanut Butter Bars – another fantastic treat that’s perfect for when you’re craving something sweet without the oven! I can’t wait to hear how your chocolate wafer candy turns out. Please leave a comment below and tell me your thoughts, or share any fun variations you try!
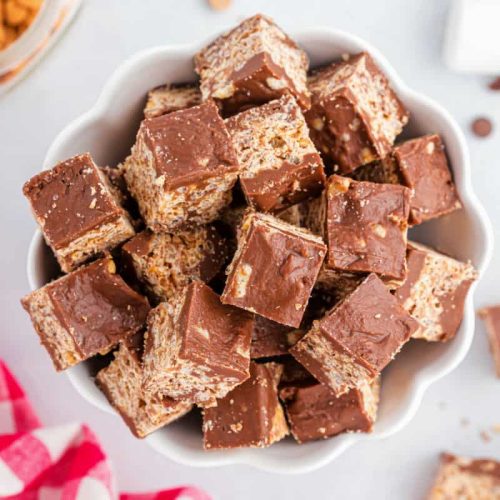
Chocolate Wafer Candy Bites
Ingredients
Candy Base Ingredients
- 0.75 cup unsalted butter
- 0.75 cup heavy cream
- 1.5 cup granulated sugar
- 25 count regular sized marshmallows
- 12 ounce milk chocolate morsels
- 1 ounce unsweetened baking chocolate
Crispy Layer & Coating
- 4.5 cup Rice Krispies cereal
- 11 ounce butterscotch morsels Melted separately
- 1 cup peanut butter morsels Melted with butterscotch
Instructions
Preparation Steps
- In a large mixing bowl, combine marshmallows, milk chocolate morsels, and baking chocolate. Set aside.
- In a large pot, bring the sugar, cream, and butter to a boil over medium-high heat. Once boiling, continue to boil for 4 minutes, stirring constantly. Remove from heat. Pour the hot mixture over the marshmallows and chocolate mixture. Using an electric mixer, beat until the chocolate has melted and the mixture is smooth (about 2 minutes).
- Melt the butterscotch and peanut butter morsels together in a microwave-safe bowl for one minute. Stir, and then heat at 30-second intervals, stirring after each, until fully melted and smooth.
- In a large bowl, combine the Rice Krispies cereal, the melted butterscotch/peanut butter mixture, and about 1/3 of the primary chocolate mixture prepared in Step 2. Mix everything completely until the cereal is well coated.
- Line a 13x9 inch baking dish with parchment paper. Pour 1/3 of the remaining chocolate mixture onto the bottom, spreading with a knife until the bottom of the dish is covered. Top with the cereal mixture and press down firmly. Pour the remaining 1/3 of the chocolate mixture over the cereal layer, spreading evenly with a knife.
- Allow the candy to set up in the refrigerator for about 1 to 2 hours. Remove from the pan and cut into bite-sized pieces. Enjoy!