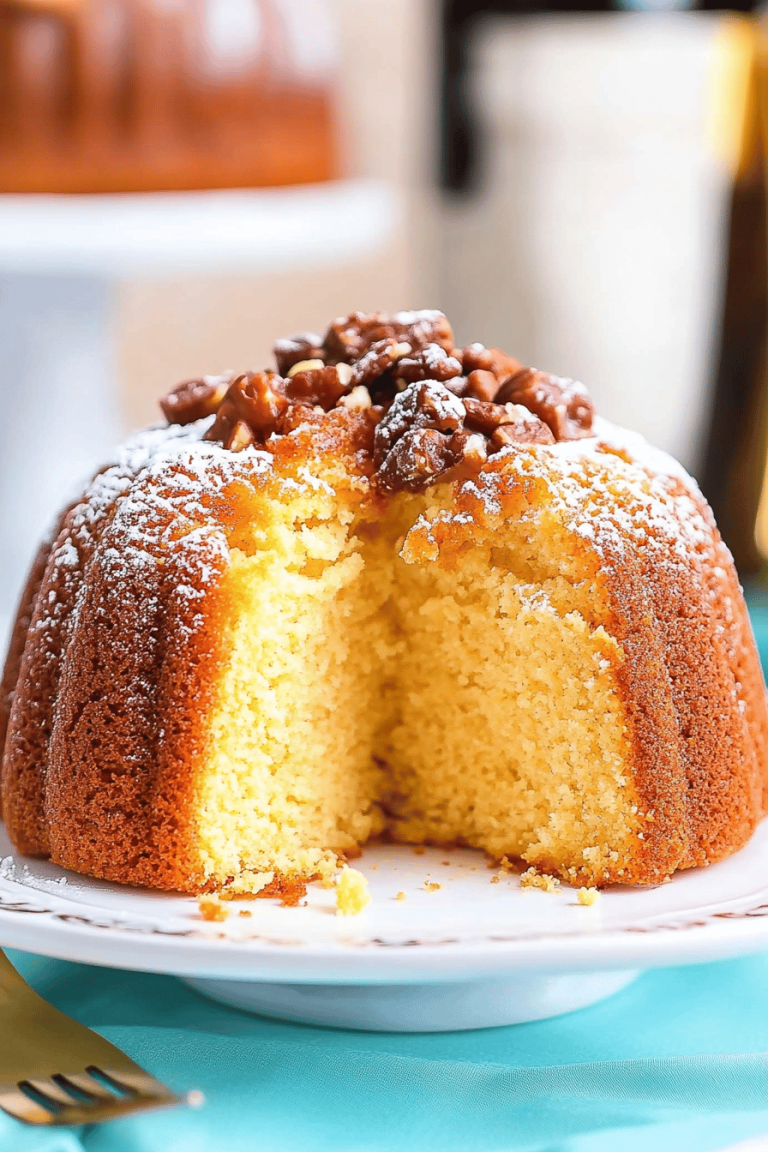
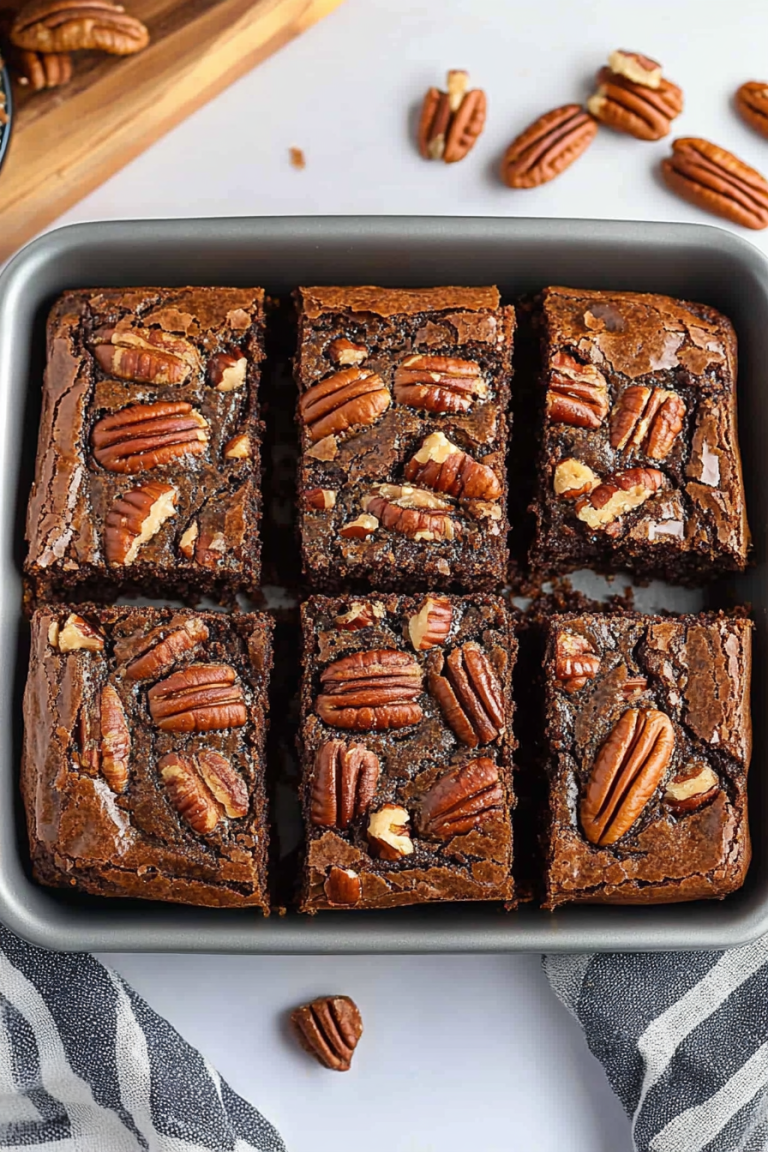
You know those days? The ones where you stare into the pantry, a little too tired to think, but desperately craving something warm, sweet, and utterly comforting? Yeah, me too. This chocolate chip Banana Bread loaf is my absolute lifesaver on those evenings. It’s not just any banana bread, though. This one has a secret weapon: a decadent swirl of gooey chocolate that takes it from “good” to “OMG, I need another slice” in about 0.2 seconds. My family devours this like it’s going out of style, and honestly, it’s become our unofficial family crest of coziness. Forget those boring, plain loaves; this is the chocolate chip banana indulgence you’ve been dreaming of, and it’s surprisingly simple to whip up, even when your energy is running on fumes. It’s the perfect hug in a loaf form, if you ask me.
What is chocolate chip banana bread?
So, what exactly is this magical creation? Think of it as your favorite, incredibly moist, perfectly ripe Banana Bread, but with a glorious, ribbon-like swirl of melted chocolate baked right into it. It’s not just chocolate chips scattered throughout; we’re talking a luscious, slightly fudgy chocolate layer that oozes out when you slice it. It’s essentially the love child of classic banana bread and a decadent chocolate cake, all rolled into one easy-to-make loaf. The “swirl” part is where the real magic happens – it’s what makes each bite a delightful surprise, a perfect balance of sweet banana and rich chocolate. It’s comfort food elevated, and the name just tells you exactly what you’re getting: pure, unadulterated chocolate chip banana bliss.
Why you’ll love this recipe?
There are so many reasons why this chocolate chip Banana bread loaf has earned a permanent spot in my recipe binder, and I just know you’re going to feel the same way. First off, the flavor. Oh, the flavor! You get that deep, natural sweetness from the ripe bananas, which also gives it this incredible moisture that’s hard to achieve with other bakes. Then, you have those pockets of melted chocolate, adding a richness that’s just divine. It’s not overly sweet, but it’s definitely indulgent enough to satisfy any craving. And the simplicity? Honestly, this is a one-bowl wonder for the most part, which is a huge win in my book. It uses common pantry staples, making it incredibly cost-efficient to whip up whenever the mood strikes. Plus, it’s super versatile. Want it for breakfast? Perfect. Craving it for dessert? Absolutely. Need a pick-me-up snack? It’s your best friend. What I love most about this recipe is the pure comfort it brings. It smells amazing while it bakes, filling the whole house with that nostalgic banana bread aroma, but with an added chocolatey twist. It’s a guaranteed crowd-pleaser, and I’ve never met anyone who didn’t ask for the recipe!
How do I make a banana bread swirl
Quick Overview
The whole process is delightfully straightforward. You’ll mash your ripe bananas, whisk together the wet and dry ingredients to form a tender batter, and then layer it with a simple, luscious chocolate filling. A quick swirl, a bake until golden and fragrant, and voilà! You’ve got a show-stopping loaf that looks and tastes like you spent hours in the kitchen, when in reality, it’s quite speedy. The key is using very ripe bananas for maximum flavor and sweetness, and not overmixing the batter, which keeps it wonderfully tender. This method ensures you get that perfect texture and that irresistible chocolate swirl in every single slice.
Ingredients
For the Main Batter:
You’ll want about 3-4 very ripe bananas. The riper, the better – we’re talking spotted, maybe even a little black! This is where all the natural sweetness and moisture comes from. Make sure they’re mashed really well. We also need all-purpose flour, about 2 cups. If you can find a good quality unbleached one, it makes a slight difference in texture, but any standard AP flour works beautifully. For leavening, we use baking soda, about 1 teaspoon. Baking soda reacts with the acidity in the bananas and the brown sugar, giving us that lovely lift and tender crumb. A pinch of salt, about half a teaspoon, to balance out the sweetness. Then, for richness and tenderness, we’ll add softened unsalted butter, about half a cup. You can also use a neutral oil like vegetable or canola oil if you prefer. Granulated sugar, about three-quarters of a cup, and for that classic banana bread depth, brown sugar, also about three-quarters of a cup. Using both sugars gives a fantastic flavor complexity. And of course, we can’t forget the eggs! Two large eggs, at room temperature, help bind everything together and add richness. Vanilla extract, a teaspoon, just enhances all those delicious flavors. And if you like, a tiny bit of cinnamon or nutmeg can be lovely, but it’s optional!
For the Filling:
This is the fun part! You’ll need about 1 cup of semi-sweet chocolate chips. I find semi-sweet gives the best balance, but you can absolutely use milk chocolate or dark chocolate if that’s your preference. To make it extra fudgy and luscious, we’ll melt these with about 2 tablespoons of unsalted butter. You can also use a tablespoon or two of heavy cream for an even richer ganache-like texture. Some people like to add a tiny pinch of espresso powder here to really make the chocolate flavor pop, but it’s totally optional.
For the Glaze:
This is technically optional, but oh-so-worth-it! A simple powdered sugar glaze is perfect. You’ll need about 1 cup of powdered sugar, and then we’ll add a liquid to thin it out. You can use milk, but I find that using some of the leftover banana flavor or even a splash of cream makes it extra special. Start with about 1-2 tablespoons and add more until you reach your desired consistency – you want it thick but pourable. A tiny splash of vanilla extract in the glaze is also a lovely touch.
Step-by-Step Instructions
Step 1: Preheat & Prep Pan
First things first, get that oven preheated to 350°F (175°C). This ensures an even bake from the moment the loaf goes in. Next, grab a standard 9×5 inch loaf pan. You have a few options for prepping it: you can grease it really well with butter or cooking spray and then lightly flour it, shaking out the excess. My personal favorite method, especially for quick breads like this, is to line it with parchment paper, leaving some overhang on the sides. This makes lifting the finished loaf out a breeze and cleanup a dream. So, grease the pan a little, lay a strip of parchment lengthwise, leaving enough to hang over both ends like handles, and then do the same on the other side. This creates a little sling for your loaf.
Step 2: Mix Dry Ingredients
In a large mixing bowl, whisk together your flour, baking soda, and salt. If you’re adding any spices like cinnamon or nutmeg, now’s the time to whisk them in too. Give it a good whisk to make sure everything is evenly distributed. This step is important because it ensures your leavening agent is spread throughout, so you don’t end up with pockets of bitterness or an uneven rise. You want it looking like a uniform, pale flour mixture.
Step 3: Mix Wet Ingredients
In a separate medium bowl, or the bowl of your stand mixer if you’re using one, cream together the softened butter and both sugars until light and fluffy. This usually takes about 2-3 minutes. Then, beat in the eggs one at a time, making sure each one is fully incorporated before adding the next. Stir in the vanilla extract and the mashed bananas. Give it a good stir until everything is well combined and you have a beautiful, lumpy banana mixture. Don’t worry about any small banana chunks; they’ll bake up nicely.
Step 4: Combine
Now, it’s time to bring the wet and dry ingredients together. Add about half of the dry ingredients to the wet ingredients and mix on low speed (or gently fold with a spatula) until just combined. Don’t overmix at this stage! Then, add the remaining dry ingredients and mix again until you no longer see streaks of dry flour. Remember, for tender banana bread, it’s crucial not to overwork the batter. A few small lumps are perfectly fine and even desirable. Overmixing develops the gluten too much, which can lead to a tough, dense loaf.
Step 5: Prepare Filling
While your batter is resting, let’s get the chocolate filling ready. In a microwave-safe bowl, combine your chocolate chips and the butter (or cream). Microwave in 30-second intervals, stirring well after each interval, until the chocolate is smooth and melted. Be careful not to overheat it, as chocolate can seize up. Alternatively, you can melt them gently in a double boiler over simmering water. You want a smooth, thick, but pourable consistency. If it’s too thick, stir in another teaspoon of butter or cream. This rich chocolate mixture is what creates those irresistible swirls!
Step 6: Layer & Swirl
Pour about half of the banana batter into your prepared loaf pan and spread it out evenly. Then, carefully spoon about half of the melted chocolate mixture over the batter. Don’t worry about perfection; you want to dollop it in irregular patches. Now, spoon the remaining banana batter over the chocolate layer, again spreading it as evenly as possible. Finally, dollop the rest of the melted chocolate mixture on top. Now for the fun swirl! Grab a butter knife or a skewer and gently swirl the chocolate into the batter. Don’t over-swirl; you want distinct ribbons of chocolate, not a uniform brown mixture. A few gentle passes through the batter are all you need. Make sure to go down to the bottom of the pan in a few places to get those deep swirls.
Step 7: Bake
Place the loaf pan in the preheated oven. Bake for about 50-65 minutes. The exact time will depend on your oven, so start checking around the 50-minute mark. You’ll know it’s done when a wooden skewer or toothpick inserted into the center of the loaf comes out clean or with just a few moist crumbs attached (but no wet batter). The top should be beautifully golden brown, and the edges should be starting to pull away slightly from the sides of the pan. If the top is browning too quickly before the center is cooked, you can loosely tent it with foil.
Step 8: Cool & Glaze
Once baked, carefully remove the loaf pan from the oven and let it cool in the pan for about 10-15 minutes. This allows the loaf to set up properly. Then, using the parchment paper overhangs, gently lift the loaf out of the pan and transfer it to a wire rack to cool completely. Resist the urge to cut into it while it’s hot; it needs to cool for the flavors to meld and the texture to firm up. Once it’s completely cool, you can prepare your glaze if you’re using one. Whisk together the powdered sugar with milk or cream and vanilla until smooth and pourable. Drizzle it over the top of the cooled loaf, letting it drip down the sides. Let the glaze set for a bit before slicing.
Step 9: Slice & Serve
Once the glaze has set (or if you skipped the glaze), it’s time to slice and enjoy! Use a sharp serrated knife for the cleanest cuts. You’ll see those beautiful swirls of chocolate within the tender banana bread. Serve at room temperature for the best texture and flavor. This loaf is fantastic on its own, but a little smear of butter can be divine, especially if you haven’t added the glaze. Enjoy every delicious bite!
What to Serve It With
This chocolate chip banana bread loaf is so versatile, it fits into almost any meal or snack time. For a truly decadent breakfast, I love serving a thick slice warm, perhaps with a dollop of Greek yogurt or a light smear of cream cheese. The tanginess of the yogurt or cream cheese is a wonderful contrast to the sweetness. Coffee, of course, is a must. A good strong brew or even a latte pairs beautifully. For a more elaborate brunch spread, I like to dress it up a bit. Think of it as part of a buffet alongside fresh fruit salad, maybe some crispy bacon, and a fluffy omelet. A sprinkle of powdered sugar or a light drizzle of honey on top before serving can elevate its presentation. As a dessert, it’s pure indulgence. It’s fantastic on its own, but if you’re feeling fancy, a scoop of vanilla bean ice cream or a drizzle of warm chocolate ganache takes it to another level. For those cozy, quiet moments, like a mid-afternoon snack or a late-night treat, it’s perfect simply enjoyed with a glass of cold milk. It’s that comforting, familiar flavor that just makes everything feel right. My family loves it after school with a glass of milk, and honestly, sometimes it’s dessert after dinner too. It’s that kind of recipe – always welcome, always delicious.
Top Tips for Perfecting Your Chocolate Chip Banana Bread Swirl Loaf
Over the years, I’ve picked up a few tricks that make this chocolate chip banana bread loaf even better. For the zucchini prep, though this recipe doesn’t call for it, if you ever find yourself with very watery bananas, just give them a quick squeeze after mashing to remove excess liquid, especially if they’re overly ripe. For mixing the batter, the biggest tip is hands-down: do NOT overmix. Mix until just combined. Overmixing develops the gluten, making your loaf tough and dense instead of tender and moist. If you see a few little lumps of flour, that’s okay! Trust me on this one. When it comes to the swirl customization, don’t go crazy. A few gentle passes with a knife are all you need to create those beautiful ribbons of chocolate. You want visible swirls, not a muddy mess. Experiment with different types of chocolate for the filling – dark chocolate adds a richer, more intense flavor, while milk chocolate makes it sweeter and creamier. For baking tips, always know your oven. If your oven tends to run hot, reduce the temperature slightly or start checking for doneness a little earlier. Using the parchment paper sling is a lifesaver for easy removal. And for glaze variations, if you want something a little different, try a maple glaze or even a cream cheese frosting. I once tried adding a touch of orange zest to the banana batter, and it was surprisingly delicious! Another thing I learned: if your bananas are *super* moist, you might need to add an extra tablespoon or two of flour to keep the batter from being too wet. It’s all about balancing those moisture levels.
Storing and Reheating Tips
Keeping this chocolate chip banana bread loaf fresh is pretty straightforward. At room temperature, it will stay delicious for about 2-3 days, especially if it’s kept in an airtight container or well-wrapped in plastic wrap. I usually just leave it on the counter, and it disappears quickly enough that it doesn’t have time to go stale. If you need to store it for longer, the refrigerator is your best bet. Wrap it tightly in plastic wrap, then in foil, or place it in an airtight container. It can stay fresh in the fridge for up to a week. Just be aware that refrigeration can sometimes dry out baked goods a little, so reheating is often a good idea. For freezing, this loaf holds up incredibly well! Wrap it very, very tightly in plastic wrap, then in a layer of aluminum foil, or place it in a freezer-safe bag. It can last in the freezer for up to 2-3 months. To thaw, simply unwrap it and let it come to room temperature on the counter for a few hours. If you want to reheat it, I love popping a slice into a toaster oven or a regular oven at around 300°F (150°C) for about 5-10 minutes, just until warmed through. It makes it taste freshly baked again! If you’ve added glaze, it’s often best to add that *after* reheating or serving if you plan to store leftovers for an extended period, as the glaze can sometimes get a bit sticky or melty with prolonged storage.
Frequently Asked Questions
Final Thoughts
So there you have it – my absolute favorite chocolate chip banana bread swirl loaf! I really hope you give this recipe a try. It’s more than just a recipe to me; it’s a taste of home, a reliable source of comfort, and a guaranteed way to bring smiles to everyone’s faces. It’s the perfect blend of familiar banana bread goodness and that irresistible chocolatey decadence. If you love this, you might also enjoy my classic moist banana bread or my chocolate zucchini bread – they’re both winners in my kitchen! Please, let me know in the comments below how yours turns out, or if you try any fun variations. I’m always eager to hear your baking adventures! Happy baking, my friends!
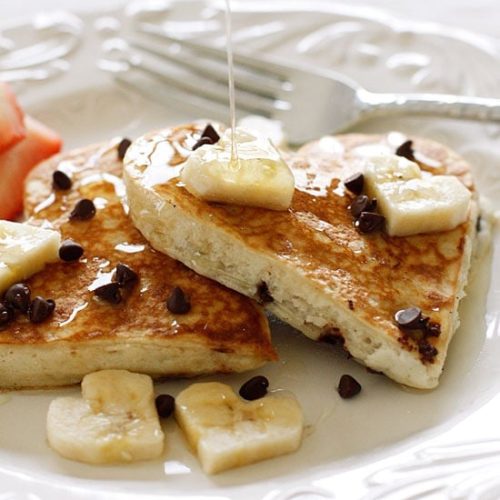
Heart-Shaped Chocolate Chip Banana Pancakes
Ingredients
Main Ingredients
- 1 cup unbleached or white whole wheat flour (blend is fine)
- 2 tsp baking powder
- 0.25 tsp salt
- 1 large ripe banana mashed well
- 1 cup 1% milk (or almond milk)
- 3 large egg whites
- 2 tsp oil
- 1 tsp vanilla extract
- 0.25 cup mini chocolate chips
- cooking spray for the skillet
Instructions
Preparation Steps
- Mix all dry ingredients (flour, baking powder, salt) in a bowl.
- Combine milk, egg whites, oil, vanilla, and mashed banana in another medium-sized bowl and mix until smooth.
- Combine wet ingredients with the dry and mix well with a wooden spoon until there are no more dry spots. Do not over-mix.
- Heat a large skillet on medium-low heat. If using a heart-shaped pancake mold, lightly spray it with cooking spray.
- Lightly spray the skillet with cooking spray, place the mold on the hot skillet, and pour 1/4 cup of pancake batter.
- Add 1 teaspoon of chocolate chips to each pancake.
- When the pancake starts to bubble and the edges begin to set, flip the pancakes. Repeat with the remainder of the batter.