Oh, this Butterbeer Fudge! It’s one of those recipes that just makes my heart happy. Every time I whip up a batch, it’s like a little trip back to my childhood, wrapped in the comforting scent of warm caramel and Brown Sugar. It’s ridiculously easy to make, which is a lifesaver on those busy weeknights when the sweet craving hits hard, or when unexpected guests pop over. Honestly, it’s so simple, you might think I’m pulling your leg, but trust me, the results are pure magic. It’s got that distinctive butterbeer flavor that’s subtly sweet, incredibly creamy, and just… well, enchanting! If you’ve ever loved those frothy, delicious butterbeer drinks, you’re going to be utterly smitten with this fudge. It’s like capturing that cozy, magical feeling in a bite-sized square. I’ve tried a lot of fudge recipes over the years, and while many are good, this one has a special place in my baking heart, right up there with my Grandma’s apple pie.
What is Butterbeer Fudge?
So, what exactly is this magical Butterbeer Fudge? Think of it as a no-bake, incredibly decadent treat that captures all the delightful flavors of that famous wizarding world beverage, but in a chewy, melt-in-your-mouth fudge form. It’s essentially a sweet, creamy confection infused with the warm, nostalgic notes of butterscotch, caramel, and a hint of cream soda – the signature taste profile of butterbeer. The name comes directly from that iconic drink, and this fudge aims to replicate that cozy, sweet, and slightly caramel-y essence without the need for a magical wand. It’s not overly complicated; it’s a straightforward combination of simple ingredients that come together to create something truly special. It’s the kind of treat that makes you want to curl up with a good book (or maybe rewatch your favorite fantasy movies) and savor every single bite. It’s pure comfort food, elevated!
Why you’ll love this recipe?
There are so many reasons why this Butterbeer Fudge is an absolute winner in my kitchen, and I just know you’re going to fall head over heels for it too. First and foremost, let’s talk about the flavor. It’s an absolute dream! You get that warm, buttery caramel undertone, a subtle sweetness that’s not overwhelming, and a creamy richness that just coats your tongue. It’s genuinely reminiscent of sipping on a cold butterbeer on a sunny day, but condensed into this perfect, portable bite. And the texture? Oh my goodness. It’s smooth, it’s dense, and it melts beautifully in your mouth. It’s not at all grainy, which is a common fudge pitfall, and that’s something I always strive for.
Secondly, the simplicity of this recipe is a game-changer. We’re talking minimal ingredients and a process that doesn’t require a candy thermometer or hours of stirring over a hot stove. This is a lifesaver on busy days or when you’re suddenly tasked with bringing a treat to a potluck. I’ve made it with kids helping, and they absolutely love being involved in the mixing and swirling. It’s also surprisingly budget-friendly! You probably have most of the ingredients in your pantry already. No fancy, hard-to-find items here.
What I love most about this Butterbeer Fudge, though, is its versatility. It’s fantastic on its own, of course, but it’s also wonderful for gifting. Imagine packaging these up for a birthday or as a holiday treat – they always get rave reviews! They’re perfect for themed parties, movie nights, or just as a little pick-me-up. It’s also a fantastic recipe to experiment with. Want a little more caramel? Add some caramel extract. Craving a richer butterscotch note? A touch more of that extract does the trick. It truly is a recipe that keeps on giving. It’s the kind of sweet treat that brings a little bit of everyday magic into your life, and who couldn’t use more of that?
How do I make Butterbeer Fudge?
Quick Overview
This Butterbeer fudge recipe is designed for maximum flavor with minimum fuss. You’ll simply combine melted butter and sugar, then whisk in your creamy ingredients and flavorings before a brief heating stage. The magic happens when you swirl in the butterscotch and caramel layers, creating beautiful ribbons of flavor. It’s then poured into a prepared pan to set. The entire process from start to finish, including setting time, is remarkably quick, making it perfect for spontaneous sweet cravings or last-minute dessert needs. You don’t need to be a master confectioner to achieve incredible results; just follow these simple steps and you’ll have a batch of pure deliciousness.
Ingredients
For the Main Fudge Base:
3 cups granulated sugar (I find standard granulated sugar works best for texture)
1 cup (2 sticks) unsalted butter, cut into pieces (using unsalted lets you control the salt)
1 (12-ounce) can evaporated milk (this gives it that signature creamy, rich texture; avoid condensed milk here!)
1 teaspoon vanilla extract
1/4 teaspoon salt (enhances all the flavors)
For the Butterbeer Swirl:
1/2 cup packed light brown sugar (for that deep caramel note)
1/4 cup butterscotch chips (these are crucial for the butterscotch essence!)
1 tablespoon milk (any kind works, just to help melt the chips smoothly)
1/2 teaspoon butterscotch extract (optional, but it really amps up the flavor if you have it!)
For the Caramel Swirl:
1/4 cup caramel sauce (store-bought or homemade works great, just make sure it’s a good, thick one)
Step-by-Step Instructions
Step 1: Preheat & Prep Pan
First things first, get your pan ready! Line an 8×8 inch square baking pan with parchment paper, leaving an overhang on the sides. This makes lifting the fudge out so much easier later. You don’t need to grease it because the parchment will do all the work. I usually do this while my ingredients are all measured out and ready to go.
Step 2: Mix Dry Ingredients
In a large, heavy-bottomed saucepan, combine the granulated sugar, unsalted butter pieces, and evaporated milk. This is where the magic really starts to build. Stir them together gently over medium heat until the butter is completely melted and the sugar has dissolved. It’s important to stir this mixture fairly constantly so nothing scorches on the bottom of the pan.
Step 3: Mix Wet Ingredients
Once the butter is melted and the sugar is dissolved, bring the mixture to a rolling boil over medium heat. This means a boil that doesn’t stop when you stir. You’ll need to boil it for exactly 4 minutes, stirring constantly. Timing is key here! Too short and it won’t set properly, too long and it can become grainy. After 4 minutes, immediately remove the pan from the heat.
Step 4: Combine
Now, stir in the vanilla extract and the salt. Give it a good whisk until everything is well combined. The mixture should look smooth and glossy. This is the base of your delicious Butterbeer Fudge. Be careful as it will be very hot!
Step 5: Prepare Filling
While the main fudge mixture is still hot (but after removing it from the heat), prepare your swirls. In a small microwave-safe bowl, combine the brown sugar, butterscotch chips, and tablespoon of milk. Microwave in 20-second intervals, stirring after each, until smooth and melted. If you’re using butterscotch extract, stir it in now. This mixture should be thick but pourable.
Step 6: Layer & Swirl
Pour about two-thirds of the main fudge mixture into your prepared pan. Then, drizzle the melted butterscotch mixture evenly over the top. Next, drizzle the caramel sauce over the butterscotch. Finally, pour the remaining one-third of the main fudge mixture over everything. Now comes the fun part: using a knife or a skewer, gently swirl the layers together. You want to create ribbons, not completely mix it all up. Don’t overdo it, or the distinct layers will disappear!
Step 7: Bake
This fudge doesn’t bake in the traditional sense. Once it’s swirled, you’ll let it sit at room temperature. This allows it to set up beautifully. The “baking” here is really just the setting process. I usually let it sit for at least 3-4 hours, or until it’s firm to the touch. For best results, I like to let it chill in the refrigerator for about an hour before slicing, especially if I’m in a hurry.
Step 8: Cool & Glaze
The setting process is crucial. Once it feels firm, you’ll lift it out of the pan using the parchment paper overhang. You can then place it on a cutting board. At this stage, it doesn’t need a glaze; the swirls provide all the decorative and flavor elements. Just ensure it’s completely set before you attempt to slice it.
Step 9: Slice & Serve
Once the fudge is completely firm, use the parchment paper to lift it onto a clean cutting board. Use a sharp knife to cut it into squares. I usually aim for 1-inch squares, but you can make them as big or as small as you like. Wipe the knife clean between cuts for the neatest edges. Serve immediately or store as directed. It’s best enjoyed at room temperature, where the flavors really bloom.
What to Serve It With
This Butterbeer Fudge is truly a standalone star, but it can also be a delightful addition to a spread or paired with specific beverages. Here are some of my favorite ways to enjoy it:
For Breakfast: While it sounds like a dessert, a small piece of this fudge alongside a really good cup of strong coffee is surprisingly divine. It cuts through the richness of the coffee and offers a sweet start without being over the top. I sometimes crumble a tiny bit over plain yogurt for an extra special morning treat. It’s a little indulgence that feels perfectly acceptable on a relaxed weekend morning.
For Brunch: If you’re hosting a brunch, this fudge is an absolute showstopper on a dessert platter. It adds a touch of whimsy and a unique flavor profile that guests will adore. Pair it with other sweet treats like scones, mini muffins, or Fruit salad. For beverages, a sparkling cider or a light, fruity tea complements its sweetness beautifully.
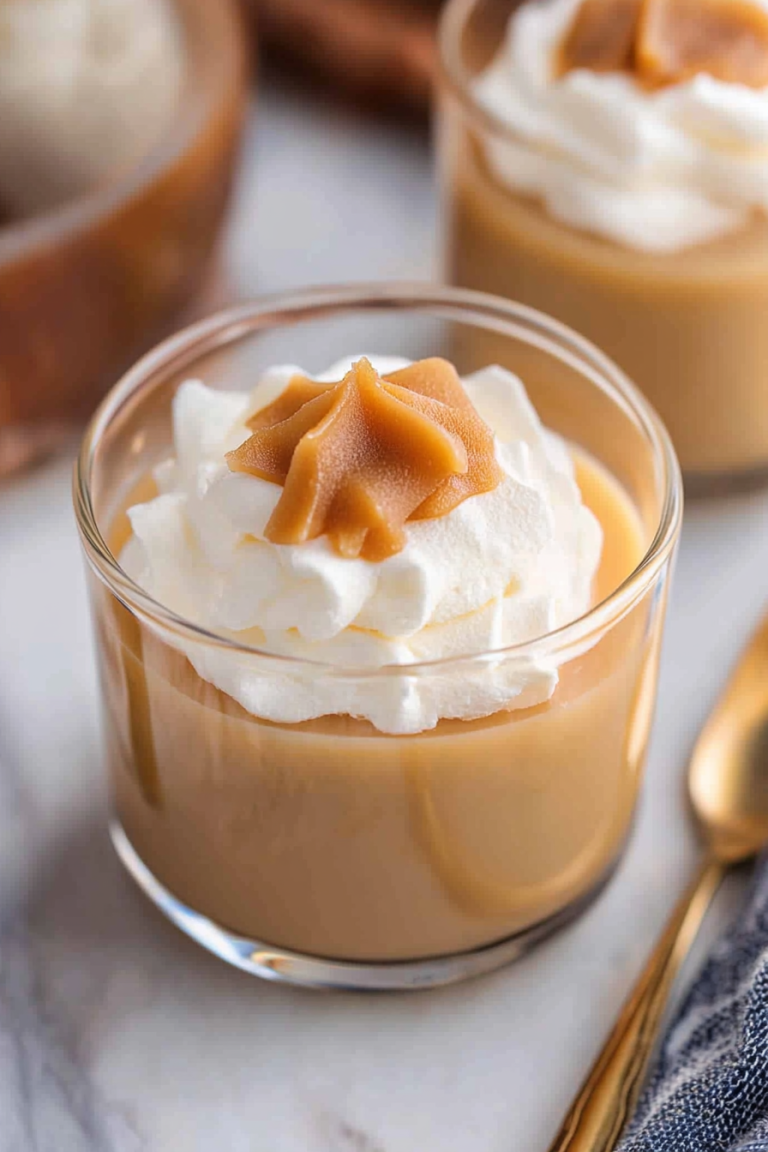
As Dessert: This is its natural habitat, right? Serve it after a hearty meal. I love to present it on a small plate with a dollop of whipped cream or a scoop of vanilla bean ice cream. The contrast of the warm, rich fudge with cool, creamy ice cream is just heavenly. A drizzle of extra caramel sauce over the top wouldn’t hurt either!
For Cozy Snacks: This is my family’s go-to for movie nights or just an after-school snack. It’s comforting, delicious, and so easy to share. My kids always ask for seconds, so I often make a double batch! It’s perfect with a cold glass of milk or a warm mug of hot chocolate. Honestly, it’s the perfect bite-sized escape on a chilly afternoon.
I’ve found that the key is moderation; a small piece is incredibly satisfying. My kids love to nibble on it while they’re doing homework, and it always seems to brighten their mood. It’s just a little bit of everyday joy in a bite.
Top Tips for Perfecting Your Butterbeer Fudge
Over the years, I’ve learned a few tricks that make this Butterbeer Fudge absolutely foolproof and consistently delicious. It’s all about paying attention to a few key details. Here are my top tips to ensure your fudge turns out perfectly every time.
Sugar and Butter Melting: Make sure your butter is fully melted and the sugar is completely dissolved before you bring the mixture to a boil. If you feel any sugar granules when you stir it initially, keep stirring over low heat until it’s smooth. Undissolved sugar is the main culprit for grainy fudge.
The Boil is Crucial: That 4-minute rolling boil is non-negotiable. Use a timer! Don’t guess. A rolling boil that doesn’t stop when you stir is important. This ensures the fudge cooks to the correct stage to set properly. Be sure to stir constantly during this time to prevent scorching. It smells amazing as it cooks, but try not to let that distract you from the timer!
Removing from Heat: Once the 4 minutes are up, take the pan off the heat immediately. Continuing to cook it even slightly after the time is up can lead to a tougher texture or crystallization. Stirring in the vanilla and salt right away helps to cool it down just enough to prevent overcooking.
Swirling Technique: For the swirls, you want distinct ribbons of flavor. Don’t over-swirl! Think about gently dragging a knife or skewer through the layers a few times. You’re aiming for beautiful marbling, not a uniform color. If you swirl too much, the flavors will blend too much, and you’ll lose that visual appeal. I like to do just 3-4 gentle passes through the pan.
Setting Time Matters: Patience is a virtue, especially with fudge. Let it set completely. Rushing this step will result in soft, messy fudge. If you’re short on time, chilling it in the refrigerator for an hour or so after it’s mostly set can speed things up, but room temperature setting usually yields the best texture. I often make mine the night before and slice it in the morning.
Ingredient Swaps: While this recipe is fantastic as is, if you find yourself without evaporated milk, a good quality full-fat coconut milk can work in a pinch, though it will impart a slight coconut flavor. For the butterscotch chips, you can use regular chocolate chips if you absolutely must, but you’ll lose that signature butterscotch punch. For the caramel, any thick, pourable caramel sauce will do. If it’s too thin, it might make the fudge too soft. I’ve tested this with almond milk and it actually made it a bit too soft, so I stick to regular dairy for this one.
Cutting for Clean Slices: A sharp knife is your best friend here. Wipe it clean with a damp cloth between each cut. This prevents sticky residue from building up and ensures you get those lovely, clean edges. If the fudge is too soft, popping it in the fridge for 15-20 minutes before slicing can help firm it up.
Storing and Reheating Tips
Properly storing your delicious Butterbeer Fudge will ensure it stays delicious for days. I’ve found a few methods that work best:
Room Temperature: This is my preferred method for short-term storage. Once the fudge is completely set, cut it into squares and store them in an airtight container. It will stay fresh and delicious at room temperature for about 3-4 days. Make sure the container is truly airtight to prevent it from drying out or absorbing unwanted odors.
Refrigerator Storage: If your kitchen is particularly warm, or if you want it to last a bit longer, you can store it in the refrigerator. Place the cut fudge squares in an airtight container, separating layers with parchment paper if needed. It should stay good in the fridge for up to a week. Keep in mind that refrigeration can sometimes slightly firm up the texture, so let it sit at room temperature for about 15-20 minutes before enjoying for the best taste and texture.
Freezer Instructions: For longer storage, the freezer is your best bet. Wrap individual squares tightly in plastic wrap, then place them in a freezer-safe bag or container. Properly wrapped, Butterbeer Fudge can be frozen for up to 2-3 months. To thaw, unwrap the fudge and place it on a plate to thaw at room temperature. It’s best to do this gradually to prevent condensation.
Glaze Timing Advice: Since this fudge doesn’t have a separate glaze but rather swirls, the “glaze timing” really refers to when you ensure the fudge is fully set before cutting and storing. For all storage methods, it’s crucial that the fudge is completely firm and set before you cut it and put it away. If it’s still soft when you store it, it can lose its shape and become messy.
I’ve noticed that fudge stored at room temperature generally has the best, melt-in-your-mouth quality, but the fridge and freezer methods are great for keeping it fresh for longer periods. Just remember to let it come back to room temperature a bit before diving in for the ultimate enjoyment.
Frequently Asked Questions
Final Thoughts
There you have it – my absolute favorite Butterbeer Fudge recipe! I truly hope you give this one a try. It’s more than just a sweet treat; it’s a little piece of joy, a burst of cozy flavor that always brings a smile to my face. The ease of making it, the incredible taste, and the way it brings a little bit of magic into your day are what make it so special to me. Whether you’re a lifelong Harry Potter fan or just someone who appreciates a really, really good piece of fudge, I promise this recipe will not disappoint. It’s become a staple in my kitchen, and I’m so excited for you to make it a staple in yours too.
If you loved this Butterbeer Fudge, you might also enjoy my other no-bake treats or my recipes inspired by popular flavors. Keep an eye on the blog for more easy and delightful recipes coming your way soon! I can’t wait to hear what you think. Please, please leave a comment below and let me know how your Butterbeer Fudge turned out, or if you have any special variations you tried! Sharing your creations makes my day. Happy baking, everyone!
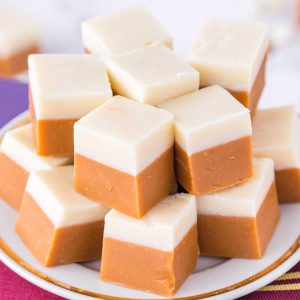
Butterbeer Fudge
Ingredients
Butterbeer Fudge Layer (Bottom Layer)
- 10 tbsp salted butter 1 ¼ sticks
- 4 ounces marshmallow crème ¾ cup (a little over half the 7 ounce jar)
- 0.75 cup sweetened condensed milk
- 0.5 cup granulated white sugar
- 0.25 cup caramel ice cream syrup/topping
- 1 cup butterscotch chips from an 11 ounce bag
White Chocolate Layer (Top Layer)
- 0.5 cup granulated white sugar
- 0.5 cup salted butter 1 stick
- 3 ounces marshmallow crème A little over ½ cup (the rest of the 7 ounce jar)
- 0.25 cup sweetened condensed milk
- 1 cup white chocolate chips
Instructions
Preparation Steps
- Line an 8x8 inch baking dish with parchment paper that has been sprayed with cooking spray and set aside.
- To make the bottom Butterbeer Fudge Layer: In a medium sized saucepan over medium high heat, heat up the salted butter, marshmallow crème, sweetened condensed milk, granulated white sugar, and caramel syrup, stirring constantly.
- Once the mixture starts to boil, set a timer for 4 minutes, and stir the mixture thoroughly for the entire time. The mixture should turn a golden-brown color.
- At 4 minutes, the butterbeer fudge layer will start to thicken. Add in the butterscotch chips and mix until smooth.
- Remove from the heat and keep whisking the mixture for another 1-2 minutes. It should continue to thicken, but not enough that it won’t pour.
- Pour into an 8x8 pan and set in the freezer to chill.
- To make the white chocolate layer: Use another saucepan to heat up the granulated white sugar, salted butter, marshmallow crème, and sweetened condensed milk, stirring continuously.
- Once the mixture starts to boil, turn the heat down to medium and set a timer for 2 minutes, and stir the mixture constantly.
- Take the pan off heat and incorporate the white chocolate chips until melted. Do not overstir as white chocolate tends to seize very easily.
- As soon as the chocolate has melted, immediately pour white chocolate over the butterscotch layer and gently smooth to the edges.
- Place fudge in either the refrigerator for 2-3 hours or freezer for an hour until completely set and chilled.
- Cut into small 1-inch cubes and serve.