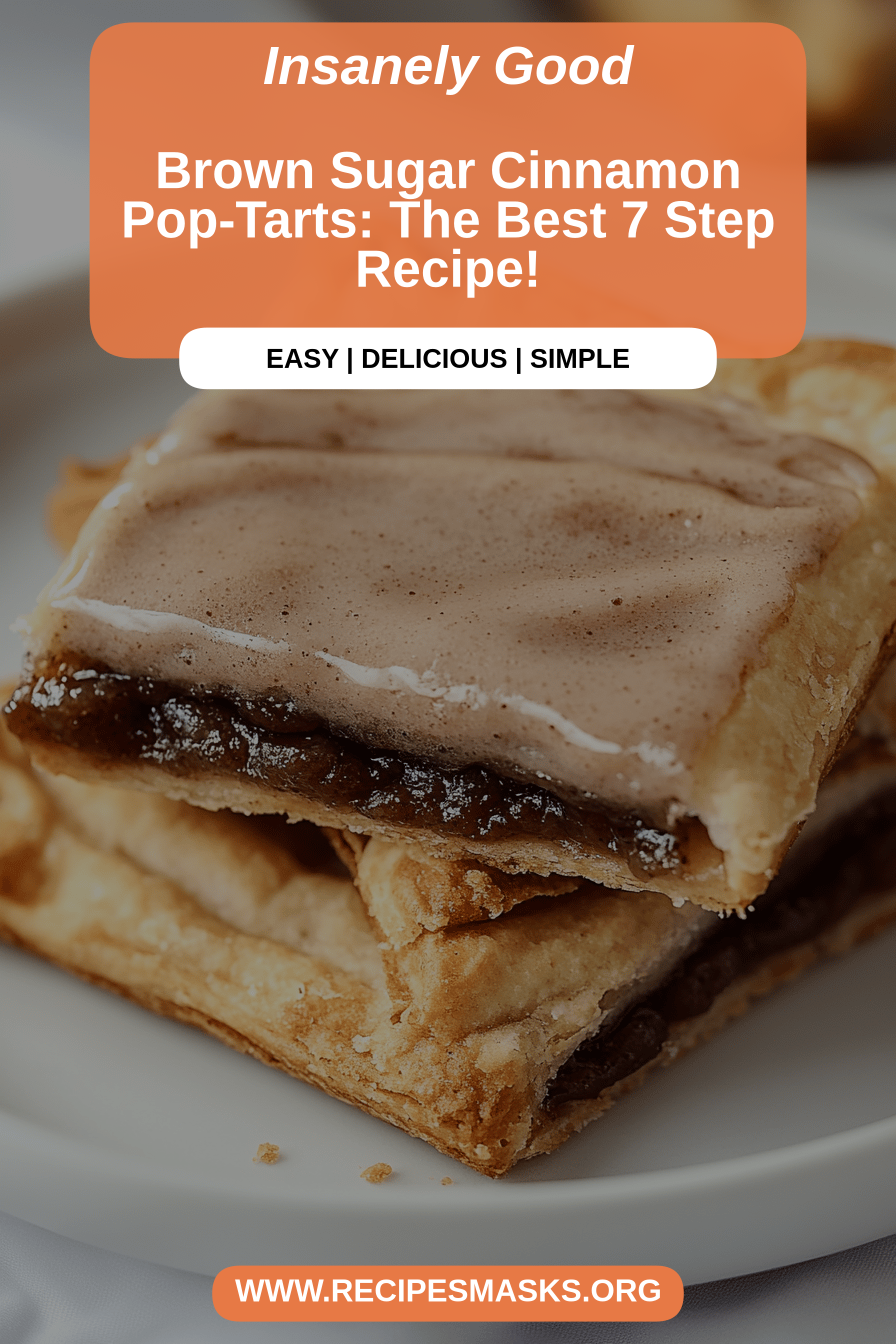
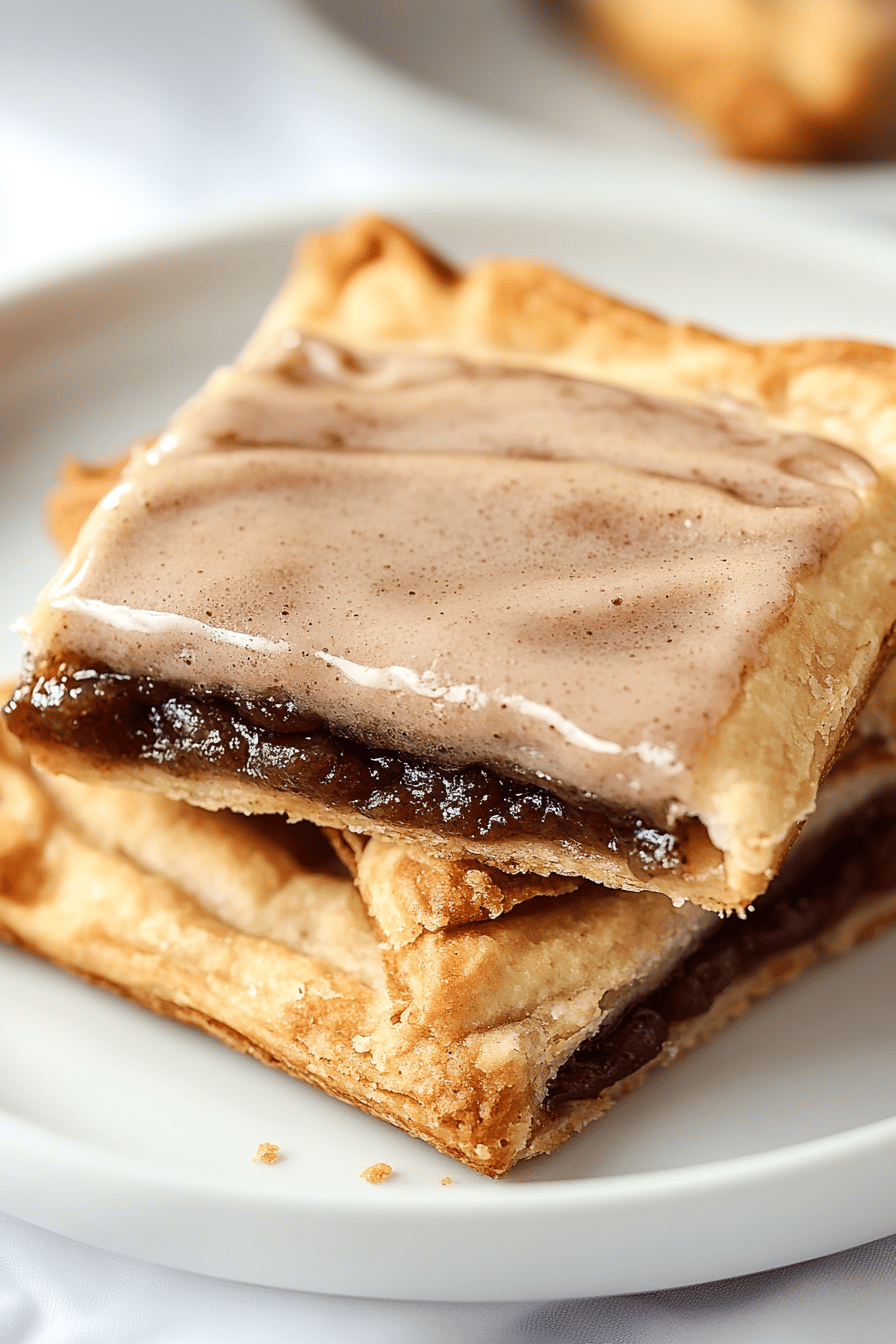
Oh, where do I even begin with these brown sugar Pop-Tarts? It feels like just yesterday my mom would whip these up on Saturday mornings, and the smell of warm, caramelized brown sugar and sweet pastry would fill our entire house. It was our little ritual, a comforting start to the weekend that I still crave whenever I need a pick-me-up. Honestly, the store-bought ones just don’t compare. They’re fine in a pinch, I guess, but they lack that soul, that homemade goodness that makes you feel truly happy. This recipe, my friends, is the real deal. It’s my go-to when I’m feeling nostalgic, or when I just need something incredibly satisfying without a whole lot of fuss. If you love those classic brown sugar cinnamon flavors, get ready, because these are going to blow your socks off. It’s like a warm hug in pastry form, and I can’t wait to share it with you.
What is brown sugar pop-tart?
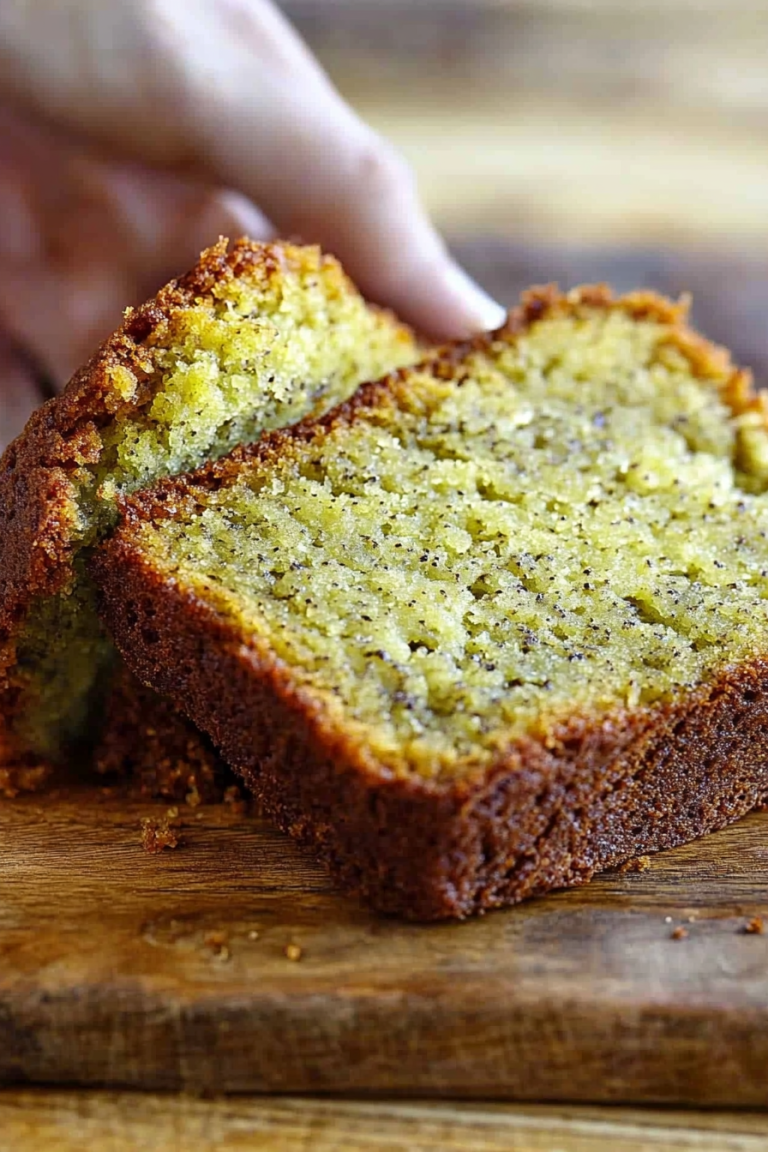
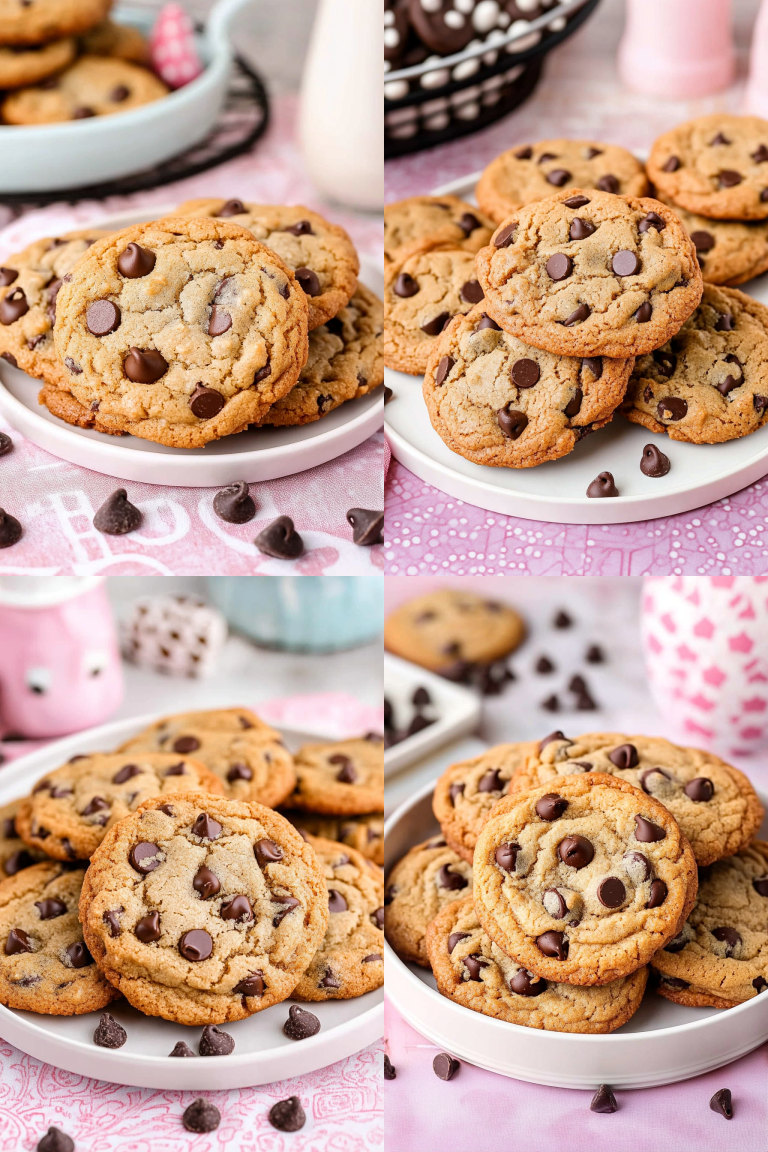
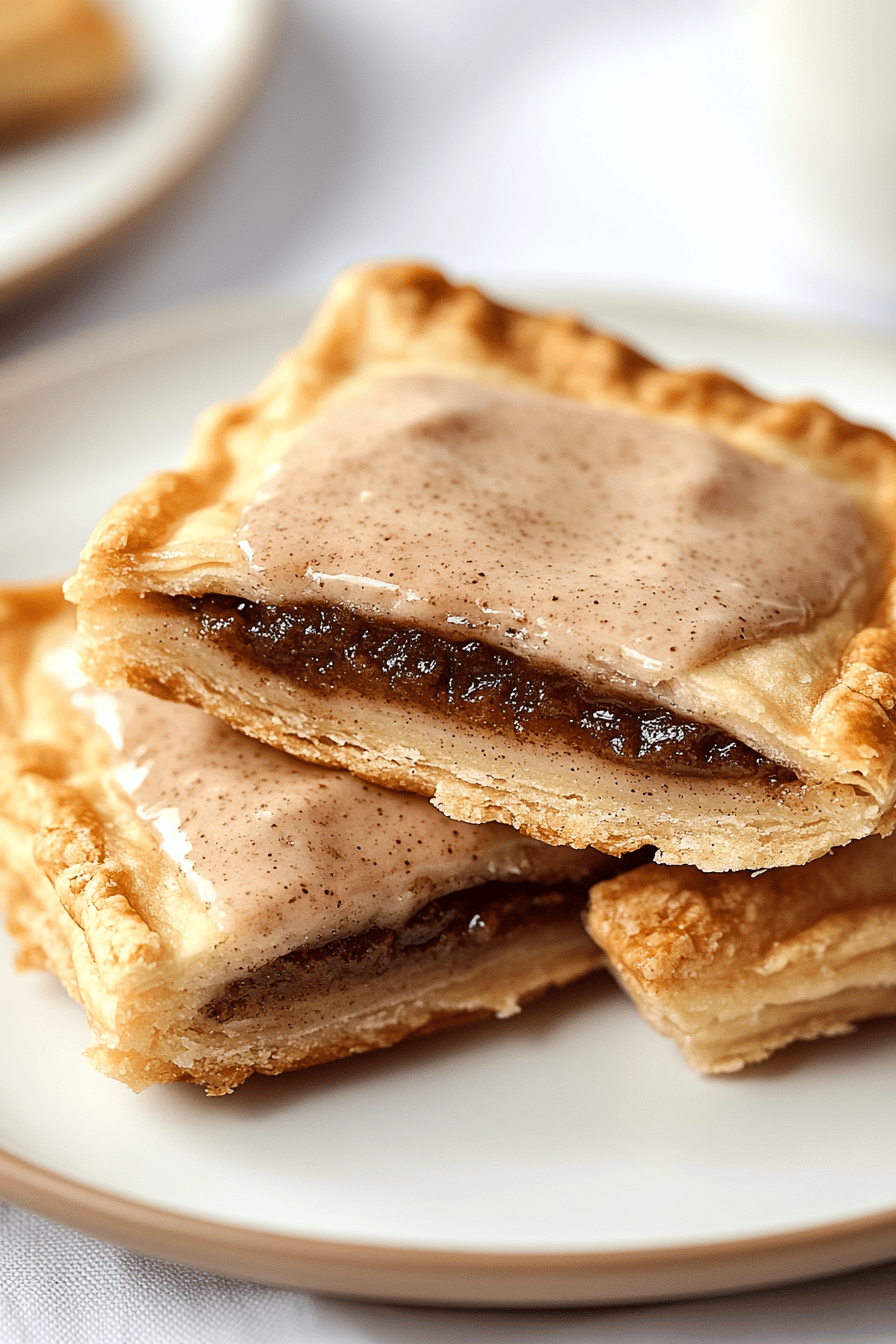
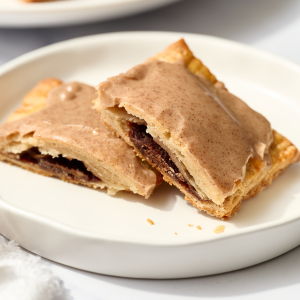
So, what exactly are we talking about when we say “Brown Sugar Pop-Tarts”? Think of it as the ultimate homemade version of that beloved breakfast pastry you probably grew up with, but taken to a whole new level. It’s essentially a sweet, buttery pastry dough encasing a luscious brown sugar and cinnamon filling, all baked to golden perfection and finished with a simple, sweet glaze. It’s a handheld slice of pure comfort. The name itself evokes that warm, slightly molasses-y sweetness that just screams cozy morning. Unlike the ones you find in the grocery store aisle, which can sometimes feel a bit artificial, these homemade beauties are bursting with fresh, honest flavors. They’re a delightful balance of tender, flaky crust and a gooey, spiced filling that melts in your mouth. It’s simple, it’s classic, and it’s utterly delicious.
Why you’ll love this recipe?
There are so many reasons why this brown sugar Pop-Tart recipe has earned a permanent spot in my heart (and my recipe binder!). First off, the flavor. Oh, the flavor! It’s that perfect harmony of rich brown sugar, warm cinnamon, and a hint of vanilla, all wrapped up in a tender, buttery crust. It’s sweet, but not cloyingly so, with a depth of flavor that’s just so comforting. And the simplicity? Honestly, it’s surprisingly easy. You don’t need any fancy equipment or complicated techniques. I’ve made this so many times, even when I’m short on time, and it always turns out beautifully. My kids ask for these all the time, especially on school mornings when we need a quick but satisfying breakfast. Plus, it’s incredibly budget-friendly. You likely already have most of the ingredients in your pantry. What I love most, though, is the versatility. You can tweak the filling, add a sprinkle of nutmeg, or even experiment with different glazes. It’s a recipe that feels both special and approachable, making it perfect for any occasion, from a quick weekday breakfast to a relaxed weekend brunch. It truly stands out because it captures that nostalgic essence without compromising on quality or taste.
How do I make brown sugar pop-tarts?
Quick Overview
The process is pretty straightforward: make a simple dough, whip up a quick brown sugar filling, assemble your pastries, bake them until golden, and then finish with a sweet glaze. It sounds like a lot, but each step is quite manageable. The beauty of this recipe lies in its deceptive simplicity. You get that incredible homemade taste and texture with less effort than you might think. It’s a total lifesaver on busy mornings when you want something that feels a bit more special than toast but comes together fairly quickly. Trust me, the aroma alone while they’re baking will make everyone in the house flock to the kitchen!
Ingredients
For the Main Batter:
2 ½ cups all-purpose flour, plus more for dusting: This is your foundation, so using good quality flour makes a difference. I usually just grab whatever’s in the pantry, but if you can, a good unbleached all-purpose flour works wonders for a tender crust.
1 teaspoon salt: Essential for balancing the sweetness and bringing out the other flavors.
1 cup (2 sticks) unsalted butter, cold and cut into cubes: Cold butter is the secret to flaky pastry. Make sure it’s really cold!
½ cup ice water: Again, cold is key here. It helps create those beautiful flaky layers.
For the Filling:
1 cup packed light brown sugar: This is the star! Light brown sugar gives that classic, slightly caramel flavor without being overpowering.
2 tablespoons all-purpose flour: This helps thicken the filling so it doesn’t all ooze out.
1 teaspoon ground cinnamon: The perfect partner to brown sugar. Don’t skimp on this!
¼ teaspoon ground nutmeg (optional, but I love it!): It adds a lovely warmth and depth.
2 tablespoons unsalted butter, melted: This makes the filling extra luscious and helps bind it together.
½ teaspoon vanilla extract: For that extra touch of sweet aroma and flavor.
For the Glaze:
1 cup powdered sugar: The base for our sweet topping.
2-3 tablespoons milk (or heavy cream for extra richness): You can use regular milk, almond milk, or even a bit of cream. I tested this with almond milk once and it actually made it even creamier, which was a delightful surprise!
½ teaspoon vanilla extract: Just a little bit to enhance the sweetness.
Step-by-Step Instructions
Step 1: Preheat & Prep Pan
First things first, let’s get your oven preheated to 400 degrees Fahrenheit (200 degrees Celsius). While it’s heating up, line two baking sheets with parchment paper. This is a lifesaver for cleanup, trust me! Parchment paper prevents sticking and makes sliding those baked beauties off the pan a breeze.
Step 2: Mix Dry Ingredients
In a large bowl, whisk together the 2 ½ cups of all-purpose flour and 1 teaspoon of salt. You want these to be evenly distributed, so a good whisking is all you need here. This ensures every bite of your pastry has the perfect balance of saltiness to cut through the sweetness.
Step 3: Mix Wet Ingredients
Now, for the buttery goodness! Add the cold, cubed unsalted butter to the flour mixture. Using a pastry blender, your fingertips, or even a food processor (pulse it carefully!), cut the butter into the flour until it resembles coarse crumbs with some pea-sized pieces of butter still visible. These little butter pockets are what will create those wonderfully flaky layers when baked. Then, gradually add the ½ cup of ice water, a tablespoon at a time, mixing gently until the dough just comes together. Don’t overmix! You want a shaggy dough, not a smooth ball. It should still look a little rough around the edges.
Step 4: Combine
Turn the dough out onto a lightly floured surface. Gently bring it together with your hands, forming it into a disc. If it’s too sticky, add a tiny bit more flour; if it’s too dry, a splash more ice water. Wrap the disc tightly in plastic wrap and refrigerate for at least 30 minutes. This chill time is crucial; it lets the gluten relax and the butter firm up again, making the dough much easier to roll out and ensuring maximum flakiness.
Step 5: Prepare Filling
While the dough is chilling, let’s whip up that amazing filling. In a medium bowl, combine the 1 cup of packed light brown sugar, 2 tablespoons of flour, 1 teaspoon of cinnamon, and the optional ¼ teaspoon of nutmeg. Stir it all together until well combined. Then, pour in the 2 tablespoons of melted butter and ½ teaspoon of vanilla extract. Mix until it forms a thick, slightly moist paste. This filling is so simple but so flavorful; it’s the heart of what makes these brown sugar Pop-Tarts so special.
Step 6: Layer & Swirl
Once the dough has chilled, divide it in half. On a lightly floured surface, roll out one half into a rectangle about ⅛ inch thick. Then, roll out the second half to the same thickness. Using a sharp knife or a pizza cutter, trim the edges so you have two neat rectangles. Now, take one rectangle and spread about half of the brown sugar filling evenly over it, leaving about a ½-inch border around the edges. For extra flair, you can gently swirl the filling with a toothpick. Then, carefully place the second rectangle of dough on top. Gently press down around the filling to seal the edges. Now, here’s a fun part: you can use a fork to crimp the edges and make them look pretty, or just press firmly with your fingers. Cut the large rectangle into individual Pop-Tart shapes – I usually aim for about 3 inches by 4 inches, but you can adjust this to your preference. Repeat with the remaining dough and filling. You should get about 6-8 Pop-Tarts from this recipe.
Step 7: Bake
Carefully transfer your assembled Pop-Tarts onto the prepared baking sheets. Now, I always like to make a few small slits in the top of each Pop-Tart with a sharp knife. This allows steam to escape during baking, preventing them from puffing up too much and bursting. Pop them into your preheated oven and bake for 15-20 minutes, or until they’re beautifully golden brown and puffed up. Keep an eye on them, as oven temperatures can vary.
Step 8: Cool & Glaze
Once baked to perfection, carefully remove the baking sheets from the oven. Let the Pop-Tarts cool on the baking sheets for about 5-10 minutes before transferring them to a wire rack to cool completely. While they’re cooling, let’s make that glaze. In a small bowl, whisk together 1 cup of powdered sugar, 2-3 tablespoons of milk, and ½ teaspoon of vanilla extract until smooth and pourable. If it’s too thick, add a tiny bit more milk; if it’s too thin, add a little more powdered sugar. Once the Pop-Tarts are mostly cool, drizzle or spread the glaze over the tops. I like to do a more rustic drizzle, but you can get fancy if you like!
Step 9: Slice & Serve
Once the glaze has set a bit, your glorious homemade brown sugar Pop-Tarts are ready to be enjoyed! I love them slightly warm, but they’re also fantastic at room temperature. Slice them with a sharp knife and savor that incredible combination of flaky pastry and sweet, spiced filling. They are perfect for grabbing on the go or enjoying with a cup of coffee.
What to Serve It With
These brown sugar Pop-Tarts are such a treat, and they pair wonderfully with so many things! For a classic breakfast, I love them with a steaming mug of coffee or a tall glass of cold milk. They’re sweet enough on their own, but a good cup of joe just cuts through that sweetness perfectly. For a more leisurely brunch spread, I’ll often serve them alongside some fresh fruit salad or perhaps some scrambled eggs. They add a delightful sweet element to the table. If you’re feeling decadent and want to serve them as dessert, a small scoop of vanilla bean ice cream alongside them is absolutely divine. The contrast of warm pastry and cold ice cream is just heavenly. And for those cozy snack moments, when you just need something comforting? These are it! They’re perfect with a cup of herbal tea, especially on a chilly evening. My family absolutely devours these, and we’ve had them for everything from a quick breakfast before school to a special treat after dinner. They always bring smiles.
Top Tips for Perfecting Your Brown Sugar Pop-Tarts
Making these brown sugar Pop-Tarts is a joy, but like any recipe, a few little tricks can elevate them from good to absolutely spectacular. I’ve learned a few things over the years from making them countless times, and I want to share them with you!
Dough Consistency is Key: The secret to that flaky pastry is cold ingredients. Always make sure your butter and water are ice cold. When you’re mixing the dough, don’t overwork it. It should just come together; a slightly shaggy dough is perfect. Overworking develops the gluten too much, which can make your pastry tough instead of tender and flaky. If it feels too sticky while rolling, don’t be afraid to use a little extra flour, but brush off any excess before assembly.
Filling Control: When you spread the filling, aim for an even layer, but don’t go too close to the very edge. Leaving that ½-inch border helps ensure a good seal and prevents the filling from oozing out too much during baking. If your filling seems a bit too wet, you can add another teaspoon of flour. Conversely, if it feels too dry, a tiny drizzle more melted butter can help.
Sealing Matters: Really press those edges together! I like to use a fork to crimp them, which not only looks nice but also creates a really good seal. This is crucial to keep all that delicious brown sugar goodness inside where it belongs. A good seal means no messy leaks in the oven!
The Art of the Slits: Don’t forget those little slits on top! They’re not just for decoration. They allow steam to escape. If you skip this step, the pastry can puff up unevenly or even burst, leading to a less attractive, and possibly messier, finished product. A few quick, shallow cuts with a sharp knife are all you need.
Baking Vigilance: Ovens can be tricky! Keep an eye on your Pop-Tarts as they bake. They should be golden brown. If one side seems to be browning faster, you can carefully rotate the baking sheet. The baking time is a guideline; look for visual cues like golden crust and puffed edges.
Glaze Consistency: For the glaze, it’s all about achieving that perfect pourable but not runny consistency. Start with the smaller amount of milk and add more gradually until it’s just right. It should be thick enough to coat the pastry but thin enough to drizzle easily. If it gets too thin, just whisk in a bit more powdered sugar. For a thicker glaze, use less milk or more powdered sugar.
Ingredient Swaps: While this recipe is fantastic as is, you can play with it! If you don’t have light brown sugar, dark brown sugar will work but might give a slightly deeper molasses flavor. For the cinnamon, you can add a pinch of ginger or cardamom to the filling for a different spice profile. For the glaze, you can even add a tiny bit of lemon zest for a bright contrast!
Storing and Reheating Tips
One of the best things about these homemade brown sugar Pop-Tarts is how well they store, making them perfect for enjoying throughout the week. I often make a double batch because they disappear so fast!
Room Temperature Storage: Once they are completely cooled and the glaze has set, you can store them in an airtight container at room temperature for up to 2-3 days. They’re still delicious and perfectly chewy. I usually just stack them carefully with parchment paper in between if I’m worried about them sticking.
Refrigerator Storage: If your kitchen is particularly warm or you want them to last a bit longer, you can store them in the refrigerator. Place them in an airtight container, and they should stay good for about 4-5 days. The pastry might firm up a bit in the fridge, but they’ll still be tasty.
Freezer Instructions: These freeze beautifully! Once they are completely cooled, you can wrap individual Pop-Tarts tightly in plastic wrap, then in aluminum foil, or place them in a freezer-safe bag or container. They’ll keep well in the freezer for up to 2-3 months. When you’re ready to enjoy one, you can either let it thaw at room temperature for an hour or two, or pop it in the toaster oven for a few minutes to warm it through. They come out tasting almost as fresh as the day they were made!
Glaze Timing Advice: I typically glaze them after they’ve cooled down a bit but are still slightly warm, as this helps the glaze adhere nicely. If you plan on freezing them, it’s often best to glaze them *after* thawing and reheating. Freezing with the glaze on can sometimes make it a little soft or sticky upon thawing. So, bake, cool, freeze, then thaw and glaze!
Frequently Asked Questions
Final Thoughts
So there you have it – the recipe for brown sugar Pop-Tarts that I truly believe will change the way you think about this classic treat. It’s more than just a recipe; it’s a little piece of comfort, a nod to simple pleasures, and a whole lot of deliciousness. The combination of that tender, flaky crust and the warm, spiced brown sugar filling is just divine. It’s the kind of thing that makes a regular morning feel a little bit special, or a lazy afternoon feel extra cozy. If you love these flavors, you might also enjoy my recipe for Cinnamon Swirl Bread or my Apple Crumble Bars. They share that same homey, comforting vibe. Give these brown sugar Pop-Tarts a try, and I promise, you won’t be disappointed. I can’t wait to hear how yours turn out, so please leave a comment below and tell me what you think! Happy baking, everyone!
Brown Sugar Pop-Tarts
Ingredients
Pastry Dough
- 2.5 cup all-purpose flour
- 0.5 teaspoon salt
- 1 cup unsalted butter, cold and cubed
- 0.33 cup ice water
Brown Sugar Filling
- 1 cup packed brown sugar
- 2 tablespoon cornstarch
- 1 tablespoon ground cinnamon
- 2 tablespoon unsalted butter, melted
Glaze
- 1 cup powdered sugar
- 2 tablespoon milk
- 0.5 teaspoon vanilla extract
Instructions
Preparation Steps
- In a large bowl, whisk together flour and salt. Cut in cold butter using a pastry blender or your fingertips until the mixture resembles coarse crumbs with some pea-sized pieces of butter remaining.
- Gradually add ice water, 1 tablespoon at a time, mixing until the dough just comes together. Do not overmix.
- Divide the dough in half, flatten each half into a disc, wrap in plastic wrap, and refrigerate for at least 30 minutes.
- While the dough is chilling, prepare the filling. In a small bowl, mix together brown sugar, cornstarch, and cinnamon. Stir in melted butter until well combined.
- Preheat oven to 400°F (200°C). Line baking sheets with parchment paper.
- On a lightly floured surface, roll out one disc of dough into a 10x12 inch rectangle. Cut into 6 equal rectangles.
- Spread the brown sugar filling evenly over 3 of the dough rectangles, leaving a small border.
- Top with the remaining 3 dough rectangles. Crimp the edges with a fork to seal.
- Transfer the pop-tarts to the prepared baking sheets. Cut small slits in the top of each pop-tart to allow steam to escape.
- Bake for 18-20 minutes, or until golden brown.
- While the pop-tarts are baking, whisk together powdered sugar, milk, and vanilla extract for the glaze until smooth.
- Let the pop-tarts cool on the baking sheets for a few minutes, then transfer them to a wire rack. Drizzle with glaze while still warm.