You know those nights? The ones where the clock is ticking, the kids are clamoring, and the thought of making a complicated dinner feels like climbing Mount Everest? Yeah, I’ve been there. More times than I’d care to admit. But then, there are those recipes that become my absolute go-to, my culinary superhero, and this Brown Sugar garlic chicken is definitely one of them. It’s the kind of dish that smells absolutely incredible as it’s cooking, filling the whole house with this sweet, savory aroma that just makes your stomach rumble in the best way possible. It’s ridiculously easy, which is a huge win in my book, but the flavor is so rich and satisfying, you’d think I spent hours slaving away in the kitchen. Honestly, it’s the perfect happy medium between a quick weeknight meal and something that feels a little bit special. If you love a good balance of sweet and savory, with just a hint of that garlicky goodness, then get ready, because this brown sugar garlic chicken is about to become your new best friend.
What is brown sugar garlic chicken?
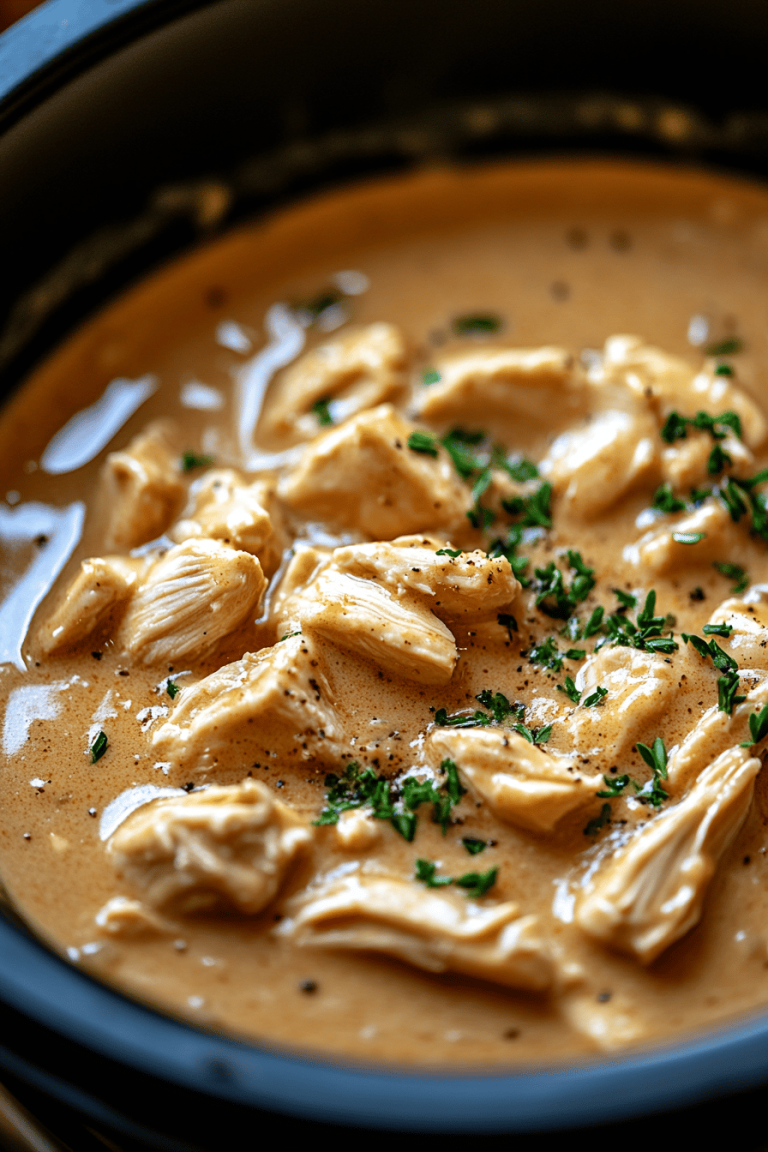
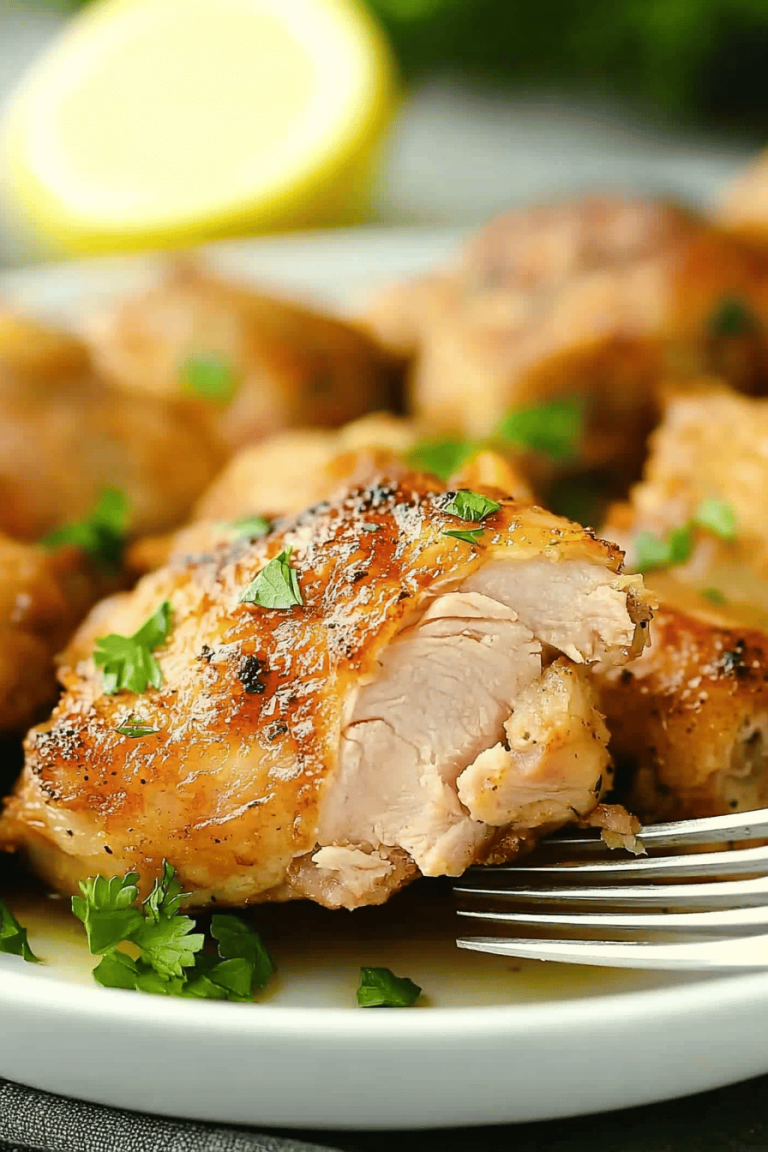
So, what exactly is this magical brown sugar garlic chicken? Think of it as your ultimate weeknight dinner hero with a flavor profile that’s seriously addictive. It’s essentially chicken, usually thighs or breasts, coated in a glorious, sticky glaze made from brown sugar, plenty of garlic (because you can never have too much garlic, right?), soy sauce, and a few other pantry staples that just sing together. The brown sugar caramelizes beautifully, creating this gorgeous, lacquered finish on the chicken that is just begging to be devoured. The garlic infuses everything with its pungent, wonderful aroma and taste, while the soy sauce adds that essential savory depth. It’s not overly complicated, it doesn’t require a million obscure ingredients, but the result is a dish that tastes like it came straight from a fancy restaurant. It’s that perfect bite: tender, juicy chicken with a glaze that’s sweet, salty, and utterly irresistible. It’s simple, it’s honest, and it’s just plain delicious.
Why you’ll love this recipe?
There are so many reasons why this brown sugar garlic chicken has earned a permanent spot in my recipe rotation, and I bet you’ll find just as many. First off, the flavor is just out of this world. We’re talking a sweet, sticky, and deeply savory glaze that coats every single piece of chicken. The brown sugar caramelizes beautifully, giving the chicken a gorgeous sheen and a delightful crispy edge, while the garlic is present but not overpowering – it’s that perfect aromatic backbone. Then there’s the sheer simplicity of it all. You can whip this up with minimal fuss, and it’s a lifesaver on those evenings when you’re short on time but still want something wholesome and delicious. I’ve tested this recipe more times than I can count, and it always turns out perfectly, which is a huge relief when you’re trying to get dinner on the table without a hitch. Plus, it’s incredibly budget-friendly. Chicken Thighs are usually quite affordable, and the other ingredients are things you likely already have in your pantry. What I love most about this is its incredible versatility. Serve it over fluffy rice, toss it with some noodles, tuck it into a wrap, or just eat it straight off the plate (guilty as charged!). It’s a crowd-pleaser, too. My kids go nuts for this, and even my pickiest eaters never turn down a plate of this brown sugar garlic chicken. It truly is one of those recipes that makes you feel like a kitchen rockstar without breaking a sweat.
How do I make brown sugar garlic chicken?
Quick Overview
This brown sugar garlic chicken recipe is all about creating a mouthwatering, sticky glaze that coats tender chicken. You’ll quickly sear your chicken pieces to get a nice color, then simmer them in a sweet and savory sauce made with brown sugar, garlic, and soy sauce until they’re perfectly cooked and coated. It’s a straightforward process that yields incredibly flavorful results in under 30 minutes, making it ideal for busy weeknights. The beauty of this dish lies in its simplicity and the amazing caramelized glaze that forms, giving the chicken an irresistible shine and taste.
Ingredients
For the Chicken:
1.5 lbs boneless, skinless chicken thighs or breasts, cut into bite-sized pieces (thighs are my personal favorite here because they stay so juicy!)
1 tablespoon Olive oil or vegetable oil (for searing)
Salt and freshly ground black pepper, to taste
For the Brown Sugar Garlic Glaze:
1/2 cup packed brown sugar (light or dark, both work wonderfully – dark brown sugar adds a deeper molasses note)
1/4 cup low-sodium soy sauce (or tamari for a gluten-free option)
4-6 cloves garlic, minced (don’t be shy with the garlic, it’s key! I usually use 5-6)
1 tablespoon honey or maple syrup (adds a lovely extra layer of sweetness and shine)
1 teaspoon grated fresh ginger (optional, but highly recommended for a little zing!)
1/4 teaspoon red pepper flakes (optional, for a touch of heat – adjust to your preference)
For Serving (Optional but Recommended):
Cooked rice (jasmine or basmati are great choices)
Sesame seeds, for garnish
Chopped fresh green onions or parsley, for garnish
Step-by-Step Instructions
Step 1: Preheat & Prep Chicken
Start by getting your chicken ready. If you’re using chicken breasts, you might want to pound them slightly to an even thickness before cutting them into uniform, bite-sized pieces (about 1-inch cubes). If you’re using thighs, just trim any excess fat and cut them into similar-sized pieces. Pat the chicken dry with paper towels – this is super important for getting a good sear later. Season generously with salt and freshly ground black pepper. Trust me, a little seasoning at this stage makes a big difference!
Step 2: Sear the Chicken
Heat the olive oil in a large skillet or wok over medium-high heat. Once the oil is shimmering, carefully add the seasoned chicken pieces in a single layer. You might need to do this in batches to avoid overcrowding the pan, which can steam the chicken instead of searing it. Cook for about 3-4 minutes per side, until the chicken is nicely browned and just beginning to cook through. It doesn’t need to be fully cooked at this stage, as it will finish cooking in the sauce. Remove the browned chicken from the skillet and set it aside on a plate.
Step 3: Make the Glaze
In the same skillet (no need to wash it – those browned bits are flavor!), reduce the heat to medium. Add the packed brown sugar, soy sauce, minced garlic, honey (or maple syrup), grated ginger (if using), and red pepper flakes (if using). Stir everything together until the brown sugar starts to dissolve. Let it simmer gently for about 2-3 minutes, stirring occasionally, until the sauce begins to thicken slightly and becomes glossy.
Step 4: Combine and Simmer
Return the seared chicken pieces (and any juices that have accumulated on the plate) back into the skillet with the glaze. Stir everything to coat the chicken evenly. Bring the mixture to a gentle simmer, then reduce the heat to low, cover the skillet, and let it cook for about 10-15 minutes, or until the chicken is cooked through and the sauce has thickened to a beautiful, syrupy consistency. Stir occasionally to make sure the chicken is coated and doesn’t stick to the bottom.
Step 5: Check for Doneness & Thicken (if needed)
The chicken should be tender and cooked all the way through. The sauce should be thick enough to coat the back of a spoon. If your sauce seems a little too thin, you can remove the lid and let it simmer for a few more minutes to reduce further, or you can mix 1 teaspoon of cornstarch with 1 tablespoon of water and stir it into the simmering sauce until it thickens. Be careful not to over-reduce, or the sugar can burn!
Step 6: Garnish and Serve
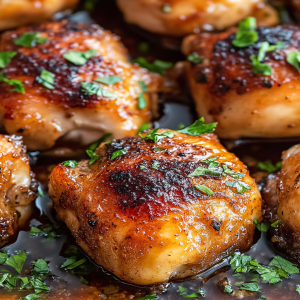
Once the chicken is cooked and the glaze is perfect, remove the skillet from the heat. If you like, sprinkle generously with sesame seeds and chopped fresh green onions or parsley. This adds a lovely freshness and a pop of color that makes the dish look extra appealing. Serve immediately.
Step 7: Slice and Serve
Serve this delicious brown sugar garlic chicken piping hot over a bed of fluffy white rice, which is perfect for soaking up all that amazing glaze. You can also serve it with roasted vegetables, a simple salad, or even noodles. The possibilities are endless!
What to Serve It With
This brown sugar garlic chicken is so versatile, it can practically show up for any meal! For a classic breakfast, I love serving it alongside some fluffy scrambled eggs and maybe some crispy bacon. The sweet and savory notes actually work surprisingly well with breakfast items. If you’re planning a more leisurely brunch, think about plating it up with some roasted sweet potato hash and a side of avocado. It feels a little bit fancy without being complicated. As a dinner, it’s a no-brainer with steamed rice, a crisp green salad, or some sautéed green beans. My kids will happily eat it piled high on top of white rice, and honestly, I often do too! For a more substantial meal, try serving it with some stir-fried noodles or even tucked into warm pita bread with some shredded lettuce and a drizzle of sriracha mayo. It’s also fantastic for making flavorful chicken wraps for lunches. My family tradition is to serve it with some quick-pickled cucumbers on the side – that little bit of tang cuts through the richness of the glaze perfectly. Seriously, this brown sugar garlic chicken is a true chameleon in the kitchen!
Top Tips for Perfecting Your Brown Sugar Garlic Chicken
Over the years of making this brown sugar garlic chicken more times than I can count, I’ve picked up a few tricks that I think really elevate it. First off, the garlic! Don’t be afraid to be generous. I find that mincing it finely rather than just crushing it helps to distribute the flavor more evenly throughout the sauce. Also, if you can, use fresh garlic; the jarred stuff just doesn’t have quite the same punch. For the chicken, I almost always reach for thighs because they are far more forgiving and stay incredibly juicy, even if you accidentally cook them a minute too long. If you’re using breasts, make sure they are cut into uniform pieces so they cook evenly. Another tip for searing: make sure your pan is hot and don’t overcrowd it. That initial sear is crucial for developing flavor and that lovely color on the chicken. For the glaze, I’ve found that using dark brown sugar gives a richer, more caramel-like flavor, but light brown sugar works perfectly fine too. If your sauce seems a little too thin at the end, don’t panic! A quick slurry of cornstarch and water (about 1 teaspoon cornstarch to 1 tablespoon water) stirred in at the end will thicken it right up to that perfect syrupy consistency. I’ve also experimented with adding a touch of rice vinegar or a squeeze of lime juice right at the end; it adds a little brightness that balances the sweetness beautifully. If you’re not a fan of heat, just skip the red pepper flakes, but I think a tiny pinch adds a really pleasant subtle warmth. Lastly, for serving, those fresh green onions and sesame seeds really aren’t just for looks; they add a fresh, nutty element that makes the whole dish sing. Trust me on this one!
Storing and Reheating Tips
This brown sugar garlic chicken is so good, you’ll likely have leftovers, and thankfully, it stores and reheats beautifully! If you find yourself with any (which is rare in my house!), the best way to store it is in an airtight container in the refrigerator. It should stay fresh for up to 3-4 days. I usually just pop the whole container in the fridge, making sure the lid is sealed tight. When it comes to reheating, I have a couple of favorite methods. My go-to is to gently reheat it in a skillet over low to medium heat, stirring occasionally. This helps to bring back some of that glossy texture of the glaze. You can also add a tablespoon or two of water or chicken broth to the pan to prevent it from drying out. Alternatively, you can reheat it in the microwave. Just place the chicken in a microwave-safe dish, cover it loosely with a paper towel, and heat in 30-second intervals, stirring in between, until heated through. Be careful not to overheat, as the chicken can become tough. If you want to freeze portions for later, that’s also an option! Let the chicken cool completely, then wrap it tightly in plastic wrap, followed by a layer of aluminum foil, or place it in a freezer-safe bag. It will keep in the freezer for up to 2-3 months. When you’re ready to enjoy it, thaw it overnight in the refrigerator and then reheat using one of the methods above. Just a note on the glaze: if you’ve refrigerated it, the glaze might firm up. Reheating gently will help it become saucy again.
Frequently Asked Questions
Final Thoughts
I really hope you give this brown sugar garlic chicken a try. It’s one of those recipes that’s simple enough for a Tuesday night but flavorful enough to impress guests. It’s the perfect example of how a few pantry staples and a little bit of love can create something truly delicious and memorable. The sweet, sticky glaze with that hint of garlic is just pure comfort food, and the way it coats the tender chicken is just heavenly. It’s a recipe that has brought smiles to my family’s faces countless times, and I’m so excited for it to do the same for yours. If you enjoy this recipe, you might also like my Sticky Honey Sriracha Chicken or my Lemon Herb Roasted Chicken – they’re all about bold, delicious flavors that are surprisingly easy to achieve! I can’t wait to hear what you think, so please leave a comment below and let me know how your brown sugar garlic chicken turned out, or if you tried any fun variations! Happy cooking!
brown sugar garlic chicken
Ingredients
Main Ingredients
- 1.5 pounds boneless, skinless chicken thighs cut into 1-inch pieces
- 0.5 cup packed light brown sugar
- 0.25 cup low-sodium soy sauce
- 4 cloves garlic minced
- 1 tablespoon fresh ginger grated
- 1 tablespoon rice vinegar
- 1 tablespoon sesame oil
- 2 tablespoons olive oil
- 1 tablespoon cornstarch
- 2 tablespoons cold water
- Salt and black pepper to taste
- 2 Green onions sliced, for garnish
- 1 teaspoon Sesame seeds for garnish
Instructions
Preparation Steps
- In a medium bowl, whisk together the brown sugar, soy sauce, minced garlic, grated ginger, rice vinegar, and sesame oil. Set aside. In a small separate bowl, whisk cornstarch with cold water to create a slurry. Set aside.
- Season the chicken pieces with salt and black pepper to taste.
- Heat olive oil in a large skillet or wok over medium-high heat. Add the chicken pieces and cook for 5-7 minutes, stirring occasionally, until browned on all sides and cooked through.
- Pour the brown sugar garlic sauce over the chicken in the skillet. Bring to a simmer.
- Stir in the cornstarch slurry. Cook for 1-2 minutes, stirring constantly, until the sauce thickens and coats the chicken.
- Remove from heat. Garnish with sliced green onions and sesame seeds, if desired. Serve immediately over rice or with your favorite side dishes.