Oh, these Blueberry Butter Biscuits. They’re not just a recipe; they’re practically a hug in baked form. I remember the first time I made them, it was a chaotic Saturday morning, the kind where you’re trying to wrangle kids, get breakfast on the table, and maybe, just maybe, sneak in a moment of peace with a cup of coffee. I wanted something special, something that felt like a treat but didn’t require a culinary degree or a whole afternoon. These biscuits delivered. The aroma that filled my kitchen was absolutely heavenly, a sweet, buttery cloud with hints of plump blueberries. My youngest, who can be the pickiest eater on the planet, took one bite, his eyes widened, and he immediately asked for another. That’s when I knew I’d stumbled onto something truly magical. They’re sort of like a scone, but way more tender and forgiving, and unlike a typical biscuit, they have this delightful pop of fresh blueberries baked right in. Honestly, if you’re looking for that perfect “wow” factor with minimal fuss, you’ve found it. These Blueberry Butter Biscuits are my go-to when I need to impress, comfort, or just make a regular Tuesday feel a little bit brighter.
What are blueberry butter biscuits?
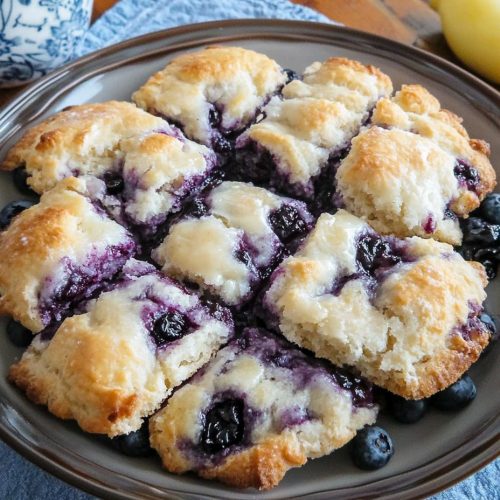
So, what exactly are Blueberry Butter Biscuits? Imagine the creamiest, tenderest biscuit you’ve ever had, but then make it even better. These aren’t your average fluffy Buttermilk Biscuits, though I love those too! These are enriched with a bit of butter in the dough itself, giving them an almost cake-like crumb that’s still incredibly light. And the stars of the show? Juicy, bursting blueberries, scattered throughout like little purple jewels. They’re sweet but not overly so, with a subtle tang from the berries that cuts through the richness. Think of them as a decadent breakfast treat that doubles as a comforting snack. They’re simple enough for a busy morning but elegant enough for a special occasion. The “butter” in the name isn’t just for show; it’s crucial to that melt-in-your-mouth texture that makes these so irresistible. It’s a comforting classic with a delightful fruity twist that always hits the spot.
Why you’ll love this recipe?
Honestly, there are so many reasons why this recipe has become a permanent fixture in my baking rotation, and I just know you’re going to fall in love with it too. First and foremost, the **flavor**. It’s a symphony of sweet and tart. The rich, buttery biscuit base is the perfect canvas for those bright, fresh blueberries. When they bake, they release their juices, creating little pockets of intense berry flavor that are just divine. It’s comforting, it’s bright, and it’s utterly delicious.
Then there’s the **simplicity**. This recipe is surprisingly straightforward, even if you’re not a seasoned baker. The steps are clear, and there aren’t any fussy techniques involved. I can whip these up on a Sunday morning without feeling overwhelmed, and they’re ready in less than an hour from start to finish. It’s the kind of recipe that makes you feel like a baking wizard, even if you’re just starting out!
And let’s talk about **cost-efficiency**. Most of the ingredients are pantry staples. Flour, sugar, butter, baking powder – you likely have them already. Fresh or frozen blueberries are usually pretty affordable, especially when they’re in season. This recipe lets you create something truly special without breaking the bank, which is always a win in my book.
Finally, the **versatility**! These Blueberry Butter Biscuits are fantastic on their own, but they also pair beautifully with so many things. I’ll get to more serving ideas later, but know that whether you’re having them for breakfast, brunch, or even as a light dessert, they shine. What I love most about this recipe is that it’s so forgiving. I’ve experimented with different types of flour, and even once accidentally used almond milk instead of regular milk, and guess what? They still turned out amazing! That kind of adaptability makes it a lifesaver when life gets a little hectic.
How do I make blueberry butter biscuits?
Quick Overview
The magic of these Blueberry Butter Biscuits lies in their straightforward approach. We’ll start by mixing our dry ingredients, then incorporate cold butter to create that signature tender crumb. Next, we’ll gently stir in our wet ingredients and the star, fresh blueberries, being careful not to overmix. A quick shape, a brush of milk or cream, and into the oven they go! The whole process, from mixing bowl to oven, takes mere minutes, promising a wonderfully satisfying bake with minimal effort. It’s a delightful dance of simple ingredients coming together to create something truly spectacular.
Ingredients
For the Main Batter:
2 ½ cups all-purpose flour: I always go for unbleached all-purpose flour for the best texture. If you can find a good quality one, it truly makes a difference. Sifting it is optional but can lead to an even lighter biscuit.
½ cup granulated sugar: This adds just the right amount of sweetness without making them cloying. You can slightly adjust this if you prefer them less sweet.
2 ½ teaspoons baking powder: Make sure it’s fresh! Old baking powder is a common culprit for flat biscuits.
½ teaspoon salt: Balances the sweetness and enhances all the other flavors.
1 cup (2 sticks) cold, unsalted butter, cut into ½-inch cubes: This is key! You want the butter COLD. It creates those flaky layers and tender pockets. I usually pop my butter in the freezer for about 15 minutes before I start.
¾ cup milk (whole or 2%): Whole milk will give you the richest flavor and tenderest texture, but 2% works great too. I’ve even tested this with oat milk once when I ran out, and it was surprisingly creamy!
1 large egg, lightly beaten: This helps bind everything together and adds a little richness.
For the Filling:
1 ½ cups fresh blueberries: I prefer fresh for the best texture and flavor, but good quality frozen blueberries work too. If using frozen, don’t thaw them completely; just give them a quick rinse and pat dry to prevent excess moisture.
For the Glaze (Optional, but highly recommended!):
½ cup powdered sugar: For that lovely, sweet finish.
1-2 tablespoons milk: To thin the powdered sugar to a drizzly consistency.
½ teaspoon vanilla extract: Adds a lovely aroma and flavor note.
Step-by-Step Instructions
Step 1: Preheat & Prep Pan
First things first, get that oven preheated to a nice 400°F (200°C). This high heat is crucial for getting a good rise and a golden-brown crust. While the oven is warming up, grab a large baking sheet and line it with parchment paper. This prevents sticking and makes for super easy cleanup – my favorite kind of baking!
Step 2: Mix Dry Ingredients
In a large mixing bowl, whisk together your flour, granulated sugar, baking powder, and salt. Give it a good whisk to make sure everything is evenly distributed. This ensures your leavening agents are spread throughout, which means a nice, even rise for your biscuits. I like to make a little well in the center of the dry ingredients before adding the wet stuff later.
Step 3: Mix Wet Ingredients
In a separate, smaller bowl, whisk together the milk and the lightly beaten egg. You want them to be well combined. This is your liquid mixture that will bring the dough together. Don’t worry if it looks a little frothy; that’s perfectly fine.
Step 4: Combine
Now, add those cold, cubed butter pieces to the bowl with your dry ingredients. Using a pastry blender, a fork, or even your fingertips, cut the butter into the flour mixture until it resembles coarse crumbs with some pea-sized pieces of butter still visible. This is where the magic happens for that tender, flaky texture. Don’t overwork it! Now, make a well in the center of the butter-flour mixture and pour in your milk and egg mixture. Stir gently with a fork or spatula until *just* combined. You want to see streaks of flour still – do not overmix, or your biscuits will be tough!
Step 5: Prepare Filling
Gently fold in your blueberries into the dough. Be tender here! You don’t want to mash them all up. Just a few gentle turns to distribute them evenly throughout the batter. This will create those lovely bursts of flavor.
Step 6: Layer & Swirl
Turn the dough out onto a lightly floured surface. It will be a bit shaggy and sticky, and that’s okay. Gently pat it into a rectangle about ¾-inch thick. Fold it in half like a book, then pat it down again to ¾-inch thickness. Repeat this folding process one or two more times. This creates layers and helps with that light texture. Then, pat the dough down one last time to about 1-inch thickness. You can use a biscuit cutter or a knife to cut out your biscuits. If using a cutter, press straight down – don’t twist – to help them rise evenly. Place the biscuits onto your prepared baking sheet, spacing them about an inch apart.
Step 7: Bake
Brush the tops of your biscuits with a little extra milk or cream for a beautiful golden sheen. Pop them into the preheated oven. Bake for 15-18 minutes, or until they’re beautifully golden brown on top and cooked through. You can test for doneness by inserting a toothpick into the center; it should come out clean.
Step 8: Cool & Glaze
Once they’re out of the oven, let them cool on the baking sheet for a few minutes before transferring them to a wire rack to cool further. While they’re cooling, whisk together the powdered sugar, 1 tablespoon of milk, and vanilla extract for the glaze. Add more milk, a tiny bit at a time, until you reach your desired drizzly consistency. Drizzle generously over the slightly cooled biscuits. The glaze will set up as it cools.
Step 9: Slice & Serve
These Blueberry Butter Biscuits are best served warm, when the blueberries are still a little gooey and the biscuit is at its most tender. Slice them in half horizontally if you like, or just enjoy them whole. They’re perfect with a smear of butter or even a dollop of Whipped cream!
What to Serve It With
These Blueberry Butter Biscuits are so versatile, they’ve become my secret weapon for all sorts of meals and occasions. For a classic **Breakfast**, they’re phenomenal served warm with a simple pat of butter. The sweetness of the biscuit and the pop of blueberry is just the perfect start to the day. Pair them with a steaming mug of good coffee or a glass of fresh orange juice, and you’ve got a delightful morning meal that feels a bit like a treat.
When **Brunch** rolls around, these biscuits really shine. They look gorgeous on a platter alongside other brunch favorites like scrambled eggs, crispy bacon, or a fresh fruit salad. Their slightly sweet, comforting nature balances out savory dishes beautifully. I love serving them with a side of creamy Greek Yogurt or a light berry compote for an extra touch of elegance.
Don’t underestimate their power **As Dessert**! Warm biscuits with a scoop of vanilla bean ice cream? Yes, please! The contrast of the warm, tender biscuit with the cold, creamy ice cream is pure bliss. You can also serve them with a light lemon curd or a raspberry sauce for a sophisticated, yet incredibly easy, after-dinner treat. The subtle tartness of the berries makes them a perfect complement to sweeter desserts.
And for those **Cozy Snacks** or afternoon pick-me-ups, these are a lifesaver. When that 3 PM craving hits but you don’t want anything too heavy, a warm Blueberry Butter Biscuit is the answer. They’re perfect with a cup of tea and a good book, or just enjoyed on their own while you relax for a moment. My kids often ask for them after school, and I happily oblige because they’re a healthier alternative to many processed snacks and they just make everyone happy!
Top Tips for Perfecting Your Blueberry Butter Biscuits
Over the years, I’ve learned a few tricks that really elevate these Blueberry Butter Biscuits from good to absolutely unforgettable. Let’s dive into some of my favorite tips:
Zucchini Prep: Wait, did I say zucchini? My apologies! I must have been thinking about another favorite recipe. For these Blueberry Butter Biscuits, the star is, of course, the blueberries! When it comes to the **Blueberry Prep**, I always recommend using fresh blueberries if possible. Gently rinse them and pat them completely dry before adding them to the dough. If you’re using frozen, give them a quick rinse and pat dry, but don’t let them thaw fully, as too much moisture can make your dough a bit too wet and your biscuits dense. You want them to burst, not turn to mush!
Mixing Advice: This is probably the most crucial part. When you’re combining the wet and dry ingredients, you really, *really* need to **resist the urge to overmix**. As soon as the flour disappears and the dough comes together, stop. Seriously, stop. A shaggy, slightly lumpy dough is exactly what you want. Overmixing develops the gluten too much, which results in tough, dense biscuits. Think of it as coaxing the ingredients together, not forcing them.
Swirl Customization: While this recipe doesn’t traditionally involve swirling, if you wanted to add a bit more flair, you could try a simple jam swirl! After you’ve patted the dough into its rectangle shape (before folding), spread a thin layer of your favorite berry jam over it, then fold and proceed. For the **Blueberry Distribution**, I like to gently fold them in. You can also lightly toss them in a tablespoon of flour before adding them to the dough – this can help prevent them from sinking to the bottom during baking, although I find it’s usually not an issue with this recipe.
Ingredient Swaps: I’ve had a few readers ask about substitutions. For the milk, **dairy-free milk** like almond, soy, or oat milk works well. I’ve found oat milk gives a particularly creamy result. If you’re out of eggs, you can try replacing the egg with about ¼ cup of unsweetened applesauce or an extra splash of milk, though the egg does contribute to tenderness and richness. For the butter, you can use a good quality vegan butter substitute, ensuring it’s cold!
Baking Tips: Don’t overcrowd the baking sheet! Give your biscuits room to expand. If your oven tends to have hot spots, rotating the baking sheet halfway through baking can help ensure even browning. And that toothpick test is your best friend for confirming they’re baked through – no one likes a gooey center (unless it’s a warm blueberry!).
Glaze Variations: If you’re not a fan of the sweet glaze, you can skip it entirely, or opt for a simple dusting of powdered sugar right before serving. Another idea is a lemon glaze – just add a teaspoon of lemon zest and a squeeze of lemon juice to the powdered sugar mixture. It adds a lovely brightness that complements the blueberries beautifully!
Storing and Reheating Tips
These Blueberry Butter Biscuits are truly best when they’re fresh out of the oven, that’s for sure. But if you happen to have any leftovers (which is rare in my house!), here’s how to keep them tasting delicious:
Room Temperature: If you think you’ll finish them within a day or two, store them in an airtight container at room temperature. They’ll retain their tenderness best this way. I usually wrap them loosely in foil or place them in a bread box. They are still quite lovely on day two, especially if you give them a quick warm-up.
Refrigerator Storage: For longer storage, up to about 4-5 days, pop them into an airtight container in the refrigerator. They will firm up a bit when chilled. To bring them back to their former glory, I highly recommend reheating them. Place them on a baking sheet and warm them in a 300°F (150°C) oven for about 5-10 minutes, or until they’re heated through and the buttery goodness is back. This is my preferred method for longer storage!
Freezer Instructions: If you want to make a big batch and freeze them for future cravings, they freeze remarkably well! Wrap each biscuit individually in plastic wrap, then place them in a freezer-safe bag or container. They’ll keep for up to 2-3 months. To reheat, you can either thaw them overnight in the refrigerator and then warm them in the oven as described above, or you can place them directly onto a baking sheet from frozen and bake at around 325°F (160°C) for 15-20 minutes, until heated through.
Glaze Timing Advice: If you’re storing them at room temperature or in the fridge, it’s best to add the glaze *after* you’ve reheated them. The glaze can get a bit sticky or melty if stored for too long, especially in warmer conditions. If you’re freezing them *with* the glaze already on, be aware that it might soften or become slightly uneven upon thawing and reheating. For best results, I always glaze them fresh after reheating from the fridge or freezer.
Frequently Asked Questions
Final Thoughts
So there you have it – my absolutely cherished recipe for Blueberry Butter Biscuits. I truly hope you feel inspired to give them a try. They’re more than just a recipe; they’re an experience, a little piece of cozy comfort that’s surprisingly easy to create in your own kitchen. The way the blueberries burst with flavor, the tender, buttery crumb, that hint of sweetness from the glaze – it all comes together to make something truly special. They’ve brought so much joy to my family meals, and I can’t wait for them to bring the same to yours.
If you love these, you might also enjoy my recipes for Lemon Raspberry Scones or my Classic Buttermilk Biscuits for a slightly different take. They’re all wonderful in their own right!
I’m always so excited to hear how your baking adventures turn out. Please, if you make these Blueberry Butter Biscuits, come back and leave a comment, share your thoughts, or even tell me about any fun variations you tried. Your feedback means the world to me! Happy baking, and may your kitchens be filled with wonderful aromas!
Blueberry Butter Biscuits
Ingredients
Main Ingredients
- 2 cups all-purpose flour
- 0.5 cup granulated sugar
- 2 teaspoons baking powder
- 0.5 teaspoon salt
- 0.5 cup cold unsalted butter, cut into cubes
- 1 cup fresh blueberries
- 0.5 cup heavy cream
Instructions
Preparation Steps
- Preheat oven to 400°F (200°C). Line a baking sheet with parchment paper.
- In a large bowl, whisk together the flour, sugar, baking powder, and salt.
- Cut in the cold butter using a pastry blender or your fingertips until the mixture resembles coarse crumbs.
- Gently fold in the blueberries.
- Pour in the heavy cream and stir until just combined. Do not overmix.
- Drop spoonfuls of dough onto the prepared baking sheet, about 2 inches apart.
- Bake for 10-12 minutes, or until golden brown and cooked through.
- Let cool slightly before serving.