You know those recipes that just feel like home? The ones you pull out when you need a crowd-pleaser, a quick dinner fix, or just a serious craving hits? For me, that’s these crispy oven-baked chicken wings. Seriously, if you’ve ever struggled with soggy baked wings or found yourself spending a fortune on takeout, this is your new best friend. I’ve tried every trick in the book – from drying the wings for hours to using cornstarch – and this method? It’s a game-changer. My family devours these every single time, and honestly, I’ve lost count of how many times I’ve made them for impromptu gatherings. They’re just SO much better than the fried versions, and you don’t even have to worry about a greasy mess all over your kitchen. If you’re a fan of traditional buffalo wings but want something a little healthier and a lot more straightforward to make at home, you’re going to absolutely adore these.
What are Crispy Oven-Baked Chicken Wings?
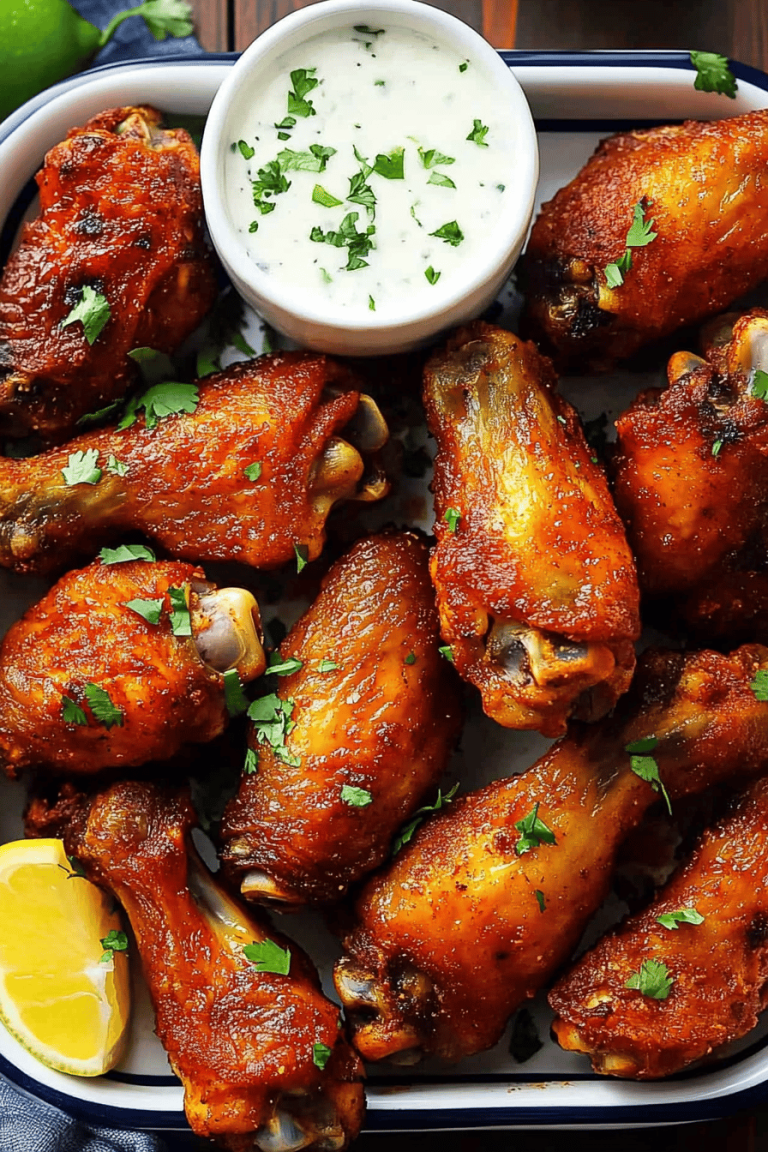
So, what exactly are we talking about here? Think of these as your ultimate, fuss-free, incredibly delicious baked chicken wings. We’re talking chicken wings that come out of the oven with that perfect crispy skin, juicy meat, and a flavor that’s just begging for a dip. They’re not fried, which means less mess and a slightly healthier option (if we can call wings healthy, right?). The magic really happens in the preparation and the high-heat baking. It’s essentially taking humble chicken wings and transforming them into something truly spectacular with minimal effort and a few key techniques. It’s not complicated at all, and the result is so much more satisfying than you might expect. It’s the kind of recipe you can whip up for a Sunday football game or even just for a fun weeknight dinner that the kids will absolutely rave about.
Why you’ll love this recipe?
What is the secret behind baked chicken wings?flavor is out of this world. We’re talking tender, juicy meat inside with that shatteringly crisp skin on the outside. It’s the perfect base for whatever sauce you decide to toss them in, or honestly, they’re delicious enough to eat plain with a little salt and pepper. Then there’s the simplicity. I cannot stress this enough – these are SO easy to make. You don’t need fancy equipment or a culinary degree. It’s mostly about prepping the wings correctly and letting the oven do its magic. This recipe is a lifesaver on busy nights when you want something impressive without spending hours in the kitchen. And if you’re like me and always trying to keep an eye on the budget, you’ll love how cost-efficientWhat are the advantages of buying wings at home?versatility is incredible! These baked chicken wings are perfect for game day appetizers, a light dinner with a big salad, or even as part of a buffet. You can customize the seasonings endlessly. I’ve made them spicy, smoky, garlicky, you name it. They’re a fantastic alternative to our popular {link to another chicken recipe, e.g., Roasted Garlic Herb Chicken} if you’re looking for something a bit more finger-food friendly. What I love most about this is how reliably fantastic they turn out every single time. No more disappointment, just pure wing perfection.
How to Make Crispy Oven-Baked Chicken Wings
Quick Overview
The secret to these unbelievably crispy baked chicken wings lies in a few simple steps: ensuring the wings are super dry, coating them with a light layer of oil and seasoning, and then baking them at a high temperature. It’s a straightforward process that guarantees that coveted crispy skin without any deep frying. You’ll be amazed at how easy it is to get restaurant-quality wings right in your own oven. No more soggy bottoms or pale skin here!
Ingredients
For the Crispy Wings:
2.5 to 3 pounds chicken wings, separated into drumettes and flats (tips removed and saved for stock if you like!)
1-2 tablespoons Olive oil or avocado oil (just enough to lightly coat)
1 teaspoon baking powder (this is the secret weapon for crispiness!)
1 teaspoon salt
1/2 teaspoon black pepper
Optional: Garlic powder, paprika, cayenne pepper for added flavor
For Your Favorite Sauce (Optional, but recommended!):
Your go-to buffalo sauce, BBQ sauce, teriyaki, or any other wing sauce you love! I usually have a couple of options ready to go.
Step-by-Step Instructions
Step 1: Preheat & Prep Pan
First things first, get that oven preheating to a nice, hot 425°F (220°C). While the oven is warming up, grab a large baking sheet. For the easiest cleanup ever, I highly recommend lining it with parchment paper or aluminum foil. Then, place a wire rack on top of the baking sheet. This is crucial! Elevating the wings allows air to circulate all around them, ensuring they get crispy on all sides, not just the bottom. If you don’t have a wire rack, don’t sweat it, just make sure to flip them halfway through for maximum crispiness, but the rack is definitely a game-changer.
Step 2: Dry the Wings (This is Key!)
This is probably the MOST important step for achieving crispy skin. Take your chicken wings and pat them THOROUGHLY dry with paper towels. Get in there and dab them until they feel completely dry to the touch. Any moisture on the skin will steam the wings instead of crisping them up. I usually lay them out on a clean towel and then pat them with another one. Trust me, a few extra minutes here makes all the difference. Some people even refrigerate them uncovered for a few hours, but for a weeknight fix, just a good pat-down does wonders.
Step 3: Season for Success
Once your wings are bone-dry, put them in a large bowl. Drizzle them with about 1 to 2 tablespoons of olive oil (or avocado oil). You don’t want them to be swimming in oil, just enough to lightly coat each wing. Now for the magic ingredient: baking powder! Sprinkle 1 teaspoon of baking powder over the wings. I know it sounds weird, but it helps draw out moisture and creates a wonderfully crisp exterior. Don’t worry, you won’t taste it! Add your salt, pepper, and any other dry seasonings you like – garlic powder, paprika, a pinch of cayenne for a little kick. Toss everything together really well with your hands until every wing is evenly coated. You should see a slightly powdery coating on them.
Step 4: Arrange on Rack
Arrange the seasoned wings in a single layer on the prepared wire rack set inside the baking sheet. Make sure they aren’t touching each other. If they’re piled up or crowded, they’ll steam instead of crisp. You might need to use two baking sheets if you’re making a large batch. This single layer ensures even cooking and maximum crispiness for every single wing.
Step 5: Bake to Perfection
Pop that baking sheet into your preheated 425°F (220°C) oven. Now, let them bake for about 20-25 minutes. Then, carefully flip each wing over using tongs. This ensures both sides get nice and golden brown and crispy. Continue baking for another 20-25 minutes, or until the wings are deeply golden brown and crispy. The internal temperature should reach 165°F (74°C). The total baking time is usually around 40-50 minutes, but ovens can vary, so keep an eye on them!
Step 6: Sauce ‘Em Up (or Don’t!)
Once the wings are perfectly crispy, carefully remove the baking sheet from the oven. If you’re saucing them, this is the time! Place the hot wings in a clean bowl and pour your favorite sauce over them. Toss gently until they are all beautifully coated. I like to do this right before serving so they stay as crispy as possible. If you’re serving multiple sauces, you can toss them in smaller batches or just serve the sauces on the side. My kids are obsessed with a classic buffalo, but a sweet and sticky teriyaki is also a huge hit in my house.
Step 7: Serve and Enjoy!
Serve your glorious baked chicken wings immediately while they’re hot and crispy! They’re fantastic with a side of ranch or blue cheese dressing for dipping, and maybe some celery and carrot sticks to balance out the deliciousness. Get ready for everyone to rave!
What to Serve It With
These crispy oven-baked chicken wings are so versatile, you can seriously serve them with almost anything! For a casual breakfast (don’t judge, sometimes a wing craving hits early!), I like to pair them with a strong cup of coffee and maybe some scrambled eggs if I’m feeling fancy. They’re also fantastic for a laid-back brunch alongside some fruit salad and maybe a mimosa. For a more dessert-like experience, I’ve been known to serve smaller batches with a drizzle of honey or a sweet glaze as part of an appetizer spread. But my absolute favorite way to serve them is for cozy snacks during movie night, piled high with a selection of dips like ranch, blue cheese, or even a creamy sriracha aioli. They also make a great main course for a relaxed family dinner when paired with a big, fresh green salad or some oven-roasted sweet potato fries. My family traditions often involve these wings during football games, accompanied by bowls of popcorn and other easy-to-grab appetizers. I also love them alongside a simple cucumber and Tomato Salad for a lighter meal. No matter how you serve them, they’re always a winner!
Top Tips for Perfecting Your Baked Chicken Wings
Over the years, I’ve learned a few little tricks that make these baked chicken wings absolutely perfect every single time. First, when it comes to Zucchini Prep, well, there’s no zucchini involved here, but if we were talking about a zucchini bread, I’d tell you to squeeze out every last drop of moisture! For these wings, the equivalent is that crucial step of drying them thoroughly. You really can’t over-dry them. I’ve tried rushing it and paid the price with less crispy wings, so it’s worth the extra few minutes. For Mixing Advice, remember that light coating of oil and baking powder is key. Don’t go overboard with the oil; you’re not frying them. You want a light dusting of the seasoning mixture, not a heavy batter. If your wings are clumping together after seasoning, that’s a sign you might have too much oil or just need to toss them a bit more to distribute evenly. When it comes to Swirl Customization, that’s more for things like cake or frosting, but for wings, it’s all about the sauce. Ensure your sauce isn’t too watery; a thicker sauce will cling better and keep the wings from getting soggy. If your favorite sauce is a bit thin, you can simmer it down slightly to thicken it before tossing the wings. For Ingredient Swaps, if you don’t have baking powder, you can try a tablespoon or two of cornstarch, but baking powder is really my preferred method for its leavening qualities that contribute to crispiness. For Baking Tips, always preheat your oven properly. A hot oven is essential for crisping. If your oven tends to run hot or cold, an oven thermometer is a great investment to ensure you’re at the right temperature. Placing the wings on a wire rack is non-negotiable for the best results; it allows air to circulate underneath, preventing the dreaded “steamed bottom.” And when it comes to Glaze Variations, if you want to get really creative, try a dry rub first, bake, and then toss with a glaze. Or experiment with different spice blends in your dry rub for a deeper flavor profile. A little smoked paprika and chili powder can go a long way!
Storing and Reheating Tips
Okay, so the chances of having leftovers are slim because these baked chicken wings disappear so fast, but when we do have them, here’s how I handle them. For Room Temperature storage, honestly, I don’t recommend leaving them out for more than two hours, just like any cooked chicken. They’re best enjoyed fresh. If you happen to have cooled wings that you’ll eat within a few hours, they can sit on the counter covered, but for longer, the fridge is your friend. For Refrigerator Storage, once the wings have cooled completely, store them in an airtight container or a resealable plastic bag. They’ll stay good in the fridge for about 3-4 days. Make sure to separate them with parchment paper if you’re stacking them to prevent them from sticking together too much. For Freezer Instructions, if you know you won’t get to them within a few days, freezing is a great option. Wrap the cooled wings tightly in plastic wrap, then in aluminum foil, or place them in a heavy-duty freezer bag, removing as much air as possible. They’ll keep well in the freezer for up to 2-3 months. When you’re ready to thaw, it’s best to transfer them to the refrigerator overnight. For Glaze Timing Advice, if you’re planning on refrigerating or freezing sauced wings, I actually recommend saucing them *after* reheating. This is because the sauce can sometimes make the wings a bit soggy during the reheating process. So, it’s usually best to reheat plain wings and then toss them with your warmed sauce right before serving.
Frequently Asked Questions
Final Thoughts
So there you have it – my absolute favorite recipe for crispy oven-baked chicken wings. It’s honestly one of those dishes that brings so much joy with such little effort, and that’s a win-win in my book. The combination of that shatteringly crisp skin, juicy interior, and your favorite flavor sauce is just pure magic. It’s the perfect thing to whip up for game day, a casual get-together, or even just when you need a serious comfort food fix. If you loved these, I think you might also enjoy my recipe for {link to another chicken recipe, e.g., Sheet Pan Lemon Herb Chicken and Veggies} for another easy weeknight dinner option. Give these wings a try, and I promise you won’t be disappointed. I can’t wait to hear how they turn out for you! Let me know in the comments what your favorite sauce is, or if you have any special seasoning blends you love to use. Happy baking (and eating)!

Crispy Baked Chicken Wings
Ingredients
Main Ingredients
- 1 kg Chicken wings cut into drumettes and flats
- 0.5 tsp Baking powder aluminum-free
- 1 tsp Salt
- 0.5 tsp Black pepper
Sauce (Optional)
- 0.25 cup Butter melted
- 0.25 cup Hot sauce
- 1 tbsp Honey
Instructions
Preparation Steps
- Preheat oven to 400°F (200°C). Line a baking sheet with parchment paper.
- In a large bowl, toss chicken wings with baking powder, salt, and pepper until evenly coated.1 kg Chicken wings
- Arrange wings in a single layer on the prepared baking sheet.
- Bake for 20 minutes, then flip the wings and bake for another 20-25 minutes, or until golden brown and crispy.
- While wings are baking, whisk together melted butter, hot sauce, and honey in a small bowl for the sauce (if using).1 kg Chicken wings
- Once cooked, toss the wings in the sauce (if using) or serve immediately.