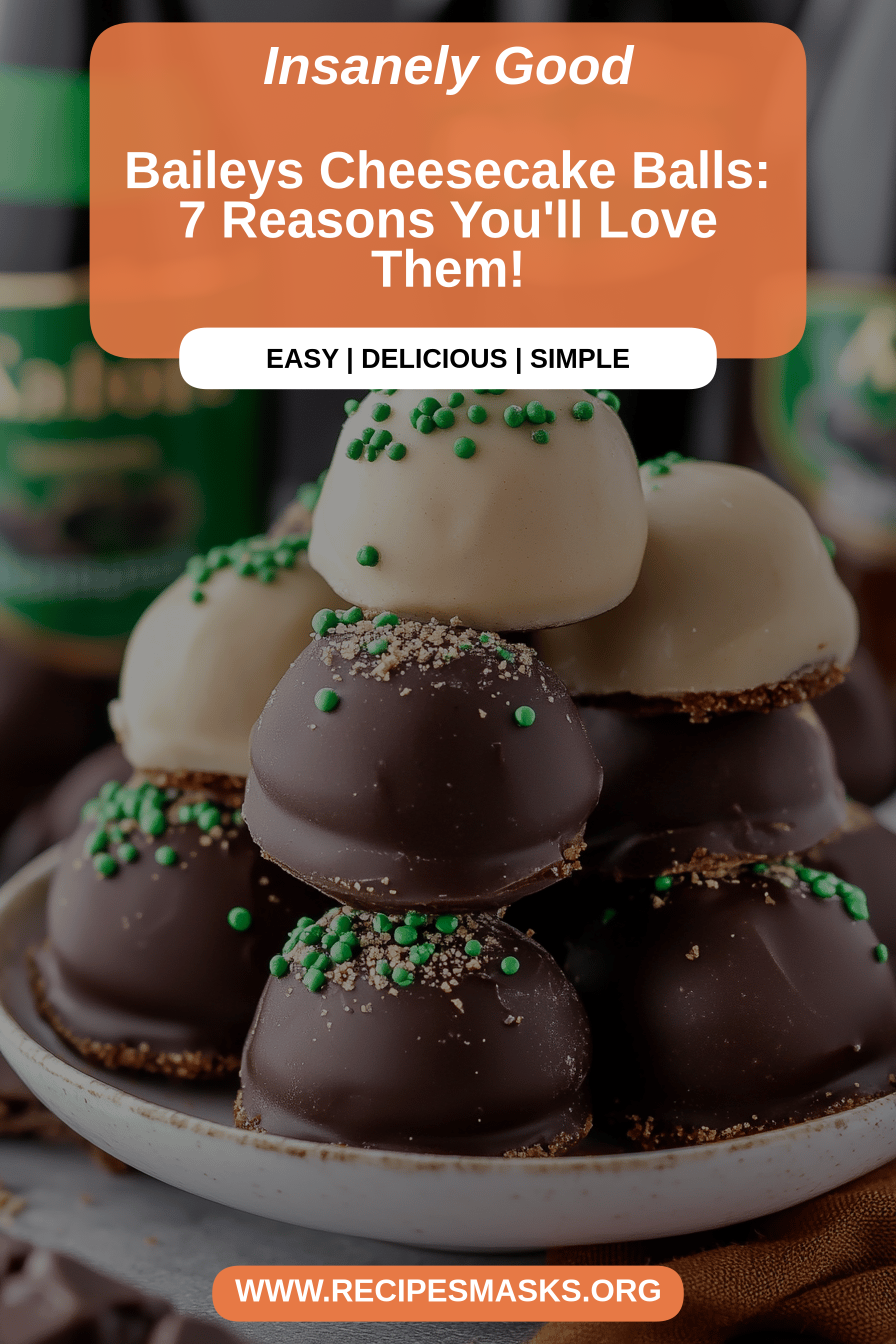
Oh, how I adore these Baileys cheesecake balls. They’re like a little hug in dessert form, you know? I remember the first time I made them – it was for a potluck, and I was slightly nervous because I’d never attempted anything quite like it. But wow, did they disappear fast! My friend Sarah, who can be a bit of a dessert snob, actually asked for the recipe, and that’s when I knew I’d struck gold. They’re incredibly rich and decadent, yet surprisingly easy to whip up, which is always a win in my book. If you’ve ever loved a good no-bake cheesecake or a decadent truffle, you are going to be absolutely obsessed with these Baileys cheesecake balls. They hit that sweet spot between a fancy treat and a comforting classic, and honestly, they’re so addictive I’ve had to make them in bulk just to make sure everyone gets a taste before I polish off the rest myself!
What are Baileys cheesecake balls?
So, what exactly are these magical little bites? Think of them as the ultimate fusion of a creamy, dreamy no-bake cheesecake and a sophisticated, boozy truffle. They’re essentially a rich, cream cheese-based batter infused with the unmistakable, delightful flavor of Baileys Irish Cream liqueur. We mix it all up with some classic cheesecake ingredients, roll them into bite-sized balls, and then… well, the best part comes next: a luscious chocolate coating! It’s essentially cheesecake, but in a more portable, more intensely satisfying, and dare I say, more fun form. The name just perfectly captures what they are – little balls of cheesecake heaven with that warm, comforting hint of Baileys. They’re not overly complicated, but they feel incredibly special, which is a combination I always strive for in my baking.
Why you’ll love this recipe?
Honestly, there are so many reasons why this recipe has become a staple in my kitchen. First off, the flavor is just out of this world. That creamy tang of the cheesecake combined with the warm, caramel-vanilla notes of Baileys Irish Cream is pure magic. When you dip them in chocolate? Forget about it. It’s a flavor explosion that’s both comforting and exciting. What I love most is how surprisingly simple they are to make. You don’t even need to turn on the oven! This is a lifesaver when I’m short on time or when the oven is already occupied with something else. Plus, the ingredients are pretty standard, making it a budget-friendly indulgence. And the versatility! You can roll them in different chocolates, add sprinkles, or even a drizzle of White Chocolate for extra flair. They’re perfect for parties, holidays, or just a Tuesday night when you need a little pick-me-up. They’re a step above your average dessert, feeling elegant without the fuss, and they always impress whoever tries them. I even find myself making them when I just crave something sweet at 10 pm but don’t want to bake a whole cake – these are my secret weapon!
How do you make Baileys Cheesecake Balls?
Quick Overview
The process for making these Baileys cheesecake balls is wonderfully straightforward. You’ll basically be mixing a few key ingredients together to form a thick, pipeable dough, chilling it until firm, rolling it into balls, and then dipping them in melted chocolate. It’s a no-bake wonder that comes together in stages, with chilling time being the most crucial part for success. The simplicity is a huge part of why I love them so much; you get maximum flavor and impact with minimal effort. Trust me, even if you’re new to making treats like this, you’ll find this recipe incredibly forgiving and rewarding.
Ingredients
For the Main Batter:
cream cheese: 2 (8-ounce) blocks, softened. Make sure it’s truly soft, folks! I learned the hard way that cold cream cheese just doesn’t blend smoothly. Let it sit on the counter for at least an hour, or even pop it in the microwave for 15-20 seconds at a time, checking frequently. Full-fat is best for that rich, creamy texture.
Powdered Sugar: 3 cups, sifted. Sifting is key here to avoid any pesky lumps. It makes the batter wonderfully smooth and gives it that perfect cheesecake texture.
Baileys Irish Cream: 1/4 cup. This is where the magic happens! Use the original Baileys for that classic flavor. If you’re feeling adventurous, you could try a different flavor like Baileys Almande or Salted Caramel, but the original is a true crowd-pleaser.
Vanilla Extract: 1 teaspoon. A little vanilla goes a long way in enhancing all those lovely flavors.
Graham Cracker Crumbs: 1/2 cup. These add a subtle crumbly texture and a hint of graham cracker flavor that really rounds out the cheesecake profile. You can buy them pre-crushed or make your own from graham crackers.
For the Filling:
Dark Chocolate Chips: 1 1/2 cups. I love using good quality dark chocolate for the coating; it balances the sweetness of the cheesecake perfectly. You can also use semi-sweet.
white chocolate Chips: 1/2 cup (optional, for drizzling). These are purely for decoration and add a beautiful contrast.
For the Glaze:
A little bit of coconut oil or vegetable shortening (about 1 teaspoon per cup of chocolate) can help make the chocolate melt smoother and give it a nice sheen.
Step-by-Step Instructions
Step 1: Preheat & Prep Pan
While this recipe is no-bake, we do need to prep for chilling. Line a baking sheet with parchment paper or wax paper. This is crucial because it prevents the cheesecake balls from sticking once they’re formed and firm. Make sure you have enough space in your refrigerator for this baking sheet, as it will be your best friend for the next step!
Step 2: Mix Dry Ingredients
In a medium bowl, whisk together the sifted powdered sugar and the graham cracker crumbs. Give it a good stir to ensure they’re evenly combined. This dry mixture will help absorb some of the moisture and give our cheesecake balls structure. It’s a simple step, but it’s important for achieving the right consistency.
Step 3: Mix Wet Ingredients
In a large bowl, beat the softened cream cheese until it’s completely smooth and creamy. This is where you want to put in a little effort to get it lump-free. Then, gradually beat in the Baileys Irish Cream and the vanilla extract until everything is well incorporated. It should smell absolutely divine at this point!
Step 4: Combine
Slowly add the dry ingredients (powdered sugar and graham cracker crumbs) to the wet ingredients (cream cheese mixture). Mix on low speed, or by hand with a spatula, until just combined. Be careful not to overmix! Overmixing can sometimes make the cheesecake mixture too soft and sticky to work with. You’re looking for a thick, dough-like consistency that you can handle.
Step 5: Prepare Filling
Melt the dark chocolate chips. You can do this in a microwave-safe bowl in 30-second intervals, stirring in between, until smooth. Or, use a double boiler method. Once melted, stir in about 1 teaspoon of coconut oil or vegetable shortening for a smoother consistency when dipping.
Step 6: Layer & Swirl
This is the fun part! Once the dough is firm enough to handle (after at least 1-2 hours in the fridge), scoop out about 1 tablespoon of the mixture at a time. Roll it gently between your palms to form small balls, about 1-inch in diameter. Place the formed balls onto your prepared baking sheet. If the dough becomes too soft as you work, just pop it back into the fridge for another 15-20 minutes.
Step 7: Bake
Good news! No baking required for these beauties. The chilling step is what firms them up, so no oven needed. Just ensure they are well chilled before dipping in chocolate.
Step 8: Cool & Glaze
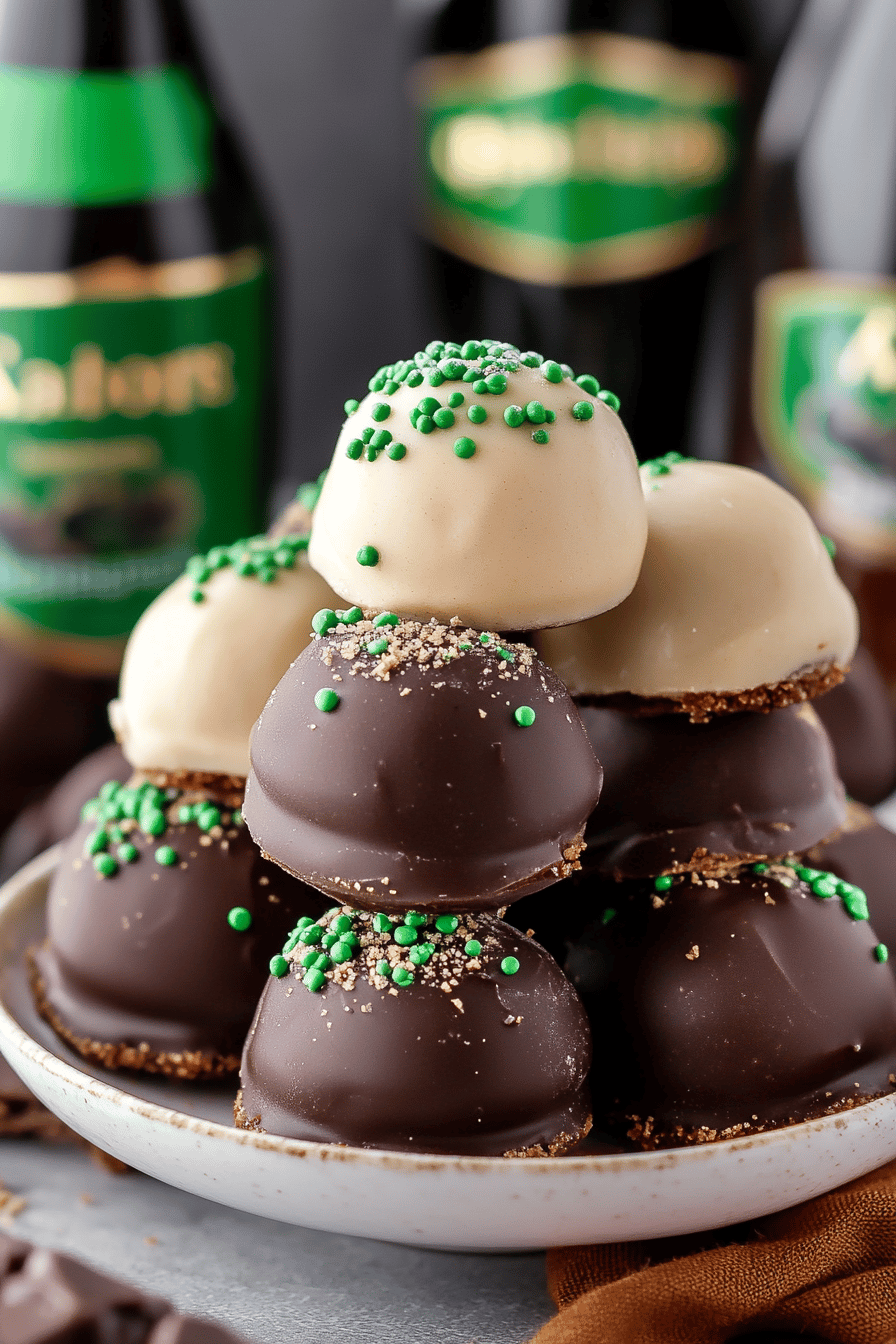
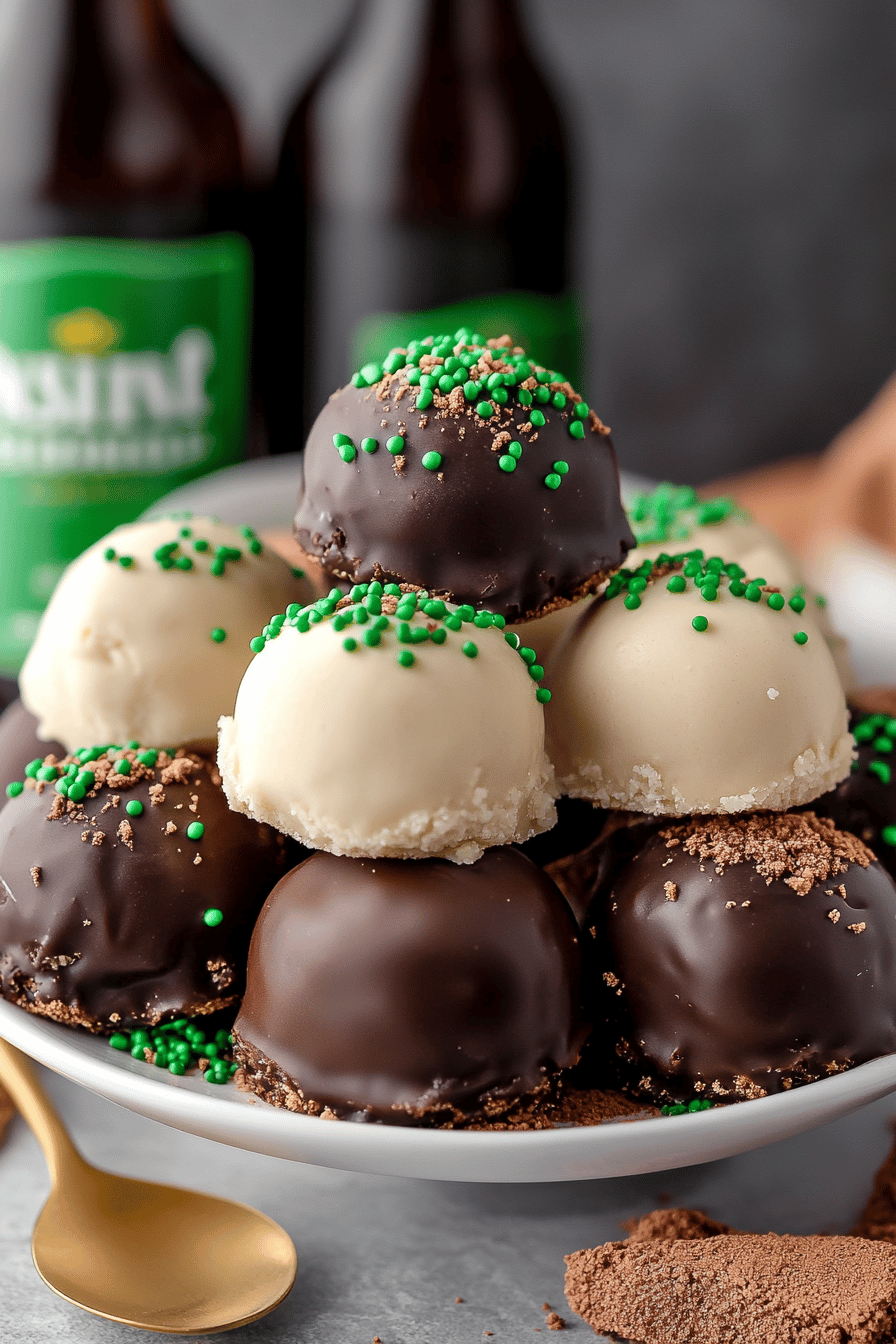
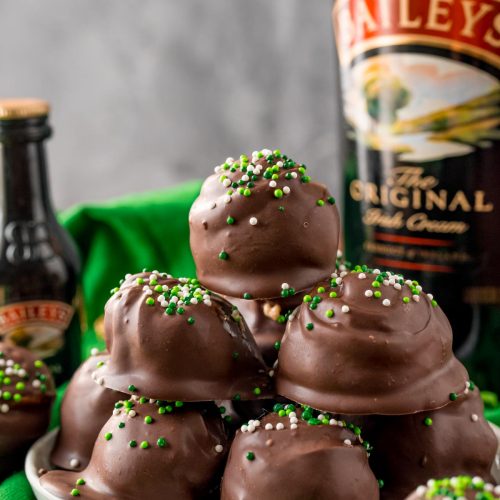
Once your cheesecake balls are rolled and chilled, it’s time to dip them in the melted chocolate. Use a fork or a toothpick to carefully dip each ball, coating it completely. Let any excess chocolate drip off. Place the dipped balls back onto the parchment-lined baking sheet. If you want to add a white chocolate drizzle, melt your white chocolate chips (again, with a touch of shortening), put them in a piping bag or a small ziplock bag with a tiny corner snipped off, and drizzle over the dark chocolate coating. Let them set completely at room temperature or pop them back in the fridge for about 15-20 minutes to speed things up.
Step 9: Slice & Serve
These are best served chilled. Once the chocolate coating is firm, they are ready to be devoured! They’re perfect little individual portions. You can also arrange them on a pretty platter for guests. The smooth chocolate shell gives way to that wonderfully creamy, Baileys-infused center – it’s pure bliss in every bite.
What to Serve It With
These Baileys cheesecake balls are so versatile, they fit in everywhere! For breakfast? I know, I know, it sounds indulgent, but a couple of these alongside a strong cup of coffee is my secret guilty pleasure on a lazy weekend. They add a touch of festivity to a simple morning. For brunch, they are just divine. Imagine them nestled amongst fresh fruit salad, mini quiches, and pastries – they bring that “wow” factor. I love serving them with a light mimosa or a sparkling rosé. As a dessert, they are truly showstoppers. They’re the perfect end to a rich meal, offering a decadent finish without being too heavy. Serve them with a dollop of whipped cream or a few fresh berries for contrast. And for those cozy snack moments? They’re ideal. I’ll often have one or two with a glass of milk or, naturally, another tiny nip of Baileys! My family also loves them after dinner with a cup of tea. They truly are a treat for any occasion.
Top Tips for Perfecting Your Baileys Cheesecake Balls
Cream Cheese Prep: I cannot stress enough how important it is to have your cream cheese at room temperature. I’ve rushed this in the past, and ended up with lumpy cheesecake balls, which is just… sad. Let it sit out for at least an hour, or use the microwave trick sparingly. It makes all the difference in getting that silky-smooth texture.
Mixing Advice: When you add the dry ingredients to the wet, mix on low speed or fold gently with a spatula until *just* combined. Overmixing can incorporate too much air, making the batter too soft and difficult to roll. You want a thick, manageable dough, not a fluffy cake batter. If it feels too soft, don’t be afraid to chill it for another 30 minutes.
Rolling Technique: For perfectly uniform balls, use a small cookie scoop (about 1 tablespoon size). This ensures consistency. Roll them gently between your palms; you don’t need to pack them super tight. If your hands get too warm and the dough gets sticky, rinse them under cold water and dry them thoroughly before rolling the next batch.
Chocolate Dipping: Make sure your melted chocolate is smooth and pourable. Adding that little bit of coconut oil or shortening is a game-changer for a glossy finish and easy dipping. When dipping, use a fork and let excess chocolate drip off before placing on parchment paper. If you want those pretty drizzle lines, let the first layer of chocolate set a bit before piping the second color.
Ingredient Swaps: While Baileys is key, if you can’t use alcohol, you can substitute with a little extra vanilla extract and a splash of cream, plus maybe a tiny bit of coffee or caramel extract to mimic some of the flavor notes. For the chocolate, milk chocolate or even white chocolate can be used for coating, but dark or semi-sweet offers the best balance against the sweet cheesecake.
Chill Time is Crucial: Don’t skimp on the chilling time! At least 1-2 hours in the fridge is essential for the dough to firm up enough to roll. If you’re short on time, you can put the baking sheet in the freezer for about 30-40 minutes. The firmer the balls, the easier they are to dip and the neater they’ll look. I’ve tried dipping them when they’re too soft, and it’s messy business!
Storing and Reheating Tips
Room Temperature: Honestly, these Baileys cheesecake balls are best kept chilled. While they might be okay for a couple of hours on the counter if your kitchen isn’t too warm, I wouldn’t leave them out for too long, especially once the chocolate is on. The cream cheese base can start to soften.
Refrigerator Storage: This is where they truly shine. Store them in an airtight container in the refrigerator. They’ll keep well for about 3-5 days. I usually line the container with a bit of parchment paper too, just to be extra sure they don’t stick. They’re even better the next day as the flavors meld together!
Freezer Instructions: Yes, you can absolutely freeze these! This is a great make-ahead strategy. Once the chocolate coating is firm, arrange the cheesecake balls on a baking sheet and freeze until solid. Then, transfer them to a freezer-safe airtight container or a heavy-duty freezer bag. They’ll keep well for up to 2-3 months. To thaw, simply transfer them from the freezer to the refrigerator overnight. The chocolate might get a bit of condensation on it, but it usually works itself out.
Glaze Timing Advice: I always recommend dipping and letting the chocolate coating set *before* storing them, whether in the fridge or freezer. If you’re planning to freeze them, make sure the chocolate is completely firm. If you plan to serve them soon after thawing, you might consider adding a drizzle of white chocolate *after* they’ve thawed and are ready to be served, just to keep it looking its best.
Frequently Asked Questions
Final Thoughts
So there you have it – my absolute favorite Baileys cheesecake balls! I truly hope you give these a try. They are such a delightful way to enjoy the classic flavors of cheesecake and Baileys in a super convenient and decadent little package. They are proof that you don’t need a fancy oven or hours of your time to create something truly special and impressive. Whether you’re making them for a party, a holiday gathering, or just a quiet night in, they’re sure to bring smiles and happy sighs. If you loved this recipe, you might also enjoy my No-Bake Chocolate Mousse Cups or my decadent Salted Caramel Brownies. Give these Baileys cheesecake balls a whirl, and please, please let me know how they turn out for you in the comments below! I love hearing about your baking adventures and seeing your creations. Happy baking, and enjoy every single bite!
Baileys cheesecake balls
Ingredients
Cheesecake Balls
- 226.8 g Cream cheese softened
- 0.5 cup Powdered sugar
- 1.5 tablespoons Baileys Irish Cream
- 0.5 teaspoon Vanilla extract
- 0.75 cup Crushed chocolate cookies (like Oreos, filling removed)
Coating
- 226.8 g Semi-sweet chocolate chips
- 1 tablespoon Vegetable oil or coconut oil
Instructions
Preparation Steps
- In a medium bowl, beat the softened cream cheese with the powdered sugar until smooth.
- Stir in the Baileys Irish Cream and vanilla extract until well combined.
- Fold in the crushed chocolate cookies until evenly distributed.
- Roll the mixture into 1-inch balls and place them on a parchment-lined baking sheet.
- Freeze the cheesecake balls for at least 30 minutes, or until firm.
- Melt the semi-sweet chocolate chips with the vegetable oil in a microwave-safe bowl in 30-second intervals, stirring in between, until smooth.
- Dip each frozen cheesecake ball into the melted chocolate, coating completely. Return to the parchment-lined baking sheet.
- Refrigerate for at least 30 minutes, or until the chocolate has set.