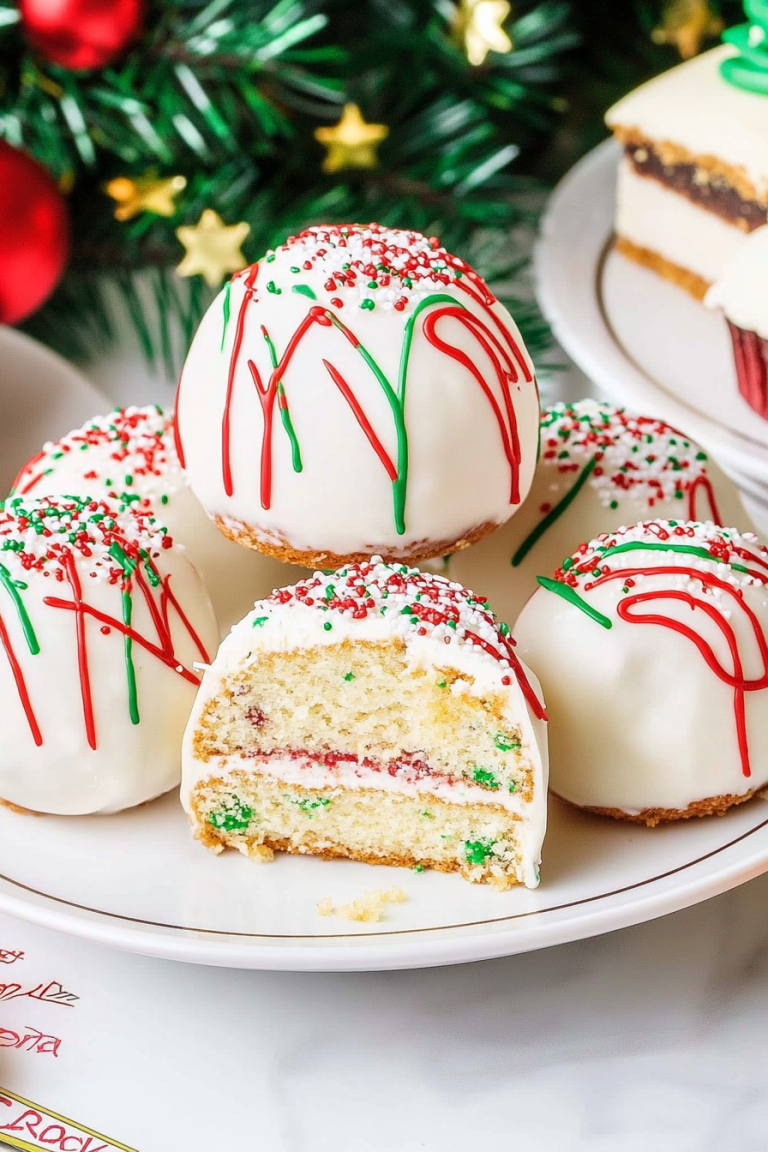
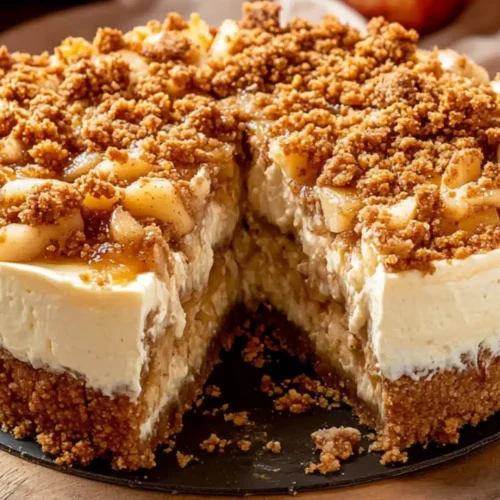
You know, sometimes a recipe just *clicks*. It’s more than just ingredients coming together; it’s a feeling, a memory, a warm hug in dessert form. For me, that recipe is my Apple Crumble Cheesecake. Honestly, I’ve made a lot of desserts in my time, from fancy layered cakes to rustic pies, but this one? This one holds a special place in my heart. It’s the perfect blend of everything good: the tang of cream cheese, the sweet comfort of apples, and that irresistible, buttery crumble topping. If you’ve ever loved a classic apple crumble, or if you’re a devoted cheesecake fan, prepare yourself. This is the best of both worlds, and believe me, it’s a game-changer. It’s the kind of dessert that makes people ask, “What IS this amazing thing?” before they’ve even finished their first bite. I’m so excited to share it with you!
What is Apple Crumble Cheesecake?
So, what exactly is this magical concoction? Think of it as your favorite creamy, dreamy cheesecake taking a cozy autumn stroll through an apple orchard. We start with a classic cheesecake base – rich, smooth, and utterly decadent. But here’s where the fun begins: instead of a plain graham cracker crust, we’re going for something a little more adventurous, and instead of a simple fruit topping, we’re going all out with spiced apples. And then, the pièce de résistance: a generous layer of buttery, crunchy apple crumble baked right on top. It’s not just a cheesecake with apples *on* it, or a crumble with cream cheese *added*. It’s a beautiful marriage of textures and flavors, where the smooth cheesecake base is perfectly complemented by the tender, spiced apples and the satisfying crunch of the crumble. It’s essentially a dessert designed to make you ridiculously happy.
Why you’ll love this recipe?
Honestly, the list could go on forever, but let me highlight the absolute best bits that make me reach for this recipe time and time again. First and foremost, the FLAVOR. Oh, the flavor! You get that signature creamy tang from the cheesecake, which is just heaven on its own, right? But then you hit those tender, cinnamon-spiced apples, which are like little pockets of pure autumn joy. And finally, that crunchy, buttery crumble topping. It’s a symphony of sweet, tart, creamy, and crunchy. It’s the kind of dessert that appeals to everyone, even the pickiest eaters in my family!
Then there’s the SIMPLICITY. Now, I know “cheesecake” can sound intimidating, but this recipe is surprisingly straightforward. I’ve streamlined it over the years, and it honestly comes together much faster than you’d think. It’s one of those recipes that feels impressive when you serve it, but you’ll know how easy it was to make, which is the best kind of win. And speaking of wins, this is incredibly COST-EFFECTIVE. Most of the ingredients are pantry staples, and apples are usually pretty budget-friendly, especially when they’re in season. You get so much deliciousness for your buck!
But what really makes me so fond of this Apple Crumble Cheesecake is its VERSATILITY. It’s not just for special occasions. Sure, it’s spectacular for holidays or dinner parties, but I’ve also made it on a random Tuesday just because. It’s perfect when you’re craving something sweet but don’t want to spend hours baking. Plus, it’s fantastic served warm or cold. Serve it with a dollop of whipped cream or a scoop of vanilla ice cream, and you’ve got pure bliss. If you enjoyed my Spiced Pear and Ginger Crumble.What are the warm spices in this cheesecake?
How to Make Apple Crumble Cheesecake
Quick Overview
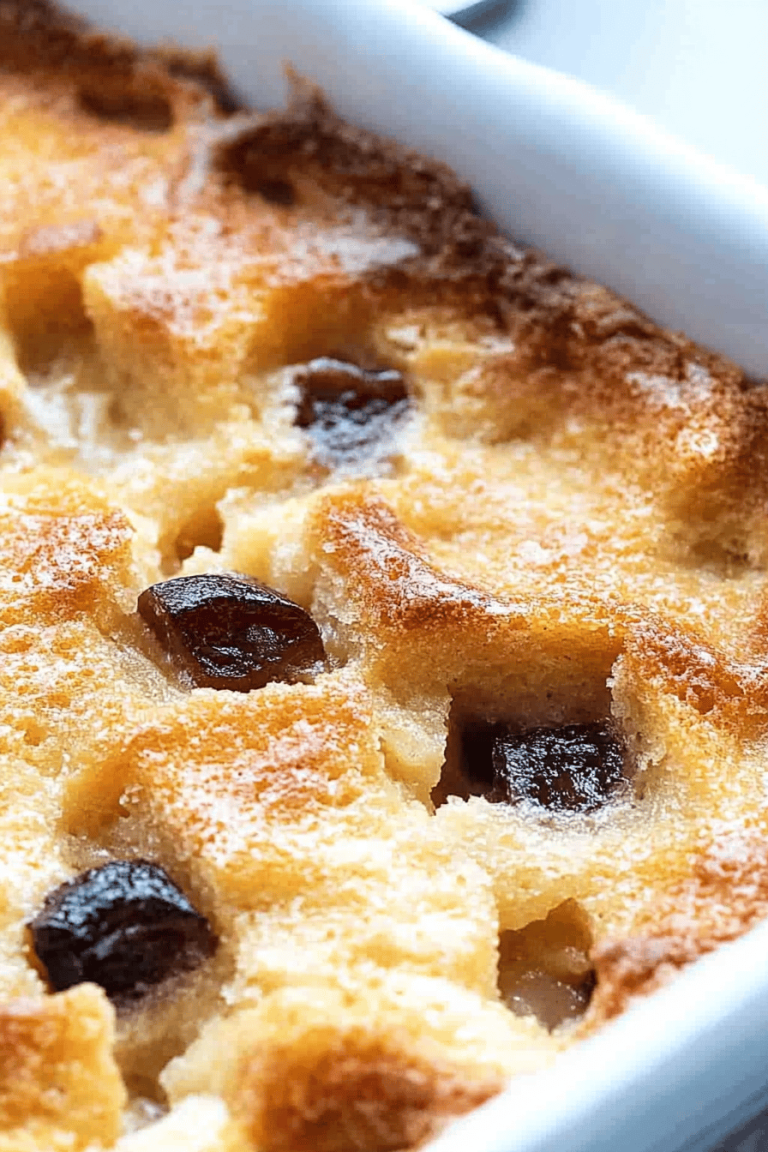
This Apple Crumble Cheesecake is all about building layers of flavor and texture. We start with a simple, press-in crust that’s a bit different from your usual, then we make a wonderfully smooth cheesecake batter. While that’s chilling slightly, we prepare our spiced apple filling. The real magic happens when we layer the cheesecake batter, the apples, and then top it all off with that glorious, buttery crumble mixture. It bakes into a beautiful, golden-brown masterpiece that smells absolutely divine. The best part? It’s way less fussy than you might imagine, and the results are always spectacular.
Ingredients
For the Crust:
This isn’t your typical graham cracker crust, and that’s a good thing! I find it adds a little extra depth and texture that just works.
- 2 cups all-purpose flour
- ½ cup packed light brown sugar
- ½ teaspoon ground cinnamon
- ¼ teaspoon salt
- ¾ cup (1 ½ sticks) unsalted butter, melted
For the Cheesecake Filling:
This is where the creaminess comes from. Make sure your cream cheese and eggs are at room temperature – it makes a world of difference in getting a smooth batter!
- 3 (8-ounce) packages cream cheese, softened
- 1 ¼ cups granulated sugar
- 3 large eggs, room temperature
- 1 teaspoon vanilla extract
- ½ cup sour cream, room temperature (this adds extra tang and creaminess!)
For the Spiced Apple Filling:
The star of the show! I love using a mix of apples for the best flavor and texture. Granny Smith for tartness and Honeycrisp or Fuji for sweetness.
- 4 cups peeled, cored, and diced apples (about 3-4 medium apples)
- ¼ cup granulated sugar
- 1 tablespoon lemon juice
- 1 teaspoon ground cinnamon
- ½ teaspoon ground nutmeg
- 1 tablespoon all-purpose flour (or cornstarch for a thicker filling)
For the Crumble Topping:
This is pure, buttery, crunchy goodness. You’ll want to eat it straight from the bowl, but try your best to resist!
- 1 cup all-purpose flour
- ¾ cup packed light brown sugar
- ½ teaspoon ground cinnamon
- ½ cup (1 stick) cold unsalted butter, cut into small cubes
Step-by-Step Instructions
Step 1: Preheat & Prep Pan
First things first, preheat your oven to 350°F (175°C). Grab a 9-inch springform pan. I like to lightly grease mine with butter or cooking spray, just to be safe. Then, I usually line the bottom with a circle of parchment paper. This is a trick I learned after a few minor cheesecake sticking incidents early in my baking career! It makes getting the cheesecake out so much easier, and you won’t have to worry about it cracking as much when you release the sides.
Step 2: Mix Dry Ingredients
In a medium bowl, whisk together the flour, Brown Sugar, cinnamon, and salt for the crust. Make sure it’s all nice and combined. This is where you start building those warm, cozy flavors that complement the apples and cheesecake so beautifully.
Step 3: Mix Wet Ingredients
Pour the melted butter into the dry ingredients. Stir with a fork until the mixture is crumbly and resembles coarse meal. It should hold together when you pinch it. This is your base!
Step 4: Combine
Gently press the crumb mixture evenly into the bottom of the prepared springform pan. You can use the bottom of a glass or a flat-bottomed measuring cup to help pack it down firmly. Don’t worry about going up the sides; we’re just doing a bottom crust here. Pop this into the freezer for about 10-15 minutes while you prepare the filling. This helps it set up and prevents it from getting soggy.
Step 5: Prepare Filling
In a large bowl, beat the softened cream cheese with an electric mixer on medium speed until it’s completely smooth and creamy. Seriously, no lumps allowed! Gradually add the granulated sugar and beat until well combined and fluffy. Then, beat in the eggs one at a time, mixing just until each egg is incorporated. Don’t overmix here, as that can lead to cracks. Stir in the vanilla extract and Sour cream until just combined. Again, smooth and creamy is the goal. This is the luscious foundation of our cheesecake!
Step 6: Prepare Filling
In a separate bowl, combine the diced apples, ¼ cup granulated sugar, lemon juice, cinnamon, nutmeg, and 1 tablespoon of flour (or cornstarch). Toss everything together until the apples are evenly coated. This mixture is going to be so fragrant and delicious. The lemon juice not only adds a little brightness but also helps keep the apples from browning too much.
Step 7: Layer & Swirl
Okay, now for the fun part! Pour about half of the cheesecake batter over the chilled crust. Spoon about half of the apple mixture over the batter. Dollop some more cheesecake batter over the apples, then finish with the remaining apples. Finally, spoon the rest of the cheesecake batter over the apples. If you want to get fancy, you can use a knife or a skewer to gently swirl the top layer of batter and apples a little, creating a marbled effect. But honestly, it’s beautiful even without swirling. Just make sure the apples are mostly covered by batter.
Step 8: Bake
Now, for the crumble! In a medium bowl, combine the flour, brown sugar, and cinnamon for the topping. Add the cold, cubed butter. Use your fingertips, a pastry blender, or two forks to cut the butter into the dry ingredients until the mixture resembles coarse crumbs. This should be nice and chunky. Sprinkle this glorious crumble mixture evenly over the top of the cheesecake. Bake for 50-60 minutes, or until the edges are set and lightly golden, and the center is mostly set but still has a slight jiggle. Don’t be alarmed if it’s not completely firm; it will continue to set as it cools.
Step 9: Cool & Glaze
Turn off the oven and let the cheesecake cool inside with the door slightly ajar for about an hour. This slow cooling process is key to preventing cracks! After an hour, carefully remove the cheesecake from the oven and let it cool completely on a wire rack. Once it’s at room temperature, cover it loosely with plastic wrap and refrigerate for at least 4 hours, or preferably overnight. This is crucial for the cheesecake to fully set up and develop its perfect texture. You can make the glaze while it’s cooling or just before serving. In a small bowl, whisk together powdered sugar, a splash of milk or cream, and a touch of vanilla until smooth and drizzle-able. Drizzle this over the cooled cheesecake before serving. You can also just dust it with powdered sugar if you prefer!
Step 10: Slice & Serve
Once chilled and set, carefully run a thin knife around the edge of the springform pan before releasing the sides. Slice with a sharp knife that has been dipped in hot water and wiped dry between cuts for the cleanest slices. Serve and enjoy the applause!
What to Serve It With
This Apple Crumble Cheesecake is pretty much a showstopper on its own, but I love thinking about all the ways to make a meal or a gathering even more special with it.
For Breakfast: Yes, you can totally have cheesecake for breakfast! Especially this one. Think of it as a very decadent pastry. I love a slice with a strong, hot cup of black coffee. The richness of the coffee cuts through the sweetness beautifully. For a slightly more elegant morning, serve a smaller piece with some fresh berries on the side – a little pop of freshness is always welcome.
For Brunch: This is where it really shines! A beautiful slice of Apple Crumble Cheesecake makes any brunch feel celebratory. I often serve it with a side of crispy bacon or savory sausage to balance out the sweetness. For drinks, a mimosa or a sparkling cider pairs wonderfully. You can even add a little dusting of powdered sugar around the plate for extra flair.
As Dessert: This is its most natural habitat! Serve it warm (just briefly pop a slice in the microwave for 10-15 seconds if you like it warm) with a scoop of vanilla bean ice cream. The contrast of the warm cheesecake and cold ice cream is divine. A dollop of freshly whipped cream is also a must for many people in my family. For a richer dessert, try it with a salted caramel sauce drizzled over the top.
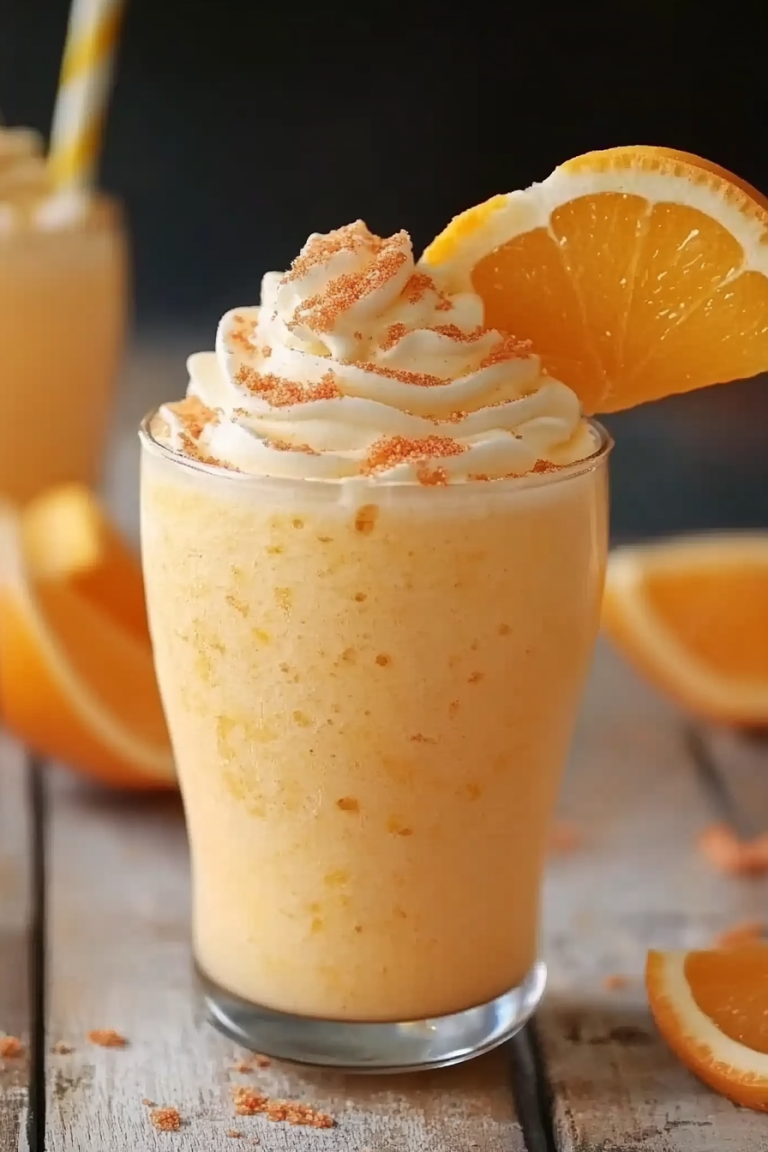
For Cozy Snacks: This is my personal favorite time to enjoy it. Picture this: a chilly evening, a good book, and a cozy blanket. Then, you cut yourself a generous slice of this Apple Crumble Cheesecake. It’s the ultimate comfort food. I often enjoy it with a warm mug of apple cider or a creamy chai tea. It’s pure, unadulterated bliss and a lifesaver when you just need a little sweet pick-me-up without a lot of fuss.
Top Tips for Perfecting Your Apple Crumble Cheesecake
Over the years, I’ve picked up a few tricks and learned from a couple of mishaps (don’t ask about the time I forgot the eggs!). These little nuggets of wisdom are what I rely on to make sure this Apple Crumble Cheesecake turns out perfectly every single time.
Cream Cheese & Egg Temperature: This is NON-NEGOTIABLE for a smooth cheesecake. Softened cream cheese means no lumps, and room temperature eggs emulsify better, preventing that dreaded cracked surface. I usually take my cream cheese out a good hour or two before I plan to start, and eggs can warm up in a bowl of warm water for about 10 minutes if you forget!
Don’t Overmix the Batter: Once you add the eggs, mix *just* until combined. Overbeating can incorporate too much air, which then expands in the oven and causes cracks as it cools. It’s a delicate balance, but gentle is the way to go.
The Magic of the Water Bath (Optional but Recommended): While this recipe doesn’t *require* a water bath, it’s my secret weapon for an ultra-creamy, crack-free cheesecake. If you want to go the extra mile, wrap the outside of your springform pan tightly in heavy-duty aluminum foil (multiple layers!), place it in a larger roasting pan, and pour about an inch of hot water into the roasting pan before baking. The steam creates a humid environment that cooks the cheesecake gently and evenly.
Cooling is Key: Seriously, don’t rush this. Turning off the oven and letting it cool inside with the door ajar is crucial. Then, letting it cool completely on the rack, and refrigerating for at least 4 hours (overnight is best!) allows the cheesecake to firm up and develop its signature texture. Patience is rewarded!
Crumb Topping Texture: For that perfect crumble, use *cold* butter. You want distinct little chunks of butter that melt and create pockets of crispiness. Don’t overwork it into a paste; chunky is good!
Apple Choice Matters: I always go for a mix of tart and sweet apples. Granny Smith provides a lovely tang that cuts through the richness, while Honeycrisp, Fuji, or Gala add sweetness and hold their shape well. Avoid very mealy apples like Red Delicious, as they can turn mushy.
Glaze Consistency: If your glaze is too thin, add more powdered sugar, a tablespoon at a time. If it’s too thick, add a tiny bit more milk or cream, just a teaspoon at a time, until it’s the perfect drizzling consistency. You want it to flow but not be watery.
Storing and Reheating Tips
The best part about this Apple Crumble Cheesecake is that it keeps surprisingly well, making it perfect for making ahead of time or enjoying leftovers.
Room Temperature: This is generally not recommended for cheesecakes because of the dairy content. While it might be okay for a very short period (an hour or two) if your kitchen isn’t too warm, it’s best to refrigerate it for food safety and quality.
Refrigerator Storage: Once cooled and set, cover the cheesecake tightly with plastic wrap or aluminum foil. If it’s still in the springform pan, you can simply cover the top. If you’ve already removed the sides, transfer it to an airtight container. It will stay delicious in the refrigerator for up to 4-5 days. The flavors actually meld and deepen over time, so sometimes it tastes even better on day two!
Freezer Instructions: If you need to freeze it, I recommend freezing slices individually. Wrap each slice tightly in plastic wrap, then in a layer of aluminum foil, and finally place them in a freezer-safe bag or container. This double-wrapping prevents freezer burn. It can be frozen for up to 1-2 months. Thaw slices overnight in the refrigerator before serving.
Glaze Timing Advice: If you plan to store leftovers, I often find it best to add the glaze *just before* serving. Glaze can sometimes soften the crumble topping if left on for extended periods, especially in the fridge. If you’re freezing slices, it’s definitely better to add the glaze after thawing.
Frequently Asked Questions
Final Thoughts
I really hope you give this Apple Crumble Cheesecake a try. It’s more than just a recipe to me; it’s a piece of my kitchen that I love sharing. It embodies everything I adore about baking: comforting flavors, satisfying textures, and the pure joy it brings to people. It’s the kind of dessert that feels special enough for a celebration but is also approachable and perfect for a cozy night in. The combination of creamy cheesecake, tender spiced apples, and that irresistible crumble topping is truly something to behold, and it’s always a crowd-pleaser.
If you’re someone who loves apple desserts, or if you’re a devotee of all things cheesecake, this recipe is going to be your new go-to. I’ve tried to make it as foolproof as possible, and with these tips, I’m confident you’ll bake a masterpiece. If you love this, you might also want to check out my Best Ever Berry Cobbler for another delicious fruit-forward treat!
I can’t wait to hear how your Apple Crumble Cheesecake turns out! Please leave a comment below with your thoughts, any variations you tried, or just to say hello. Happy baking!
Apple Crumble Cheesecake
Ingredients
For the Cheesecake Base
- 200 grams Digestive biscuits
- 100 grams Unsalted butter, melted
For the Cheesecake Filling
- 600 grams Cream cheese, softened
- 150 grams Granulated sugar
- 2 Large eggs
- 1 teaspoon Vanilla extract
- 0.5 cup Sour cream
For the Apple Crumble Topping
- 4 medium Apples, peeled, cored, and diced e.g. Granny Smith or Honeycrisp
- 100 grams All-purpose flour
- 75 grams Brown sugar
- 50 grams Cold unsalted butter, cubed
- 1 teaspoon Cinnamon
Instructions
Preparation Steps
- Preheat your oven to 325°F (160°C). Grease and line a 9-inch springform pan.
- For the base: Crush the digestive biscuits into fine crumbs. Mix with melted butter and press firmly into the base of the prepared springform pan.
- For the filling: In a large bowl, beat the cream cheese and granulated sugar until smooth. Add eggs one at a time, beating well after each addition. Stir in vanilla extract and sour cream until just combined.
- Pour the cream cheese filling over the biscuit base.
- For the crumble topping: In a medium bowl, combine flour, brown sugar, and cinnamon. Cut in the cold butter with your fingertips until the mixture resembles coarse crumbs.
- Add the diced apples to the crumble mixture and toss to coat.
- Evenly sprinkle the apple crumble mixture over the cheesecake filling.
- Bake for 55-65 minutes, or until the edges are set and the center is slightly wobbly. Cover loosely with foil if the top starts to brown too quickly.
- Turn off the oven and let the cheesecake cool in the oven with the door slightly ajar for 1 hour. This helps prevent cracking.
- Remove from the oven and let it cool completely on a wire rack. Chill in the refrigerator for at least 4 hours, or preferably overnight, before serving.