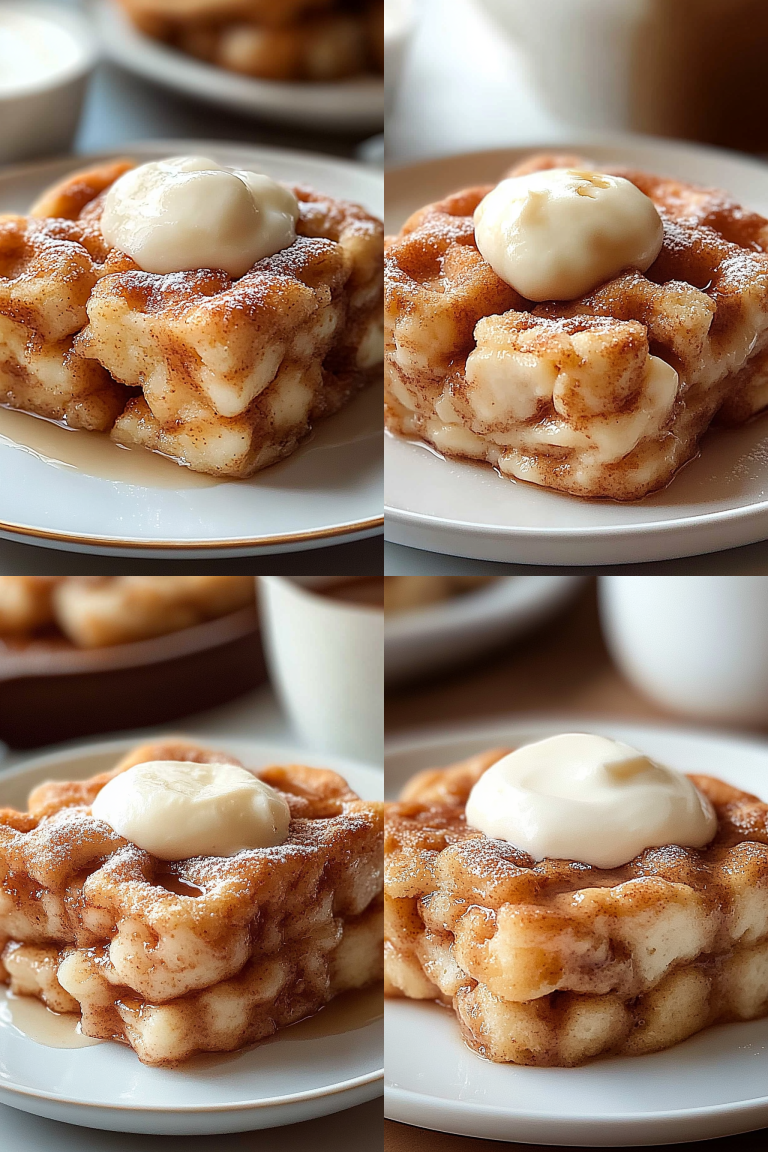
You know those recipes that just… work? The ones you can whip up even when you’re exhausted, and they *always* turn out perfectly? This crustless quiche is absolutely one of those for me. It’s become such a staple in our house, and I’ve lost count of how many times I’ve made it. It’s right up there with my famous chocolate chip cookies in terms of requests, but honestly, it’s way healthier! Think of it as the sophisticated, slightly more grown-up cousin of a breakfast casserole, but without all the fuss of pastry. It’s the kind of dish that makes you feel like you’ve really accomplished something, even if you only had 20 minutes to spare. I’ve tinkered with this a lot over the years, finding just the right balance of creamy egg, savory veggies, and a hint of something sweet, all without a crumb of crust. It’s pure comfort in every bite, and I just know you’re going to fall in love with it too.

What is a crustless Quiche?
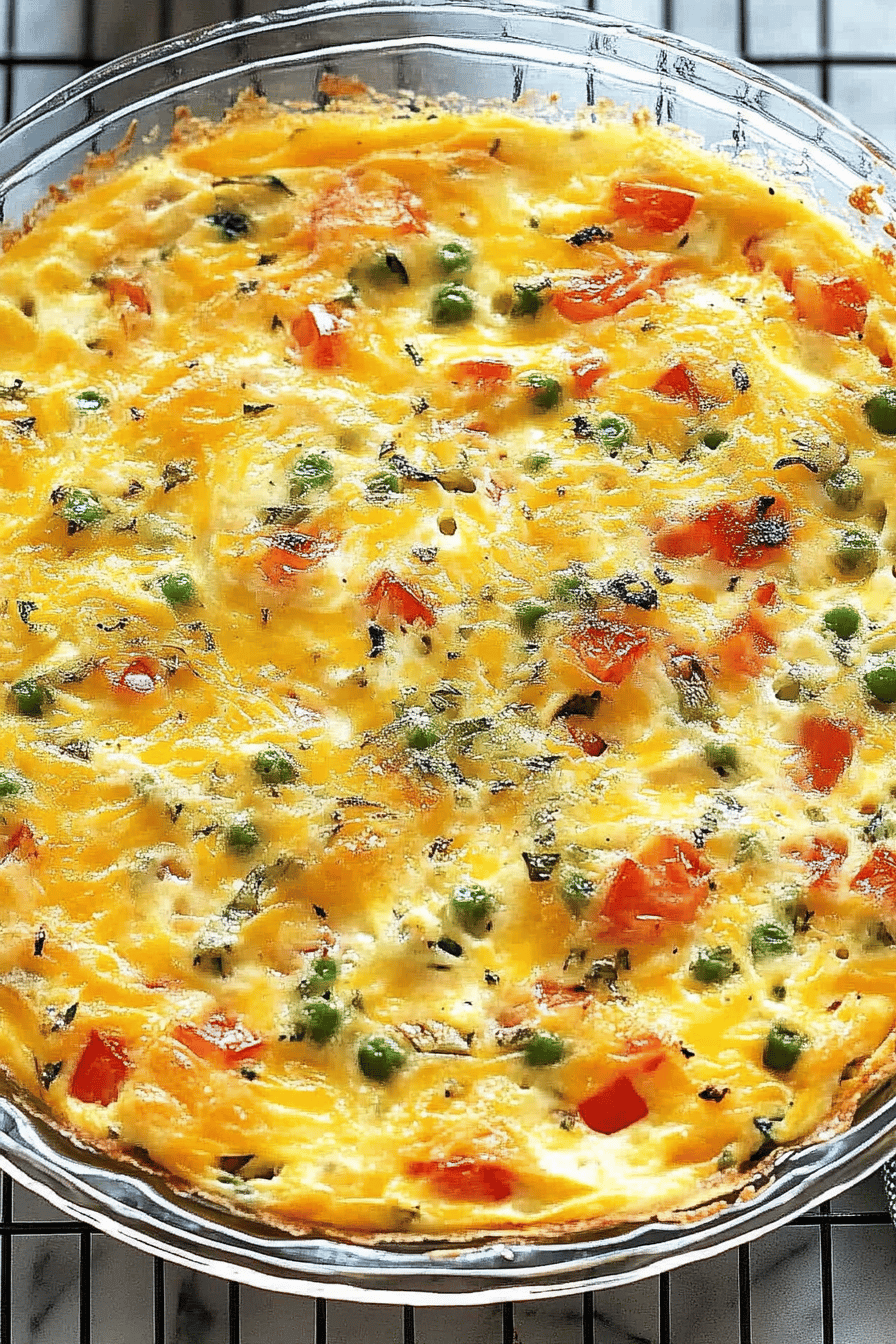
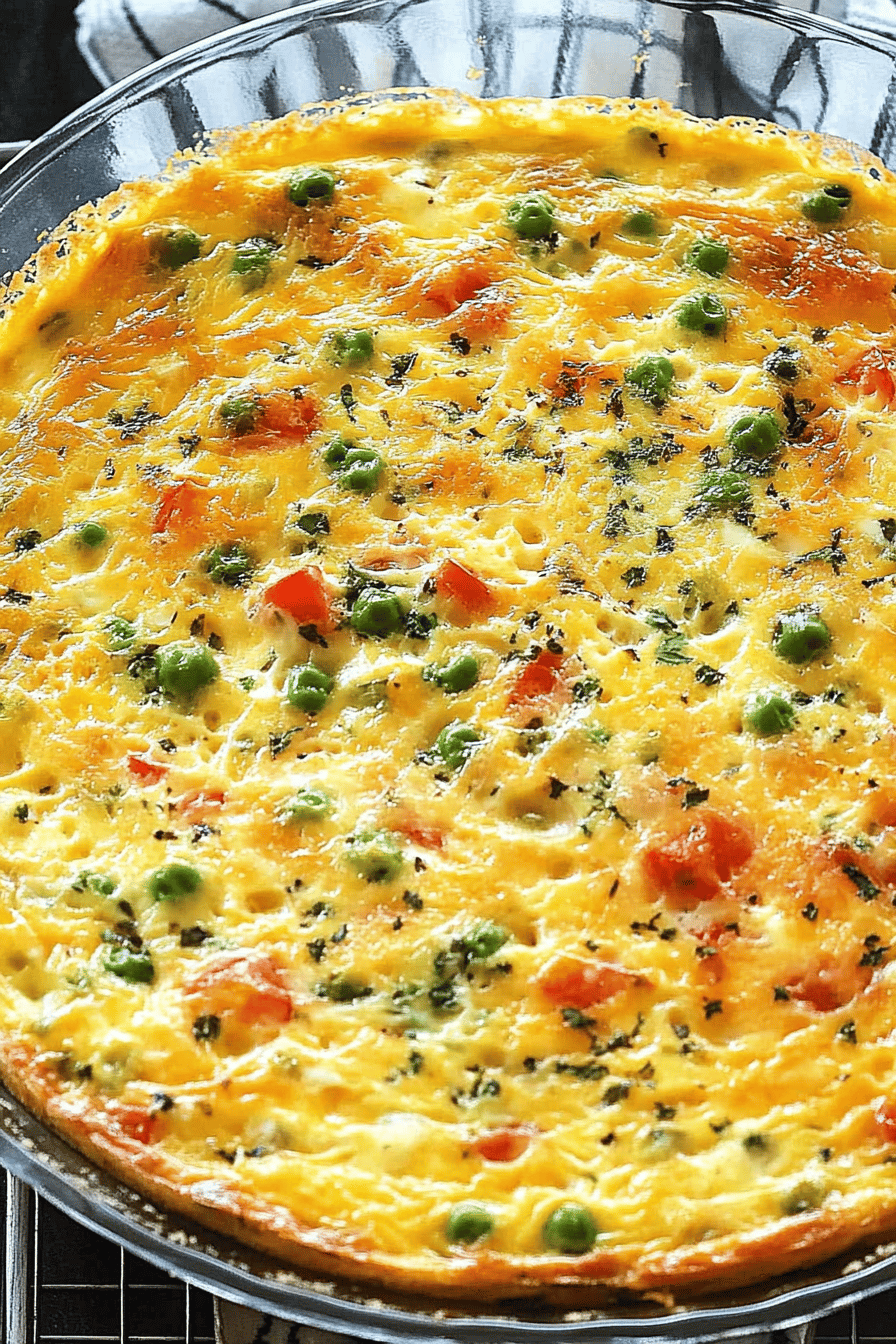
So, what exactly is a crustless quiche? At its heart, it’s just a beautiful, baked egg dish filled with all sorts of goodies. The “crustless” part, of course, means we’re skipping the pastry. Instead, we rely on the eggs and a touch of dairy (or non-dairy alternative!) to form a tender, custardy base that holds everything together. It’s essentially a very elegant, savory custard tart without the shell. I always tell people it’s like a deconstructed quiche, but in the best possible way! The flavors of the fillings really get to shine through without being masked by a heavy crust. It’s naturally lighter and, dare I say, often even more satisfying because you’re not filling up on dough. It’s perfect for when you want that comforting, satisfying quiche experience but need something a little quicker or perhaps gluten-free.
Why you’ll love this recipe?
Oh, where do I even begin with why this recipe is a winner? First off, the FLAVOR. Even without a crust, this quiche is packed with deliciousness. The eggs create this wonderfully creamy, rich base, and then you have all the delicious fillings mingling together. It’s savory, it’s comforting, and it’s just so satisfying. What I love most about this is how incredibly SIMPLE it is. Seriously, once you’ve prepped your veggies, it’s just a matter of whisking, pouring, and baking. No tricky pastry to roll out, no blind baking required – it’s a lifesaver on those busy weeknights when dinner needs to be on the table fast, or for those lazy weekend mornings when you want something special without a lot of effort. And let’s talk COST-EFFICIENCY. Eggs and veggies are usually pretty budget-friendly, making this a fantastic option for feeding a crowd without breaking the bank. Plus, it’s incredibly VERSATILE. I’ll share some of my favorite filling ideas below, but honestly, you can throw in almost anything you have on hand. Leftover roasted vegetables? Perfect! A handful of spinach? You bet! It’s a great way to use up odds and ends in the fridge. Compared to a traditional quiche, this crustless version is quicker, often lighter, and just as delicious. It’s the recipe I reach for when I want something elegant and impressive, but also ridiculously easy.
How do you make a crustless quiche?
Quick Overview
Making this crustless quiche is surprisingly straightforward. We’ll start by prepping our chosen fillings, then whisking together a simple egg and dairy base. Everything gets poured into a greased baking dish, and then it’s off to the oven until golden and puffed. It’s all about creating that perfect, creamy custard texture that holds its shape beautifully. The beauty of this method is its inherent simplicity, allowing the fresh flavors of your ingredients to really take center stage. It’s a fuss-free approach that delivers impressive results every single time, making it a true weeknight hero.
Ingredients
For the Main Batter:
6 large eggs. I always go for good quality, free-range eggs if I can – you can really taste the difference in the richness and color!
1 cup milk (whole milk or half-and-half will give you the creamiest results, but I’ve tested this with almond milk too, and it actually made it even creamier for a lighter option!)
1/2 cup grated Parmesan cheese (or any hard, salty cheese you love – Gruyere is fantastic here too!)
1/4 teaspoon salt (adjust to your taste, especially if your cheese is very salty)
1/8 teaspoon black pepper
A pinch of nutmeg (optional, but it adds a subtle warmth that’s just divine)
For the Filling:
2 cups of your favorite chopped vegetables. Think sautéed spinach, roasted bell peppers, caramelized onions, steamed broccoli florets, or even some pre-cooked crumbled bacon or ham. The key is to have them cooked and not too watery. I usually aim for about 1 to 1.5 cups of cooked veggies for this amount of batter. Make sure any watery veggies, like mushrooms or spinach, are well-drained!
For the Glaze:
This is optional, but it adds a lovely sheen and extra layer of flavor. I often use a simple mixture of:
1 tablespoon melted butter
1 teaspoon Dijon mustard (or honey for a sweeter touch!)
Whisked together until smooth. You can also just brush with a little extra melted butter or even a drizzle of cream before serving.
Step-by-Step Instructions
Step 1: Preheat & Prep Pan
First things first, let’s get our oven preheated to 375°F (190°C). While the oven is warming up, grab a 9-inch pie dish or a similar-sized oven-safe skillet. I find that greasing the dish really well with butter or non-stick cooking spray is crucial to prevent sticking. A light coating of olive oil works too! Make sure to get into all the nooks and crannies, especially if you’re using a pie dish with fluted edges.
Step 2: Mix Dry Ingredients
In a medium bowl, we’re going to whisk together our grated Parmesan cheese, salt, pepper, and that pinch of nutmeg if you’re using it. Giving these a quick whisk ensures the cheese is evenly distributed throughout the batter and that your seasonings aren’t clumped up in one spot. It’s a small step, but it makes a difference in the final texture and flavor!
Step 3: Mix Wet Ingredients
Now, in a larger bowl, crack in your 6 large eggs. Give them a good whisk until they’re nicely broken up and the yolks and whites are fully combined. Then, pour in your milk (or your milk alternative). Whisk this together until it’s smooth and homogenous. You’re looking for a nice, uniform pale yellow mixture. No streaks of egg white should be visible.
Step 4: Combine
Add the whisked dry ingredients (your cheese mixture) into the wet ingredients. Give it another good whisk until everything is perfectly combined. Don’t overmix here; we’re just aiming to incorporate everything smoothly. The batter should be a lovely, creamy consistency at this point.
Step 5: Prepare Filling
This is where you get to have fun and customize! If you haven’t already, make sure your chosen fillings are cooked and cooled slightly, and importantly, that any excess moisture has been drained away. For example, if you’re using spinach, give it a really good squeeze after cooking to get out as much water as possible. For sautéed onions or peppers, you might want to let them drain on a paper towel for a few minutes. This step is crucial to prevent your quiche from becoming watery. Spread your prepared filling evenly across the bottom of your greased baking dish.
Step 6: Layer & Swirl
Gently pour the egg batter over the prepared filling in your baking dish. You can give the dish a gentle shake to help the batter settle and fill in any gaps. If you want a slightly more visually interesting quiche, you can gently swirl in some of your filling ingredients on top with a knife or skewer, but it’s totally optional! The goal is to have a nice, even layer of batter covering the filling.
Step 7: Bake
Carefully place your dish into the preheated oven. Bake for about 30-40 minutes, or until the quiche is set around the edges and the center is just slightly jiggly. It should be beautifully puffed up and golden brown on top. To check for doneness, you can insert a knife near the center; it should come out clean. Keep an eye on it, as oven temperatures can vary!
Step 8: Cool & Glaze
Once it’s done, remove the quiche from the oven and let it cool on a wire rack for at least 10-15 minutes. This is important! It allows the custard to finish setting and makes it much easier to slice. While it’s cooling, you can quickly whisk together your glaze ingredients if you’re using them. Once the quiche has cooled slightly, gently brush the glaze over the top for a lovely sheen. Trust me on this one, it makes it look extra special!
Step 9: Slice & Serve
Now for the best part! Carefully slice your beautiful crustless quiche into wedges. Serve it warm, and just watch everyone dig in. It’s wonderfully satisfying on its own, but I’ll give you some serving ideas below!
What to Serve It With
This crustless quiche is honestly a chameleon when it comes to pairings. It fits in perfectly at almost any meal! For a simple, comforting BREAKFAST, I love serving it with a freshly brewed cup of coffee and maybe a small bowl of fresh berries on the side. It’s quick, filling, and feels like such a treat to start the day. For a more elegant BRUNCH spread, I’ll serve it alongside a vibrant green salad with a light vinaigrette, some crispy bacon or sausage, and perhaps some mimosas or freshly squeezed orange juice. The quiche makes a beautiful centerpiece! Don’t underestimate its dessert potential either. As a light AFTER DESSERT, especially after a rich main course, a small slice with a drizzle of balsamic glaze or a dollop of crème fraîche is surprisingly delightful. And for COZY SNACKS or a light lunch, it’s perfect on its own or with a side of crusty bread. My kids actually ask for this all the time as a quick after-school snack, and it’s so much better than anything processed!
Top Tips for Perfecting Your Crustless Quiche
I’ve made this crustless quiche so many times that I’ve picked up a few tricks along the way that really help ensure it turns out perfectly every single time. First, ZUCCHINI PREP is crucial if you decide to use it. Grate it using the large holes of a box grater, then place it in a colander and sprinkle with a little salt. Let it sit for about 10 minutes, then squeeze out as much moisture as humanly possible. This step is non-negotiable for watery vegetables like zucchini, spinach, or mushrooms – it prevents a soggy quiche! For MIXING ADVICE, remember not to overmix the batter once you’ve combined the wet and dry ingredients. Overmixing can develop the gluten in the flour (if you’ve added any for structure) or make the eggs tough. Just combine until it’s smooth.
When it comes to SWIRL CUSTOMIZATION, keep it simple. A few gentle swirls with a knife on top of the filling before pouring the batter will create beautiful patterns without disturbing the base too much. For INGREDIENT SWAPS, feel free to experiment! If you don’t have milk, cream or even plain yogurt can work in a pinch. For cheese, cheddar, Swiss, or even a sprinkle of feta can be delicious. Just remember to adjust salt accordingly. In terms of BAKING TIPS, make sure your oven rack is in the center of the oven for even heat distribution. If you notice the top browning too quickly, you can loosely tent it with foil. For doneness, the center should be set but still have a slight jiggle, like a cheesecake. It will continue to firm up as it cools. Finally, for GLAZE VARIATIONS, if mustard or butter isn’t your thing, a light brush of honey mixed with a tiny bit of water before baking can give it a lovely golden hue and a hint of sweetness. Or, skip the glaze altogether and just enjoy the beautiful, natural browning.
Storing and Reheating Tips
This crustless quiche is fantastic for meal prep, and I often make one on Sunday to have on hand for lunches and dinners throughout the week. When it comes to STORING, it’s pretty straightforward. If you have leftovers, let the quiche cool completely before storing. You can keep it at ROOM TEMPERATURE for no more than 2 hours. After that, it’s best to transfer it to the REFRIGERATOR. Store it in an airtight container or simply cover the dish tightly with plastic wrap or foil. It should keep well in the fridge for about 3-4 days. The quality is best when enjoyed within the first few days, but it’s still perfectly safe and tasty for longer.
FREEZER INSTRUCTIONS are also an option if you want to make a batch ahead of time. Once completely cooled, you can wrap individual slices tightly in plastic wrap, then in foil, and freeze them for up to 2-3 months. To reheat from frozen, unwrap the slice and bake it in a preheated oven at around 325°F (160°C) for about 20-25 minutes, or until heated through. If reheating from the refrigerator, you can warm individual slices in the oven at 350°F (175°C) for about 10-15 minutes, or until warmed through. A quick zap in the microwave is also fine, but I find the oven gives it a nicer texture. For GLAZE TIMING ADVICE, it’s best to apply any glaze or topping *after* reheating, or right before serving if you’re serving it at room temperature, to maintain its sheen.
Frequently Asked Questions
Final Thoughts
Honestly, this crustless quiche recipe is one of those dishes that just makes life a little bit easier and a lot more delicious. It’s proof that you don’t need a fancy crust to create something truly special. It’s forgiving, adaptable, and always delivers that comforting, satisfying taste that I absolutely adore. Whether you’re making it for a leisurely weekend brunch, a quick weeknight dinner, or just a tasty snack, it never disappoints. I hope you give this a try and that it becomes a favorite in your kitchen too! If you end up making it, I’d absolutely love to hear how it turned out for you in the comments below. What fillings did you use? Did you try any fun variations? And please, don’t forget to share your culinary triumphs with your friends!

Crustless Ham and Cheese Quiche
Ingredients
Main Ingredients
- 0.25 cup diced ham
- 0.5 cup shredded cheddar cheese
- 0.5 cup chopped onion
- 0.5 cup chopped green bell pepper
- 4 large eggs
- 1.5 cup milk
- 0.5 teaspoon salt
- 0.25 teaspoon black pepper
Instructions
Preparation Steps
- Preheat oven to 375°F (190°C). Grease a 9-inch pie plate.
- Spread the diced ham, shredded cheddar cheese, chopped onion, and chopped green bell pepper evenly in the prepared pie plate.
- In a medium bowl, whisk together the eggs, milk, salt, and pepper until well combined.
- Pour the egg mixture over the ingredients in the pie plate.
- Bake for 40 to 45 minutes, or until the quiche is set and lightly golden brown. A knife inserted near the center should come out clean.
- Let the quiche cool for a few minutes before slicing and serving.