Ever walk into a room and think, “Wow, this could use a little love”? That’s exactly how I felt about my old, spotted coffee table last spring. It had seen better days but I simply didn’t want to toss it out or buy something new. That’s when I rolled up my sleeves and gave it a fresh coat of paint — and wow, what a transformation! Learning how to paint furniture opened a whole new world for me. It’s like breathing life back into an old friend without breaking the bank or hiring a pro. Honestly, I compare it to whipping up a homemade pasta sauce instead of ordering takeout: simple, satisfying, and totally worth the effort.
What is paint furniture?
Okay, so “paint furniture” is really just what it sounds like—sprucing up your worn-out or outdated furniture pieces by painting them yourself. But it’s more than slapping on a color. Think of it as a creative reset button; you get to choose how your favorite chair, table, or dresser looks and vibes in your home. It’s essentially a DIY makeover that’s surprisingly approachable, even if you don’t have prior painting experience. The best part? You don’t need to be Picasso or have a fancy workshop. With a little prep, some paint, and maybe a brush or two, you transform the ordinary into something uniquely yours.
Why you’ll love this recipe?
The thing that really hooked me on painting furniture is how amazing it feels to see old, tired pieces suddenly become the stars of the room. The flavor — well, think of color and texture as the ‘taste’ here — the right shade can brighten your space instantly or create a cozy, muted calm that feels like a hug. I always find it supremely satisfying to mix it up with chalk paint or milk paint for that vintage vibe, but smooth satin or semi-gloss can make a piece feel fresh and modern.
Simplicity? This can be such a fun, weekend project that’s easy to fit in. I remember the first time I painted a nightstand while binge-watching a favorite show to keep me company; it was relaxing rather than a chore at all. The materials are budget-friendly, too — a quart of paint and some sandpaper usually do the trick. And versatility? Oh yes. I’ve painted everything from a tiny flower pot stand to a big old dresser, each one uniquely reflecting my style. It’s this mix of creativity and practicality that keeps me coming back. Plus, it’s a sweet way to add sentimental value to pieces that mean a lot.
How do I paint furniture?
Quick Overview
Alright, here’s the gist: you’ll start by preparing your furniture — cleaning, sanding, and making sure it’s ready for paint. Then comes the fun part: applying primer and your chosen paint in smooth layers. Finish it off with a protective sealant to keep your masterpiece safe from scrapes and spills. The whole process is pretty straightforward once you get a rhythm going, and trust me, the results are worth the little extra elbow grease. You’ll be amazed how a few hours one afternoon can completely refresh your favorite room piece.
Ingredients
For the Main Project:
- Furniture piece (wood, metal, or MDF all work)
- Mild soap and water or a TSP cleaner
- Sandpaper (medium and fine grit)
- Painter’s tape for edges and details
- Drop cloth or old newspapers to protect your floor
For Painting:
- Primer (choose according to your furniture material, like bonding primer for slick surfaces)
- Paint (chalk paint for vintage charm, latex for easy cleanup, or oil-based for durability)
- Paint brushes (angled for edges, foam brushes for smooth coats)
- Paint roller (small size, for larger flat surfaces)
For Finishing:
- Clear wax, polyurethane, or polycrylic (matte, satin, or gloss finish depending on your style)
- Clean cloths for waxing
- Protective gloves (optional but helpful)
Step-by-Step Instructions
Step 1: Preheat & Prep Pan
Okay, maybe not a pan here but your workspace! Make sure you have good ventilation — an open window or fan is your best friend. Lay down your protective drop cloth, tape off any hardware you can’t remove, and give your furniture a good scrub. I always feel like this first cleaning step breathes new life in by itself; a clean surface means the paint sticks better. Also, remove any loose paint flakes or dust with a dry cloth before moving on.
Step 2: Mix Dry Ingredients
This part is simple in furniture painting terms: sanding. Your goal is to roughen up any shiny surface to help the primer grab hold. Use medium-grit sandpaper in gentle, even strokes — and don’t rush it! You want a smooth, even texture, not scratches or uneven patches. After sanding, wipe the dust off with a damp cloth or tack cloth to get that perfect clean slate.
Step 3: Mix Wet Ingredients
Mix your primer and paint well before using. Sometimes paint settles or separates a bit, and a gentle stir makes all the difference in coverage. If you’re feeling adventurous, this is where you can add small amounts of water to latex paint to achieve a thinner consistency, but go slow so you don’t dilute it too much.
Step 4: Combine
Apply the primer evenly over your furniture using your brush and roller—start with edges and corners, then roll the flat surfaces. Let it dry completely before painting. This base layer will prevent old stains and colors from bleeding through your fresh coat. It’s a little extra step that really pays off for a smooth, even finish. I’ve learned this the hard way after dealing with stubborn knots in wood.
Step 5: Prepare Filling
If your furniture has dents or holes, now’s the time to fill them with wood filler. Spread it with a putty knife and once dry, sand smooth. This step is a game-changer and makes your piece look professionally restored. I once skipped this and regretted it later when those imperfections popped through the paint.
Step 6: Layer & Swirl
This is where the magic happens. Paint your first coat with long, even strokes, following the grain on wood pieces. Let it dry completely — patience is key here. If you’re going for a distressed look, now’s when you can lightly sand edges or spots to reveal a bit of the original finish. For deeper color, add a second coat, making sure each layer stays thin and smooth. Swirling paint is more for artistic finishes, but keep it subtle unless you’re aiming for a bold graphic impact.
Step 7: Bake
No oven needed — your furniture dries at room temperature. But drying times vary based on paint type and humidity. Chalk paint dries fast, but oil-based can take a day or more. During this time, keep dust away and avoid moving the piece to prevent fingerprints or dents. I usually leave mine for 24 hours before sealing to be safe.
Step 8: Cool & Glaze
Once dry, seal your paint with a protective finish like wax or polyurethane. Wax gives a soft, matte subtlety while poly adds more shine and durability. Apply wax with a soft cloth in circular motions, and buff it gently once dry. For poly, use a clean brush and thin coats; two to three coats usually do the trick. Don’t rush this step — the sealing locks in your hard work and keeps your furniture looking fresh for years.
Step 9: Slice & Serve
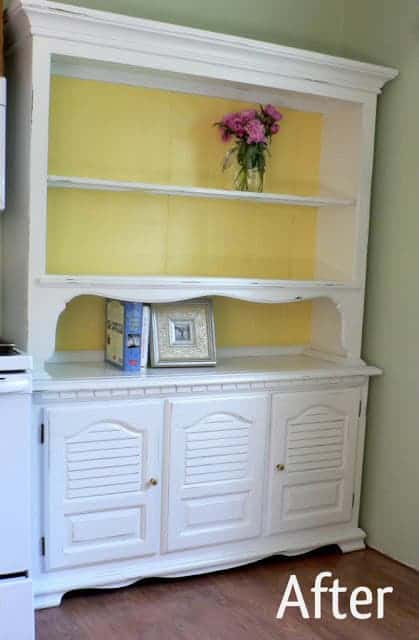
Okay, no slicing, but time to admire and style! Carefully remove any painter’s tape and hardware you took off. Give your space a little rearrange if you want to showcase the piece front and center. For me, placing a vase of fresh flowers or a stack of beloved books on the newly painted coffee table has become a little ritual that makes the room smile. My kids even stop to notice, which is always a win!
What to Serve It With
For Breakfast: Think cozy corner vibes — pair your freshly painted kitchen chairs or breakfast nook table with a steaming mug of coffee and warm croissants. The fresh paint smell somehow makes mornings feel like new beginnings.
For Brunch: A painted buffet or sideboard can be the perfect stage for a colorful brunch spread. Fresh fruit bowls, leafy greens, and mimosa glasses shine against a crisp white or pastel paint job, making the meal feel special without trying too hard.
As Dessert: If you painted a nightstand or console, use it as the backdrop for your after-dinner ritual — think candles, sweet treats, and a good book. The glow and fresh colors make even a simple dessert feel like a celebration.
For Cozy Snacks: A painted coffee table or side table holds your cozy snack essentials in style — a mug, your favorite book, and maybe a little jar of homemade jam. It’s that little detail that makes settling in so comforting. My family’s tradition is always to gather around the painted table during movie nights — it just feels inviting.
Top Tips for Perfecting Your Paint Furniture
Surface Prep: Never skip sanding! Removing old finishes and creating a rough surface is your secret weapon for long-lasting paint. I learned after my first chipped chair that prepping saves so much frustration later.
Mixing Well: Stir paint thoroughly so the pigments are evenly distributed; it’s key for smooth, vibrant color. And always keep your brushes clean by rinsing or cleaning between coats to avoid streaks.
Swirl & Texture Customization: If you want a marbled or textured look, practice on a scrap piece first. Light swirling with a damp brush or sponge creates soft, interesting effects without feeling gimmicky.
Swap Considerations: Using chalk paint? It’s forgiving and low prep but less durable, so pair it with wax. For outdoor or heavily used pieces, go with oil-based or epoxy paints for extra toughness. I tried chalk paint on my kitchen table once and it needed more sealing than expected — lesson learned!
Oven Baking vs Air Dry: While some pros recommend a kiln or heat curing for professional results, home drying with patience is perfectly fine — just avoid using the piece until sealed and fully dry.
Glaze Variations: Don’t shy from experimenting — tinted waxes can add depth and antiqued charm. Or skip the sheen and opt for a matte clear coat if you want a modern minimalist style. I always keep a test board handy for trying new finishes before committing to the furniture.
Storing and Reheating Tips
Room Temperature: Painted furniture stored indoors maintains its finish beautifully for years. Keep it away from direct sunlight and moisture to avoid fading or warping. Cover with a breathable cloth if not in use, like when storing seasonally.
Refrigerator Storage: Not applicable for furniture, but if you’re storing small painted décor pieces, make sure they’re airtight to avoid dust buildup. I keep painted picture frames sealed in clear boxes during moves.
Freezer Instructions: Again, furniture doesn’t freeze well, but you can store leftover paint or wax in the fridge to prolong shelf life.
Glaze Timing Advice: Always apply glaze or finish after your paint has fully dried—rushing this is the fastest way to ruin your work. If you’re in a humid space, give it a little extra time — patience is your friend here.
Frequently Asked Questions
Final Thoughts
I can’t tell you how many times painting furniture has transformed not just my rooms but my mood, too. It’s that little burst of creativity and accomplishment — seeing a tired piece become a beloved showstopper is pure joy. What’s more, it’s budget-friendly and surprisingly therapeutic. Whether you’re refreshing an heirloom or crafting something new from a thrift find, this little paint project has big heart and personality.
If you’ve enjoyed this adventure, try pairing painted pieces with some fresh textiles or vintage accents for the full effect. Don’t be shy to experiment and share your own stories — I love hearing what colors and techniques you’ve fallen for. Happy painting, my friend! Can’t wait to see how yours turns out.
paint furniture
Ingredients
Main Ingredients
- 0.5 quart Zinsser Cover Stain oil-based primer
- 1 quart Latex furniture paint
- 0.25 quart Minwax water-based Polycrylic polyurethane Protective clear coat
- 0.25 cup Floetrol paint conditioner Optional, for smoother paint application
- 0.25 cup Paint thinner For cleaning brushes and thinning oil-based primer
- 1 piece Wood filler For patching holes and dents
Instructions
Preparation Steps
- Remove all doors and hardware from the furniture using a screwdriver. Patch holes and imperfections with wood filler then sand smooth.
- Lightly sand all surfaces with a medium-grit sanding block to roughen the surface for better primer adhesion. Clean off all dust completely.
- Apply two coats of oil-based primer, allowing the first coat to dry fully before applying the second.
- Paint 1 to 2 coats of latex furniture paint, allowing each coat to dry between applications. Let the final coat dry at least 24 hours before distressing.
- Distress the furniture gently using sanding blocks to achieve the desired worn look. Remove all sanding dust thoroughly.
- Apply the first coat of water-based polyurethane. Let dry, then lightly sand with fine-grit sanding block to smooth drips or brush marks. Wipe off dust and apply additional coats as needed for protection and shine.