Nothing quite smells like the start of a cozy morning like a batch of freshly baked banana bread warming up in the oven. I remember my mom pulling this out when I was a kid — that rich, sweet aroma swirling through the whole house made it impossible to resist sneaking a slice before breakfast. This banana bread is one of those recipes you turn to when life throws you a little chaos; it’s simple, comforting, and honestly, a little slice of joy. If you’ve ever been intimidated by banana bread, trust me, this one changes everything. It’s a bit like a classic chocolate chip cookie of quick breads—easy, sweet, and endlessly satisfying. My kids literally ask for this every week, and I bet by the time you try it, you’ll find yourself baking it on repeat, too.
What is banana bread?
Banana bread is essentially a moist, sweet quick bread made with mashed bananas — no yeast necessary, so it’s super fast to whip up. The “bread” part might throw you off at first, but think of it as a cake’s simpler, less fussy cousin with a bit of a banana punch. Originating from American kitchens in the 1930s, it was a clever way to use up overripe bananas before they got tossed. It’s that perfect marriage of banana’s natural sweetness and a tender crumb, often dotted with a bit of nuts or chocolate chips if you’re feeling fancy. It’s approachable enough for beginners, but deeply satisfying for anyone craving that homestyle, nostalgic treat.
Why you’ll love this recipe?
Let me tell you, what I love most about this banana bread isn’t just the taste — although that toasty, buttery banana flavor is out of this world — but how forgiving it is in the kitchen. You don’t have to fuss over complicated techniques, which makes it a lifesaver on busy nights when you want something sweet without the stress. Plus, it’s wallet-friendly: ripe bananas, pantry staples like flour and sugar, and a few common ingredients—super accessible if you ever find yourself mid-week with nothing planned.
Flavor-wise, this banana bread is rich and warmly spiced without overpowering the natural banana essence. I like to throw in a little cinnamon and sometimes nutmeg — subtle but it adds that cozy homey vibe I crave on cold mornings. The crumb is dense yet tender, with just enough moistness to feel like a treat, without being soggy. Plus, it plays well with mix-ins. Throw in walnuts, pecans, or chocolate chips, and you’ve got a completely new spin on a cherished classic.
And versatility? This banana bread doubles as breakfast with a smear of butter, a mid-afternoon snack with tea, or even a last-minute dessert with a drizzle of honey or some whipped cream. If you love other quick breads like zucchini or pumpkin, you’ll see plenty of love and familiarity here — but banana bread still wins in the “comfort food” department for me every time.
How do you make banana bread?
Quick Overview
This banana bread comes together in just one bowl (hallelujah), which means minimal cleanup — always a bonus. The key is marrying your wet ingredients (hello, ripe bananas!) with the dry ones carefully, not overmixing so the crumb stays tender but fully blended. Then it all goes into the oven to bake up into a golden, fragrant loaf you’ll want to slice immediately. I promise, it’s as simple as it sounds, and if you have a few overripe bananas waiting at home, you’re already halfway there!
Ingredients
For the Main Batter:
- 3 very ripe bananas, mashed – These are the heart of your bread. The riper, the sweeter and more flavorful.
- 1/2 cup (1 stick) unsalted butter, melted and slightly cooled – I’ve played with oils, but butter adds that rich, comforting flavor that’s hard to beat.
- 3/4 cup granulated sugar – Feel free to cut back if you want less sweet or substitute with coconut sugar for a deeper flavor.
- 2 large eggs – Helps bind everything together for that tender crumb.
- 1 teaspoon vanilla extract – Small but mighty for enhancing all those banana notes.
- 1 1/2 cups all-purpose flour – If you try whole wheat, expect a denser loaf but a lovely nuttiness.
- 1 teaspoon baking soda – The secret lift for your bread.
- 1/2 teaspoon fine salt – Balances the sweetness and enhances flavor.
- 1/2 teaspoon ground cinnamon – Optional but highly recommended for warmth.
For the Filling:
- 1/2 cup chopped walnuts or pecans (optional) – Adds crunch and texture contrast. Toast them lightly for an extra flavor hit.
- 1/2 cup chocolate chips (optional) – Because who can resist a little melty chocolate in banana bread?
For the Glaze:
- 1 cup powdered sugar – For that sweet finishing touch.
- 1–2 tablespoons milk (dairy or almond) – Adjust for drizzle consistency.
- 1/2 teaspoon vanilla extract or fresh lemon juice – Your choice for flavor boost; lemon adds a lovely tang.
Step-by-Step Instructions
Step 1: Preheat & Prep Pan
First things first, get your oven warmed up to 350°F (175°C). I always lightly grease a 9×5-inch loaf pan and line it with parchment paper, leaving a little overhang to make pulling the loaf out a breeze after it’s baked. This step pays off every time, trust me — no loaf left behind!
Step 2: Mix Dry Ingredients
In a medium bowl, whisk together the flour, baking soda, salt, and cinnamon. I like doing this separately so the baking soda is evenly distributed—nothing worse than biting into a patch of soda surprise! Whisking also helps keep the flour light, which leads to a fluffier bread.
Step 3: Mix Wet Ingredients
Now, in a large bowl, mash those ripe bananas well with a fork or potato masher until chunky-smooth. Stir in the melted butter, sugar, eggs, and vanilla extract until well combined. The batter will smell like banana heaven already!
Step 4: Combine
Gently fold the dry ingredients into the wet mixture with a spatula, stirring just until you see no big streaks of flour. The batter should look a bit lumpy—don’t overwork it or you’ll end up with flat bread. I learned this the hard way after years of trying to “make it perfect.” Loose lumps are your friend here.
Step 5: Prepare Filling
If you’re going for the nutty or chocolatey route, fold in your toasted nuts and/or chips now. If you want to keep it classic and simple, skip this step. Both ways are delicious! Sometimes, I add a bit of shredded coconut too, just to shake things up.
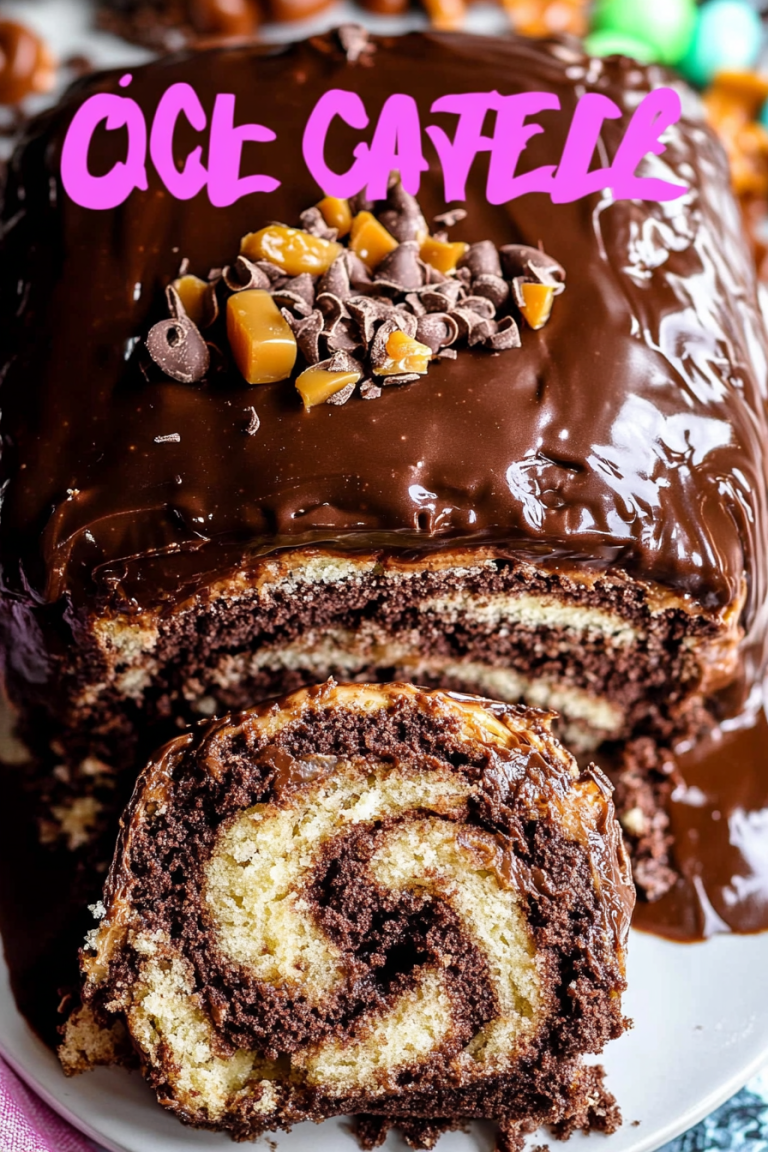
Step 6: Layer & Swirl
I like to pour about half the batter into the pan, then add a few extra chocolate chips or nuts if I’m feeling extra generous, and follow with the rest of the batter on top. Use a butter knife to give it a gentle swirl. This little swirl isn’t just for looks—it gives the loaf a bit of visual excitement and an even distribution of flavors.
Step 7: Bake
Bake for about 60 minutes, but start checking at 55. The aroma filling your kitchen will be your first sign it’s almost done. Use a toothpick inserted into the center to check: if it comes out clean or with just a few moist crumbs, you’re golden. Overbaking dries it out, so don’t be tempted to push past that golden window. My oven runs hot, so I sometimes cover the top loosely with foil halfway through to avoid too much browning.
Step 8: Cool & Glaze
Let the bread cool in the pan for 10-15 minutes—it’s tough, but important so it sets nicely. Then use those parchment edges to lift it out onto a wire rack. While it’s still warm but not hot, whisk together your glaze ingredients and drizzle lightly over. The glaze hardens just enough to add a delicate sweet crust that’s irresistible.
Step 9: Slice & Serve
Slice with a sharp serrated knife, wiping the blade clean between cuts for neat slices. This banana bread tastes best when it’s slightly warm, so the butter or glaze can soften and meld with the crumb. I love serving it up with a cup of strong coffee or a creamy latte — my little family tradition for weekend mornings!
What to Serve It With
For Breakfast: Spread a thick layer of softened butter or cream cheese on your slice alongside your morning coffee or chai. The combo of hot drink and sweet bread is honestly what I crave most on chilly or rushed mornings.
For Brunch: Present it on a pretty platter alongside fresh fruit and maybe an egg dish, like scrambled eggs or a vegetable frittata. A light mimosa or sparkling herbal tea rounds out the meal perfectly.
As Dessert: Dress up your banana bread by serving warm slices with vanilla ice cream or a drizzle of caramel sauce. Add a sprinkle of toasted pecans or a dusting of cinnamon for an extra cozy treat.
For Cozy Snacks: Keep things simple. A thick slice with a smear of peanut butter or almond butter hits the spot when you need a little pick-me-up through the afternoon. My kids gobble theirs up with nutella, no judging!
This banana bread has woven itself into so many of my family’s lazy mornings and impromptu get-togethers. Sometimes we even pack it for picnics, and honestly, it never lasts more than a few bites before being devoured.
Top Tips for Perfecting Your Banana Bread
Banana Prep: Don’t rush the bananas — overripe ones with lots of brown specks are pure gold here. They’re sweeter and easier to mash. If your bananas aren’t quite there, pop them in a brown paper bag for a day, or bake them (unpeeled) at 300°F for 15 minutes to speed up ripening.
Mixing Advice: Resist the urge to beat every lump out of your batter. Fold gently and stop as soon as the dry ingredients disappear. Overmixing introduces gluten, which gives you a tough, rubbery texture—something I’ve stubbornly learned after a few tries!
Swirl Customization: For a pretty marbled effect, swirl filling with a gentle figure-eight motion using a spoon or knife. Don’t go too deep or you’ll flatten the layers. It’s like making a cozy, edible painting.
Ingredient Swaps: I’ve swapped half the all-purpose flour for whole wheat or oat flour with decent results — expect a bit denser crumb. Brown sugar or maple syrup can replace granulated sugar for richer flavor; just reduce the wet ingredients slightly to keep balance.
Baking Tips: Use the middle rack for even heat exposure. If your oven runs hot, tent the top with foil halfway through baking. Toothpick tests are a must after 55 minutes — look for crumbs, not wet batter.
Glaze Variations: Try a cream cheese glaze or even a simple dusting of cinnamon sugar for less fuss. If you like zest, add lemon or orange zest to your glaze for a bright twist.
I’ve learned that a little patience with cooling and the right banana ripeness make all the difference. Plus, it’s a wonderfully adaptable recipe—feel free to experiment and make it your own!
Storing and Reheating Tips
Room Temperature: Wrap your banana bread tightly in plastic wrap or keep it in an airtight container. It stays fresh this way for about 2 to 3 days. I usually leave mine out on the counter covered with a tea towel if I’m eating it quickly.
Refrigerator Storage: If it’s warm and humid where you live, refrigerating is a safe bet. Put the bread in a sealed container or wrapped tightly in foil and plastic wrap; it’ll keep for up to a week. Just know that refrigeration might dry it out slightly, but a quick zap in the microwave with a moist paper towel brings back the moisture nicely.
Freezer Instructions: Banana bread freezes beautifully. Wrap whole loaf or individual slices in plastic wrap then foil for maximum protection, and freeze for up to 3 months. Thaw overnight in the fridge or for a few hours at room temperature. Reheat slices gently in the oven or toaster.
Glaze Timing Advice: I usually add the glaze once the bread is mostly cooled, but if freezing, I recommend glazing just before serving. This keeps the glaze fresh and prevents it from cracking or turning gritty in the freezer.
Frequently Asked Questions
Final Thoughts
Banana bread has this unbeatable way of making ordinary days feel special, and this recipe has been a quiet hero in my kitchen for years. It’s forgiving enough for kitchen mishaps and versatile enough to adapt to whatever mix-ins or tweaks you’re craving. The warm aroma, the buttery crumb, and that perfect hint of cinnamon make it an all-time champion in my house. I’d love for you to try it, share how you like yours, or even experiment with your own twists—this recipe welcomes all your tweaks and loving touches. So go ahead, bake a loaf today. Happy baking, and I can’t wait to hear how yours turns out!
Coconut Oil Banana Pineapple Bread
Ingredients
Main Ingredients
- 2 large eggs
- 0.5 cup coconut oil melted
- 0.33 cup buttermilk
- 1.25 cups granulated sugar
- 0.25 cup light brown sugar packed
- 1 tablespoon vanilla extract
- 2 cups all-purpose flour
- 1 teaspoon baking powder
- 1 teaspoon baking soda
- 0.5 teaspoon nutmeg optional but recommended
- pinch salt optional and to taste
- 1.25 cups mashed ripe bananas 2 large or 3 small
- 1 cup pineapple diced, frozen or fresh well-drained
Instructions
Preparation Steps
- Preheat oven to 350°F. Spray two 8x4-inch loaf pans with floured cooking spray; set aside.
- In a large bowl, whisk together eggs, melted coconut oil, buttermilk, granulated sugar, brown sugar, and vanilla extract until combined.
- Add flour, baking powder, baking soda, nutmeg, and salt; stir until just combined to avoid overmixing.
- Fold in mashed bananas and diced pineapple (add frozen pineapple directly if using frozen).
- Pour batter evenly into prepared loaf pans and bake for about 45 minutes, or until golden and a toothpick inserted in the center comes out mostly clean.
- Allow bread to cool in pans for 15 minutes before transferring to wire racks to cool completely.
- Store bread in an airtight container at room temperature up to one week or freeze for up to three months.