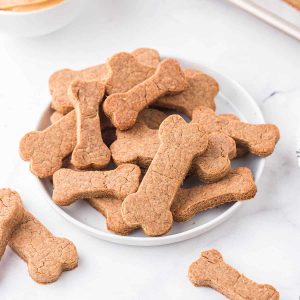
I swear, there’s nothing quite like the look on my dog Max’s face when I bring out these homemade dog treats. The smell alone — earthy pumpkin and nutty peanut butter — makes his tail wag uncontrollably before I even open the jar. I stumbled on this recipe on a chilly fall afternoon, after Max gave me the “I’m bored and I want snacks” look about a dozen times. These dog treats turned out to be a total game-changer: simple enough to whip up on a busy weeknight, super budget-friendly, and clearly loved by every furry friend who’s gotten a taste. Honestly, they’re kind of like the dog version of pumpkin muffins — warm, chewy, with just the right touch of nutty sweetness. And while my friends bake their pups store-bought biscuits, I’m over here feeling like the ultimate dog mom with these homemade gems.
What are some good homemade peanut butter dog treats?
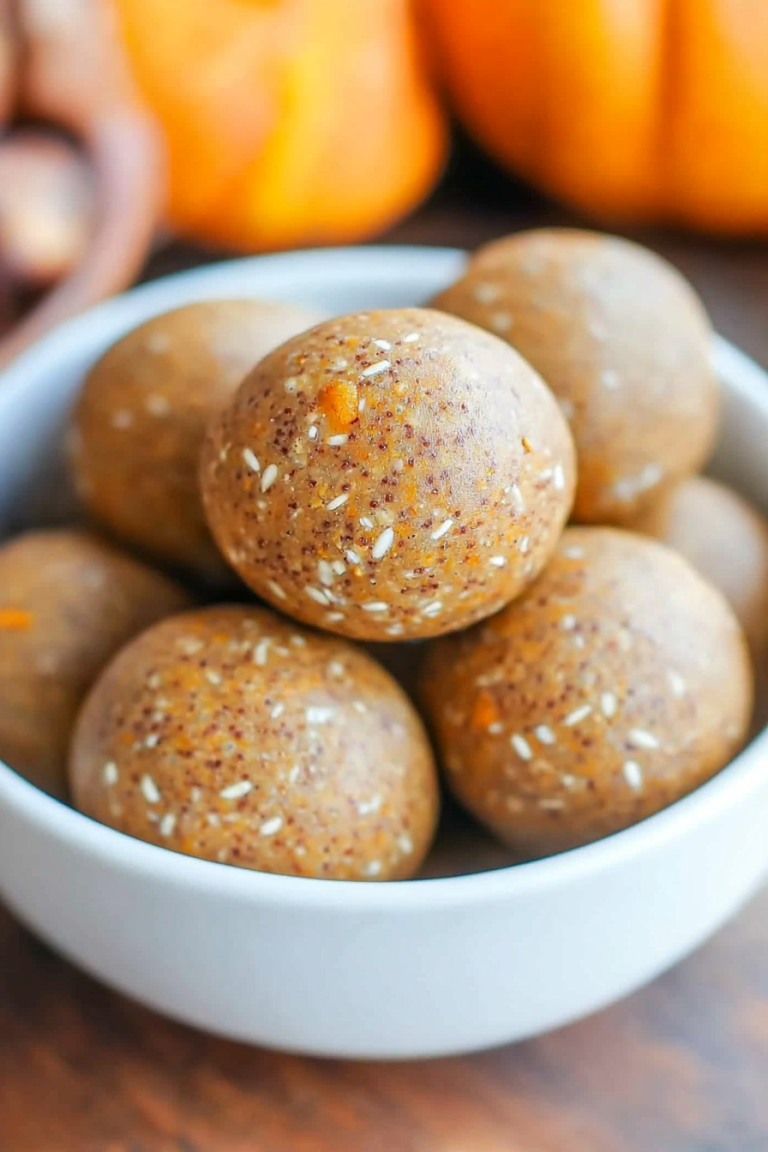
Think of these as crunchy-cakey little bites made especially with our canine pals in mind. It’s essentially a blend of wholesome ingredients — pumpkin purée, peanut butter (make sure it’s the kind with no xylitol!), oats or whole wheat flour, and a few natural binders — mixed into a dough that’s rolled, cut, and baked to perfection. These treats get their name because pumpkin and peanut butter are the stars of the show, bringing flavor and nutrition that dogs love. The pumpkin keeps things moist and adds fiber, while the peanut butter gives a rich, irresistible taste. Totally free of any weird additives, they’re the kind of treats I feel good giving Max anytime — training sessions, after walks, or just because I want him to know he’s my best buddy.
Why you’ll love this recipe?
What I love most about these dog treats is how ridiculously easy they are. You don’t have to be a kitchen whiz or have a pantry stuffed with fancy ingredients — just some basic staples you probably already have around. The flavor combo? Spot on. The pumpkin gives a subtle earthiness and moist texture that the dogs seem to go nuts for, and the peanut butter adds a touch of richness that’s basically doggy crack. Plus, there’s something so satisfying about baking something from scratch that I know is 100% safe for my fur baby.
Another big win: cost. I can make a batch for less than the price of store-bought treats, and the kids even like sneaking bites of the dough (after a little encouragement, of course). The versatility is a bonus, too — you can tweak the recipe to make crunchy biscuits or softer chews depending on your dog’s preference. When I first tested this recipe, I swapped in almond butter for the peanut butter just to see if Max would notice…let’s just say, he definitely did! But it was fun experimenting, and you can mix things up depending on your pup’s tastes or allergies.
If you’re used to the pre-packaged stuff, this definitely feels like a little therapy session in your kitchen — mixing, rolling, baking, and watching your dog’s happiness grow bite by bite. Max has officially given it two paws up, but my other friends’ pups have gone crazy for these as well.
How do I make homemade peanut butter dog treats?
Quick Overview
This is one of those recipes where you pop everything in a bowl, mix it up, roll it out, and bake until golden. No complicated steps or fancy equipment. The magic really happens in the simplicity — fresh, wholesome ingredients coming together to make a treat dogs drool over every single time. It’s great for when you suddenly remember you’re out of treats or want to spoil your pup with something healthy and homemade. I promise, you won’t stress about it.
Ingredients
For the Main Dough:
- 1 cup pumpkin purée (canned 100% pumpkin, NOT pumpkin pie filling)
- 1/2 cup natural peanut butter (no salt, no xylitol – safety first!)
- 2 cups whole wheat flour or oat flour (you can grind oats yourself — just keep it coarse for texture)
- 1/2 cup rolled oats (adds a nice chewiness)
- 1 large egg (helps bind everything together)
Optional Add-ins:
- 1 teaspoon cinnamon (for a little warm flavor – dogs generally love it)
- 1 tablespoon honey (only if your vet says it’s okay)
Step-by-Step Instructions
Step 1: Preheat & Prep Pan
Start by preheating your oven to 350°F (175°C). Line a baking sheet with parchment paper or a non-stick silicone mat. Trust me, this helps with even baking and no sticking — nothing worse than breaking a perfect treat while trying to pry it off the pan!
Step 2: Mix Dry Ingredients
In a large bowl, whisk together the whole wheat flour, rolled oats, and cinnamon (if using). I always sift a little to make sure there’s no clumping — it just helps the final dough feel lighter and bake more evenly.
Step 3: Mix Wet Ingredients
In a separate bowl, combine the pumpkin purée, peanut butter, egg, and honey (if you’re using it). Use a sturdy spoon or spatula to mix until smooth and creamy. You’ll notice the peanut butter adds a wonderfully thick texture that binds everything perfectly.
Step 4: Combine
Pour the wet mixture into the dry ingredients and stir gently until everything just comes together. This dough is a little sticky but firm — don’t overmix or your treats might turn out dense. I always stop as soon as there’s no visible flour.
Step 5: Roll Out The Dough
On a lightly floured surface, roll the dough out to about ¼-inch thickness. If the dough is sticky, sprinkle a bit more flour on top but be gentle — too much flour dries things out.
Step 6: Cut Shapes
Use a cookie cutter (I love bone shapes or simple circles) to cut out your treats. My dog goes bonkers for the bone ones — probably the power of suggestion!
Step 7: Bake
Arrange the cutouts on your prepared baking sheet. Bake for about 20-25 minutes, flipping halfway, until the edges are golden and the centers are firm. All ovens vary, so start checking after 18 minutes and test a treat’s texture by letting it cool a bit before giving Max a tiny nibble (he’s a strict quality control officer).
Step 8: Cool & Store
Remove the treats from the oven and let them cool completely on a wire rack. This step is crucial — it firms up the treats so they don’t crumble. Once cool, store in an airtight container. They’ll keep nicely for about a week, or you can freeze extras for longer.
Step 9: Watch Your Dog’s Joy
This is the best part — bring out the treats and watch your pup’s eyes light up. Max literally circles for a few moments before sitting politely (sometimes) to get that next piece. This recipe never fails to bring tail wags and happy woofs.
What to Serve It With
For Breakfast: These treats make a fantastic “morning boost” for your dog alongside their regular kibble or a dollop of plain yogurt. I love pairing them with a cup of coffee for myself, so we both start the day happy.
For Brunch: Planning a little weekend brunch? Arrange the treats on a small platter alongside a few slices of banana or apple for a colorful, pup-friendly snack board. Max’s tail wags especially fast when I add a spoonful of mashed sweet potato on the side.
As Dessert: Serve them chilled after dinner as a little reward for good behavior. You can drizzle a tiny bit of peanut butter on top for an extra special touch. This one’s always a hit after family movie nights.
For Cozy Snacks: When the weather turns chilly, these treats are perfect with a warm blanket and a cuddle session. Max usually demands at least three before settling down, so keep some hidden for yourself if you want uninterrupted snuggle time.
Top Tips for Perfecting Your Homemade Pumpkin Peanut Butter Dog Treats
Peeling the Pumpkin: For canned pumpkin, go straight to 100% puree — no sugars or spices added. If you’re lucky enough to cook fresh pumpkin, roast and puree it fully, then strain excess water to avoid soggy dough.
Peanut Butter Quality: Use natural peanut butter with no artificial sweeteners or added salt. I’ve learned the hard way that xylitol is toxic for dogs — always double-check the label.
Mixing Technique: Don’t overwork your dough. Stir gently until just combined to keep the treats light rather than dense. When kneading or rolling, flour your surface minimally to keep that moist texture.
Thickness Matters: The ¼-inch thickness is a sweet spot — thinner treats turn crispy; thicker ones stay chewy. I’ve tried both, and Max alternates his preference, so mix it up!
Baking Time Adjustments: Oven temperatures can vary. If your treats come out soft, bake a few minutes longer and flip halfway to get that perfect golden crunch.
Glaze & Decorations: I sometimes brush a little peanut butter on the treats right after baking for extra shine. Avoid store-bought glazes with sugars or chemicals.
Storing and Reheating Tips
Room Temperature: Keep your dog treats in an airtight container for up to 5-7 days. I usually store mine in mason jars on the counter, away from sunlight, so they stay fresh and crunchy.
Refrigerator Storage: For longer freshness (up to 2 weeks), store treats in a sealed container in the fridge. Bring them to room temp before serving so Max doesn’t turn his nose up.
Freezer Instructions: These treats freeze beautifully. Layer them between parchment paper in a zip-top freezer bag and freeze for up to 3 months. Thaw overnight in the fridge, then warm gently in the microwave for a few seconds to bring back softness.
Glaze Timing Advice: If you add peanut butter glaze, do it right after baking when the treats are warm. For frozen or pre-made treats, glaze just before serving to keep things tidy.
Frequently Asked Questions
Final Thoughts
Honestly, these homemade pumpkin peanut butter dog treats have become a little ritual in our house. Baking them fills the kitchen with comforting scents and gives me a chance to spoil Max with something I truly trust and love. It’s those moments — watching his eyes light up when I say, “Treat time!” — that make the quick mixing and baking absolutely worth it. If you’re the kind of dog parent who worries about what’s in those commercial snacks, this recipe is your new best friend. Once you try it, you might never go back to store-bought again. Why not experiment with your own tweaks and tell me how it goes? I’m always eager to hear new twists and happy stories from you and your pups. Happy baking — and give your furry friend an extra scratch behind the ears from me!
Homemade Peanut Butter Dog Treats
Ingredients
Main Ingredients
- 1 cup creamy peanut butter
- 1 large egg
- 0.5 ripe banana (mashed) banana
- 1 tablespoon maple syrup
- 1 cup whole wheat flour
Instructions
Preparation Steps
- Preheat the oven to 350 degrees Fahrenheit and line a baking pan with parchment paper.
- In a mixer, beat together the peanut butter, egg, mashed banana, and maple syrup until fully combined. Slowly beat in the whole wheat flour.
- Roll out the dough on a floured countertop to 0.5 inch thickness. If dough is crumbly, add 2-3 tablespoons of water to firm it up.
- Use a dog bone-shaped cookie cutter to cut out treats and place them on the prepared baking pan.
- Bake for 15-25 minutes or until golden brown. Remove from oven and let cool completely before serving.